The UAZ 469 is in demand among motorists due to its high cross-country ability. Some owners equip the model with an expeditionary trunk. This allows you to transport cargo on the roof of the car.
Expedition trunk for UAZ 469
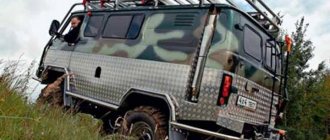
Photo 1: Expedition trunk on a UAZ 469 with an awning (Source: Yandex.Pictures)
The roof rack of the UAZ 469 can be installed either with the help of specialists or with your own hands. No specialized education is required for manufacturing. The work can be performed by a person with minimal technical knowledge.
Photo 2: Drawing of an expeditionary trunk (Source: Yandex.Pictures)
The first step is to create a detailed drawing. This will allow you to calculate the amount of material needed. To work you will need certain tools and devices.
Why do you need an expedition rack?
A powerful metal structure on the roof of a car performs several functions simultaneously. The shape, degree of power and resistance to negative factors are selected based on the personal preferences of the owner. Functions performed by the expedition luggage rack:
- Increase in usable space used for cargo transportation. The expedition trunk has a large area. This allows you to transport large cargo. When regularly using a car to drive over rough terrain, motorists carry fuel containers, spare wheels, entrenching tools, etc. on the roof.
- Protecting the roof from damage when driving in the forest. The design protects the roof from impacts from branches.
- Installation of additional equipment. Additional lighting lanterns, ladders, tool holders, etc. are installed on the expedition trunk. When making a structure, it is necessary to take into account what type of additional equipment will be used in the future.
Types of expedition racks
There are several types of metal structures designed for installation on the roof of a UAZ 469 car. The choice of a specific type is made by the owner of the vehicle based on personal preferences. Types of expedition racks:
- Universal. Can be installed not only on UAZ 469, but also on other SUVs. Has adjustable brackets for mounting on a car.
- For a specific model. Fasteners are designed for installation on UAZ 469.
- Individual. Made to order or independently by the car owner. During production, all the preferences of the motorist are taken into account. This allows you to create a unique product that meets the functionality of a specific person.
Purchasing a ready-made expedition rack
It is possible to purchase a ready-made design. When choosing, you should consider the functionality of the product. Select designs with ready-made brackets for attaching additional equipment.
Particular attention should be paid to the material from which the trunk is made. Light metal alloys are used for the manufacture of structures. To transport light cargo, you can choose a trunk made of aluminum alloy. For heavier luggage, you must choose a product made from high-strength metal.
When purchasing, you need to pay attention to the method of attaching the product to the car. Some models are fixed to the roof. This does not allow you to quickly remove the trunk if necessary. You can choose products with quick-release brackets.
Dimensions
When starting to make the roof rack, you need to measure the roof and mark where the supports will be placed. Only after this can you think through the design of the future accessory, draw a drawing, and calculate the weight of the trunk.
That is, by the time the work begins, the master should have in his hands:
- measurements taken;
- calculated frame weight;
- total weight of all trunk parts.
The overall weight of the rack is important for design. It depends on the material used.
- Aluminum is an excellent material for making structures: it is durable, lightweight, strong, flexible, etc.
- As another option, you can use profile thin-walled pipes , which also weigh a little.
- Another simple option is stainless steel or plain metal strips . These materials are heavy, but easy to process.
Make an expedition trunk with your own hands
Photo 3: DIY expedition trunk (Source: Yandex.Pictures)
You can make a trunk for a UAZ 469 car yourself. This will require certain tools and materials, as well as skills in welding metal structures. A self-made design has a number of advantages:
- Unique design. When you make it yourself, you can create a trunk whose design will be different from its analogues.
- Practicality. The car owner independently develops a drawing according to which the expeditionary trunk will be manufactured. In this case, you can take into account the presence and location of brackets for additional equipment. A hand-made trunk will meet all the owner’s requirements.
- Strength. The owner independently selects the material for production and controls the quality of the connection of parts.
- Low cost. By making an expedition trunk with your own hands, the car owner saves money.
When making it yourself, you should pay attention to the roof of the car. You can install a trunk with various types of fastenings on a metal one. When manufacturing a roof rack for a tent roof, it is necessary to provide a method for attaching the product to the car.
Photo 4: Expedition trunk on a tilt UAZ (Source: Yandex.Pictures)
Photo 5: Expedition trunk on a UAZ with an iron roof (Source: Yandex.Pictures)
Structures of light weight and spaciousness are attached to metal arches on which the awning is installed. More durable and heavier products are mounted on the car body. To do this, the fastening points are pre-reinforced with metal inserts. The disadvantage of installing the trunk on metal arches is damage to the integrity of the awning.
Tools
To independently manufacture an expeditionary trunk for a UAZ 469 car, you will need certain equipment and materials. The list of tools may vary depending on the personal preferences of the car owner. Required tools:
- Angle grinder. Necessary for cutting metal parts.
- Pipe bender Various types of devices can be used. The manufacturing process will require curved parts. You can bend a metal profile without losing its strength characteristics using a pipe bender.
- Drill. A manual or electric model is suitable. Along with the drill, you will need a metal drill, the diameter of which will correspond to the size of the fasteners.
- Tape measure or other measuring device.
- Welding machine. You can order welding work in specialized workshops. Workers will produce a design that strictly corresponds to the car owner’s drawing. When carrying out the work yourself, you can use any type of welding machine suitable for joining parts made of a certain metal.
- Individual protection means. To avoid injury, it is necessary to use specialized clothing and protective equipment, such as gloves, goggles, etc.
To make an expeditionary trunk you will need a metal profile or pipe. When creating a lighter structure, aluminum pipes can be used. To make the fasteners, you will need a metal plate with a thickness of at least 3 mm. It is necessary to prepare the bolts and nuts to secure the trunk to the car. To prevent the nuts from turning during installation and dismantling, they can be welded to brackets or reinforcing plates.
Manufacturing process
Before starting work, you should take the necessary measurements. Based on them, a detailed drawing is created. At this stage, it is important to provide a method for attaching the trunk to the car, and the availability of brackets for attaching additional equipment. The manufacture of the trunk is carried out in a certain sequence.
Preparation of material. The trunk is made of metal pipes. Before assembly begins, curved parts are made. It is important to strictly adhere to the pre-drawn drawing.
Making the base. At this stage, the base of the structure is welded. To do this, use several pipes, lay them in parallel and weld crossbars to them. The base is made on a flat surface. Its correct location in the horizontal plane can be checked using a building level.
IMPORTANT: When exposed to high temperatures, metal parts are deformed. To avoid distortion, you can use clamps or other fixing devices.
Making the top part. The design of the upper tier may vary depending on the personal preferences of the owner. Some motorists make it identical to the lower part, others - a modified shape. In the upper tier, metal pipes are installed around the perimeter. The structure is not reinforced with crossbars. After assembly, the trunk should be in the shape of a basket.
Connection of the base with the upper tier. The structures are connected to each other by pipe sections that simultaneously serve as amplifiers. The diameter of the pipe may be smaller than the material used to create the base. To improve strength characteristics, it is necessary to install amplifiers at a distance of no more than 250 mm.
Manufacturing of fasteners. The type of brackets for fixing the trunk to the car is selected depending on the type of roof of the UAZ 469 car. For metal ones, fasteners are used that are fixed to the gutters. Specialized fastenings are made for the tent. They are fixed on the UAZ body. The front brackets are installed at the bottom of the windshield pillar. The remaining elements are mounted at the same distance, on the rear wing. This design allows the load to be evenly distributed.
Manufacturing of brackets for additional equipment. The location of the elements may vary. Some motorists install additional lighting in the front. A nut of the appropriate diameter can be used as a bracket. It is welded to the trunk and subsequently additional equipment is attached to it using a threaded connection.
Painting. Before installation on the car, it is necessary to apply a coat of paint to the product. This will not only improve the appearance of the expedition trunk, but also protect the metal surfaces from corrosion. Before painting, remove any uneven surfaces with sandpaper and apply primer.
Purpose and types of device
The external luggage compartment is designed for transporting items for expeditionary purposes. Cargo in this category includes means of transportation on rivers, folded tents, auxiliary tools, fuel and motor oil. The forwarding luggage compartment has a lattice design with reinforced sides that prevent the load from falling when shifted. The mesh located on the bottom of the compartment allows for cargo to be stowed, and the strength of the structure allows for human movement.
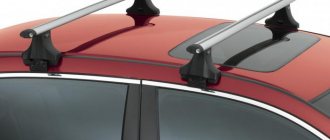
A less common trunk option is a closed trunk made of impact-resistant plastic (for example, made by Thule), which is mounted on arches. The box is equipped with a hinged lid with a lock, and a mechanism for automatically lifting the upper part of the case is provided.
Due to the high cost and low capacity, boxes are rarely used on UAZ Patriot vehicles. Also infrequently used is a luggage basket attached to a tow bar. The product has a small capacity and impairs the geometric cross-country ability of the vehicle.
Since the UAZ Patriot is not equipped with special guides for attaching the trunk, water drainage channels are used to hold the cargo basket on the roof of the car. The elements are located on the roof of the body and are partially covered with protective rubber seals.
For fixation, metal brackets of an L-shaped configuration are used, which cling to the gutter flange and are then closed with a rubber seal.
Fastening the trunk using brackets.
The bracket is installed in the groove formed by the gutter flange. On the other side is the trunk support bracket. The parts are tightened with a bolt that ensures reliable retention of the support; protective gaskets made of rubber or plastic are provided.
The installation sites of the supports are sprayed with an anti-corrosion agent. A lattice basket is then installed on top and bolted to the supports. To adjust the position (in the case of different heights of the support points), additional washers are used, which are placed under the supports.
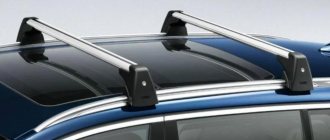
It is allowed to install special Lux luggage bars designed for TagAZ Tager vehicles. The roof structure of the Tager vehicle uses gutters of an identical configuration, which makes it possible to mount the roof bars on the Patriot SUV. To fasten the guides, a mounting element is used, which is pressed with a special steel plate. All elements necessary for installation are supplied complete with arches.
The procedure for installing luggage bars on the roof of a UAZ Patriot:
- Carry out preliminary modifications to the embedded element, reducing the length by 2-3 mm. For processing, a milling machine or hand tool equipped with a grinding wheel is used. At the same time, it is recommended to grind off sharp edges and burrs that damage the paint and rubber seal.
- Remove the protective rubber from the water channel, and then push the insert plate into the groove to the required position.
- Set the symmetrical position of the fasteners for the arches along the sides of the car. Then a clamping bar is placed on top of the plate, secured with 2 Phillips head screws. Additionally, you will need to cut a segment from the drain that prevents the fastener from twisting.
- Treat the place where the support points are attached with an anti-corrosion compound.
- Reinstall the rubber pad, having previously cut out the central part located opposite the installed supports. The arch supports are placed on a rubber edge, in which holes for the bolts are drilled. Then arches are placed on the supports, onto which a luggage case is attached or additional cargo (for example, skis or an inflatable boat) is placed.
The trunk arches are secured with screws and nuts.
Installation of the product on UAZ 469
The method of installing an expedition rack depends on the type of fastening. When installing the structure on a metal roof, you can use gutter mounts. On the tented roof you can install a luggage rack with fastenings on the arches or the car body. During installation, it is important to ensure that the structure is positioned correctly in relation to the roof of the car.
Photo 6: Installation of an expeditionary trunk on a UAZ (Source: Yandex.Pictures)
When installing a trunk with extended brackets, the body should be reinforced at the mounting location with metal plates at least 3 mm thick. Holes are drilled at the fastening points. Installation is carried out using bolts. To avoid turning the nuts when tightening the bolts, you can pre-weld them to the metal reinforcement plates.
Side top bar
Have you forgotten how we bent the front arch? We also bend the side upper crossbar. One, another. Next, we weld the bushing to the bend point of the crossbar on the side so that the upper part of the front crossbar is securely fastened.
Now all the work is almost done. The hour has come for creative motorists. We need to paint the entire structure and give it a little style. To avoid rust, we recommend applying a coat of primer and only then thinking about paint. Among soil solutions, the most resistant to salt influences is soil containing zinc.
After applying a layer of primer, you should wait at least a day, and then use regular enamel and apply the desired color. Many people don’t like the way the bolts look at the joints of the structure. To avoid an unsightly appearance, you can place decorative nuts in these places. Here's a modern trunk for you.
Optional equipment
You can improve the functionality of the expedition rack by installing additional equipment. The type of accessories and installation method may differ and are selected individually by each motorist. Additional equipment installed on the UAZ 469 vehicle:
- Lighting. Car owners install additional lighting lamps into the structure. This allows maximum illumination of the space in front, behind and on the sides of the car at night.
- Windshield protection. Made in the form of cables connected to the trunk and the edge of the front fender of the car. When driving in the forest, branches hit the cable without touching the windshield.
- Ladder. Used for easy access to the trunk. Can be installed both at the rear and on the side of the car. At the rear of the car, the ladder is mounted on movable hinges. This allows you to open the door if necessary.
Photo 7: Headlights on the expedition trunk of a UAZ 469 (Source: Yandex.Pictures)
The list of additional equipment does not end there. Some motorists install brackets for mounting a spare wheel, shovels, axes, additional light alarms, etc. on the expeditionary trunk.
Roof mount
The procedure for installing factory guides on a UAZ Patriot:
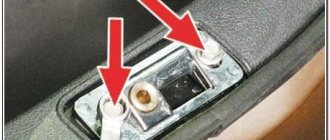
- Remove the roof lining located in the passenger compartment. The panel is dismantled along with the side handles and sun visors.
- Mark the attachment points of the standard guide bars; it is recommended to study the design of the car with elements installed at the factory. The front support is located inside the gutter, and the middle and rear points are located on the side slopes of the roof surface. Reinforcing elements need to be drilled along with the roof panel. To obtain a hole, a crown with an increased diameter is used, since the nuts securing the arcs are tightened through the channel.
- Treat the resulting holes with an anti-corrosion compound.
- Screw the arches with bolts that fit into the threaded bushings in the supports. Support washers with an increased diameter are placed on the underside of the roof panel, reducing the load on the metal of the roof panel. Rubber gaskets are additionally treated with sealant.
