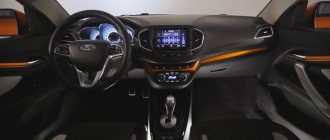
A car painted in an unusual color is not guaranteed to attract attention. To give the car originality without going broke on materials, painting in two harmoniously combined colors is often used. A high-quality painting of this type is guaranteed to make the car stand out in a stream of “gray” traffic and save the owner from searching for an exclusive enamel color. Again, if the painting process is carried out by a master who is not devoid of a certain talent, and also has all the necessary technologies, the result will differ from other cars in originality and uniqueness. The painting procedure and photos of two-tone cars are presented in this publication.
Two-tone painting: ideas and technologies
Exclusive paint on the body does not guarantee increased interest in it, but painting a car in two or more colors can solve the problem of a lack of individual features, even without expensive and spectacular materials. Two-tone paint can be a good solution to the problem of matching enamel or intended to imitate the war paint of street racers. In any case, if the master has creative abilities and the necessary technologies to create transitions and hard lines, it will be impossible to confuse the result of his work with another car.
Polishing
After the paint dries, there is still a long way to go. All that remains is to polish the surface. Here they operate according to the following algorithm:
- Work only in confined spaces. The worst thing that can be advised here is to go outside into the shade. One blow of a breeze is enough for dust or sand to fall on the surface, and this will negate all the work.
- The oxide layers of paint are sanded, then an abrasive paste is applied.
- Select sandpaper for cleaning in advance. Dark paint is more difficult to work with. P2500 sandpaper is suitable for it. To apply the abrasive paste, be sure to moisten the surface and the polishing disc. First, they start it at low speeds, then increase them to 1500 rpm. The polishing machine is moved up and down and sideways, without pressing. It is important to ensure that the disc and surface do not overheat or dry out. If the paste dries out, you can add water, but do not let it get on the paint. After applying the abrasive composition, the “cured” area is polished with a soft circle, and a protective polish is applied.
For light-colored coatings, hard disks and regular paste are used.
Two-color car painting technology
Achieving controlled transitions with acrylic paint is quite problematic, and when applying local enamel on top of another material, the problem of changing the shape of the surface arises.
The second material should have good covering power and not spread under the tape (it is recommended to use high-quality tapes, analogues of 3M Fine Line). Therefore, the area under which there should be no second paint at all is sealed with a film with a weak adhesive composition (Chinese products), and then it is removed along with part of the paint. When painting small parts in 2 colors, the base is often powder paint, the main advantage of which is uniform application. It is impossible to paint a car in two colors with powder paint, due to the fact that during sintering the powder forms noticeable shimmers. Therefore, at the second level, ordinary enamel is used. This technology is used especially often on wheel rims, due to the fact that the relief of these parts does not allow the transition to be seen in detail.
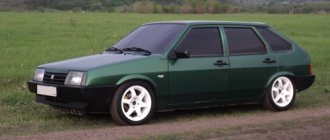
A two-tone paint job doesn't have to be all hard lines, although frequent vertical lines on the side of the body, roof, and hood suggest full use of tape and film. Smooth transitions between two similar colors can also create an interesting effect, although the cost of an error here is noticeably higher, and not every artist is capable of painting using the transition method. Two-tone painting is also often found, in which the border of two enamels passes along the joints of body parts (hood cover, vehicle roof, fenders, doors).
Subtleties and nuances
Photos of two-tone cars on the Internet will help you decide on the colors and paint design. A significant difficulty when painting a car in different colors is creating a good transition, as well as transforming the appearance of the surface on which the second enamel is applied.
The paint must have excellent hiding power and should not flow under the tape.
In this case, the surface area on which no second paint is planned at all is filled with Chinese film with a weak adhesive layer. This film is then removed from the car, partly with the paint.
If you intend to paint small parts in two different colors, you can use powder paint. Its advantage is the evenness of application, however, painting the entire car with only powder paint in two colors is almost undesirable, because the powder creates obvious shimmers. Ordinary enamel is used as a second color material.
Two-tone painting of a personal car does not have to have clear boundaries between shades; a smooth transition looks very good (see photo). However, making a high-quality transition is not easy; not every master can do it. This method of two-tone painting is often used, when the color change occurs along the border of the body part.
By slightly darkening the edges of the part or its corners, a volume effect is created, which looks quite attractive. Two-tone car paint options using different shades of the same base color look good. There are many photos on the Internet with options for painting the body in two colors.
Hard edges and muted colors
The most popular combinations form the following colors: electric blue, dark red, silver, green, orange. Combinations of black and white are rare, and brown and purple can more often be seen in smooth transitions. Painting in 2 tones using one color can look impressive. The cost of tinting materials rarely reaches the cost of airbrushing. In this option, hard boundaries will not look so attractive, but a smooth transition of 5-10 cm, on the contrary, will attract attention.
It is best if the contact strip is tied to one of the natural lines of the body. The absence of a clear border can be used to create a volume effect. In this case, the area to be painted is darkened at the edges or corners. To create a transition, paint is applied in several layers or a separate paint of a third, intermediate tone is prepared.
An interesting effect can be achieved if, instead of changing the color, you add a pigment, like mother-of-pearl. The pigment layer can emphasize the border of the transition or completely cover the area, rhyming the colors of the first level with the second. When using glitter in car painting, you should not overdo it with the amount of paint: this element in itself can give the car a bright note.
Successful combinations
In practice, the most common color combinations are:
- electric blue;
- silver;
- orange;
- Dark red.
At the same time, we note that the combination of white and black almost never occurs, and brown and purple colors sometimes appear only in the main transitions. As practice shows, a car painted in one color, but using several tones, or with pearlescent paint makes a strong impression - it always looks fresh and stylish:
If, as a result of painting a car, you want to give your car maximum originality, you should add a little pigment to the paint. A carefully applied pigment layer can favorably emphasize the transition boundary, adding attractiveness to the appearance of the car:
Change of color and PTS
Airbrushing should occupy no more than 30% of the total area of the body, although traffic police officers do not have a reliable way to calculate this area.
The color of the car must correspond to at least 70% as specified in the PTS. If there is a significant change in color, you will need to make changes to the vehicle's passport by first writing an application to the traffic police, to which the vehicle registration is linked. When updating the appearance of wheeled vehicles, owners often overlook the fact that a large pattern makes it difficult to establish the primary color of the vehicle. According to the rules, a traffic police officer must be able to determine the color upon inspection from any side. The color setting is done by comparing the car's paint with a standard classifier. Due to the difficulties associated with changing the title, many owners prefer not to repaint, but to change the tone, i.e. colors in two or more tones. Formally, such a decision may not violate any regulations and seems to be the most logical solution if there is no desire to write an application to change the PTS.
Accent wall
This is a fashionable solution that allows you to make a bold statement in the interior without the risk of oversaturating it. Three walls in the room are painted in one color, usually neutral or quite light. The fourth is painted with a different color - it can be very discreet or very bright, depending on the desired effect.
Only part of the wall can be painted - for example, in the form of a wide vertical stripe. Read more about creating an accent wall in our article.
Car painting in two colors
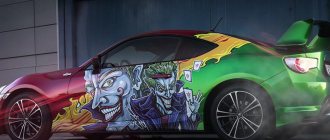
Even paints that are unique in their shades cannot always make the appearance of a car exclusive. But if you want to paint your car in two (three, four...) colors, then it will definitely become unique and attract everyone's attention. And we’re not even talking about the use of expensive materials, which only enhance the visual effect. Just the combination of different colors radically changes the appearance of any vehicle. Remember when in the early 2000s street racers drove through the streets, their cars decorated with special “tattoos” that imitated double-layer body paint? Agree that it really looked very impressive.
Using the services of our service center, you can make the appearance of your car truly unique. You don't need that much money for this. In our car service there is an offer for each client to suit his taste and pocket. An individual design project is created especially for any client by our artist-designers. All you have to do is discuss all the details of the order with our artist-designer and wait for your colorful fantasies to come true. And you won’t have to wait long, since one of the main features of the work of our service specialists is efficiency.
How to paint a car for $100 (30 photos)
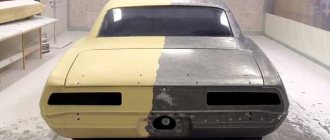
One girl had a 1999 Toyota Corolla. The technical condition of the car was not bad, but the appearance required painting. Due to the lack of extra money, she and her boyfriend decided to paint it themselves!
Preparations for painting have begun
The new hood is already covered in rust.
Here are all the materials that were needed, it all cost about $100
The cleaning and preparation process turned out to be the most labor-intensive
Pasting glass, headlights and anything that does not require painting
The first layer of paint was applied late in the evening, and the work took place under the headlights of another car =)))
The car was covered layer by layer
The girl thought the new color was very bright, so for the last few layers it was decided to mix the paint with black.
The next stage is coating the door handles and car nameplates with black PlastiDip coating
Source: imgur.com
Color combination when painting a car
In connection with this topic, I remember children's computer games in which it is proposed to paint the car in parts, choosing the required color for each element of the body. So, for example, if black goes well with all colors, then pink, burgundy and yellow require careful selection of a pair. In all such cases, there is an effective way to get out of the situation by using a second shade from the same color scheme. The result of this combination is modesty, tasteful.
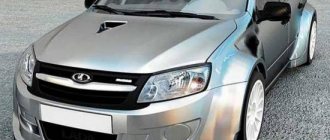
There are motorists for whom it is enough that instead of the factory gloss, their car will be “dressed” in metallic or chrome, and will also be coated with varnish. These colors themselves are distinguished by exclusivity, but in combination with other shades they can easily become pompous.
Preparation
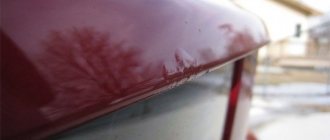
The first step is to inspect the damage and estimate how much local painting will cost in this situation. Before you begin to evaluate this, you need to wash the entire surface so that all defects are visible.
After the car body is completely dry, you need to remove everything necessary from the part. For example, if this is the front fender, then you should remove the turn signal repeater, bumper and other plastic parts that may interfere with surface treatment.
The fact is that in this case, the process of rusting of a car body part may begin. In addition, with such painting there will be a strip that will not be painted over and will be noticeable against the background of the entire car. In fact, the stage of preparing the body for painting is considered the longest.
As already mentioned, local car painting is required after accidents. If your car’s body part is uneven, it needs to be leveled or replaced with a new one. You often have to straighten metal using straightening, and then putty. The use of putty is considered a mandatory procedure, because after straightening, even small irregularities remain in one way or another. In this case, you can use liquid putty. It is necessary to process until there are no uneven areas left on the surface of the element. After the surface of the element is completely leveled, primer can be applied. Today there are various primers, but it is recommended to use anti-corrosion.
You can check the surface for small dents using special developers. This is not a rare item, so buying it will not be difficult. After everything is ready, you should apply the developer to the surface and wait until it dries. If you ignore this action, you may not notice individual irregularities, and after applying paint and varnish it will become obvious that it will not be possible to polish. Having straightened the entire surface, you should degrease it. This can be done using solvents. There are, of course, special products that help degrease the surface before applying primer and paint, but it is best to use solvents, because these chemicals have very poor contact with porous materials.
Two-color painting: the principle of crossing boundaries
In fact, there is no one universally accepted way of painting a car in two colors. In showrooms and on the streets you can see two-tone cars with clear dividing edges. There are color options with a smoother transition from one color to another. In a word, each method has its own characteristics.
Let's talk about a painting method with clear transition boundaries. This transition can be designed in different ways. As an option, we can offer our clients a clear chrome line on the border of the main and additional shades. Quite often this line is located in the same place where the figured line of the body is located: the level of the front and rear wings and doors. But there may be an option with a curved wavy line, suitable for new car models.
A smooth transition is most often used when painting a body, when it is decorated in a uniform color scheme. In fact, the location of the color combination depends only on your imagination. The most important thing is to maintain body symmetry, which makes the car truly attractive.
We apply varnish. Transition “over varnish”
Before applying the varnish, be sure to go over with an antistatic wipe and remove any spray that got into the transition zone of the varnish during the application of the base. If this is not done, upon further polishing of the transition zone, an unfortunate border may appear.
After making sure that the base enamel has dried sufficiently (15-20 minutes at 20°C), you can begin to apply the varnish.
If the part is completely varnished, we work according to the standard scheme: we apply MS varnish in two full layers, HS in one and a half layers. Working with varnishes is described in more detail here.
But we need to make a smooth transition, which means the varnish must be applied in a special way: with a smooth release and gradual reduction of the varnish film to “nothing.” Again, avoid applying the varnish in one thick border, as it will not wash out easily (especially on high-fill varnishes).
Therefore, we proceed as follows: apply the first layer of varnish (prepared in a standard proportion) only to the area of painting, with a small margin, and after curing, apply the second - slightly expanding the application area. In this case, the second layer must be smoothly “torn off” at the beginning of the zone that we matted for the transition with copper Scotch-Brite, in no case reaching the edge of the prepared surface.
When applying varnish, be careful not to reach the edge of the matted surface. There should always be some space left to make the transition!
Reducing the varnish film to nothing.
Turning the brush, loosen the trigger. After the standard one and a half to two “covering” layers of varnish have been applied, we will form a transition on the resulting dust and the remainder of the matted surface. A special miracle material will help us with this - transition solvent . Its task is to “blur” and make invisible the transition boundary between the old and new paintwork.
To do this, a strictly defined quantity of transition solvent is added to the working varnish mixture, the mixture is thoroughly mixed and applied to the transition zone. This is usually done in two stages: we apply the first layer, and after a short exposure (literally 1-2 minutes) - the second, expanding the application area and almost reaching the matting border.
Remember that the viscosity of the resulting mixture will be much lower than the viscosity of regular varnish, so you need to apply it carefully, in a thin layer, so as not to cause smudges!
Our transition is almost complete. But if the edge of the varnish is not blurred well enough, some manufacturers recommend increasing the amount of thinner and repeating the “blurring” of the border. Others recommend using pure transition thinner for this purpose. See the instructions here.
If you use a solvent in its pure form, you need to apply it very carefully, in 1 or 2 thin layers with an exposure of 15-30 seconds, and strictly on the border of the old and new paintwork, on the area of dry dust formed from the previous stage.
All operations to perform the transition must be carried out strictly within the matted surface, and even the solvent itself must not come into contact with the gloss!
The transition has been made, but here’s the problem: a small deposit remains at the repair boundary. You can remove it and thereby completely hide the fact of the repair performed using a polishing machine and paste, or even manually (a few circular movements with a napkin with polish are enough). Of course, this can only be done after the varnish has completely dried.
Polishing under-dried varnish can lead to the appearance of the repair boundary!
Remember that at 20°C most varnishes cannot be polished until after 24 hours. So you will have to either wait or use forced drying (heating in a chamber or IR lamp). Or, when painting locally, use a quick-drying varnish.
When polishing the repair area, it is not advisable to use sanding paper: for it, the varnish layer at the border is too thin, sanding it can lead to the appearance of the repair border. Therefore, try to use only abrasive paste. For polishing, you can use a 3M orange pad. It is necessary to work at low speeds without overheating the surface.
Two-color car painting technology
Two-tone paint does not always consist of hard lines. Quite often you can find variants of vertical lines on the roof, hood, and sides of the car body.
Painting conditions, tools and materials
Two-tone car painting requires the following tools and materials:
- spray gun and compressor;
- covering film, masking tape;
- solvents, varnish, primer, enamels;
- putty materials that remove dents and scratches;
- containers for stirring;
- respirator and special painting mask;
- abrasive and polishing pastes, sandpaper with different grits, power tools for preparatory and polishing work.
Some other things may be required, but a professionally prepared room where preparatory work will be carried out before painting the car itself is also important.
List of materials for painting. What can't you do without?
Are you not indifferent to the appearance of your car, and are you willing to spend time and effort to improve it? No matter how you twist it, sooner or later you will have to purchase a spray gun. One of the most versatile tools, capable of solving a wide range of problems and suitable for both beginners and professionals, it is. Next, everything goes in order:
Of course, you will also need many different little things such as masking tape, sandpaper of various grain sizes, brushes and solvents, as well as basic knowledge about car painting.
Work before painting
Before starting two-tone painting of a car, it is necessary to remove the old coating. Cleaning areas with remnants of old paint and putty is done with P80, P180 sandpaper.
In those places where the putty goes into the metal, grinding is done with a finer abrasive, which allows you to erase scratches that occurred after rough grinding.
Gradually, when significant flaws are eliminated, you can use P180 - P320 sandpaper, which will eliminate minor damage and scratches. If no serious defects were found at the very beginning of processing, sandpaper with a medium grain is immediately used, and then it is the turn to process sandpaper with a fine grain. You must always remember not to leave deep scratches on the surface of the body. In the future, these scratches will show through the enamel and the quality of the paint will be poor. The surface to be painted must be cleaned of dust and degreased using white alcohol.
Note for the road
If you paint a car in several colors, you need to remember that when you meet with a traffic police officer, questions will certainly arise regarding the color of the body. To get out of such situations without fines and problems, when painting, it is worth changing the color by no more than 30% of the body surface.
If this norm is exceeded, then within five days after repainting it is worth legitimizing your innovations by filling out an application for a replacement title. The documents will indicate both colors. After this, you can safely drive on the roads without fear of checks.
Expert: Andrey Volkov.
Primer work and painting
The base for priming must be prepared in advance.
This is one of the most important stages of the car painting procedure. If a one-component primer is used, then one fifth of the thinner is enough to dissolve it. In the case of using a two-component primer, it is necessary, among other things, to add a hardener to the composition, following the instructions. All components of the primer must be produced by one manufacturer so as not to reduce the quality of the primed surface.
The surface that is not being painted at this stage is covered with film and tape. It should be noted that painting a car in two colors can be done in the same way as in one. In this case, the same technology is used, that is, enamel and varnish are applied to the treated surface using a spray gun. The only difficulty is to establish the boundary between colors as clearly as possible. First, a smaller area is painted, which is then allowed to dry and covered with film and tape. The remaining surface is matted and degreased in order to apply a different color. The tape is removed completely only after all the paint has completely dried. If there are no flaws, the body is coated with colorless varnish.
The fashion for two-tone car bodies has returned.
In the 1950s and 60s, two-tone cars were all the rage. In those years, many models, from minivans to SUVs, had two-tone bodies. Then gradually the cars became monochromatic. And today this trend in the auto industry is returning again.
Today we see that every year more and more new cars appear with two-tone body paint. The fashion for painting the roof a different color, as usual, began in the USA. Many American cars today have two exterior colors. Even models such as the Range Rover Velar and Volvo XC40, which also received a two-tone body design, began to pick up this trend.
Other leading automobile companies are gradually starting to follow this trend. So we have no doubt that soon more and more new cars will have two-tone exteriors. It is noteworthy that even the Japanese, who usually do not follow global fashion trends in auto design, are going to start painting their cars with combined colors. For example, the new generation of Toyota Camry will hit the market in 2021 in a two-tone design.
Why did automakers decide to go back to the old ways again? Of course, there is no clear answer to this question. Fashion in the auto world lives by the same laws as clothing fashion. As you know, clothing fashion returns periodically. But in a slightly modified form, and of course, new clothes often use higher quality modern fabrics.
So the fashion for two-tone cars is back. In this way, car companies want to give their customers more emotions from buying a car. The fact is that people react in incredible ways to the colors of cars. For example, if you paint a car in two colors, then the car can have two characters at the same time. As you understand, this is impossible with one color.
For example, the black roof of a red car gives it a sporty feel. The cream color of the body combined with a black roof gives the car a feeling of reliability and quality.
Or, for example, many body colors with a white roof give some car models a bit of femininity.
In particular, the contrast between the two body colors certainly changes the overall design of the car and gives it more aggressiveness, character, etc.
The new fashion trend in the automotive industry gives, according to marketers of automobile companies, more freedom of choice, so that every car enthusiast can choose what best suits his style and tastes. So in the near future there will be more colorful cars on the market.
Color change and its effect on PTS
When changing the color of your car's body, you must take into account the established requirements and regulations. For example, the area of areas with airbrushing should not exceed 30% of the total surface area of the car body. By the way, traffic police officers do not have specific equipment that can accurately calculate that same 30%. If we talk about the color of the car, then its change should not be more than the same 30% of what is indicated in the PTS. If the percentage is exaggerated, appropriate changes must be made to the vehicle passport.
One of the important factors that every car enthusiast should remember is the placement of drawings on the car body. The fact is that many car owners contact our service center with a request to make a drawing on the hood and other parts of the body. But there are such drawings that significantly complicate the identification of the color of the car, which is a violation of existing legislation. That is why we recommend that you seek advice from our specialists and understand which paint job will best suit your car.
Two-tone painting of a car takes a little longer than painting a car according to the classic scheme using only one color. In any case, we do not recommend that you paint your car in two or more colors yourself. This work, at first glance, is easy, but requires experience and modern painting equipment. It is almost impossible to perform it efficiently at home. Therefore, we hasten to notify you that our car service professionals are waiting for your calls and orders at any time!
Primrose, Snow Queen and Peanut: remembering the paints and colors of Soviet cars
Despite the relatively small range of cars in the USSR, the color range of cars in the Land of the Soviets surprised from time to time not only with the unusual shades, but also with the type of paint! Our review today includes not only ordinary enamels, but also the spectacular “metallics” that were used to paint Ladas and Muscovites.
Start
The first Soviet passenger cars of the pre-war years corresponded in color scheme to the concept of the great automobile industrialist of the early last century, Henry Ford: both the famous “black funnel” and the less ominous GAZ-M1 “emkis”, with rare exceptions, were painted black. And the government ZISs, of course, were painted similarly. The “nomenklatura-official” color scheme looked quite appropriate, but the still rare traffic flow from this looked rather dull and monotonous. Occasionally we came across “emkas” with a dark green or light gray body, and brighter “spots on wheels” were practically not found in the USSR until the forties.
Black body color for GAZ-A and Emka was provided, as they say, “by default”
And only after the Second World War ended, the traffic flow in Soviet cities was full of unprecedented colors, because “Victory” appeared on the streets. Unlike its predecessor, the new model was painted in different colors - several shades of beige and green, coffee, blue, gray.
Pre-production Pobeda were even two-color with a division along the belt line
The most unusual were cars painted in turquoise and pistachio colors, and this was not a trade name for the shade, but an official designation in the “Pobeda Car Body Finish Standards,” approved by the USSR Minister of Automotive Industry. But there simply were no black Victories: this “official nomenclature” body color became the prerogative of more prestigious cars - the ZIS-110 and GAZ-12 ZIM.
The color scheme of the Pobeda was much more varied than that of pre-war cars
“Government” cars were painted with nitro enamels in seven (!) layers with intermediate polishing of each of them. In addition to the traditional black color, although rare, there were cars painted gray, and cars with a two-color body were even sent for export! However, for most citizens of the USSR, ZIM was associated with a gloomy black color.
Most of the ZIMs were, of course, black...
...although there were also such bright and two-tone color options!
The “People’s” Moskvich-400-420, like its modernized version 401-420, did not differ much from the Pobeda in color scheme - all the same soft pastel shades characteristic of European cars of the forties. Dark gray, dark beige and blue-green - that’s, perhaps, the entire “palette” from which you could usually conditionally choose “your” body color when buying a Moskvich.
The “four hundredth” Moskvich also did not shine with the brightness of its colors
All the colors of the rainbow
Everything changed with the start of production of the GAZ-M21. Despite the fact that most of the new Volgas flashing along the streets were painted in a single-color body color (and a rather calm one - gray, beige, white, etc.), the color scheme developed at GAZ included not only a wide variety of bright shades, but also a two-tone painting available at additional cost.
“Twenty-one” received a combined color even at the stage of early prototypes!
Cars of all three series were two-tone
Four options were offered for dividing surfaces by color: for example, a roof of one color and the bottom of another, or a roof with stamping of one color, and the remaining parts of another. Twelve color combinations ensured complete uniqueness - the chances of meeting a second “two-color” car in the stream were slim. Especially when you consider that over the 14 years of the “twenty-first” conveyor life, over 160 articles (!) of colors were used to paint the GAZ-21 body, and the shades could differ noticeably from batch to batch. This was explained by the imperfection of technology in the production of automotive enamels, which is why the plant received paints with significant differences in shade from the standard denomination. That is why GAZ was forced to introduce new articles. Therefore, the same tone, depending on the year of manufacture and even the batch of cars, could differ noticeably in shade, which is why the very concept of “body color” for the GAZ-21 was rather vague and conditional.
The two-tone paint, like the styling of the GAZ-21 body, evoked associations with American cars of those years. And, I must admit, the bright shades and multi-colored colors looked very appropriate on the Volga - no worse than on Ford and Chevrolet sedans of those years.
Both the paint scheme and many of the colors of the Volga seem to be borrowed from these American cars of the fifties. Or not as if...
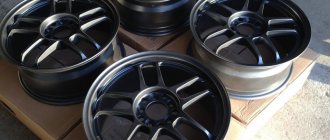
Wheels are painted in two colors. Materials and technology for self-repair.
If you want to not only restore your rims, but also give them a special look, then you should take note of such a technique as painting the rims in two colors. This is used as an accent for the car, and the technology for applying the materials is not complicated, which encourages drivers to paint them themselves. Thus, by slightly repairing the surface of the discs and choosing a visually beautiful combination of paint colors, you can achieve a bright effect, which is what many car enthusiasts do.
Painting a car with liquid rubber yourself!
Liquid rubber as an idea for painting a car is an excellent option; in addition to high visual aesthetics, such a coating provides additional protection for your car from the external environment.
When applying liquid rubber, proceed in the following order:
- Remove all non-paintable elements (if you seal them with tape and cover them with film as when painting with ordinary enamels, then there will be difficulties later, don’t be lazy);
- Degrease the surfaces to be painted with a solvent;
- The coating should be applied with a spray gun from a distance of 15 cm, in three layers, with intermediate drying of each for 60 minutes;
- After applying the last coat, allow the coating to dry for 24 hours;
It should be noted that liquid rubber is a very successful painting material. You need to work with it at low compressor pressure, take your time and do everything smoothly. Then you will certainly succeed.