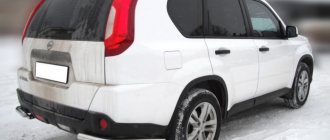
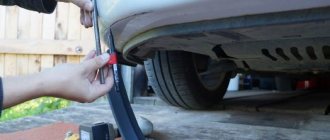
The use of wide-profile rubber on cars and SUVs is accompanied not only by a change in appearance, but also by severe contamination of the car body. Wheel arch extensions or, as they are also called, fenders, allow you to level out these negative aspects. You can implement your plans in different ways.
Inflated wheel arches perform two main functions at once:
- Protect the fenders and doors of the car from damage to the paintwork by stones thrown from under the wheels,
- They give the appearance of the entire body an attractive and “muscular” appearance.
At the end of the article, watch the video instructions on how to make arch extensions with your own hands.
There are several popular methods that are used by motorists to increase wheel arches.
Types of fenders
Wheel arch extensions are presented on the modern market in several variations:
- universal. These are rubber pads sold in rolls. The use of such parts has no restrictions on the make or model of the vehicle - when installed, they can easily be adjusted to any arches. But despite the excellent protective properties, universal arch extensions do not have an elegant design and significantly worsen the appearance of the car, which is why they are most often purchased by SUV owners;
- plastic. They are attractive, but are produced for a specific model. Fixation to the body is carried out using self-tapping screws. A significant disadvantage of plastic wheel arch extensions is the low level of protection and fragility, so they are most often used for beauty;
- fiberglass. The pads are quite durable and look like plastic ones. Most often they are made by hand or made to order;
- fiberglass. They are characterized by excellent appearance, as well as good protective qualities. They are quite expensive. In addition, the installation of these elements is a labor-intensive and complex process. To install such a wheel arch extension, you must first clean its surface and apply a layer of putty. After this, the trim is aligned with the car body, secured with self-tapping screws and painted with the appropriate shade of paint.
Wheel arch extensions are presented on the modern market in several variations
Replacing the rear arches of a car with penetrating corrosion
Welcome to the kuzov.info blog!
Let's talk about replacing the rear arches of a car. The rear arches of some car models are a weak point that is easily subject to corrosion. There are options when you can “cure” rust without changing the arches, but, usually, car owners wait until the last minute, when drastic measures are needed. The need to replace the rear arches arises, as a rule, due to their through corrosion. In such cases, all that remains is to cut off all the rusty metal and weld a new, non-rusty segment in its place. How to do this, and what subtleties need to be taken into account. Let's look at everything in detail.
First we need to determine the boundaries of the area that has been corroded. To do this, you need to clean off the old paintwork in the place where the rust is visible. An autopsy, as they say, will show what's under the paint. It is necessary to clean, with a reserve, retreating from the zone with corrosion to the zone with normal metal. Usually an autopsy reveals that there is much more rust than it seemed at first glance.
Next we need to cut off all the corroded metal. We use a grinder and cut everything down to bare metal. After cutting off the rusty segment, you need to check the back side of the remaining intact metal as much as possible. Why do we need this? It happens that the front part of the part does not contain corrosion, but on the back side everything is much worse. Usually you just have to slightly enlarge the area being cut so that the repair segment can be welded to metal that is good on both sides.
Cut out segment of rear wing Arch made by yourself from sheet metal
Next, we need to get a repair insert somewhere to weld and restore the arch. Here you can choose the following options:
Welding a homemade arch
New repair arch The front fender has similar shapes to the rear fender arch How
You can use this method. Take cardboard, lean it against the cut-out area and the boundaries of the cut-out area will be imprinted on it. Now, along these boundaries, you can cut out a stamp from cardboard, and using this stamp, cut out the desired patch from metal. It is better to slightly increase the boundaries of the cut metal, since welding will need to overlap.
Welding the repair insert
The next step is to weld the repair insert. When welding, you must not overheat the metal. It is better to weld with points, starting from one end of the patch, then weld with a point on the other side and at intervals, then reduce the interval. The point is to prevent the metal from moving too much.
After welding, you need to clean the seam from oxides and grind the weld seam.
Weld protection
Next you need to protect the seam from corrosion. One option is epoxy anti-corrosion primer. After the primer has completely dried, you need to sand it without rubbing it to the metal, then you can apply putty.
It is also important to protect the reverse side of the weld. To do this, you can use anti-corrosion primers in aerosol cans. The most important thing is to get to the other side. If there is no access, then you can use a can with a long tube and a nozzle on it. One of these options is “Movil”. Very convenient design. You can crawl into the hidden cavity by inserting a tube into a small hole. "Movil" is not the best option for protection against corrosion, but the tube with a nozzle can be adapted to any other means of protection in an aerosol can.
Then you can proceed to the final removal of the putty, priming with acrylic primer, preparation for painting and the actual painting.
Share “Replacing a rusty rear fender arch. How to do everything right.”
More interesting articles:
Popular manufacturers
Today, many domestic and foreign companies are engaged in the production of extenders for car wheel arches. The following have proven themselves to be the best:
- Bushwacker is an American company with many years of experience, producing a variety of accessories for various models of SUVs and pickups. The production uses high-quality materials that are resistant to ultraviolet radiation, low temperatures, and also resist the destructive effects of acids and salts found in dirt or natural waters.
- GFG is a Spanish company known not only for its accessories for vehicles, but also for the production of special additives that make the car more economical and the fuel materials used by the car owner more environmentally friendly.
- Cezar is a Polish company that produces high-strength plastic tape materials.
- Master Sport and Russian Artel are Russian companies that are equally successful in manufacturing wheel arch extensions for domestically produced cars - Zhiguli, UAZ, Lada Niva.
Bushwacker Wheel Arch Extension
How to make a fender with your own hands?
You can make a wheel arch extension for a car yourself from different materials:
- Expanded polystyrene (foam plastic). It is an excellent material for widening arches on a car, featuring the following advantages:
- ease;
- high compression resistance;
- non-hygroscopic;
- flexibility to machining;
- affordable price.
Expanded polystyrene is an excellent material for expanding car arches
Wheel arch extensions made of polystyrene foam are made as follows:
- pieces of polystyrene foam are glued to the car body using special glue (it is best to use Macroflex);
- after the glue has completely dried, use an electric knife and sandpaper to adjust it to the desired size and shape;
- To increase strength, a layer of resin is applied to the foam, followed by fiberglass. In this case, it is necessary to carefully ensure that no air bubbles form;
- after the previous layers have dried, putty is applied to the manufactured part, which, after drying, is necessarily subjected to a grinding process in order to smooth out unevenness, as well as ensure a smooth transition of the expander to the car body;
- the surface is treated with a primer;
- Finally, the structure is painted with a paint material matched to the tone of the car body.
- Sculptural plasticine. To produce expanders, you can also use special plasticine. Process steps:
- the working surface of the body is covered with mounting tape;
- soften the plasticine and spread it on the wings - first you need to rub small portions into the tape until a thin, uniform layer is obtained, and then, in large pieces, the required shape is created;
- Next, it is necessary to achieve symmetry between the wheel arches - experienced car enthusiasts claim that this is the most painstaking part of the work;
- apply layers of resin and fiberglass (must be at least three layers);
- after drying, the structure is removed from the body along with the sculptural plasticine, the inner surface of the fender is cleared of plastic mass;
- attach the part to the body using sealant and self-tapping screws;
- putty, sanding and applying a paint layer.
- Polyurethane foam. The manufacture of car wheel arch extensions from polyurethane foam, a cheap and very durable material, is becoming increasingly popular. Wheel arch extensions made from polyurethane foam do the following:
- a plastic arch is taken as a basis - it is cut into pieces and fixed to the body with self-tapping screws;
- foam is applied outside and inside the arch;
- after complete hardening, armed with sandpaper and a utility knife, future wheel wideners are trimmed and given the required shape;
- the structure is sealed with resin and fiberglass (it must be laid in at least 2 layers);
- finishing processes – sanding, priming, etc.
DIY arch extensions
The use of wide-profile rubber on cars and SUVs is accompanied not only by a change in appearance, but also by severe contamination of the car body. Wheel arch extensions or, as they are also called, fenders, allow you to level out these negative aspects. You can implement your plans in different ways.
Inflated wheel arches perform two main functions at once:
- Protect the fenders and doors of the car from damage to the paintwork by stones thrown from under the wheels,
- They give the appearance of the entire body an attractive and “muscular” appearance.
At the end of the article, watch the video instructions on how to make arch extensions with your own hands.
There are several popular methods that are used by motorists to increase wheel arches.
Purpose
Wheel arch extensions prevent dirt and small stones from entering the car body while driving.
Flare devices are often called mud flaps, fenders, fender flares.
The function of fenders is as follows:
Wheel arches will need to be widened for SUVs and crossovers. Such tuning is useful for cars participating in races or rallies.
Installing the arched device is not difficult. After spending a couple of hours on repairs, you can make the overlays yourself. If you don’t have time for this, you need to go to a car store that sells different types of similar devices made in Russia and abroad.
Universal and original fenders for arches
On sale there are both universal wheel arch extensions and original body kits.
- Universal rubber fender flares are sold in roll form. They are usually used by SUV owners. But these additional elements for the body can only fulfill one of the assigned tasks. Rubber fenders will protect the arches from the effects of stones and sand, but they cannot improve the appearance of the car, which is why they are not widely used in car tuning.
- Universal plastic fenders are found on sale in the form of curved blanks. They are mounted to the arch using self-tapping screws.
- Fiberglass body kits can often have defects, both in configuration and in the quality of cutting. Only those motorists who are not afraid of dirty work with putty can install such expanders.
- When installing, it is important to initially accurately attach the material to the arch with self-tapping screws.
- The wing is first protected with masking tape, after which the “blown” arch is puttied.
- After drying, the surface of the fender is smoothed with sandpaper and painted in the body color.
An alternative to purchased fenders can be homemade wheel arch extensions.
Features of the material
Most drivers choose plastic fender flaps for the Niva 2121. The material is highly durable and, when properly processed, the flare does not corrode and provides reliable protection.
The price of plastic wings for Niva Vis starts from 2,400 rubles. In 70% of variants, pickup trucks are sold already with overlays. Plastic parts are made of low-density polyethylene, and ABS is used for the wing. Main advantages:
- resistance to corrosion;
- allow installation of larger diameter tires;
- plastic is UV resistant;
- high strength and flexibility.
The disadvantages of wings and extensions include the need for complete replacement under mechanical influence of medium force. If a dent forms on the steel plate after an impact due to careless parking, the plastic element will crack in this case.
How to make wheel arch extensions with your own hands?
As a rule, all homemade fenders for arches are made of fiberglass. However, the basis of such expanders may be different.
Below we provide a brief description, and at the end of the article there is a video that clearly shows how you can make fenders for arches with your own hands.
Arch extensions based on polystyrene foam (foam)
A good material for increasing the volume of wheel arches is polystyrene foam. The sequence of manufacturing styrofoam-based fenders will be as follows:
- Pieces of the required size are glued to the surface of the body using “macroflex”.
- After the glue has dried, the foam styrene is processed with an electric knife and coarse sandpaper.
- The treated surface is covered with a layer of resin and fiberglass to add strength.
- The pieces of fiberglass are laid overlapping each other; it is important to remove any air bubbles that appear in a timely manner.
- When the fiberglass layer is dry, a rough putty is applied.
- The dried surface is smoothed with sandpaper.
- Existing sinks are filled with a finishing layer of putty.
- If necessary, several more layers of fiberglass are applied, followed by puttying, sanding, priming and painting.
Making fenders for arches using sculptural plasticine
Fender flares can also be made from fiberglass using sculpting clay.
- The working surface of the body element is previously covered with masking tape.
- Softened plasticine is spread on the wings. First, the material is rubbed into the masking tape in a thin layer, and then the volume of the arch is created in large pieces.
- The most difficult job will be giving the arches a symmetrical shape.
- Next, epoxy resin and fiberglass are applied. The number of layers must be more than three.
- After drying, the resulting expander matrices are removed along with the plasticine. The inner surface of a homemade fender is cleaned of plasticine.
- All that remains is to fit the parts in place and attach them to the arches using self-tapping screws and sealant.
- The final stage will be the same finishing operations of grinding and applying paints and varnishes.
Arch extensions based on polyurethane foam
To make a mold for expanding the arch, you can also use polyurethane foam as a base.
- The base is made from universal plastic arches. The plastic is cut into pieces and attached to the wing with self-tapping screws.
- Polyurethane foam is applied immediately inside the arch, and then outside.
- When the foam has completely hardened, the arch is trimmed to the required geometry using a utility knife and sandpaper.
- The next step will be to reinforce the structure using fiberglass and resin. A minimum of 2 layers of fiberglass should be applied.
- All that remains is finishing (sanding, priming and painting).
It makes sense to widen the wheel arches only when the car has wide tires.
Blown arches will not only change the design of the car, but will also save body parts from chips and damage.
Installation
Store-bought fenders for arches must be secured in a special way. Standard fastening of the expander is carried out using the following tools:
Installation of plastic expanders is carried out only at positive air temperatures.
The car must first be washed and dried, and the working areas must be degreased. Then they lay out the kit and begin installation.
During installation, plastic expanders need to be heated with a hairdryer so that they become more elastic and take the desired shape.
After installation, the car should be kept in a warm place for two days.
Rubber expanders are an elastic band, usually 6 meters long. The installation process consists of the following steps:
Fenders on the arches will help protect your car from dirt and give it a stylish look. Automotive stores have a wide range of linings made from different materials. Buy them ready-made or make arch extensions yourself - the choice is up to the driver.
Source
I wanted to somehow transform the appearance of the rear wheels and arches, I wanted to cut them down, roll out what was left, drop them a little lower and stick on the fenders. Well, in the end, I drew it according to a drawing found on the Internet
But in general I’m a lazy piece of feces, no matter how I abandoned it (((otherwise it’s been lying in the garage for a long time( It’s supposed to be a blockhead, I’ll remove the matrix from it and make arches from it already
How to make fenders with your own hands?
CONTENT:
EFFECTIVE LOOK OF A WIDE CAR
It just so happens that widening the wheel arches of a car in all its manifestations has become popular among auto enthusiasts. And that's cool! After all, a wide car looks much more interesting. And if you look at the racing cars of the WTCC touring series, or at the drifters with their wide arches, you immediately want to join this motorsport picture!
But athletes do not sculpt wide fenders and fenders on their cars for beauty. In them, the widening of the body is usually preceded by the widening of the track. A wider track, all other things being equal, immediately makes a racing car more stable in corners. And it also allows drifters to achieve greater ejection, which, as you know, can never be too much)
>>> Track - the transverse distance between the centers of tire prints on the road.
>>> Wheelbase is the longitudinal distance between the axles of the front and rear wheels.
WHY ARE ARCH EXTENSIONS NEEDED?
To ensure safety, competition regulations always stipulate one important point. When looking at the car from above, the widely spaced wheels should not stick out from the car body, so as not to scatter pieces of rubber, stones and dirt in unpredictable directions. To protect against such troubles, and, sometimes, to improve aerodynamics, they try to cover the wheels with extended arches. The athletes have been dealt with.
And you (and we), who love the roar of the engine and thirst for speed, may need to install wheel arches (fenders) if, in pursuit of grip or just appearance (why not?), you installed wheels so wide that they no longer fit in the stock arches . Some even combine it - they install wide “rollers” with shiny shelves and, in addition, throw in thick spacers, 40 millimeters thick (spacers of different thicknesses are in our catalog, but there will be a separate post about them). They set it up, tighten the nuts, and lower the car from the jack.
And as a result, they get the image of a fighter seasoned in motorsport battles, but for now with bare protruding wheels))) The best way to complete this image is by installing universal plastic wheel arch extensions in order to stand on par with the most famous tuning projects on the planet. Or, according to all the rules, through a rubber seal, attach a full-fledged body kit to the wings. Just like Akira Nakai-San does with his coolest Porsches. Just Google the word “fenders” to get inspired by hundreds of options for using universal flares on different cars with different wheels. try)
PRACTICALITY OF ABS PLASTIC EXTENSIONS
But! For all their external effectiveness, ABS plastic fenders also bring practical benefits. Here is an example of testing our parts in drifting - our body kit is installed on the well-known VAZ 2105 of Fyodor Vorobyov. For starters, they make his car look even more attractive) Next, they are as light as possible! With all this, they are very flexible and therefore durable. We all see that drifting has recently become quite a contact sport. Plastic fenders allow the car to remain intact and beautiful, because they tolerate numerous light contacts well. And if suddenly the blow turns out to be stronger, then with some skill you can change such a fender yourself in just a few minutes! At the same time, a destroyed plastic fender will not pinch or tear your expensive tire with its sharp edge, as iron fenders do, that is, the car does not even lose mobility!
But we haven’t touched on ease of installation yet. As we already mentioned, our ABS plastic Fenders are very flexible. They can be mounted without gaps on a wing of any complexity. If necessary, you can even warm them up with a hairdryer if your wings are of a very exotic shape) You can secure the linings either with rivets or with a detachable connection. It all depends on the goals you are pursuing. You can have and quickly replace several expansion kits for wheels and spacers of different widths - for example, for summer and winter setups. And your car will always look the way YOU want it!
The fenders in our catalog are also very different. A range of shapes, sizes and textures will allow you to choose a product for any task and preference. For example, only by the size of the extension we can offer a palette of values: +30, +40, +50, +60, +70, +90 mm, but fenders also come in different shapes! You can choose universal ones, like those installed by enthusiasts all over the world, or those manufactured and tailored specifically to your car brand. They can be painted or simply black with embossing for installation “as is”.
Friends! Inspire each other - install wide rims, expand your cars, enjoy their appearance! Together we can take a step towards the development of automobile culture in our country.
