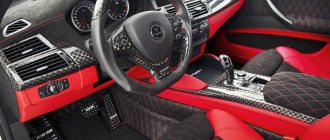
How to properly putty a car is a question that every car owner should carefully study before updating the surface of the body or redecorating the interior. Otherwise, the result of the restoration may be disastrous. For example, under a beautiful shiny coating, sloppy bumps will appear or the paint will begin to peel off over time.
It is important not only to be able to select suitable materials, but also to have a good knowledge of the technology of their application, processing, and the compatibility of various auto chemical products.
How to fill dents on a car: what are the tricks?
Help!
Last night, when driving into the yard, I slightly missed the gate. To be honest, this is not the first time((I haven’t had any practice yet. I don’t really want my husband to see. How to fill dents on a car without being noticed? What are the subtleties and tricks of this process? If you have never filled dents on a car before, then it’s better not to risk it , so as not to aggravate the situation, but entrust this matter to professionals from the nearest auto repair shop.
They will assess the condition of the dent and may be able to straighten it, making the dent almost invisible.
Then they will select the most suitable tone of auto enamel that best matches the body color of your car (you may have to do a computer paint selection).
As you can see, there is practically no chance for a delicate person to do everything efficiently in this type of body repair and so that it is not noticeable later, but this is my personal opinion.
How to fill dents on a car: what are the tricks?
There are no special tricks, there is a certain technology.
First, assess the extent of the damage.
Deep or not deep dent.
Are there any metal tears, through cracks, etc.
If this is not the case, then you can purchase two-component polyester putty with aluminum powder.
This putty is not designed for large layers, but it is very flexible and easy to work with.
You will need a spatula, a container for putty, fine-grain sandpaper, and a degreaser.
We clean the dent from dust and dirt.
Next, we work with sandpaper, carefully sanding that same dent.
Again we remove the dust and degrease again.
I don’t know what kind of putty you will buy, just read the instructions, I’m talking about proportions.
Added hardener to the main mass and mixed thoroughly until smooth.
Now we work with spatulas, apply putty to the surface and level it (remember that the layer of this putty, and about polyester with aluminum from , should be no more than 3 mm).
Drying and sanding to zero, ready for painting.
Perhaps one layer will not be enough.
Perhaps there is a dent somewhere in a place where there is a chance to crawl up with your hand or a wooden tool and bend the metal back, see for yourself.
I don’t really want my husband to see it.
You will still have to report to your spouse, because even if you suddenly can putty, it is almost impossible to match the paint one to one.
I knew one spouse who left the car in front of the gate, her husband drove in and out (for years), perhaps this information will help you.
Hello! The main tricks to puttying damage to a car are that the scratch area must be thoroughly cleaned of damaged paint using 3-hardness sandpaper. The main thing is to do this carefully so as not to damage the undisturbed paint. Then apply the first layer of putty to the scratch area, wait until it dries, and apply the second layer of putty. It is better to do this using a narrow metal spatula no more than 3 centimeters thick. I recommend Guntex 2K as a putty. This is a high-quality German putty that dries very quickly. The last step will be to apply automotive paint to match the color of the car's body. It is better to paint with a spray can by spraying paint onto the putty surface. Tamiya makes some pretty good aerosol paints. At the end of the process, wait for it to dry and rejoice at the work done!
Source
Typical mistakes when working with putty
In order to be pleased with the result of body repair, it is necessary to prevent a number of mistakes that beginners often make.
Small amount of hardener
In this case, the mixture will roll off when processed with sandpaper, and it will take an order of magnitude longer to dry. In the future, there is a high risk of severe shrinkage of the putty. However, when working in hot weather, the amount of hardener is reduced by almost 2 times!
Too much hardener
When pouring the hardener, the mass hardens in a matter of minutes, and it is impossible to properly distribute it over the base. Even if you manage to apply putty, in the future the hardener will come to the surface in the form of spots on fresh paint.
Excessively high temperature
Drying of the putty is carried out at a temperature not exceeding +60 degrees. If you overheat the base, the material will soften and fall off, and you will have to reapply it.
Temperature too low
You can work with the mixture at temperatures from +10 degrees. If the temperature is lower, the putty will shrink greatly, polymerization will proceed too slowly, which will affect the quality of subsequent processing.
Putty is a creative matter
Many vehicle owners think that puttying steel body parts is not particularly difficult. It is noteworthy that this opinion is shared by those drivers who did not try to do such work themselves, but only watched from the sidelines as others did it.
However, the vast majority of drivers putty the car body on their own. This is not surprising, since specialized centers require a lot of money for this service.
However, if a car enthusiast masters the art of puttying, then the results of his work will be by no means worse than those that would be achieved by experienced craftsmen. Moreover, puttying a car involves a creative approach. In short, every driver will be able to turn his vehicle into a real work of art. But on condition that he does not act in a formulaic way, but creatively.
Important nuances of the process
Then the driver must take the required portion of the material with a spatula, dilute it with a hardener (as a rule, the optimal proportions are indicated by the manufacturer in the instructions) and mix the resulting mass well. Next you need to apply it to the car body. After 15 minutes, and sometimes 30 minutes. the putty hardens.
At the same time, a car enthusiast who decides to putty his own car should take into account that the amount of hardener affects the intensity of hardening of the material. But you need to know when to stop. After all, a strong deviation from the recommended proportions will reduce all efforts to “no”.
It is important to know that while the putty is in a liquid state, it can be applied in several layers. This allows you to speed up the filling process. When it has hardened, it must be sanded and only then can the next layer be applied.
As for sanding the putty applied to the body, this procedure involves the use of special bars, emery paper or a sander. Simply put, a car enthusiast can polish parts either manually or using special equipment. Of course, the last option is the most practical. In addition, the driver will save a lot of time. However, certain shapes can be brought to the ideal texture only in manual mode.
Also, the car enthusiast should not forget that the spatula must be treated with solvents and rags. This will clear them of any remaining hardened putty.
Types of repair material for metal and plastic
Today there are several types of putties. Each of them meets certain requirements. Firstly, it must have good bonding properties with a properly treated surface. Secondly, the solution must lie flat on the car body. Thirdly, high-quality putty gives a minimal percentage of shrinkage after hardening .
Let’s also not forget about the quality of workability of the frozen material. Solid putty should not be brittle. And ultimately, we must not forget that the leveling mixture you select must be compatible with the paint and varnish material being applied. Among the main ones we highlight the following types:
Coarse (coarse-grained repair)
Used to mask significant body defects: dents, patches or various types of holes. Often this type of putty contains a filler, for example, steel filings, to increase the strength of the material.
Among coarse putties, mixtures with aluminum filler can be distinguished. This material has a number of significant advantages. It is resistant to elevated temperatures, exhibits slight shrinkage, is easy to sand, and has a high degree of elasticity, which allows it to be used for leveling large surfaces.
With fiberglass
They have high strength due to the presence of glass fibers. The applied putty turns into a hard layer of fiberglass, which lends itself well to subsequent sanding. This type of material is convenient for masking, for example, plastic body parts and through holes that are the result of metal corrosion.
Fine (fine grain or finish)
Used to eliminate minor defects in the surface of the car. Thanks to fine fillers, they ideally mask scratches and other minor defects. The last stage of filling the machine is carried out with this type of material. The finishing ones include the so-called fine and nitro putties . Both serve to hide minor defects. Both materials are easy to process.
Liquid
Applied with a special gun. With this type of putty you will be able to achieve a final even layer over a large area of the damaged surface. Hardens in approximately 2-3 hours.
Universal
Important! They are very good because they can be a worthy replacement for both fine-grained and coarse-grained putties. The high strength of the material allows it to be used as a filler, and its homogeneous structure gives an even hardened layer after processing.
Car owners of old cars will have to pay special attention to the choice of putty. thermoplastic acrylic varnish as a paint material Such a surface will be compatible only with certain types of putties, as can be found in the instructions on the packaging itself.
Sometimes manufacturers produce paints and varnishes that are compatible only with putties marked by their own brands. This remark should not be neglected.
Remember, you should never ignore instructions and rely only on your knowledge and experience.
Try to find out in advance whether the putty you choose is compatible with the car body material . This will save not only your time, but also money.
Puttying plastic elements
It would seem that puttying parts that are made of metal or plastic is an identical process that is carried out according to a standard scheme. But that's not true.
The fact is that if it is necessary to putty, for example, a plastic bumper, then the gloss should be removed from it. The latter is removed with sandpaper. Then the surface should be treated with a degreaser and wiped with a napkin. And only after completing all these procedures can you begin to putty.
Despite some nuances, puttying a car body on your own is a fairly simple procedure. But at the same time, it is not too light. So, if a car enthusiast does not have the relevant experience, at first it is better for him to observe this process from the outside, and also get his hands on old parts. And these can be found in every driver’s garage or basement.
Sanding for car painting
To prepare the metal for applying the putty mass, use P80 abrasive paper. This grain size is optimal to prevent shrinkage of the putty. Surface treatment with sandpaper of this size prevents sanding marks from appearing through the layers of coating, and also ensures active adhesion of materials.
In some cases, coarse P80 sandpaper is not the best option when preparing the surface for putty work. To remove, for example, small scratches on plastic or metal, use P150 sandpaper and fine-grained putty.
A thin layer of putty may shrink, and small scratches will be enough for the material to adhere to the surface. Therefore, in this case there is simply no need to treat the area with coarse sandpaper.
Another example is incomplete, fragmented puttying of parts. This restoration method is used in most cases. The center of the dent is sanded with coarse sandpaper, as a thick layer of putty will be applied to it.
Peripheral areas of damage, on the contrary, will be covered with a thin layer, so it can be rubbed with fine-grained sandpaper P150 .
Mandatory removal of dust deposits is carried out both after grinding work and before it. It is convenient to use special blow guns for quick and effective cleaning. And it’s not only convenient, but also beneficial in terms of economy.
The permissible air flow when using this tool is 150 l per minute. At the same time, when blowing the surface of a car from a hose with an internal diameter of 9 mm, compressed air in a volume of 1000 liters per minute is a net loss.
Service departments with a modest set of equipment thus incur material losses due to unnecessary energy costs. A well-equipped service center, on the other hand, saves costs by using a blow gun.
To roughly calculate the average loss when blowing with a hose, you need to multiply the cost of electrical energy consumed by the compressor available in the workshop to produce this extra 850 liters per minute.
It is advisable to thoroughly degrease the surface, as well as remove dust deposits, before and after grinding. This is no less important task than other preparatory operations, and the final result largely depends on it.
Before you properly fill your car, it is extremely important to select the appropriate grease removers and other chemicals.
An indispensable sander
The puttying procedure is just one of the stages in leveling the car body or its individual parts. After all, then comes the turn of finishing polishing. Without it, it will not be possible to achieve a perfectly flat surface of the body. And if professionals have gotten the hang of using exclusively sanding blocks, then it is better for beginners to use a grinder.
The putty can be sanded either wet or dry. With the manual method of work, the first option is more preferable, since the formation of dust is excluded. However, wet sanding has one major drawback. During operation, water can reach the metal and provoke corrosive processes. If you grind with a machine equipped with a dust removal function, there is no need for water.
Despite the fact that many car enthusiasts strictly follow the recommendations of specialists and achieve good results in puttying and subsequent polishing of their own cars, they neglect basic safety rules. In short, drivers do not wear dust masks while working. But in most cases they practice dry grinding, which creates a lot of dangerous dust. It penetrates the respiratory system and can cause serious illness.
Taking into account some nuances, as well as observing safety rules, absolutely every car enthusiast is able to give his car a perfectly smooth surface. This way you can not only save money, but also once again prove to yourself that impossible tasks do not exist.
Puttying a car door - in the video:
Source
We putty the car body ourselves
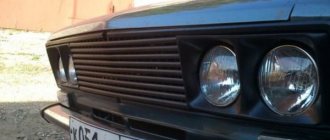
Sooner or later, all vehicle owners are faced with the problem of body damage. The causes of damage can be an unsuccessful “meeting” with another car, bad luck when parking, small pebbles flying from under the wheels while driving, driving through a problematic area overgrown with bushes, etc. As a result, scratches, chips, small cracks, dents appear on the car body, and corrosion pockets form. One of the important stages in solving such problems is puttying, which you can do yourself. But in order for the body repair to go smoothly, you need to figure out how to putty the car.
How to choose putty?
The choice of material is the most important point on which the success of the process largely depends. There are putties designed for deep and minor damage. So for deep dents the following must be purchased:
The modern car market also offers a universal option, designed for both starting and finishing work.
Depending on the composition there are:
A high-quality putty should spread evenly over the surface, have good adhesion, and have minimal shrinkage after curing.
Therefore, in the case when the car owner does not yet know how to properly putty a car, it is better to consult with a specialist in a car shop, and also read reviews from experienced motorists.
The property of shrinkage and disruption of application technology at home
In the question of how to properly putty a car, a very important problem is the shrinkage of the putty mass.
This characteristic mainly depends on the components. 30% of the volume is the optimal amount of solvent in the composition, according to the recommendations of many manufacturers.
Exceeding this indicator affects the price of the material. Thus, cheap products usually contain a larger amount of solvent, which significantly increases the shrinkage of the material.
This is due to the fact that when drying, styrene evaporates, reducing the total volume of putty applied.
High-quality polyester putties decrease in volume after drying by 2%. If you apply them in a thin layer, the shrinkage will not be noticeable visually. The most important task in cosmetic repairs is to hide the traces of restoration and make them as invisible as possible. To do this, you need to correctly choose one of two methods of preparing the surface for putty work and take into account shrinkage.
In some cases, it is optimal to smoothly mow the old coating; other damage is best restored with a sharp break. With a smooth bevel, the shrinkage rate of the mass at the border with the unputtyed area will be 2 microns, and with a sharp break - about 20 microns.
There is, in addition, secondary shrinkage. When soil or liquid mass is applied to a dry putty surface, the upper layers dissolve and substances penetrate through them to scratches and marks. During the drying period, the layers are gradually compacted due to the solvent escaping from the putty. This phenomenon is often observed in materials containing low-quality fillers and resins.
Incorrect application technology can also cause secondary shrinkage and subsequently cracks. The mass must be carefully placed into deep grooves with a special spatula. If it falls into the recesses later, dissolved by the surface coating, secondary shrinkage will occur. This undesirable effect can also be caused by low-quality, cheap primers with a low solids content and a base made of an aggressive nitro solvent.
Important! The use of such materials can lead to two serious problems: strong dissolution of the putty with pronounced shrinkage and weak filling ability of the soil, which prevents the defect from being accurately hidden.
Process description
Body surface preparation
Before you putty the car, you need to take care of the quality preparation of the body for further processing. First of all, it is necessary to thoroughly wash the vehicle and assess the extent of the problem and the nature of the existing damage. The further action plan will look like depending on the situation:
Putty work
How to putty a car correctly? This seemingly simple process requires some skill and consists of the following steps:
Preparing your car for painting with your own hands
Compliance with the correct surface treatment technology before starting work is the main condition for obtaining a reliable and high-quality coating, a long-lasting effect of cosmetic repairs, and the accuracy of recreating the original lines and contours.
Before starting the puttying process, it is necessary to perform several preparatory operations on the surface of the car. Namely:
Special paper is used for sanding metal and plastic elements. Large surfaces can be machined, while small damaged areas can be carefully sanded by hand. Emery cloth has different gradations depending on the grain size.
Important nuances
There are subtleties, knowledge of which will ensure high-quality performance of putty work:
Despite the fact that puttying is not a particularly complicated process, novice car enthusiasts may not get everything perfect the first time. In order to avoid disappointment, you need to watch the corresponding video, which describes in detail how to properly putty your car, and also consult with practicing specialists who can give many practical recommendations.
Source
Tips to help you do everything right
To ensure that restoration activities are carried out efficiently and quickly, you should pay attention to a few small tips:
To check the quality of the work done, you can use developing powder.
It is a black substance that is applied with a sponge to the surface to be treated before sanding. Sandpaper immediately cleans convex places, and where you need to add putty, the powder will remain. This way the overall picture and the places that need to be improved will be clear.
By following simple instructions and watching special videos, you can carry out the putty work yourself. And, despite the apparent complexity, everyone can carry out high-quality car repairs.
Source
Puttying a car yourself
Sometimes situations arise when a car requires repairs (puttying), but there is practically no money, then you have to take on the work yourself. All it takes is time, patience and a little skill.
If you are unfamiliar with the material, it is better to contact a competent specialist who will help you master the basics of technology. When getting started, there are a few things to remember:
Recommendations:
All automotive putty offered on the market is divided into:
The putty is selected based on the planned work and the nature of the damage to the car body. Only with the help of a good and correctly selected mixture can you achieve the desired result.
Auto putty is a finishing material presented in the form of powder or finished paste. The powder is diluted in the required proportions, while the paste is completely ready for use. The putty mixture is required for finishing the damaged surface of the car followed by applying a paint layer.
To put it simply, you need to putty your car in case of damage, chips and scratches that disrupt the attractive appearance of the car and potentially threaten the gradual spread of corrosion.
Putty is used to repair both metal and plastic parts. But not every putty is suitable for certain tasks. It is important to understand which mixture to choose, what its features and advantages over competitors are.
We choose wisely, taking into account key factors and with an emphasis on achieving optimal quality of body repair. To choose the composition, you need to study each type of putty.
Rough
Coarse putty is used for major damage to the body. It is also coarse-grained. Suitable for complex work when it comes to serious body damage and defects:
It is distinguished by the inclusion of a special filler made of metal shavings. This guarantees a better connection and increased strength of the treated area.
The most popular coarse putties are mixtures based on aluminum filler. They are heat-resistant, ductile, elastic and easy to sand after drying.
How long does it take for car putty with hardener to dry?
The drying speed of automotive putty is influenced by many factors:
On average, one layer of putty dries for about 20 minutes until it gains strength sufficient for abrasive processing. However, when applying several layers, the drying time can be reduced. The final strength is gained in 2-6 hours.
You can also speed up the polymerization process of the putty with a hairdryer or incandescent lamp. But there is one caveat here: it is categorically impossible to dry the first layer artificially, as this can subsequently lead to its cracking and peeling. And subsequent layers should sit for at least 10 minutes after application without external influences. Only after the initial polymerization has taken place is the putty allowed to dry a little.