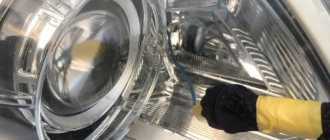
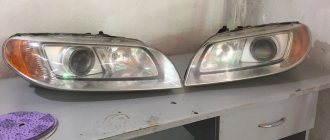
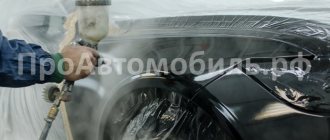
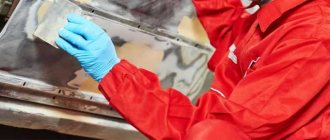
During vehicle operation, headlight lenses become covered with a network of scratches and become cloudy, worsening road lighting conditions. To restore characteristics, surfaces are treated with abrasive materials. The master needs to varnish the headlights after polishing, providing additional protection for the plastic from external climatic and mechanical influences.
Causes of cloudiness
Yellow headlights, if this is not a special type of tuning, cause sympathetic glances from drivers and problems with traffic police inspectors. The requirements for the quality of road lighting are high, and if the lights have dimmed significantly, this is a direct violation of traffic regulations.
The cases are made of glass and plastic. Optics manufacturers refuse to use glass for many reasons:
- expensive;
- glass blocks are heavy;
- do not require frequent replacement and are not profitable to produce.
It takes more than one year for headlights made of glass to become cloudy. Plastic cases are 70% lighter and 560% softer than glass. It is beneficial for manufacturers to use plastic, because car owners have to spend more time and money on maintaining them. Reasons why optics units turned yellow or cloudy:
- Systematic impact of gravel, which hits the lights at speed.
- Using light bulbs of unspecified power: the protective coating in the plastic peels off from the inside.
- Dust accumulates in microscopic cracks.
- Overheating during polishing causes the plastic to become cloudy and dark.
If the lights have lost their transparency, you can restore the optics with varnish, after polishing the surface.
Let's turn to GOST
You probably know that there are rules and laws regarding tinting car windows. Just recently I talked about removable tinting, and we also discussed the issue of curtains for a car. I advise you to refresh your memory and read the materials again. In addition to them, I would suggest that you familiarize yourself with removable tinting on a rigid base, the link to which will be, and removable silicone tinting with a link.
Category: Tuning
Now let's talk specifically about the rear lights. There are no requirements for their tinting. There are only regulations for the operation of automotive lighting equipment. Regarding the rear optics, it states that only yellow, red and orange light can be used. All others are prohibited.
There is one correction here. To illuminate the reversing lamp in the Russian Federation, only white light is used, as well as to illuminate the license plate.
These are the only official rules regarding this matter. That’s why you need to rely on them when you decide to tint the rear optics. If any color other than those listed is used, when recording this fact, law enforcement officers will classify this as an offense. Therefore, you will be issued a fine.
Potential penalties
If there is tinting on the rear optics that does not correspond to the characteristics prescribed in the Code of Administrative Offenses, then the driver of the vehicle will be fined.
Only here there are important nuances. The thing is that in the current legislation there are no specific clauses that relate specifically to rear optics. Just don’t think that it’s now legal to tint your headlights any color you like.
Here, traffic police officers will rely on Article 12.5 Part 1 of the Administrative Code. That is, they will charge you with a violation due to vehicle malfunctions in accordance with the requirements for permitting a vehicle to operate. If your taillights are in poor condition, get ready to receive a fine of 500 rubles.
Drivers note that traffic police officers rarely issue fines for such violations. And if you tint the optics without changing the color of the instruments, then there will be no problems at all.
Even though there is practically no threat of a fine in this situation, it is still necessary to remind you about the methods of paying fines. There will be a link to interesting and useful material about this.
How to restore the transparency of headlights using varnish
Restoring headlights under varnish is an alternative way to return proper lighting to your car. The method is suitable for glass and plastic headlights only if the optics are not significant, more than 3 mm. into the depth of scratches and chips.
Before varnishing, it is necessary to remove the yellowness of the headlights by simple, non-machine polishing.
Restoring headlight lenses with significant scratches and chips requires machine grinding and polishing.
Before varnishing, it is necessary to drive the car into a garage, the air temperature is at least 20 ° C. You can remove the running lights from the car; in this case, you will not need to protect the body during polishing and varnishing. The whole work will take an hour and a half. The coating will dry for at least a day. During this time, you must not touch the surface, try to correct it, etc.
The restoration process step by step, if you do not want to remove the headlights:
- Use masking tape to cover the paintwork near the optics unit.
- Use 400 grit sandpaper to remove large scratches. You can clean it manually for 3-5 minutes.
- Using 1200 grit sandpaper, re-treat the surface. You can use a polishing machine.
- While cleaning, water the block generously. It is not recommended to use polishes: they are difficult to wash off.
- Clean the surface from dust and polish, if used with a hairdryer.
- Degrease the surface and dry thoroughly.
To restore transparency, either a two-component varnish or a special one in cylinders is used. Two-component, consisting of resin and solvent, pre-filtered. Apply to the surface via sprayer.
- Cover the car with film to prevent the varnish from damaging the bodywork.
- Spray a thin layer of varnish over the entire surface. Try to complete the procedure in one step, making the layer of varnish the same over the entire surface.
The composition will fill all cracks and roughness on the body, making the outer wall smooth. This will ensure optimal refraction of light through a uniform coating. The material will harden in 50-60 minutes and completely dry in 48 hours.
Tools and materials
To do the work yourself you will need:
- clean napkins or rags;
- detergent for removing dirt from headlight glasses;
- protective adhesive tape;
- neutral solvent for removing grease stains (for example, isopropyl alcohol);
- electric grinder with elastic nozzle;
- sandpaper with a grain size from 1000 to 2500 units;
- protective varnish;
- a tank for mixing components (required if using 2-component material);
- construction hair dryer with adjustable air temperature (to speed up the polymerization process).
Which varnish to choose
Depending on the surface material, the varnish for the headlights is also selected. For glass bodies, acrylic, two-component, polyurethane compounds are used; for plastic optics, only two-component, aerosol ones are used.
Purpose of coverage:
- tinting;
- protective.
The composition for restoring the capacity of a clouded headlight is marked according to the classification. When choosing an aerosol or two-component material, it is recommended to pay attention to the ratio of active substances. Drying time and shine depend on the amount of polymer compounds:
- UHS. The varnish contains less than 15% polymers. The material dries quickly and is often used as a tint or protective after polishing.
- H.S. More than 70% polymers. The material dries slowly and can be used to polish headlights and restore full transparency. It is recommended to apply in 1 layer.
- MS. Equal amount of polymers, solvent. The material is suitable for restoring throughput and for tinting. Apply in 2 layers and dry in 24 hours.
- The two-component composition is available in two containers: dry residue and solvent. Before work, it is necessary to mix the substances and filter the material through a sieve.
- Polyurethane is available in aerosol cans, completely ready for application to the surface.
- It is recommended to varnish the block with your own hands using aerosols. There is no need to mix components, calculate proportions, or look for a spray bottle.
Safety precautions
When performing work, it is important not only to do everything according to the instructions, but also to adhere to safety rules:
- When applying varnish, protective clothing is worn. Gloves and safety glasses are required, and protective overalls will also be useful. Additionally, you should take care of the respiratory tract; paint and varnish materials can only be applied in a respirator.
- Preparing the premises. The room where work will be carried out must be clean and have good ventilation.
- Fire safety. There should be no open flame sources near the headlight varnishing area. It is advisable to have a fire extinguisher on hand.
- No outsiders allowed. It is important that children do not have access to the place of work; it is also advisable to limit access to pets.
At the end there is a thematic video.
Ceramic varnish
Car enthusiasts who believe that the chemical composition of polycarbonate ceramic varnish contains elements of ceramics are mistaken. The material received its name due to the great similarity of the hardened varnish to natural ceramics. More often used for painting the body, it has up to hundreds of shades from matte to chameleon.
Ceramic varnish to restore the transparency of headlights is more often used in garage repairs. A transparent composition is selected that gives shine and gloss to the glass surface. Apply with a brush or spray.
Ceramic varnish “heals” microcracks and completely restores the surface due to its non-uniform hardness. The outer microlayer has increased hardness, the inner one is elastic. When a scratch occurs, the inner layer fills the crack, restoring the original appearance.
Before applying ceramic varnish, it is necessary to completely remove the factory varnish.
Tinting the glass of your optics is a beautiful tuning effect
There is a way to improve the appearance of the headlights even more, they will not only have a shine, but also a special color. Tinting is used to enhance visual qualities. The headlights get a dramatic look and add tint to the headlights. The only drawback is the complexity of the procedure. To create a tint, you will need high-quality polishing and subsequent frosting of the glass. Only after preparation is the material applied.
The method of applying all types of tint is described in the instructions for the product or on the official resource. To determine the best tinting varnish with the optimal combination of price and quality, you can use customer reviews, but it is not recommended to buy cheap options. Regardless of your choice, you must adhere to the following application principle.
Car optics tinting
Polyurethane varnish
One of the most common types of protective chemicals for automotive optics. It consists of a solvent and a varnish base mixed in different proportions.
It is necessary to restore the optics and remove yellowness only after polishing the headlight, washing and drying it. The quality of the brightness of the optics and the durability of the coating depend on the adhesion strength of the surface and the varnish composition.
Polyurethane varnishes are equally suitable for restoring plastic and glass cases. If the interior of the polycarbonate headlight peels off and the optics become cloudy, replacement is recommended. It will no longer be possible to restore the quality of light output.
Application process
Glass running lights that have lost their transparency are often processed only on the outside. Glass, as one of the hardest materials, is practically not subject to clouding due to a burnt-out light bulb in the unit or a short circuit. The external varnish coating of the headlights is made from a spray can.
In the case of plastic blocks, there is a possibility that the outer surface is damaged by scratches, and the inner surface begins to peel off due to frequent overheating. In this case, the optics are dismantled from the car, internal and external restoration and polishing are carried out.
Grinding, coating the plastic of rear lights, dimensions, head lighting in steps:
- Dismantle the headlights, remove the lamps and blocks from the housing.
- Separate the plastic part by preheating it with a hairdryer.
- Wash the headlight.
- Sand the outer and inner surfaces.
- Wash and dry the block.
- Degrease the surface.
- Treat the outer and inner surfaces with an activator.
Painting various surfaces
The principles of using chrome paint in cans are common to all surfaces, but it is worth considering some features when painting metal and other surfaces:
Painting metal surfaces . These emulsions are mainly used for this type of surface:
- Before painting, the surface must be thoroughly cleaned;
- Anti-corrosion treatment and degreasing are required;
- Damaged areas are puttied, sanded and then polished. After this, the surface is cleaned again;
- If necessary, primer is applied;
- If primer was applied, then after it has completely dried, polishing is carried out;
- Before spraying, shake the paint can thoroughly for at least one minute;
- The paint is applied in a thin layer. To fully achieve the chrome plating effect, at least three layers may be needed;
- Once completely dry, polishing may be required.
Treatment of plastic surfaces:
- Before painting, the plastic must be thoroughly polished;
- It is necessary to apply primer. Otherwise, the painting may not last long;
- It is recommended to slightly warm the surface before application;
- After drying, polishing is required.
Using special wipes
Wipes for restoring headlights can only be used as an aid. They will quickly restore only slightly tarnished glass or plastic. Before use, it is also necessary to treat the surface with fine-grained sandpaper (from 1800 grit). Cleansing takes no more than a minute.
The manufacturer recommends washing and drying the headlight before using the wipes. Experienced drivers prefer to additionally sand the surface with sandpaper of more than 2000 grit, or pre-polish with toothpaste.
It is necessary to wipe the cleaned and dry headlight with a special cloth without rubbing the varnish. Apply the product with gloves. The DOVLight coating lasts on the headlight for up to 7 months.
Other means
Glass housings can be cleaned of plaque through steam restoration of headlights. The ribbed surface inside is quickly cleaned of yellowness and dust. The outer surface is polished and varnished.
You can restore the original shine of the optics by chemically restoring the headlight. Meguir's set will do. The kit includes:
- headlight cleaner;
- degreaser;
- varnish cloth.
There is no need to grind the optics: the cleaner will remove all dirt, and the polyurethane varnish will quickly fill microcracks.
How to clean headlights with toothpaste
You can restore the original appearance of a glass or plastic case with toothpaste. If the clouding of the optics unit is associated with peeling of the polycarbonate layer inside the plastic headlight, no method of external cleaning of the housing will help.
To clean headlights with toothpaste in no more than 30 minutes, you will need:
- any paste with a whitening effect;
- polishing machine with a soft felt nozzle;
- pure water;
- degreaser;
- rags for wiping.
Cleaning process in stages:
- Wash the headlights and wipe dry.
- Treat with a degreaser.
- Apply the paste directly to the body or to the surface of the sponge of the polishing machine.
- Thoroughly clean the surface with the paste for 3–5 minutes if using a machine, 12–15 minutes if cleaning by hand.
- Rinse off the paste with clean water and wipe dry.
After cleaning with toothpaste, they pass over the surface with special varnish wipes. Applying the varnish takes a few minutes, and the optics restore their original shine and brightness.
Recommendations from experts
Tips from experienced professionals:
- Before varnishing, polycarbonate glass should not be polished with a fine-grained paste. A smooth surface impairs the adhesion of dissimilar materials.
- To prevent the formation of stripes, polishing should be carried out alternately, changing the direction of movement at a right angle.
- When processing diffusers, it is necessary to gradually reduce the grain size, preventing the formation of defects on the surface. Excessive force leads to failures or cracking of parts.
- When treating headlights with a 2-component varnish, it is necessary to mix small portions (the shelf life of the solution does not exceed 5 minutes).
- It is recommended to carry out work at an ambient temperature of +20…+25°C.
To speed up the polymerization of the varnish, you can turn on the low beam headlights or apply heated air with a hair dryer. The technique reduces the risk of dust settling. After pre-drying, the headlights are left for 1-2 hours to allow the solvent to evaporate naturally. It should be noted that applying varnish yourself requires the car owner to be careful and have painting skills. If you have no experience, it is recommended to contact a service center, which will save time.
Manufacturers
The Delta Kits company produces single varnishing kits. The set includes:
- two-component varnish;
- degreaser:
- polishing paper in calibration 320,500,800,1200,1500,3000 grit.
- felt lint-free napkin.
With one set you can polish your optics yourself and apply Delta Kits varnish. Its main advantage is the protection of plastic from UV, maintaining the transparency of the restored headlight for up to 22 months.
The manufacturer Dovlight produces kits for restoring car optics, two-part and aerosol varnishes, headlight cleaners, and anti-rain. Polyurethane varnishes are characterized by a small percentage of solids, dry quickly, hardening occurs in 20 minutes, complete drying in 24 hours. Restores initial light penetration by 98%. Well-known manufacturers:
- Diamond Vision;
- Meguir's;
- Philips Headlight;
- Presto.
The degree of wear of the block affects the choice of reducing agent. Depending on the number of scratches and chips, the restoration option will depend: napkins without sanding, light sanding, polishing or serious restoration.
