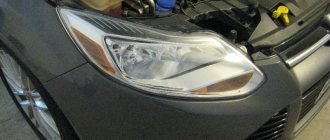
Bumpers are not only a decorative element, but also perform a protective function, preventing damage to the car body in light collisions. The rear bumper is especially often damaged. Many car owners have a desire to remove scratches in the paint and cracks in plastic that appeared during such minor accidents. This type of work is carried out by completely removing the rear bumper of a Ford Focus 2 sedan.
- A screwdriver or wrench with a Torx T25 or T30 head (the type of fastening screws depends on the year of manufacture of the car).
- Phillips head screwdriver.
- Flat blade screwdriver.
- 10 mm socket and 10, 13 and 7 mm open-end wrenches.
Ford Focus 2 Manual
We carry out work when repairing and replacing the front bumper.
We carry out the work on an inspection ditch or overpass. On a Ford Focus 2 with a hatchback body, we disconnect the wire blocks from the fog lights (see “Replacing the fog light bulb, removing the Ford Focus 2 fog light”).
Remove the mudguard of the radiator of the cooling system (see “Removing the radiator shield of Ford Focus 2”).
Using a Torx T-30 wrench, unscrew the lower...
...and the upper screws securing the right fender liner to the bumper.
Similarly, unscrew the screws securing the left fender liner to the bumper.
Using a Phillips screwdriver, unscrew the two screws for the upper bumper mounting to the upper cross member of the engine compartment.
From the bottom of the car, using a 10mm head, unscrew the two self-tapping screws securing the bumper to the right fender.
Similarly, unscrew the two bolts of the left fastening of the bumper to the fender.
We move the sides of the bumper away from the right and left wings, overcoming the resistance of the clamps.
Position of the lock on the right wing (for clarity, the headlight has been removed)
By prying up the right holder of the upper cross member of the engine compartment, we remove the bumper fixing tab from it.
Similarly, remove the left bumper tab from the holder.
By pressing the three bumper latches located in the center of the car, we remove them from the grooves in the upper cross member of the engine compartment...
...and remove the front bumper.
We install the front bumper of Ford Focus 2 in the reverse order.
Removing the front bumper Ford Focus 2
Primary source of content – WiKi of the Za Rulem magazine website
Removing and installing the front bumper Ford Focus 2 2005-2008
You will need: TORX T25 wrench, 10mm socket, flat-blade screwdriver (or pistons puller), Phillips-blade screwdriver.
1. Open the hood and place it on the stop.
3. Remove the mudguard and engine crankcase protection (see “Removing and installing the engine mudguard”).
4. In the arches of both front wheels, turn out one lower...
5. ...and two front screws securing the fender liners to the bumper.
6. ...as well as two bolts each of the outer fastening of the front bumper to the front fenders.
7. Using a puller...
8. ...or a screwdriver...
9. ...remove the two pistons securing the bumper to the side pillars of the radiator frame.
10. On both sides of the car, remove one bolt from the internal fastening of the bumper to the front fenders...
11. ...unscrew the fasteners...
12. ...and remove one piston securing the bumper to the frame of the engine compartment...
13. ...on both sides, press out with your finger the two latches of the side fastening of the bumper to the frame of the engine compartment...
14. ...and press the latches into the frame holes...
15. ...press down the two side latches and move the edges of the bumper away from the frame of the engine compartment.
16. Unfasten the three central latches...
17. ...and remove the front bumper.
18. Install the front bumper and all removed parts in the reverse order of removal.
The front bumper beam is part of the engine compartment frame, so the removal and installation of the frame is described in a separate subsection (see “Removing and installing the engine compartment frame and front bumper beam”).
What rear bumper is installed on Focus 2 and its price
Actually the bumper itself.
If it happens that you have to completely change the rear bumper, you need to look for either the original or a replacement.
- The rear original bumper of the second Focus is designated in the ST catalogs FDA5087A0 for the sedan body, the station wagon bumper has the original number FD04327BA, and the hatchback - FD04326BA . The originals cost about 5 thousand rubles from dealers for 2021.
- And analogues are from 2 to 4 thousand. They are produced mainly by companies TYG, Atek, Norden, NTP, Junsit, Polcar .
The prices for all bumpers are different, respectively, and the quality of plastic, casting, and precision of execution are also different.
Removing the rear bumper with your own hands
On a sedan and a hatch, the bumper is removed using the same algorithms. The only difference is that the sedan has a 7mm head bolt under the black cross molding. All other operations are performed the same for all bodies. The operating algorithm is as follows:
- On Focus hatchbacks, the first step is to disconnect the contact blocks for the fog lights and reverse lights. This is done from under the car. On sedans, if parking sensors are not installed, you do not need to disable anything.
- The wheels can be removed for ease of work, but you can do without dismantling them.
- We remove the mudguards. Depending on the year of manufacture, they are mounted on three or four self-tapping screws for a Torx T 30 or T25 bit. Unscrew the lower far screw with a Phillips screwdriver.
- Use a Torx bit to unscrew the screw securing the top clamp and remove it.
- All that remains is to unscrew two more screws and remove the mudguard.
- We repeat the same operation on the other side.
- On both sides, unscrew the nuts for the side fastening of the bumper. To do this, take a 10mm head.
Bolt securing the bumper to the body
- After this, we unscrew the fastenings of the rear part of the bumper with the same head.
- The bottom of the bumper is secured with pistons. To remove them, use a Phillips screwdriver to unscrew the screws and carefully remove the piston. If the piston rotates together with the screw, press the edge of the bumper downwards, wedging the body of the piston.
If it's a hatchback, remove the size.
- Carefully separate the sides of the bumper from the body. To do this, we apply a little force, but without extremism, otherwise you can break off the latch.
- We pull the bumper towards ourselves, it is advisable to use the help of a partner to simultaneously pull the bumper on both sides.
- If you need to remove the amplifier, unscrew three nuts securing it to the studs in the spar and remove the amplifier.
How to remove the rear bumper on a Ford Focus 2 hatchback?
To remove, you will need Torx keys T25, T30, a 10mm socket, Phillips and regular screwdrivers. First you need to remove the mudguard. We unscrew the screws that secure the mudguard to the bumper and remove the mudguard.
Now we remove the fender liner. We remove the clamps from the studs in three places on the side of the body.
Then from the front below.
One at the back at the top.
Remove the screw from the front bottom.
We pull it off the studs.
Well, we remove the mudguard.
Now you need to disconnect the block of wires going to the bumper, the block is located below the car, on the right. You also need to disconnect the wire holder from the body. The bottom of the bumper is supported on both sides by pistons. You need to unscrew their screws.
And remove the pistons.
The bumper is secured in the wheel arches with nuts.
Open the back door and unscrew the bumper screws.
Now, by pulling the right and left sides of the bumper towards you, we pull it off the mounts.
Well, let's remove it completely.
Tool
It is necessary to check in advance the availability of tools, without which the work cannot be completed. The minimum set of tools is as follows:
Front bumper
Fastening the element is quite simple, and the part can be removed from the car with your own hands. The work is done by one person.
Step-by-step removal instructions
Before starting work, the vehicle must be placed on a horizontal base with a hard surface. Removing the front bumper on a Ford Focus 2 (restyling) should begin from the attachment points on either side of the car. After removing one corner, you need to move to the other side. The sequence of steps is as follows:
- Remove the front wheels and install safety stands under the sills.
- Unscrew the T25 or T30 Torx screws and remove the mudguard.
- Remove the dirt protection panel. One side of the shield is placed behind the flange on the bumper, and the other is fixed to the radiator mounting frame with seven Torx screws.
- Remove the fender liner mounted on Torx screws.
- Unscrew the mm securing the Focus 2 bumper to the front fender.
- Remove the headlight, which is held on by one screw and the wiring harness block.
- Unscrew the third 10 mm bolt under the headlight.
- Remove the 2 radiator grille mounting screws.
- Unfasten the latches on the bottom edge with a flat-head screwdriver and remove the grille.
- Follow the same steps to remove the fasteners on the other side.
- Carefully remove the bumper from the amplifier and disconnect the fog light connectors.
Features of dismantling and installing third-generation Focus bumpers
To remove the front bumper of a Ford Focus 3, you will need two sockets (10 and 13 mm), a flat-head screwdriver and a Torx T30 socket. The procedure for dismantling parts is the same for machines of any configuration and is carried out as follows:
- Remove the fender liners and engine protection.
- Disconnect the radiator splash guard mounted on six pistons.
- Unscrew the bolts securing the wing and remove the remaining pistons (one per side).
- Unscrew the nuts on the side mounting of the bumper.
- Remove the plastic fastener.
- Remove the four screws securing the radiator splash guard to the mounting frame.
- Remove the mudguard from its seat.
- Put your hands through the resulting holes and disconnect the plugs of the fog lights.
- Remove both headlights from the vehicle.
- Disconnect the hood lock drive cable from the opening handle.
- Remove the pins and mounting screws on the top.
- Dismantling is complete.
To remove the rear bumper on a Ford Focus 3, you will additionally need a 7 mm socket. The procedure itself looks like this:
- Remove the rear lights.
- Unscrew one bolt at a time in the lamp niches.
- Remove the rear axle wheel mudguards.
- Bend the fender liner panel forward.
- Unscrew the fastening screws located in the inner part of the wheel arch.
- Use a screwdriver to pry the latch of the plastic guide bracket and remove the bumper edge from it.
- Carry out similar actions on the other side.
- Remove the pistons from the lower mounting points.
- Remove the bumper from the bracket in the light niche and completely dismantle it from the car.
Installing the part in its original place is done in the reverse order.
Features of removing bumpers
On a Ford Focus, in order to remove the front bumper, you must perform the following steps:
- Open the hood and fix it in this position.
- Remove the radiator trim.
- We dismantle the engine splash guard and crater protection.
- We unscrew the mounting bolts (3 on each side at the top and bottom) of the fender liner and remove them, after which we gain access to the mounting screws for the front wings.
- We remove the pistons that secure the body part and radiator struts, while doing everything with extreme caution.
- From the inside of the wings, remove the bolts and clamps that secure them to the bumper.
- Remove the fasteners to the engine compartment.
- We open the latches of the part, and this must be done simultaneously, pushing them down with your fingers.
- We remove the side fastenings and move it away from the frame of the engine compartment.
- We disconnect all the remaining fasteners and remove the front bumper.
Replacing the rear bumper requires its removal, and accordingly for the Ford Focus this happens as follows:
We fold back the trunk mat (for a station wagon you will have to remove the rear door trim).- Remove the fastenings of the side trim of the trunk of the Ford Focus.
- Pull back the trim and unscrew the bumper mounting bolts (for this you will need a socket wrench with an extension and a replaceable head).
- Unscrew the hex bolts on the left and right (2 on each side).
- Unscrew the screws that connect the fender liners and the rear bumper.
- Detach the part from the body brackets by pressing it firmly on the sides and pulling it by the edges.
- Remove the rear bumper, lifting it above the fender liners.
That's all, armed with the necessary tools, a few hours and an assistant, you can remove the bumpers from your second generation Ford Focus. This may be followed by replacing it with a new option, improving the existing one, etc. In general, do whatever is necessary. Good luck!
Ford focus 2 rear bumper repair
How to remove the front bumper of a Ford Focus 2
YTE rear bumper for Ford Focus 2
Ford focus ST /// An attempt at crossing bumpers
How to remove the rear bumper?
Removing the rear bumper on a third generation Ford Focus is no more difficult than removing the front bumper. To do this, first remove the rear lights. They are held in place by two plastic bolts and one rivet. Then unscrew the screws that are on the mudguards. There are three of them on each. Next, the rear bumper is pulled to the side from one edge and the self-tapping screw that has become accessible is unscrewed. The same is done on the other side. Then take out the two pistons located on the apron below and behind. After this, you need to unscrew the four screws that become visible after opening the trunk lid. There are two of them on each side. Having completed all the operations, carefully pry up the latches and pull the rear bumper towards you. It should come out easily.
Ford Focus II front bumper mount
Removing the front bumper from the car may be necessary in the following cases:
- replacement due to significant damage (after an accident);
- repair of minor damage;
- replacement to change the appearance or aerodynamic properties (restyling).
The front bumper in a modern car, and the Ford Focus is no exception, performs several functions. First of all, this is a frontal impact mitigation function, for which, in fact, this body part was originally intended. In addition, the front bumper plays an important role in the overall concept of body design, that is, it is an integral part of the external “picture” of the car. Also, having the correct, well-thought-out shape, this part of the body can significantly improve the aerodynamics of the car, improving stability and controllability in motion, especially at high speeds.
Effective tips for eliminating cracks
The fastest and most inexpensive way to repair cracks is to use a heat gun. A device with a power of 1,600 W is purchased. With temperature control up to 700 degrees. The universal rod is suitable for almost all types of plastics. It is better to rent or buy a heat gun with overheat protection.
The edges of the cracks need to be secured with clamps and grabbed with a soldering iron. The broken pieces of the bumper should be installed in a similar way. Using a soldering iron, the defect is somewhat deepened and a welding rod is inserted into it. You will have to work with a hairdryer and a soldering iron at the same time. Do-it-yourself repairs are not difficult, taking into account the above techniques.
Removing the front bumper of a Ford Focus
To work you will need tools:
- Phillips screwdriver with medium tip;
- a set of hex keys (stars) or an electric screwdriver with the appropriate bits;
- straight screwdriver (may be needed to “fight” some latches).
Screwdriver with replaceable bits
Before you start removing the front bumper, you should thoroughly wash the front of the body, including the bottom. After all, working with clean parts is much more pleasant and faster.
So, let's start gradually approaching the front bumper in order to eventually remove it:
- You should start working on one side, gradually moving to the other. Which side to start with doesn’t matter. To facilitate access to the necessary fastenings, you need to turn the wheels in the right direction, or even better, simply remove them;
- First, remove the mudguard, secured with self-tapping screws for a Phillips screwdriver;
- The fender liner is removed, here you will need hexagons;
- Now you need to find and unscrew the screws from below that fasten the bumper to the wing. But these are not all screws. One fixing element must be unscrewed from the engine compartment. However, to get to it, you need to remove the headlight from the corresponding side, for which you need to unscrew one screw, unfasten two latches, and disconnect the electrical wires;
- Next, the radiator grille is removed, for which several screws are unscrewed and the latches are released;
- All that remains is to remove the part from the hooks in the middle, and then do the same actions as described above on the other side of the front of the car;
- The last step will be to disconnect the sidelights, which will completely free the bumper.
Ford Focus bumper installation
Installing a new or repaired bumper is done exactly the opposite. True, it is more convenient, after connecting the sidelights, to immediately attach the front removable body part to the central hooks, which will position it symmetrically. And then connect the latches sequentially and tighten the screws in their places.
The entire process of removing the Ford Focus front bumper, including removing the wheels, takes no more than 2 hours. If someone helps, everything can be done much faster. The reverse process, that is, installation, usually takes a little longer, especially if some of the screws have become unusable and you have to look for a replacement. In general, there is nothing complicated here, so replacing the bumper yourself is more than realistic.
Which rear bumper is used on FF2
If you need to remove the rear bumper of a Ford Focus 2 and then replace it, you need to buy an original spare part or an analogue. In the catalogs for the sedan, the original part for FF2 has the code STFDA5087A0, for the hatchback a bumper with the index FD04326BA is used, and for the station wagon you need to find a product with the code FD04327BA.
When purchasing a spare part from dealers, you should prepare about five thousand rubles for the original rear bumper, and an analogue will cost 2-4 thousand. They are produced by companies Norden, Polkar, Atek, Jansit and others. The cost will vary depending on the manufacturer, as will the quality of the material, casting, and design accuracy.
Here, each car owner decides for himself how much he is willing to spend and what quality of the new part he expects. You can also go to a car wrecker and try to find a “live” bumper, but often this search will be difficult - many body parts at such car flea markets already have various flaws. And installing another broken bumper to replace an already damaged one is unlikely to be advisable.

