Strips of plastic or rubber have appeared on doors and other parts of the body of passenger cars for quite some time. Even the AvtoVAZ company, being a Soviet one, mastered gluing similar elements to the thresholds of the “classic” VAZ 2106. Now the vast majority of cars are trimmed with moldings of various shapes. Hence the problem arose of how to reliably glue the torn decorative elastic band so that it did not fall off again. There are several methods worthy of attention and proven practice that are worth considering.
What is he?
Everyone has heard the term “molding”. What is this word and where did it come from? Its origin is American. From an architectural point of view, it means decorative molding. From the point of view of the automaker, it is a special profiled metal for car body parts. In other words - a sealant.
· transforms the appearance of vehicles;
· masks the gap between the body and the glass;
Helps ensure structural rigidity;
· protects the car interior from the penetration of noise, dust and humidity.
The original seal, which is cast together with the glass in production, has the highest quality characteristics.
The original car molding is made using special equipment from high quality rubber.
With it, any car enthusiast will not experience unnecessary worries and worries about the “health” of his pet. All types of original moldings are tested and tested in special laboratories and meet international quality characteristics.
What glue should I use?
How to properly apply film to a car?
It’s nice that for installation on a car you don’t need to drill or cut anything in the body. These parts are easily installed using adhesives. The main thing is to choose the right glue.
Often, drivers try to glue the molding with the traditional “Moment” or an analogue and the part after a while, or even immediately disappears. Such adhesive compositions very weakly bond surfaces that do not “breathe”.
Special cyanoacrylate compounds are best suited for such tasks. They hold the pad very tightly. There is one drawback - if drops of glue get on the paintwork, there can be serious difficulties in removing them. You will need to buy special removing compounds.
As an alternative, motorists use ordinary sealants. They are used for mounting parts on glass and other parts of the car, but the sealant is also suitable for attaching moldings.
Drivers also glue these parts using “liquid nails.” But working with such compositions will require a lot of effort - you need to press the parts to be glued during the entire hardening time. Using “liquid nails”, it’s worth thinking about how to fix the molding to the door for a long time.
Manufacturers of overlays recommend gluing the parts with double-sided tape. But drivers are advised to be extra safe and use one of the adhesives along with tape - it’s more reliable.
Types of convex strips on cars
Before purchasing moldings, you need to familiarize yourself with their main varieties, which are divided into:
- Invoices. Most of the planks are installed using clips, which significantly reduces installation time.
- With rain channels. This type of decor allows you to remove atmospheric moisture from the roof of the car. Often this type of protection is installed on the windshield, which allows you to effectively remove moisture during rain.
- Half-opened. The cast part has a U-shaped design, which, in addition to decorative qualities, allows you to protect both the side of the car and the transition between the glass and the car body.
- Universal. Can be used for various car models. This type of decor is in demand among drivers whose vehicle models are no longer in production. And it is no longer possible to order a factory part. Also, universal moldings can be installed in places not provided for by the design of the car.
Marking
When choosing a molding for a car, you need to know the basic designations (markings) that can be applied to the decorative trim. The information will be useful when ordering accessories remotely on various online trading platforms.
- PVC Mld - indicates the type of synthetic material. This marking indicates PVC moldings.
- EPDM - says that decorative molding is made of rubber with the addition of ethylene propylene.
- TPR - marked moldings are made from thermoplastic rubber, which is resistant to gasoline and engine oil.
You can also find chrome moldings on sale. Such decorative items will cost the motorist more, but the aesthetic effect of chrome parts will be higher.
Which part of the car should I put it on?
In addition to the type of molding and the material from which the casting is made, before purchasing you need to decide on which part of the car the decorative element will be installed.
- For doors. Usually made of plastic. Install the door molding in the lower third of the driver's and right passenger's doors. They can also be installed on the rear doors of the car. An additional plastic lining allows you to well absorb impacts of the door on hard objects when opening and gives the car a more dynamic look.
- For the bumper. Universal bumper moldings are very popular among motorists. This part is subject to significant mechanical stress during careless parking.
- For glass. Rubber products are used to install protection on car windows. The soft product does not damage the fragile material and allows for high-quality sealing of the joints between the glass and the metal of the body.
The listed types of moldings can be supplemented with decorative elements for the roof, body kits, arches and wings. But the installation of these elements is for decorative purposes and is not always used by motorists.
Casting Installation
To install moldings, adhesive compositions that are resistant to adverse conditions are used.
For gluing you can use:
- Cyanoacrylic glue. An effective means of fixing moldings to the hood, glass or fender of a car. When using cyanoacrylic adhesive, be careful not to allow the product to come into contact with the paintwork. If the adhesive composition is used carelessly, it will be impossible to remove dried adhesive from the body surface without damaging the enamel.
- Glass sealant. It has proven itself only when installing decor on car glass. Installing a decorative plastic element using sealant is also possible on the hood, but the quality of the fastening will be poor. It is not recommended to use glass sealant when installing security products on car doors. If there are frequent mechanical impacts on the part, the sealant will not be able to provide high-quality fixation of the element on vertical surfaces.
- Liquid Nails. When using liquid nails, you can install molding on different parts of the body, but only if the surface is well prepared. Before installing molding with liquid nails, the surface must be clean, grease-free and dry. A prerequisite for reliable fixation is holding the molding with force.
There is self-adhesive molding on sale that has an adhesive layer. To install a self-adhesive decorative element, you need to remove the protective film and attach it to a clean and degreased surface.
Conclusion
How to glue molding to a car door or any other part of a four-wheeled friend is described in the article. Even with no experience, the entire operation can be completed quickly.
Replacement features
According to the type of installation, moldings are attached to clips, screws and glued.
Body kits, door sills and bumpers are attached with self-tapping screws and clips, since such panels are most often made of steel and aluminum, are of average weight and experience systematic loads. Moldings are glued to doors, windshields, side windows and roofs in 95% of cases. Proper gluing reliably secures the part to the body and prevents moisture from penetrating under the panel. How to glue the molding:
Gluing the overlay is simple, quick and cheap. The only thing worth remembering is that when gluing, it is necessary to distribute the adhesive composition evenly, without gaps. If moisture penetrates under the molding, corrosion may occur under the panel. This problem often occurs when moldings are pasted over the bottom of doors or door sills are glued on.
What will you need?
If car enthusiasts try to attach the trim with simple “moment” type glue, they fail. A rubber or plastic seal will last a minimum time. For installation, it is necessary to use techniques that will withstand vibration, temperature changes and mechanical stress.
- Sealant for gluing car glass.
- Liquid nails are a special adhesive composition that has high adhesive properties.
- Cyanoacrylic glue.
- Double-sided tape.
It is not rational to use one method; experts recommend installing the settings using double-sided tape and one of the adhesives.
The sealant has a high bonding strength; after application it requires additional fixation until it completely hardens for a long time. You can secure it with masking tape.
Fastening with “liquid nails” requires strong physical pressure until the molding fully adheres to the car body, which is impossible to achieve when working independently.
Cyanoacrylic glue is the best option, but the liquid composition requires special care when working.
Double-sided tape is easy to use and provides a uniform, sealed joint. Manufacturers produce overlays with an adhesive base. It is easy to remove the molding without damaging the paint.
Bottom line
Almost any motorist can remove the molding and install it. The presence of a special stamping on the car allows you to independently solve the problem of installation and removal for moldings of any type. This means that the manufacturer took into account in advance the possibilities for installing additional parts. Classification and labeling will allow any buyer to make the right choice. Then fewer problems arise during further operation.
Next Why you should pay attention to the 2017 Range Rover Evoque Back How difficult is it to register a homemade car
- Engine/Ratings
Aug 23, 2019
- Hyundai crossovers / News
Aug 23, 2019
- Aug 22, 2019
- Volkswagen crossovers / News
Aug 21, 2019
- Crossovers Ford / News
Aug 20, 2019
- Audi crossovers / News
Aug 20, 2019
- April 13, 2019
- March 12, 2019
- Feb 17, 2019
- April 11, 2019
- July 27, 2017
Dismantling
If the appearance of the old molding in the area of the hood or side doors only causes tears, you can remove it and install a new element. But there are also parts that can be updated by repainting.
I think there will be no problems with how to paint the molding. Take cleaning products and detergents, remove all dirt and apply a coat of paint.
But if you need a full replacement, then answer the first question - how are the moldings fixed. When using glue, two dismantling methods are used.
- Heating method. You will need a regular household hair dryer. It is better for construction workers not to heat in the area of the paintwork, otherwise it may be damaged. Then you will need either a wider molding or several hundred dollars to repaint the body. The molding should be heated at approximately 40 degrees Celsius. Most adhesive compositions lose their adhesive properties due to such heat, and therefore you can easily remove the molding manually after a few minutes of gradual heating.
- Solvent method. It is considered safer, but also more expensive. This method protects the paint from exposure to temperature. Plus, if you're just removing the moldings to repaint your car and then put them back in place, the heat could simply ruin the trim. Take a soft cloth, moisten it with solvent and apply it to the joints. After a few minutes, the reaction will begin and the glue will easily release the pad.
But sometimes moldings are mounted using special tendrils. They fit into small holes in the body and are therefore tightly fixed.
If you bother, then you will have to remove the inner lining and trim the antennae from the inside. But when planning to throw away these pads, just break off the antennae and that’s it.
Antichrome
If the client decides on the option of covering chrome parts with film, the experienced craftsmen of our detailing center will complete the job efficiently and quickly. What is the advantage of our car dealership? Pasting with film is one of our main directions, so we have a specialized room that is constantly maintained clean and at an optimal temperature for gluing work - 22-23 degrees Celsius. Our detailing center is the only one in Moscow
offers a lifetime warranty on this option. The thing is that we carry out complete dismantling of components that require pasting. This aspect of the work is important, because this is the only way to tuck the material deeper under the part, thereby establishing a stronger adhesion to the film. This will help to avoid bubbles and peeling in the future. After dismantling, we place the moldings in a special chemical solution that removes excess chrome from the object. Thus, a complete reconstruction of the coating occurs. Thanks to this technique, chromium is removed even from parts with complex weaving - the solution removes chromium from hard-to-reach places. We paint objects of this nature, since the pasting may not last long. Our craftsmen thoroughly degrease the cleaned part, after which it goes through the gluing process. Many centers work with so-called patterns - blanks. However, for our team this option is unacceptable - if the size does not match, the film will have to be stretched. This, in turn, entails a reduction in service life. Also, other car dealerships in Moscow cover moldings without dismantling them, which will undoubtedly sooner or later lead to damage to the film at the car wash. Upon completion of all work, our craftsmen place the parts in their rightful place, and a satisfied client can happily pick up the updated car. On average, the work is completely completed within 5-7 hours, but if the scope of work is more than pasting window moldings, the process can drag on for more than a day.
There are two types of film - polyurethane and vinyl. The second option is directly suitable for pasting with a color change, that is, black gloss or matte. You can choose any color for this film - many people opt for the black version, as well as to match the main body color or chrome trim. The first method is to cover the moldings with polyurethane film. It protects objects due to its unique anti-scratch properties due to the varnish layer. There is another option, which is popularly called “Antichrome” - this is a kind of analogue of Shadow-line polyurethane film. However, the most common option is to restore the authentic appearance of the body - that is, covering the moldings with chrome.
Moldings are an important aesthetic component, without which the car looks unfinished. In appearance, these parts are small and inconspicuous, but their aesthetic function becomes obvious with any deformation of the chrome. A frequent question that clients ask us is the use of new spare parts and maintenance of the coating. In fact, covering moldings with chrome does not imply fundamentally different methods of use and control from standard ones. The coating is hydrophobic - this ensures its cleanliness. Any film should not be exposed to chemicals or powerful jets of water.
Thus, pasting moldings is an inexpensive, but optimal operation to restore the aesthetic appearance of a car. The high-quality work of the masters of our detailing center will provide a lifetime guarantee for the coating, which will transform worn-out chrome or protect a new car from possible environmental influences: after removing the film, the moldings underneath appear in their original form.
How to attach the seal
To install a seal on their car, car owners have tried many types of glue, including “Moment” and “Montazh”. They, despite their adhesive ability, greatly disappointed drivers, as they did not provide sufficient adhesion to the surface.
Among the options that are popular among car owners today are:
- Liquid Nails. When using, they require strong pressure, as well as preliminary degreasing of the surface. Able to glue the molding tightly. To make their work easier, some car enthusiasts resorted to this method to ensure pressure: they placed the car close to the wall, glued a seal and propped it up using improvised means (for example, wooden blocks). You need to work carefully so as not to damage the body.
Liquid Nails
- Glass sealant. They can be used to glue the windshield. The sealant must be applied within an hour - for this you can use mounting tape (it will not leave marks on the body).
Glass sealant
- Cyanoacrylic glue. It will glue the seal effectively and for a long time, but you need to carefully monitor its quantity: drops that appear due to the molding will subsequently be difficult to remove without damaging the car’s paintwork.
Pros and cons of self-installation
Drivers can install car moldings themselves. To work you will need:
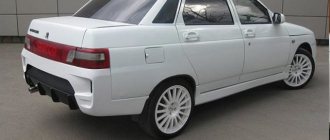
Rear bumper molding
Let's look at an example of how to re-glue a corner molding onto a bumper if one of its edges has come off a little:
The advantage of self-installation is that you don’t have to pay money to the craftsmen for the work. Minus - you can damage the paintwork of the body if you do not know the technology for dismantling/installing the trim.
Source
The purpose of moldings on car doors
In relation to cars, this is a functional plastic, metal or rubber lining for any part of the car.
The part performs two functions:
- Decorative;
- Protective.
Every driver wants to improve the appearance of the car in every possible way, to make it stand out on the road among the stream of boring identical credit cars, and dreams that people will pay attention to the car. A decorative trim will not give the body a brilliant look, but with its help you can still make the car stand out.
These elements are made from a wide variety of materials; they vary in shape and color. A decorative overlay will allow you to divide the car body into visual sections and visually change the geometry of the body.
Often, with the help of such elements, drivers hide chips on surfaces and deep scratches. If you select or paint the element in the body color, the car will take on a more streamlined appearance.
But don’t think that this is just decoration and nothing more. This is actually a useful detail that can protect paintwork from mechanical damage. If in a parking lot near a supermarket the driver of a neighboring car or his passengers open the door carelessly, it will hit the lining rather than the body.
Installation is carried out on a variety of parts of the car body:
- Bumper;
- Windshield and rear windows;
- Wheel arches;
- Doors - front and rear.
Door molding is especially popular. Some drivers install the element only on the front doors, but decorating and protecting the rear doors would also be a good idea.
Our recommendations
Installation of moldings can be made from materials that the car owner purchases independently. It is possible to use and order the necessary elements from us.
If moldings are purchased by the owner of the car, then it is recommended to buy painted models. It is better to order parts from official dealers, this will give confidence in their originality. Painted moldings will cost the owner less than unpainted ones, for which you still need to match the paint color.
Some vehicle owners, in order to save money, purchase linings that need to be adjusted to the parameters of the car. Our craftsmen advise choosing ready-made kits, where the moldings have protected edges and well-chosen fasteners.
Installing Window Moldings Installing Door Side Moldings New Moldings on a Car
How to remove old moldings
There are several ways to dismantle decorative trims. In this case, both the element and the car’s paint will not be damaged.
This can be done with:
- Heating with a hairdryer. You need to heat it up to 40 degrees. Usually at such temperatures the glue loses its properties, the connection weakens, the element is removed without damage to the paintwork;
- Special solvents. These liquids are sold in auto stores and are designed to dissolve adhesives. In order to remove the old molding, you need to apply liquid to the fabric and wipe the areas around the part.
Then it is important to remove any remnants of old adhesives from the door. The same solvent will help with this. After using solvents, you need to clean and degrease the treated area.
Decorative trim made of aluminum or stainless steel is attached using special clamps. Regardless of the material of the clamp, you should not try to pry them off with screwdrivers or other unsuitable tools.
As a result, you can only ruin the molding or scratch the door. A special device for dismantling such clamps will cost less.
general description
In order to effectively make the exterior of a car, a special self-adhesive chrome vinyl film is used for covering surfaces. With the help of such material it is easy to give a catchy, exclusive look. Chrome is now used for a wide variety of cars, photos of which can be easily found on the Internet.
Regardless of the color of the film, its vinyl base remains the main component that determines the properties.
Main types
There are two types of vinyl chrome film: and automotive. They are no different in appearance, but advertising vinyl is twice as thin and less durable. Sometimes, due to its cheapness, such a film is used to cover a car, not realizing that it does not meet the requirements of automotive vinyl. Therefore, when this type of material is criticized for its fragility and lack of resistance to wear, you should first make sure that automotive vinyl was used, not advertising vinyl.
Mirror effect
Vinyl chrome film is a high-strength polyvinyl chloride (PVC) color film on an adhesive backing with a mirror effect. This material can be used for wrapping cars and motorcycles, as well as for outdoor advertising. In addition to all the advantages, it has a special aesthetic appeal. A car covered with such a film looks unusual, expensive and original.
What to stick on the door
It is especially nice that to install the molding you do not need to drill holes in the body and other parts of the car. These elements are easily installed in place using adhesives.
However, you should not use regular Moment glue for these purposes. It does not bond “non-breathing” surfaces together well. This molding will fall off very soon. And it’s good if you notice this before you move far enough from the place of loss.
Specialized cyanoacrylate adhesives have proven themselves best in this regard. They firmly hold the car's overlays. The only negative: if you were careless during the installation process and spilled a few drops of product on the paintwork, it will be quite difficult to remove them. Most likely, you will have to resort to the help of special removal compounds or even the services of auto repair shops. Therefore, be extremely careful while working.
cyanoacrylate glue is the best tool for installing moldings
An alternative to adhesives can be conventional automotive sealants. As a rule, they are used when installing parts on windows, but they are also good for other parts of the car.
The sealant will reliably hold the car's coating and molding together.
Another option is to use “liquid nails”. However, when using them, you will have to hold the molding tightly pressed against the door for a long time. Think in advance how you will fix the part.
Liquid nails are good for gluing molding
Some motorists use double-sided tape. This method has a right to life, but it is better to play it safe and add a couple of drops of glue. This way you will be sure that the molding will not blow off when driving fast.
Double-sided tape is best used together with glue
Keep in mind
The “My Mechanic” service works only with trusted suppliers of automotive accessories who are responsible for quality and offer affordable prices. Therefore, every car owner can be sure that the installation of moldings, the price of which is much cheaper than that of competitors, will be performed by our craftsmen quickly, reliably and inexpensively. Each technician will also explain how a particular service is performed, including how to install a roof rack on your car.
A set of moldings for a car. Markings for installing the molding. Installing the molding on the car.
The best sealant adhesive
Most of those drivers who had to install a seal on their car with their own hands agree that the best and inexpensive way to install the part in place is double-sided tape.
But you need to take into account that working with it also has its own nuances: if you stick it without preliminary preparation, you run the risk of having to re-stick the seal that has fallen off the surface after some time.
There are several rules to follow to properly attach molding:
- use ZM brand adhesive tape. Practice shows that this particular brand is more reliable in operation, since it has a small thickness. Thanks to this, the part will look like a natural extension of the car;
- thoroughly clean and degrease the surface;
- remove the protection on one side;
- Warm up the glue on the tape and the part itself with a warm stream of air (hairdryer). Do not allow components to overheat;
- stick the tape on the surface, press it and remove the protective layer on the other side;
- hold the part for at least 2 minutes.
Those who have encountered the problem of re-gluing advise that when tearing off part of the molding from the door, do not be lazy, but tear it off completely and install it again. This is explained by the fact that if you glue the rubber seal in place of the previously fixed part, a gap will remain. In this case, the tension of the molding on the car door will be different, a void will form, which will cause the seal to peel off in the future.
If you move it after peeling it off again, which most likely will happen in another place, you will get a crooked line, which will definitely not look presentable.
Useful advice from experts
Liquid adhesives cannot provide a complete seal. It is impossible to apply the liquid evenly and ensure simultaneous hardening in all areas. Moisture in such areas provokes corrosion.
If you need to clean your car, use a non-aggressive car wash and use a non-acetone degreaser. The caustic chemical composition affects the coating. The varnish on the body will fade, and the plastic elements of the molding will melt.
It is difficult to glue the door sills with double-sided tape.
It is important to apply the part evenly, so do not be afraid to measure all movements; the adhesive composition on the tape does not dry out for a long time after removing the protective layer
After completing the work, it is recommended not to travel by car for 24 hours, and not to leave it in the cold or in direct sunlight.
How to remove molding from a door
As noted above, any molding performs a number of useful actions, and there is no point in removing it without a reason. However, in some cases it is necessary to remove the molding, for example, if:
- It is necessary to straighten the car body after a traffic accident;
- The molding coped with the task and protected the car door from impact, after which it needed to be replaced;
- The driver intends to install a “custom” molding, which differs in appearance from the version installed at the factory.
Depending on the door design and manufacturing decisions, the molding can be attached in various ways, which determine what the process of dismantling it will look like.
How to remove molding if it is glued to a car door
In most cases, the car's middle molding is attached to the door using strong double-sided tape.
Many drivers make the mistake when dismantling it, trying to pick up the accessory with a screwdriver or knife, thereby scratching the paintwork of the door. To remove the molding from the door, it is better to use a plastic spatula, which will allow you to pick it up from the edge, but will not damage the paint on the body. The process of removing the glued pad is as follows:
- Using a hair dryer, the car molding is warmed up slowly and evenly;
- Next, it is pryed off from one of the edges with a plastic spatula;
- After this, the area under the peeled off part of the lining is heated, and it is again pulled towards itself to expose a new part of the surface that needs to be heated.
Before removing the molding glued to the car door, it is better to enlist the help of a friend so that one person constantly keeps the trim removed, and the second warms up the area under it with a hairdryer.
How to remove a molding if it is attached to a car door with screws or rivets
The lower molding and sometimes the middle one are attached to the car door using self-tapping screws and rivets (plastic clips), sometimes the fastening methods are combined. In this case, you will need to remove the door trim to remove the molding from it. After removing the trim, you can unscrew the screws or snap off the rivets. It is worth noting that often it is not possible to snap off the clips due to the “old age” of the plastic, and they have to be broken, and new fasteners must be used when reinstalling the molding.
Article on the topic: What tinting is allowed on front windows. Tinting alternatives.
Attention: Often moldings secured with screws and rivets are additionally glued to the car door using double-sided tape or glue. If the trim does not come off after removing the fasteners, you must follow the instructions described above, that is, use a hair dryer and a plastic spatula to detach the molding from the door.
Material of manufacture
Automotive moldings are made from various materials, most often rubber and plastic elements are found on the market.
Universal designs have a budget price and are easy to install - to glue the panel, you do not need to contact a service center. The work is carried out independently and takes up to 15 minutes. Decorative panels by material:
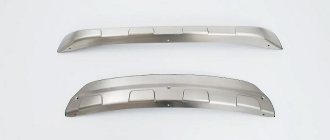
In 90% of cases, steel trims are installed on doors and thresholds. Aluminum trims, plastic and rubber panels are used to decorate window openings and bumpers.
Steel moldings with rubberized elements have lower density, cost and weight compared to steel parts.
The rubber pads are quite flexible - the molding can be bent at the required angle, it can simply be cut to the required length. They are often chosen for restyling cars for which the manufacturer does not produce original decorative components.
Plastic or rubber-plastic elements have a budget price, but are not durable. Plastic linings minimally protect the body from chips; they have the largest percentage of low-quality replicas on the market: they crack in the cold, deform in the heat, etc.
Classification based on frame coverage capability
Flexible window molding comes in the following types:
- four-sided. Can be worn over the entire window area. It is most often installed on the windshield and reaches a length of 4.5 meters;
- trilateral. The U-shaped mount is mounted on the top and side of the car glass. The absence of the lower part is easy to explain - due to the wiper panel on the windshield, it is inconvenient to attach the seal here. It is 3 meters long;
- bottom, side or top. It is presented as a separate rubber strip, which has its own functions. For example, the upper ones are used if the car windshield has right angles. The side ones are often made of plastic and protect the gap between the frame and the window, increasing the degree of air flow while driving;
- combined. Contains several structural parts. This type of flexible molding is suitable for you if you need to seal each side of the glass, but you do not intend to do it right away or find installing a one-piece model difficult.
Flexible car window molding
Universal instances
The most suitable option is universal molding. What it is? What are its advantages?
Their versatility is due to the fact that they fit most cars and are approved by installers.
Advantages:
· all-season;
· flexibility, which facilitates ease of installation;
· made of high-quality material, similar to the original product models;
· have been tested and researched in laboratories;
· budget price.
Negative points:
· the material is not natural;
· lack of correct rigidity of forms.
Historical reference
The first use of the product began in the 70s. At that time they were strengthened with the help of special clips. The moldings were too noticeable, and the procedure cost some money. Over time, experts proposed modern models of parts that were built in secretly and were invisible. The installation process has become more economical and simplified. Let's look at the advantages and disadvantages of modern elements, and what problems motorists face when installing them.
Main advantages:
1. Perform protective functions, namely: protect doors and bumpers from contact with foreign objects.
2. Distributes the load even with the slightest impact.
Disadvantages of the element:
1. They are not able to protect the entire surface of the car.
2. If the blow falls away from the location of the molding, you should not expect results.
3. Using protection leads to a change in the appearance of the car, which not everyone likes.