Damage to the bumper is a common car breakdown. You can get a hole not only as a result of an accident, but also by simply driving unsuccessfully onto a curb or by inattentively parking: posts, low fences and other protrusions often lie in wait for motorists in their yards.
The easiest way to fix it is to replace the part, but not everyone is ready to go through such an expensive procedure. Alternatively, you can solder or seal the hole. Both methods are effective.
If the bumper was manufactured using the cold mechanical pressing (molding) method, then it will not be possible to solder the crack. In this case, special types of glue come to the rescue. The advantage is that the repair can be easily done with your own hands.
In this article we will look in detail at how to seal a bumper, how to choose adhesive for repairs and how to prepare the surface so that you can carry out the necessary repairs yourself.
Final work
After the glue has dried and checked the tightness of the resulting seam, you need to remove traces of the work.
To do this, they begin the final stage of restoring the damaged body part. It consists of the following steps:
- Remove the foil from the outside of the bumper.
- Using a grinding wheel or sandpaper, polish the seam to the level of the rest of the bumper surface.
- If necessary, fill the uneven areas with putty. To do this, use wide and narrow spatulas.
- A layer of primer is applied to the treated surfaces.
Paint the treated area
It is important to ensure that the painted area does not stand out on the surface of the body kit
Damage to the bumper spoils the appearance of the car. Restoring a broken body kit can be done at a service center. On average, for 5,000 rubles, you can seal a crack and remove traces of repairs. To save money, the operation is performed at home. The car enthusiast will need to be patient and careful, which will lead to an acceptable result.
Tools and materials
To dismantle the bumper and carry out repairs at home, you will need a number of tools. Some of them are quite expensive, although they can always be replaced with manual tools. Here is a sample list of what a master might need:
- keys, screwdrivers;
- sandpaper with different grain sizes and a block;
- grinding machine with wheels;
- electric drill (mini drill);
- rubber spatula;
- clamps for fixation;
- construction hair dryer;
- soldering iron;
- metal tape (rigid adhesive tape);
- a sharp knife (for example, a stationery knife).
As consumables, you need to purchase putty, primer and paint for the bumper, and, if necessary, mesh to reinforce the crack. You will also need a solvent to degrease the part, high-quality glue, and rags. In order to comply with safety precautions, you need to prepare gloves and safety glasses.
Sealing process - preparation
Before sealing the bumper with fiberglass, we recommend conducting a trial compatibility test on a small area of the damage. To determine how to glue the body bumper, carefully study the manufacturer's instructions. The adhesive material must match the surface type of the part.
If there are body kits at the site of damage, they must first be secured and only then removed. At the same stage, accurately determine the material of the spare part to select the desired adhesive base.
This information is on a stamp on the inside of the product. When the mixture is selected, all that remains is to use it correctly in order to correctly restore the spare part after damage.
In order for the repair to last as long as possible, the bumper will have to be pre-treated. The part is disconnected in advance.
Carry out mandatory training:
- thoroughly clean the car buffer from dirt accumulations;
- remove residual oil and dust;
- let the parts dry;
- wipe it with a chemical to degrease it;
- grind the broken surface with an abrasive or a grinding machine;
- if the cracks are too deep, we recommend drilling them out, protecting the spare part from increasing damage.
With the listed procedures, you will achieve stronger adhesion of the glue to the surface, which will guarantee the quality and long service life of the part.
How to glue a bumper: let's get started
Once the surface has been pre-treated, it is time to begin the bulk of the restoration process. Cover the damaged area of the spare part with a primer and wait until the substance dries completely.
The second option: seal the crack on the bumper from the outside so that glue does not leak out of it. To do this, use foil. Once the adhesive has dried, the material must be removed.
Primary gluing from the inner surface of the buffer is carried out with a composition having reinforcing properties. To do this, we recommend using a composition based on epoxy resin with a high degree of adhesion.
If you have previously decided to abandon priming work, then carefully move the damaged areas towards each other
Sometimes the cracked parts are held together with metal staples. However, fixing the two parts from the outside is done with standard paper tape. He will carefully secure the edges of the surface at the same level before painting. After gluing the hole from the inside, the tape will be easier to remove than the staples.
When both parts of the car are securely fixed, apply the adhesive mixture to both parts of the damaged part. Before it dries, glue a metal or synthetic mesh to strengthen the seam.
This can be a painting mesh, which also needs to be treated with adhesive on top. It is impossible to predict the drying time, since each chemical composition takes its own time to dry.
Final stage
When the crack is glued and the adhesive solution is completely dry, the car buffer remains visually unattractive. There is no need to sound the alarm - this is natural, because there is still finishing work ahead.
Let's get started:
- Remove any excess compound on the plastic, carefully cut it off or sand it.
- Prepare the surface of the spare part for further painting. To do this, use a primer, putty or other materials for this purpose.
- The car buffer must be painted according to technology. Such paints are available in car dealerships.
Detailed work on painting a bumper with your own hands in the video:
Results
Repairing a buffer at home is not a difficult task. Therefore, if you have minimal experience in this matter and follow all the instructions, you can quickly restore the part. And you won’t have to spend money on paying a car mechanic.
Glue for car parts has significant advantages. It is cheap, its purchase will not affect the family budget. The method of sealing a cracked buffer with an adhesive mixture is in no way inferior to sealing.
We recommend watching the video instructions on how to glue a bumper with glue yourself:
Mechanical impact on a car bumper as a result of an accident or collision with a high curb leads to the need for repairs. In order not to spend money on car service services, many car owners prefer to do the repairs themselves. Detailed instructions on how to properly glue a bumper with your own hands at home will help you avoid mistakes.
In conclusion
Almost any car enthusiast can repair a bumper using glue at home, without causing damage to the family budget. In terms of reliability, a sealed part will not be inferior to a sealed one.
There are many options available on the market and everyone can choose the right adhesive composition.
We recommend watching another method for repairing bumpers in this video:
A car bumper is not only a decorative element, it performs an important practical function. This part is used to protect the body from damage in minor accidents. It is the bumper that is the first to suffer in case of unsuccessful parking, hitting a high curb, or in a number of accidents. If a crack occurs, you can find out how to seal the bumper and carry out the repair yourself.
Content:
Choosing glue for gluing the bumper
A high-quality adhesive composition should: sand well, fill and restore large damaged spaces, not spread during application, have rapid adhesion, withstand temperature fluctuations after hardening, have high rigidity and mechanical stability.
NOVOL professional PLUS 710 repair box/repair kit
The material allows you to work with surfaces made of polyester laminate/plastic and metal; Application is possible on an old varnish surface or two-component acrylic primer.
After the adhesive mass has hardened, all that remains is to polish the glued area, putty and paint the bumper.
TEROSON PU 9225 SF ME, two-component polyurethane-based adhesive
The composition is suitable for gluing various plastic parts in a car, including interior trim.
Bumper repair adhesive interacts with the main plastics suitable for gluing: PP/EPDM, SMC, PC, PA, ABS, PUR.
To increase strength, the manufacturer recommends additionally strengthening the glued parts with fiberglass. A special glue gun is required for application.
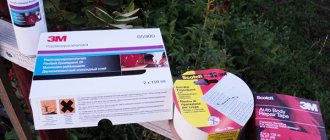
3M 05900 (2 tubes of 150 ml) or 05901 (2 tubes of 25 ml) Compound for Repair of Plastic Parts
A two-component epoxy mixture designed to repair damage to most common plastics. Bumper adhesive
Once cured, this bumper adhesive conforms to automotive grade plastic.
Reinforced mesh or machine fiberglass can be used to enhance strength on large bonded surfaces.
3M Automix 55045 Compound for Restoring Plastic Parts
Bumper adhesive with the properties of full-fledged auto plastic after hardening allows you to work with most manufactured plastics for car parts.
It is distinguished by particularly fast hardening, after which the processed parts can be sanded and putty, as well as trimmed and drilled when restoring the lost part of the element.
Peculiarities
Elastic putties are resistant to vibration and mechanical stress due to their composition and adhesive properties. In order for the coating on the bumper to last as long as possible, it is necessary to properly dilute the chemical compounds. It is important to maintain the proportion when making the solution. Mix the product in the following ratio:
- 5% is the hardener;
- 95% is the total mass of the main substance.
The main condition when creating putty is the quick connection of the components and application to the surface, taking into account the high rate of hardening of the solution. The layer hardens within 5 minutes, so you need to have time to distribute the mixture on the bumper.
How to glue a bumper: instructions
If the bumper is cracked, it is better to carry out repairs without delay so that the defect area does not become clogged with dirt. First, the part must be removed by first removing the plugs and disconnecting the fasteners. Severely broken body kits do not need to be removed immediately; they should first be fastened together, then disconnected from the car
Before work, it is important to double-check what material the bumper is made of in order to choose a truly suitable adhesive for it.
Novice craftsmen are wondering whether it is possible not to remove the bumper before repairing and painting? If the product is not properly dismantled, it may burst during manipulation. Only removing the part will eliminate excess stress in the area of cracks and their further increase.
https://youtube.com/watch?v=d3HB83Dn8UQ
Preparatory work
First, it is important to carefully prepare the base that will be subject to application of glue. This will directly affect the service life of the completed adhesive joint.
First of all, wash the bumper, clearing it of dirt and oil, and dry it well. Then do the following:
- remove the coating (varnish, paint) using a grinding machine or a block with sandpaper;
- remove all rust, if any (it cannot appear on a plastic bumper);
- the edges of the crack are drilled with grooves in the shape of a Latin V so that it does not continue to expand, and also for the purpose of more reliable adhesion of the glue;
- degrease the bumper using acetone, alcohol or another solvent;
- sand the product and prime it or coat it with a special adhesion improver;
- leave until completely dry.
Repairing cracks on bumper
First, primary gluing is carried out on the inside of the bumper, using the selected adhesive with powerful bonding properties. Next, the composition is applied to the front part of the part, acting carefully and accurately. If necessary, the areas around the crack can be covered with foil, which will prevent contact of the glue with undamaged areas. From the “wrong side”, if there are large chips, you can apply a mixture of adhesive and soda, since these components turn into durable acrylic-like plastic upon contact.
If the bumper is cracked so that it falls apart into two parts, the individual pieces are combined with each other with an exact fit and secured with metal tape. If necessary, after gluing, clamps are used to clamp the fragments. For reliability, a reinforcing mesh made of metal or synthetics is glued onto large cracks from the inside, impregnated with glue. Wait until the product dries completely according to the instructions. After the clamps are removed, the adhesive seam is sanded to the level of the surface of the part.
Puttying and painting
The sealed bumper needs to be painted with high quality so that its appearance does not cause any complaints. Sometimes puttying is first carried out with a special means for plastic, which will smooth out minimal defects. The layer of putty must be very thin, otherwise it will not stick.
After the putty has dried, the surface is sanded with P1000 sandpaper and primed in 2 layers, the drying time of the first is at least 15 minutes. Then the bumper is painted with decorative auto enamel to match the body color. Apply the paint in 3-4 layers with intermediate drying cycles of 15-20 minutes. The last step is to varnish the bumper to give the repaired part a flawless look. Strict implementation of the entire sequence of actions will help you save on the work of professionals and learn how to fix minor problems with your car yourself.
Preparatory activities
Before you glue the plastic bumper, you will need:
- Remove the cracked body element from the car.
- In the body kit that has burst, you will have to drill holes at the ends of the crack. This will prevent further damage to the part.
- Wash and dry the body kit thoroughly. Degrease the working surface of the bumper.
- Using sandpaper, remove the paint in an area from 3 to 5 cm from the edges of the crack. Apply a layer of soil to the damaged area.
- The places where the connection of the restored body element will pass must be carefully sanded. If you have a milling machine, then grooves in the form of a Latin letter V are made on the edges of the crack, which makes the gluing more reliable.
- If the body kit is cracked in many places, without removing it, you will need to fasten all the elements together (using a construction gun), and only then dismantle the element.
Sealing a crack in a bumper
The gluing process itself implies the creation of an inseparable connection, using the adhesion of the adhesive mixture used between the pieces to be glued.
Modern adhesive mixtures are quite extensive in use and allow the gluing of thermoplastics, as well as thermosets. All current adhesive mixtures (compositions) intended to restore the integrity of the plastic base in many cases are high-molecular types of compounds that, during the hardening process, are modified and become a full-fledged polymer material.
A fairly necessary and important factor for performing high-quality gluing with your own hands is the choice of an adhesive base. A correctly selected adhesive mixture guarantees better adhesion to the required type of plastic, as well as the most similar physical characteristics of the materials used in the production of the bumper and the seam itself after it has completely hardened. Especially to check the adhesive composition, it is necessary to conduct a test, control gluing in order to determine whether the mixture is suitable for your bumper or not.
Plastic repair glue
If, after completing the work, you plan to dry the finished bumper using hot drying, it is worth using special thermosetting types of glue, or thermoplastic adhesive mixtures, so as not to provoke a destruction process or a change in the properties of the seam itself. It is for this reason that it is worth doing the repair work yourself in the same workshop.
Preparing the surface for gluing also has an impact on the quality of the seam. The surface must be prepared as much as possible for the best bonding of the plastic surface. To obtain a similar result, you must perform the following steps on the back of the product:
- Clean the surface as thoroughly as possible from dirt;
- Special mechanical processing of two edges in the place of the resulting deformation, using a milling cutter or an abrasive wheel, in order to make the section of the future seam in the form of the letter “V”. This shape will increase the plane of the plastic in contact with the adhesive, which will ultimately increase the strength of the entire connection;
- It is necessary to degrease the surface, or carry out chemical treatment.
https://youtube.com/watch?v=jgzTQw2ixS0
Often, at the time of production of the bumper, to simplify formation, the manufacturer adds special lubricating additives to the plastic base, due to which it is possible to reduce the adhesion of the adhesive composition. In order to remove such additives, it is necessary to perform more thorough and repeated treatment of the bumper surface with special chemical compounds.
In order to make sure that the surface is properly processed and ready for gluing, it is necessary to check its wettability, for example, apply a drop of a 60% alcohol solution, and the diameter of the spot itself must be at least 35 mm. Before gluing the front side of the bumper, you can apply aluminum foil to fix the parts and prevent the adhesive from leaking out, which can be removed after complete drying.
Bumper bonding materialThe process of sealing a crack consists of:
- Applying the optimal layer of glue. Due to the lack of volume of lamination of the adhesive mass, a decrease in the strength of the seam itself is guaranteed. Excessive application of glue can lead to the opposite problems; differences in the characteristic properties of the bumper material and the fastening joint itself may occur. For example, different rigidity can easily lead to damage to the paintwork in the gluing area, or to the seam itself, resulting in even minor deformations; such cases are quite possible even when installing the finished bumper in place;
- The adhesive composition must be applied in an even layer to all adjacent surfaces of the parts to be joined;
- In order to seal the seam, it is necessary to stick a synthetic or metal mesh impregnated with the same composition on the inside of the bumper;
- The glue hardening procedure can take from ten minutes to several hours. Despite this, it is necessary to ensure that the parts remain stationary to ensure reliable sealing.
Step-by-step gluing technology
Before gluing the bumper, carry out a trial test on a small area of the damage. This will allow you to determine the compatibility of the adhesive base with the bumper material. The body kits at the point of failure are first fastened together and only then removed. At this step, determine the material of the spare part in order to select the required adhesive base. Information can be found on the stamp on the inside of the product.
Preparatory work
For strong bonding, we thoroughly prepare the working surface of the bumper:
- disconnect and carefully inspect;
- wash away dirt accumulations;
- completely remove oil residues and dust;
- dry the spare parts;
- degrease by wiping with a chemical;
- sand the edges of the damaged area.
You will also need to drill out any cracks that are too large to avoid causing even more damage. If there are chemical additives in the bumper structure that negatively affect bonding, you need to get rid of them by treating them with a special compound.
Gluing a car bumper
After preliminary sanding, cover the damaged part with a primer and wait for it to dry completely. Or we seal the bumper crack on the outside to prevent glue from leaking out. For this purpose we use foil. Immediately after the adhesive has dried, remove the material.
For initial fastening inside the bumper, we use a reinforcing compound with high adhesion, for example, epoxy resin. If the work is carried out without a primer, then carefully move the damaged areas together. Damaged parts are often held together with metal staples. However, they are fixed from the outside with ordinary paper tape, which securely fastens the edges at the same level before painting. And it is easier to remove than staples after gluing the crack from the inside. After securely fixing both damaged parts, apply an even layer of adhesive mixture to them. Its quantity should be optimal.
The lack of glue during application violates the identity of the physical characteristics of the glue and the bumper after the solution dries! As a result, even minor external influences will lead to paint peeling.
Before the glue dries, apply metal/synthetic mesh to strengthen the seam. It is also treated with adhesive on top. We wait for complete drying, it can last from half an hour to several hours (here everything depends on the composition), and proceed to the next phase.
Coloring
No matter how diligently the procedure is performed, the car bumper after repair does not look very attractive visually. Finishing, which includes the following, will help correct all roughness:
- Carefully trimming or sanding away excess plastic.
- Preparing the restored bumper for painting with the obligatory use of putty/primer to prevent peeling and cracks from appearing in the future.
- Coloring in compliance with technology.
Grinding is carried out in a slow mode, otherwise you can damage the plastic with strong heat!
Can be coated with paints and varnishes that are not specifically used for plastic products, but only with the mandatory addition of a plasticizer. They are usually painted with ordinary enamel/texture paint to give it a rough finish. To paint under the base color, apply another primer coat.
Once you get acquainted with the information on how to glue a bumper with your own hands, you can do it yourself and not spend money on paying for work at a car repair shop. Follow the step-by-step instructions, and then quickly and reliably restore the part. The cost of glue will be minimal - it is inexpensive - and the effect of gluing a broken bumper will be no worse than when sealed.
To visually obtain information about gluing a bumper with your own hands, it is advisable to watch the video instructions.
Is it possible to seal the bumper yourself?
If the damage is serious, requiring qualified repairs, including replacing the bumper, then it is best to contact a car repair shop. However, for minor damage and cracks, you can seal the bumper yourself.
You need to choose the appropriate glue, prepare the necessary equipment and protective clothing, and become familiar with the gluing technique, which allows you to carry out the restoration without removing the bumper.
Choosing the right adhesive
Before you repair a plastic bumper yourself, you need to choose an adhesive. It must have the same properties as the part of the car being restored. Glue, as a rule, is selected according to the following parameters:
- Heat resistance. Without high temperature resistance, when painting a part, the adhesion will dilute during heating.
- Good grip. Adhesive bases must have high adhesion to plastic.
When choosing a thermoactive or thermoplastic composition, you need to take into account the upcoming painting of the part in advance. From different types, car bumper adhesive
choose the one that is most suitable for your situation. Get to know the most popular brands of adhesives that exist today:
- PowerPlast. The solution perfectly glues automotive and household plastic parts. It is used mainly when other methods do not bring the desired result. It is easy to use, dries quickly, and firmly connects the treated parts of the car bumper. They can not only repair plastic of various shapes, but also restore missing elements.
- Weicon Construction. It is characterized by elasticity and strength. It tolerates temperature changes, high humidity and other negative factors well.
- AKFIX. Characterized by high-strength gluing. The structure of the solution allows it to be applied vertically, without drips after use. Does not require additional primer when used. Often used for point connections. The solution contains cyanoacrylate, which provides viscosity. It is possible to repair parts that have a porous structure or roughness. To speed up the gluing of the bumper, it is advisable to use an activator aerosol.
- 3M. It is a two-component composition. You can repair a fiberglass bumper and other plastic car parts. Sands well and paints after application.
- Moment. It is a universal superglue produced by a domestic manufacturer, which is perfect for joining damaged plastic car bumpers. It is characterized by thermal and moisture resistance, strong connecting qualities, low toxicity and relatively low cost. Before use, serious preparation of the work area is required.
- TEROSON PU 9225 SF ME. Polyurethane adhesive, two-component. The composition allows you to easily seal a crack on the bumper. Interacts with various types of plastic. For strength, the bonded surfaces are reinforced with fiberglass.
Tools
Active plastic is used to make this part of the car, and it usually sticks together well. What is needed to repair a bumper? Before restoring a car's thrust element at home, you must carefully prepare the necessary tools and materials. By following the step-by-step instructions below, you can complete the restoration without any problems. You need to prepare:
- abrasive or grinding apparatus;
- foil;
- mesh (metal/synthetic).
- sharp knife;
- napkins;
- dye brushes.
You also need to stock up on epoxy glue to attach the mesh, which will serve as the basis for a better screed. Don't forget glasses and gloves.
Preparing the putty consistency
Diagnostics of a diesel car engine: subtleties and nuances
Before mixing putty, you need to carefully read the instructions for this type, since if you prepare the solution in violation of the technology, the whole thing will go down the drain. If it is a putty with fiberglass, then mixing it is a little easier; you don’t have to worry about overpressing the hardener or mixing it incorrectly by letting air in, since air does not enter it. But if you are dealing with mixing polyester putty, then you need to strictly follow the instructions. Firstly, add 1.5-2% of the hardener mass, and secondly, spread it with certain movements (in the video the master shows how to properly mix the putty). It is done as if smearing it into a spatula, this is done so that air does not get into the putty and it does not become porous.
There are 7 important points to note:
1. The grinding area must be larger than the area being repaired.
2. Apply putty only to a clean and grease-free surface.
3. Use only a clean spatula.
4. Stir the putty thoroughly and correctly and prevent the entry of air bubbles.
5. Add the required amount of hardener strictly according to the instructions.
6. After activating the putty, its lifetime is limited, so you need to apply it in just 6-10 minutes at a temperature of 20 °C.
7. Putty is applied to the car in two steps with an interval of 20-30 minutes.
Glue selection
Several types of glue are suitable for the restoration of silicone products. To choose the right composition, it is recommended to familiarize yourself with the characteristics of the available options and settle on the appropriate one, taking into account the characteristics of the product. As a rule, silicone sealant or cyanoacrylate glue is used to connect parts. Such solutions reliably eliminate defects and firmly join surfaces.
A good gluing result is ensured by an adhesive that meets the following requirements:
- elasticity and strength - the composition forms a seam that is not damaged by external influences and vibration loads;
- optimal consistency - the thickness of the mixture to penetrate hard-to-reach areas and fill small cracks;
- ability to withstand high temperatures - just like silicone itself, the glue must withstand heat without loss of properties;
- ease of use - convenience is affected by the packaging of the substance and the method of application;
- rapid polymerization - a high-quality solution can harden in a couple of hours.
Silicone adhesive sealants
Elastic silicone sealant is made from silicon, which is found in the form of quartz or sand. First, polymers are created from the material, which act as the base for the sealant. The source material determines the key parameters of the sealant. The main characteristic is its high tensile capacity, which allows the sealant to be used to work with moving joints. The material compensates for deformation at the joints and does not collapse under external influence.
Special types of sealants with increased heat resistance can be heated up to 300 degrees. Also, the possibility of widespread use is associated with the resistance of the sealant to the negative effects of ultraviolet rays, cleaning agents and humidity.
Cyanoacrylate adhesives
The basis of cyanoacrylate solutions are esters of alpha-cyanoacrylic acid. Plasticizers necessary to regulate viscosity and stabilizers to improve adhesion are used as additional components. Depending on the brand of cyanoacrylate solution, it may contain modifying components that are responsible for the resistance of the resulting seam to moisture and heat.
Cyanoacrylate compounds demonstrate immunity to organic solvents and electrical insulating properties. To dissolve the applied adhesive after hardening, treatment with specialized substances will be required.
Useful tips
As you can see, when choosing auto putty, it is better to focus on the nature of the damage. This will allow you to decide which mixture is optimal in a given situation.
At the same time, there are general rules that must be followed when carrying out body work and using automotive putty compounds.
- Degreasing. This is one of the key rules, ignoring which usually leads to poor quality of the work done. For degreasing, some use regular gasoline. But this is not an optimal solution and is not suitable for some types of putty. Therefore, it is better to use special solvents. When repairing a car bumper, make sure that the solvent applied will not damage the paint layer. It is better to cover entire areas with tape.
- Required types of putty. Depending on the nature and complexity of the damage, you may need one or more types of mixture. Decide on this in advance so that you don’t have to interrupt your work and run for new putty.
- Cleaning up. Any surface to be treated is pre-cleaned. The most relevant tool for this work is sandpaper with a grit of P60 to P180. Only a cleaned, degreased and dried surface will interact optimally with car putty.
- Speed of work. Auto putties do not tolerate delays. The peculiarity of their properties is that they quickly harden and become unsuitable for work. Strictly follow the manufacturer's instructions for storage methods, and prepare dry mixtures in small portions so that you have time to produce a paste.
- All proportions are selected strictly in accordance with the manufacturer’s recommendations. Therefore, read the instructions before starting work.
- Spatulas. Since the mixture is applied with a spatula, one universal tool will not help to thoroughly treat the surface. Prepare several types of spatulas in advance.
Based on these rules and instructions from car putty manufacturers, you can carry out all the necessary repair work yourself without any problems.
It is impossible to say unequivocally which of the presented mixtures is better or worse. It all depends on the nature of the damage. The manufacturer plays an important role. Choose putties from leading brands, the quality and characteristics of which you will be confident in.
Subscribe, leave comments and ask questions that interest you! We will try to answer them! Tell your friends about us and wait for new interesting materials!
Is it necessary: when is it advisable to repair a plastic bumper?
One such case is an incorrectly painted product. The paintwork on the bumper must be plastic. Only in this case the varnish and paint will not crack from a simple bend or a small dent, which can be easily straightened by heating. To find out if your part is painted well, inspect the crack to see if the layers have peeled off from each other.
A clear separation of paint and primer indicates that inappropriate components were used to paint the bumper. We talked about how to paint plastic at home in a series of summer articles
Let us repeat that in this case it is important to acquire a special primer and paint with plasticizers
Plastic repair technologies
There are two ways to accurately select the appropriate plastic repair technology:
1. Incineration:
Break off a small piece of plastic from the part being repaired. Make sure there is no paint, release agent or other contaminants on the broken piece. Set it on fire. If the plastic burns, emitting heavy black smoke and soot, this indicates that there is no need for preliminary priming. If the plastic burns with a clean flame (like a candle), then before the main priming it is necessary to apply primer for plastic.
2. Buoyancy check:
Place the plastic in water. If it drowns or is completely submerged in water, this indicates that the part does not need preliminary priming. If it floats on the surface of the water, then before applying acrylic primer it is necessary to apply primer for plastic.
Due to the fact that during the manufacture of plastic body parts, various special mold lubricants are introduced into them, before starting repairs, the remnants of these lubricants must be removed as follows:
Degrease using White Spirit and clean with anti-silicone compound.
How to glue a damaged bumper
Naturally, the quality of the fastener directly depends on the composition of the selected brand of glue for the job. To eliminate damage to plastic surfaces, the building materials market offers a sufficient selection of specialized glue for car repairs, namely for the bumper. As an example:
- glue moment;
- AKFIX;
- Weicon;
- Power Plast.
Types of adhesives: “Moment” and “88” (click to enlarge)
They are versatile and suitable for gluing any type of plastic, and after hardening they transform into a full-fledged monolithic layer. After the preparation, for hot drying of the glued part, it is worth using special types of hot-melt adhesive, so as not to provoke further deterioration of the condition of the seam, or its re-breakage. Also, thermoplastic adhesives are used on the condition that the bumper is to be painted in the future, so it is reasonable to carry out repairs and painting at the same time.
To check the adhesive ability of the mixture individually for a given item, you must first check it and conduct a test gluing.
Is it possible to do without painting the bumper?
The function of the bumper, both front and rear, is to protect the vehicle from damage in minor collisions.
In modern cars, the front bumper also reduces pedestrian injuries in the event of a collision. Therefore, most of these parts are made of plastic. Very often, as a result of damage, the plastic bursts, and sometimes even shatters into many pieces. In this case, it makes sense to purchase a new bumper, which will only need to be painted. Currently, many car shops sell already painted bumpers (new) in a large assortment. Having entered such a store, all that remains is to choose the color to match your car. And most importantly, the price of a painted new bumper will be 20-25% less than the cost of repairing the old one.
However, in auto stores such parts can not be found for all cars, but only for the most popular ones, for example, Daewoo Lanos. In the case of rare cars, the bumper will have to be repaired. Typically, bumpers are soldered after first being removed from the car.
Soldering large bumper damage
Numerous cracks, breaks and torn bumper elements can be repaired using thermal methods, in particular soldering. To complete this painstaking work, a small set of tools and materials is required:
- soldering iron with a power of at least 100 W with a wide tip and a wooden handle;
- thin metal mesh, specially designed for thermal bonding of plastic parts;
- knife, wire cutters for processing broken segments;
- screw clamp;
- sandpaper with fine and coarse grains for cleaning seams.
Powerful soldering iron with a wide tip
In preparation for soldering, paint must be removed to the base not only from cracks, but also from torn pieces of the bumper. Moreover, in this case, the body kit is not removed from the car until all the breaks are fastened and fixed by soldering, otherwise the element will lose its exact shape.
The soldering technology is implemented in the following sequence:
- After stripping, wipe the area with degreaser and let it evaporate.
- Align the edges of the cracks and, if necessary, secure them in this position with clamps.
- Using a heated soldering iron, make tacks along the length of all cracks. For high-quality heating, the tip must be immersed in the plastic to a depth equal to half the thickness of the material, and then level the surface of the molten plastic. The distance between the tacks is 1.5-2 cm.
- When tacks have been made on all the cracks, you need to put the broken piece back in place. Fit it to the hole and trim it if necessary so that it fits flush with the surface into the hole.
- Solder the torn segment using tacks, then repeat the operation from the inside. After which the bumper can be carefully removed from the car and work can continue in more comfortable conditions, although this is not necessary, depending on your convenience.
- Perform continuous soldering of all joints on both sides of the body kit. To prevent adjacent tacks from moving apart due to heating, the seam must be soldered with gaps. That is, first the first section between the tacks is welded, then the third, fifth, seventh, and so on. When finished, go back and solder all remaining sections.
- Cut the mesh into pieces 2-4 cm in length. They need to be soldered across the seam in the most intense places - along the edges of cracks, in the middle, at the junction and near the stiffeners. The technology is simple: a steel mesh is placed on the seam and, heated by a soldering iron, immersed in the polymer base of the bumper. At the end, the softened plastic over the mesh needs to be smoothed out.
Bumper cleaned and ready for painting
At the end of the soldering procedure, sand the surface of the element, then degrease and paint it in the required color. During further operation, be more careful, since a strong impact may cause the bumper to shatter into pieces, tearing in the same places. To fasten it more firmly, you should use another method - welding with donor plastic.
DIY putty
The price of some putty mixtures is quite high, and when carrying out repairs, many craftsmen prefer to use homemade compounds. To make putty for the bumper, proceed as follows:
- prepare a convenient container, polystyrene foam, acetone and a wooden stick;
- crumble the foam into small pieces and throw it into a container;
- pour acetone into the foam, leave to dissolve and mix;
- The dense sediment that appears at the bottom is used as putty, but only immediately, since it hardens quickly.
What affects the reliability of gluing
The reliability of the seam is influenced by a number of conditions. All of them are important, and failure to comply with any one can lead to the fact that what is glued at home will fall off, despite compliance with all the others. So:
Compliance of the product material and adhesive composition. Correspondence of the type of adhesive composition to the magnitude of the forces that the connection will experience
The direction of these efforts is equally important. Thus, compounds that produce hard seams are not suitable for repairing, for example, shoes - after all, the sole will bend and twist during use, despite the fact that the tensile force will be small
At the same time, this composition can successfully glue, say, a hook to glass, and hang tens of kilograms on it. Compliance with application technology. Everything is important here - how many seconds or minutes the surfaces need to be compressed, and how to degrease them, and how long to keep the parts pressed against each other. All this depends on the properties of a particular “plastic-glue” pair, is described in detail in the instructions and must be followed verbatim. A deviation of one second in the exposure time or premature start of use of the product can lead to secondary failure. Mechanical part of the process. It is important to thoroughly clean the surface from dust and roughen it. In addition, the direction of pressing the parts against each other must be perpendicular to the surfaces being glued. You should not allow the parts to move mutually after pressing - this will also lead to failure.
Gluing plastic tightly is not so easy. Carefully following simple rules by the home craftsman will allow you to obtain strong and durable connections. The main thing is not to forget about safety precautions: do not inhale vapors of the adhesive and do not allow it to get into food, skin or mucous membranes. If accidentally swallowed, consult a doctor immediately, making sure to take the tube with you.
Grinding stage
Before covering with putty and further painting the bumper, the plastic is sanded. To do this, resort to using a grinding machine. The optimal wheel option for equipment No. 240. It is necessary to carefully handle chips and irregularities. In hard-to-reach places, smooth the surface manually. Use sandpaper P 120. Sand the seam very carefully so as not to damage it. After sanding, the bumper is blown to remove dust that has settled on the surface. In this way, hidden cracks can be detected. If such a defect is discovered, soldering should be done. If red spots appear during sanding, this indicates problem areas that require re-processing.
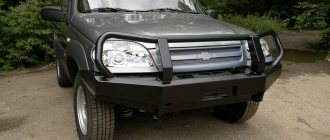
How to make a power bumper
power bumper" width="660″ height="440″ />
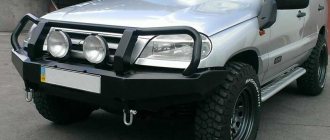
The part is mainly installed on SUVs. Thanks to it, the vehicle, when driving off-road, will be able to overcome serious obstacles without risking its integrity. The passive safety of the driver and passengers will also significantly increase. The power bumper is made of iron. Homemade elements, in addition to safety, “give” the SUV an aggressive appearance. With a homemade power kit, you can drive. To obtain this permit, changes to the design of the vehicle must be registered with the traffic police.
Before starting work on creating a power element, you need to draw up a plan on how to make a bumper, and only after that, start working. To complete this you will need the following tools and materials:
- Tape measure, tape, marker, scissors.
- Sheet metal (up to 3 mm thick), and cardboard.
- Grinder, cutting and grinding wheels, welding machine.
The work process is slightly different, depending on the method used to create the bumper:
- Constructed from a single piece of metal.
- Construction from several parts.
Despite the differences, the process has some similar operations:
- Creating templates from cardboard.
- Cutting out the necessary elements from metal, or creating the desired shape from a single piece.
- Connecting several parts into one piece using a welding machine, or forming a structure by bending sheet metal (practically impossible at home, since powerful equipment is required).
- Primer and painting.
- Installation on a vehicle.
Offers from manufacturers
You may find the following waterproof putties in hardware stores:
"Weber Vetonit
"Shitrock
"GLIMS Styro Prime":
"GLIMS Finish-R":
| Parameter | Description |
| Country of manufacture | Russia |
| Suitable materials for processing |
|
| Color | White |
| Weight | 5 kg |
| Approximate consumption with a millimeter layer of application | 1200 g per square meter |
| Possible layer thickness | 0.1-10 mm |
| Application method | Manual |
| Curing period | Day |
| Base type | Cement |
| Price | 225 rubles |
"Prospectors Basic Gray":
How to achieve maximum effect when gluing plastic parts
To ensure maximum effect when gluing plastic at home, you should:
- accurately determine the material and select the appropriate adhesive for it;
- carefully follow the instructions for use;
- wait for the required time for the seam to gain strength and do not try to use the product ahead of time;
- for outdoor use or for items used in high humidity conditions, you need to choose a waterproof brand;
- despite the declared heat resistance of the adhesive, the parts themselves may not survive this temperature;
- If there is no marking on the product, then you can try dropping a drop of adhesive in an inconspicuous place and see if the material dissolves.
Epoxy resin
Epoxy glue produces one of the strongest bonds and is compatible with many types of plastics.
General provisions
What properties does waterproof putty for wet rooms have? Why is it worth using it when carrying out finishing work in a bathroom or swimming pool?
Basic qualities
- High moisture resistance
. If we are talking about rooms with high humidity, it means that all finishing materials used in them must, first of all, easily tolerate dampness and direct contact with drops of water;
- Resistant to temperature changes
. An unused bathroom is cold, but after you fill the tub with hot water, it immediately becomes hot. In such cases, ordinary putty begins to change its volume, as a result of which the lining falls off;
- Durability
. On average, you can count on 20 years of service, so you don’t have to worry about the immediate need for repeated repairs.
Varieties
The following types of putties have the qualities described above:
- Cement
. The main component of such mixtures is high-quality Portland cement. When exposed to moisture, this building material only gains strength and does not lose it. Also a plus is the fairly low cost of the product. And if you also choose putty with the addition of, for example, marble chips or colored pigments, then you can do without further decoration at all, which will lead to even greater savings;
- Polymer
. These are water-dispersed compositions based on acrylic or latex. In addition to high moisture resistance, they are also distinguished by simple operating instructions. The only negative is the relatively high cost.
Additional tuning elements
Motorists, trying to give their vehicle a unique design, tune the bumper. Basically, these alterations concern the installation of the following elements:
- Lip. It is a kind of protrusion, which is located at the bottom of the protective structure. It is made of fiberglass and polyurethane foam, as a result of which the lip is primed and painted to match the color of the car.
- Diffuser. Decorative trim for the lower part of the rear bumper. Foamed PVC is used to create it. Markings are created on the material, after which the sheet is heated with a construction hairdryer and the parts are given shape. They prime and paint, and then attach it to the car using sealant.
- Fangs. A decorative element that is installed on both metal and plastic body elements. For mounting on “plastic”, fiberglass is used. To install fangs on iron parts, use metal and a welding machine.
Also, to give the car an individual look, stickers are placed on the bumpers, or parts are covered with carbon fiber.
Types of putty mixtures
Manufacturers produce putties for various purposes. Bumper repair includes leveling deep and minor surface defects. Therefore, there are such basic types of coverage.
- Filling - has a coarse-grained structure.
- Finishing - contains fine-grained filler.
- Universal - combines the properties of the first two options.
The first option allows you to eliminate deep blockages and deformations. The latter serves as a finishing layer or removes minor irregularities, making the part smooth and durable, easy to apply and quickly sanded. Universal putties are convenient to use because they do not require additional costs for purchasing several types of mixtures. Most modern car models have a plastic bumper. Therefore, the use of putty is obvious. However, for some outdated models, other mixture options are relevant.
What bumper damage can be repaired at home?
Without the help of car service specialists, it is possible to eliminate various types of bumper defects. The easiest to restore are scratches, which can be almost imperceptible superficial or deep, reaching the inner layer of the part. Repair in the second situation will be more difficult, since deep scratches often turn into cracks. If the bumper is cracked through and through, it is not recommended to use the car until the problem is completely eliminated, since when the car is moving, a vibration load is applied to the front part of the body, which can cause the crack to expand. This will affect the condition of the entire body and its performance characteristics.
In addition to scratches and cracks, dents, punctures and chips may form on the part. Dents appear as a result of strong external influence and must be corrected. Breakdowns and chips often occur due to a collision with an obstacle located at an angle.
How to repair minor damage to a plastic car bumper
Bumper damage comes in many different types, from minor scratches and small dents to serious cracks. Small dents and scratches can be removed yourself.
If the car bumper is made of thermoactive plastic, then minor damage to it can be easily eliminated using the polishing method with special chemicals. means.
Related article: We remove chips and scratches on the car body with our own hands
For example, if there is a shallow scratch, it can be treated with WD-40 universal cleaner.
In order to polish a scratch or chip, you will need a sponge, a soft rag and a chemical reagent. First, you need to clean the damaged area from dirt and dust with a sponge and water. After applying chemical. spray or sponge. Next, the damaged area is intensively polished with a rag until no damage is visible on it.
The second way to eliminate small dents and scratches on a plastic car bumper is to straighten the damaged area with a hot air gun. The essence of the method is that the damaged surface is evenly heated with a hair dryer. Due to heat treatment, the damage is leveled and straightened.
The method is simple and does not require special skills to perform, but it is not without its drawbacks: there is a possibility of deformation of the plastic; heating with a hairdryer can only be used on unpainted areas.
Also, a wax pencil is considered a simple and inexpensive way to eliminate minor damage to a plastic car bumper.
With its help, scratches and chips are simply painted over. Chem. the composition of the pencil fills the damaged areas, leveling them with the general surface and forms a protective layer. The process of removing chips and dents with a wax pencil takes no more than 5 minutes.