The car wing most often suffers from careless actions of the driver. Careless parking, sharp branches, stones and other unpleasant surprises leave scratches, dents and chips on this part of the body. They not only spoil the appearance of the car, but also cause corrosion. However, you can easily fix your own work and restore the ideal smoothness of the body yourself. To do this, it is enough to know the methodology for carrying out such work and select materials of proven quality. Let's figure out how to paint a wing - quickly, efficiently and with a professional result.
Which paint is best to choose for restoration work?
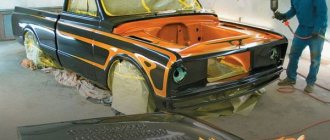
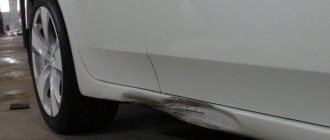
Even with careful driving and careful handling of the car, the car fender is often subject to corrosion and mechanical damage - scratches, chips.
Damage needs to be repaired
The choice of damage restoration technology depends on their size - in case of local defects, painting the entire wing is irrational due to high financial costs, here you can only get by with restoring the damaged area, whereas in case of a significant area of damage you will have to remove, straighten, putty, and only then completely repaint the entire surface.
Grinding
When restoring local defects, accurate selection of paint is important, since a stain that stands out against the background of the body will not add visual appeal to the car. To do this, a table of colors is used, by comparing which with the shade of the car the required paint is selected .
Subsequent technological operations are performed according to the algorithm below:
- Cleaning the damaged area from contamination;
- Grinding;
- Degreasing the surface;
- Puttying of irregularities (if necessary in several layers);
- Drying the putty with a hairdryer;
- Priming the treated surface;
- Polishing putty;
- Wing painting.
we work with sandpaper
The technological process for restoring dimensional damage to the body is similar to the above sequence, however, painting the car is carried out in a special spray booth using a spray gun, since it is extremely difficult to paint a large surface in a high-quality manner using a homemade method.
In order to paint a car fender after restoration, it makes sense to use nitro paints specifically designed for repair work.
They dry quickly (within 25 m) and upon completion of drying they are opened with a layer of varnish.
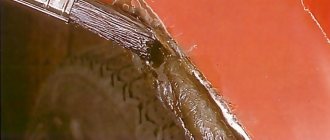
Wing varnish coating
Immediately after applying the main base, you need to coat the wing with varnish. The preparation of this composition is carried out while the third layer dries. During this time, you need to carefully prepare the varnish, mix it with the hardener, as well as with the solvent in the proportion specified in the special instructions. After these preparatory works, the paint layer is wiped with a special antistatic cloth. Only after this can you begin the process of coating the wing with varnish.
The technology for applying varnish is no different from how paint is applied. It is usually laid in two layers to avoid serious shagreen. Immediately after applying one layer, you need to let it dry for about 20 minutes, it all depends on the ambient temperature.
When working with varnish, you should avoid smudges, since removing them will be quite problematic, especially if they are present on bends, as well as on stampings.
&feature
Preparatory stage
Preparing for painting takes up most of the time when doing a DIY renovation. The algorithm for repairing the front and rear metal wings differs slightly.
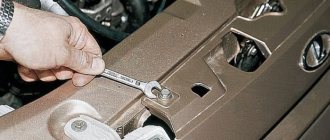
The front metal fenders are easier to remove from the car; for repairs you will need a full set of tools and materials:
- spray gun, compressor for painting entirely;
- rubber spatulas;
- spot welding, if the part needs to be removed from the car;
- sandpaper P80-3000;
- putty, automotive primer;
- degreaser;
- car enamel, varnish;
- antistatic wipes;
- dismantling tools;
- rags;
- film, tape.
All work can be divided into the following stages:
- Preparing the garage.
- Inspection of damage.
- Dismantling the part for straightening, installation on the car.
- Sanding, priming.
- Painting, varnishing.
- Final processing, polishing.
Preparation and sanding
Preparing a metal wing for painting is significantly different from working with plastic parts. The metal is first galvanized or coated with an anti-corrosion compound, primed, and puttied.
Grinding of the damaged surface is carried out with a stripping plane; if the metal under the paintwork is rusty, then the area is cleaned with sandpaper and treated with a rust converter. If there are significant pockets of corrosion, the part must be replaced.
Surface preparation
Preparing for a DIY paint job starts with cleaning out your garage. Dust, which is invisible under normal conditions when the spray gun is operating, rises and sticks to the fresh car enamel. After drying, small bubbles may appear that will be difficult to sand out and will require repainting. Preparing the room:
- Blow dust from corners.
- Remove dust from the walls and ceiling with a vacuum cleaner.
- Wash the floor and ensure there is no draft.
- Prepare the part for transition painting.
Painting a car wing using the transition technology begins with processing the part with P-80 abrasive until the transition between the outer layer of paint and the primer is visible. The transition places must be controlled with clubs; after grinding, there should be no “steps” on the metal. If there is a dent or defect, they are corrected with a spotter. Stages of work:
- An epoxy or acid primer is applied to the cleaned metal.
- The area is sanded and filled with fiberglass putty.
- After the putty has dried, the surface is cleaned.
- Treated with a degreaser.
- The edges of the local painting area are cleaned with R-80 sandpaper.
To prevent the color transition from being noticeable, it is necessary to seal the adjacent area with tape. Apply paint in 3 layers to the prepared surface. Each layer is dried until matte. After drying, the soil is ground and re-grinded.
Preparing to paint the transition of the plastic wing
Plastic elements are more difficult to prepare for transition painting due to less adhesion of the plastic to the car enamel. The process of preparing a plastic surface in steps:
- The part is treated with a primer, a special softener, which will prepare the plastic surface for adhesion to the acrylic primer.
- A plasticizer is added to the acrylic primer in a 1:1 ratio. The component will ensure the elasticity of the base for smooth adhesion of the auto enamel to the surface of the part.
- The part is puttied and prepared for painting in the same way as with metal surfaces.
Preparing for full painting
The car's wings are the first to suffer from mechanical damage and the aggressive effects of salt reagents that are sprinkled on the streets in winter. In addition, cars from the Chinese automobile industry have a very thin layer of auto enamel; after just a year, abrasions and small cracks are noticeable on the wings, bumpers, and doors. The part needs to be repaired and repainted entirely.
During such work, the wing is removed from the car. To remove the front fender, you need to remove the bumper and remove the protection. Metal fenders are often installed on the body by welding; it is necessary to cut out or drill out the spots. Plastic parts are installed on the body with a bolt connection and sealant.
When dismantling the rear wing, the door seals, the fuel tank flap are removed from the car, the turns and stops are removed.
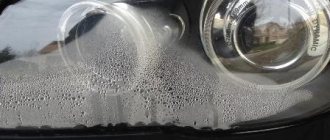
How to prepare a wing for painting
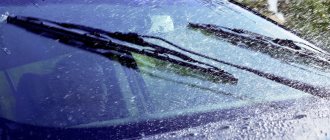
Before starting work - wash the car
How the wing will be painted will certainly depend on the degree and amount of damage. In the case when a chip or small scratch affects only the top layers of paint or varnish, then such areas can simply be thoroughly polished. If the metal or primer is damaged, then painting is necessary.
Self-staining requires mandatory preliminary preparation, which affects the final result. First, you should wash and then dry your car. After which you need to dismantle some parts. In the case where the rear wing requires painting, it is necessary to remove all door seals, stops and hatch. And if it’s the front one, it’s best to remove it completely, otherwise you’ll have to unscrew the bumper, fender liner and headlight. This area will need to be covered around the entire perimeter with special masking tape.
Sanding the damaged part
To completely remove any minor scratches or minor chips, sanding is required, which must be completed immediately after the entire surface is completely matte. This is usually done using a plane and sandpaper P800-P400, since otherwise unevenness will form on the surface. If the scratches are deep, then it is better to clean the damaged area down to the metal using a special rotary machine.
Painting materials
For painting you will need the following materials:
Antisilicone for degreasing and rags for applying it. Napkin for removing dust particles. Dye. Approximately one can for each part, but it’s better to take extra, because... The roof and hood may require two cans each.
When painting one or two parts, you will need a covering bag, newspapers and paper tape for wrapping the car. Instead of anti-silicone, you can use alcohol-containing solvents, but they do a worse job of degreasing. Some people use isopropyl alcohol, but this substance is very poisonous, and its vapors alone can cause serious poisoning.
Definition and Application
Transition painting is a technology for applying light-colored paint material with a partial transition to the original coating to minimize the differences between layers.
The technology under consideration is used in the following situations:
- when the original paintwork has faded or shows signs of wear;
- if there is a defect on any body element of a large area;
- to eliminate errors in previously carried out painting work.
Instead of completely repainting the part, which in these cases is the most rational way, painting with a transition is used mainly for the following reasons: in order to save time, money and simplify the work, and when it is impossible to select a paint material that matches the original color.
Preliminary work on a damaged wing
Next, the following stages of preparatory work are carried out:
Necessary tools for painting the wing
- Sanding damage:
- if there are only light scratches on the surface, then it is enough to achieve a matte finish;
- if the layer is damaged down to the metal, then there is a risk of rust formation, so the area needs to be thoroughly cleaned with sandpaper P120-180, and then used to combat corrosion.
Degreasing the work area. To do this, you can use white spirit or even acetone, and after the applied product has dried, immediately prime the surface
Here it is important to do everything as quickly as possible, so you will avoid the risk of the smallest particles of rust. Grinding the primed area with a fine abrasive, removing dust and re-degreasing
Please note that the surface must be completely smooth. If there was serious damage to the surface, then they need to be puttied and sanded until the geometry is completely restored. To do this, use an abrasive of 320-400 grit and only the dry processing method. If you still have a feeling of roughness, then use paper with P500. Next, you need to matte all adjacent areas of the wing with your own hands by removing paint and varnish around the damaged area. Here you need to use matting paste or paper with P1000-1200. This must be done so that the transition from new paint to old is least noticeable. Sanding the surface for future painting. You need to work with small areas, gradually increasing their size. Then the entire painting area is primed. It is necessarily preceded by high-quality degreasing. The application of the primer should be carried out in parallel lines, each subsequent one should slightly touch the previous one and slightly extend beyond the putty areas. Here, pay close attention to the instructions on the primer can - these recommendations take priority. After drying, the primer is sanded with a fine abrasive and degreased. After this, you should walk over the surface with a special sticky cloth, which will collect any remaining dust. Touching the surface with your hands is strictly prohibited!
Paint selection
The next important step is the choice of paint and varnish substance. You can paint the car fender with auto enamels. They contain pigments and additives that protect the car surface from water, fire, corrosion, etc. Main types:
- Melamine-alkyd one-component enamel. Pros: dense structure due to nitrocellulose in the composition, wear resistance, not afraid of gasoline; applied in three layers, does not spread; provides shine. Cons: takes a long time to dry, doesn't polish well.
- Acrylic two-component enamel. Advantages: high-quality protection against corrosion, atmospheric influences, air temperature changes, precipitation; easy to use, dries quickly; polishes well; durable. Disadvantages: relatively high cost.
- Nitroenamel is not a universal product and is only suitable for eliminating minor defects. Cons: does not give the surface a glossy shine, applies unevenly, requires a large number of layers (up to 10 sprays), takes a long time to dry, is flammable, fades quickly.
- Enamels with a metallic effect are distinguished between single-layer, two-layer and three-layer compositions. The latter give the surface a “chameleon” effect. The compositions dry fairly quickly (no more than an hour). The metallic coating looks much more impressive, besides, it prevents overheating due to light reflection, and also has greater durability. Cons: high price.
Melamine-alkyd one-component enamel
Acrylic two-component auto enamel
Automotive nitroenamel
Acrylic enamel with a metallic effect Please note: Choosing a compressor for painting a car
Necessary tool
The labor-intensive process of restoring the appearance of a car requires the use of improvised tools, auxiliary materials, etc. You will need:
- paper, newspapers, masking tape;
- abrasive agents (sandpaper, plane);
- degreaser (white spirit, kerosene, special solvents);
- spatula, putty, primer;
- spray gun, compressor, paint or aerosol can;
- rags, varnish, polishing paste and napkin;
- gloves, respirator, work clothes.
To complete the task, you need to prepare all the necessary means at hand in advance before starting repair work.
Sandpaper
Spray gun
Dent Removal
The technology for straightening dents depends on the wing material. Dents on plastic fenders are pulled out by heating the area and using a spotter. You can use PDR technology.
If the plastic wing has small cracks, then a specialized service station may suggest a method of welding plastic at high temperatures. In this case, the price of painting a car wing will be much higher.
Plastic front parts are made of either thermoplastic or fiberglass. Depending on the material, dent extraction and crack repair are carried out differently.
Thermoplastic panels are glued together with special electrodes when heated with a hairdryer. Dent extraction also occurs after the part is heated. When you repair it yourself, you can only straighten the dent; after heating, the part takes its original shape, but without special equipment it is impossible to glue the crack.
Fiberglass elements are restored with epoxy or any other polyester glue without preheating.
The technology for removing dents on a metal fender depends on the depth of the defect. If there is no tear in the metal, then you can restore the surface in the garage:
- reverse hammer;
- using PDR technology;
- use vacuum suction cups and hoods.
Aluminum wings are lighter in weight than metal ones, but harder to repair and paint. The material is flexible, it is difficult to level it, in order for the auto enamel to fit well on the aluminum wing, it is necessary to treat the metal with several layers of putty, which will ensure optimal adhesion.
How to fix a scratch on a car without resorting to traditional painting?
The integrity and beauty of a car body is like the cleanliness and neatness of your business suit. Every time we go out, we look at ourselves in the mirror, thinking about how our interlocutors, employees, partners and clients will perceive our appearance. Many car owners have the same thoughts about their car. It is important that the car always looks beautiful, the body is clean, and the interior smells nice. Such criteria make even a not too expensive car a pleasant means of transportation with certain positive emotions from the trip.
But the cleanliness and neatness of the body often depend on the condition of the paintwork. This factor is not always under the control and responsibility of the driver. Scratches and chips may appear regardless of careful driving. For example, a pebble flying out from under the wheels of an oncoming car can leave a very deep chip, and a careless driver in a nearby parking space can leave a couple of scratches on the body of your car. Let's figure out how you can deal with such troubles.
Deep scratch - basic neutralization processes
The most unpleasant occurrence for paint repair will be a deep and obvious scratch. It can be left unnoticed by a fence or tree when reversing, as well as by other road users. Often scratches are caused by impatient motorcyclists who are trying to squeeze through the entire flow of cars in a traffic jam. Large gravel that touches the body tangentially can also leave behind a whole crater in the paint.
There can be many reasons why a deep scratch may appear on your body, and each case will be relatively individual. Therefore, it is important to determine not the origin, but the ways to solve this problem. Let's say right away that every deep scratch is a potentially dangerous phenomenon for the body. It can cause metal corrosion. The features of its repair are as follows:
- it is necessary to begin fixing the problem as soon as possible and work on such a scratch before rust appears;
- The type of repair will depend on the location of the scratch, the importance of performing aesthetic treatment;
- first you need to completely clean the scratch crater, removing the beginnings of corrosion from the metal;
- it is impossible to treat this area with solvents and degreasers, this will lead to peeling of the paint around it;
- you need to clean, wash and dry the scratch area as effectively as possible and keep it clean;
- then you should carefully apply a primer to cover exactly the inside of the crater and fill in the metal;
- after the primer has dried, it can be wiped with a solvent, degreased and painted;
- The paint material is applied differently depending on the type of scratch and its location.
If the scratch is located on the fender, hood or upper part of the door, paint should be applied as carefully as possible so as not to create additional relief on the surface of the body. It is worth understanding that repairing deep scratches on your own will not give an ideal result. The most important point in this situation is to ensure the protection of the metal and the absence of corrosion.
But often such repairs will have to be redone when you get tired of the visible stripe of paint on the body. We do not recommend using ready-made paint repair kits. They are quite expensive, but almost never match the color of the paint. Therefore, it is better to give preference to selecting paint and purchasing hundreds of grams of material for less money at a specialized service center.
Small scratches and chips - do-it-yourself repairs
If you want to tidy up the body of your car yourself, remember one important point about such work. In a garage with unprofessional tools and hastily selected materials, it is almost impossible to achieve aesthetic goals. Therefore, repairing chips and scratches in this case will be more preventive for the body, specifically saving the metal from corrosion.
If you need visually high-quality paintwork repairs, it is better to contact specialists who will simply repaint the body part you need. If the chips and scratches are minor, you can make fairly simple repairs yourself. To do this, you need paint that matches the color perfectly, a thin artistic brush (or better yet, several brushes) and a certain amount of free time. The repair process is as follows:
- identify all areas that need to be repaired;
- prepare the paint, bring it to the desired state using varnish and solvent (in this case, you do not need to add varnish);
- completely clean the areas you will be repairing, thoroughly wash and dry the body;
- if the scratches reach the metal, read the first part of the publication and perform preventive repairs;
- for scratches and chips that only reach the primer layer, a simpler method is suitable;
- put a drop of paint on a brush and fill the crater of a scratch or chip so that the paint does not spread over the surrounding paintwork;
- align the paint as clearly as possible along the edges of the scratch to improve the visual effect;
- Allow the paint to cure and then go through several stages of polishing the body.
With these simple tasks you can remove chips and small scratches, prevent their further spread, and get a more attractive body. Of course, such repairs do not exclude full painting in the future, but only delay the moment when this painting will need to be done. But it is quite possible to protect the metal and postpone repairs.
Please note that only those surfaces that have been applied recently can be degreased with a solvent. If you are filling a scratch with primer, you can resort to this method of surface preparation. Otherwise, the solvent may get under the paint and cause it to erode. The main stage that determines the aesthetic beauty of the repair will be high-quality polishing using abrasive materials.
Professional repair of scratches and chips - partial and full painting
If the body of your car can no longer be easily repaired in a garage, it has a lot of scratches, chips and cracks in the paintwork, you shouldn’t waste time trying to get the paint in order. It is better to immediately contact specialists and get professional repairs. This will help you achieve a beautiful body with the perception of a new car. But the main thing in this matter is the quality of the repair. Therefore, a company should be selected according to the following criteria:
- high-quality equipment for selecting paint - extremely important for partial body repairs;
- professional employees with experience in complex work and excellent equipment for painting;
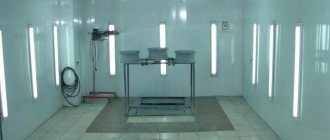
- the presence of a special box in which an atmosphere without dust and excessive humidity is created;
- tools and conditions for preparing the body for painting, applying putty and other materials;
- practical advice from experts on the stages and methods of repairing your car.
Only in such a company you will receive the necessary repair capabilities. It is enough to find real professionals so that within a few days your car leaves the pit like new. Also, to obtain such a result, you should not waste money on high-quality paint and varnish materials and choose only major methods of professional body repair.
The main thing is not to paint the car the way the heroes of the following video do:
Let's sum it up
If you value the appearance of your car, use only professional repair services. But with minor damage to the paintwork, you can often do it yourself, without resorting to the expensive services of specialists. To do this, you just need to spend a few hours of time on careful work and perform all the processes yourself.
Maintaining a good appearance of your car will not only allow you to derive some pleasure from operating the car. Another important aspect is maintaining the secondary value of the car. The investment in paint repairs will pay off as soon as you want to sell the car. If the car looks good, the buyer won't bargain too much. Have you ever done car paint repairs yourself?
avto-flot.ru
Final painting of car arches
The base paint is diluted with a hardener in the proportions recommended by the instructions on the package, then the solvent is added to the desired consistency. After mixing the resulting composition, it is poured into the spray gun.
During the painting process, the hand with the spray gun must move along a line parallel to the side of the surface being painted. To properly paint the front and rear wing arches, the tool must be held perpendicular to their surface and located at a distance of 15-20 mm from the plane being processed. Painting is carried out in several passes, each subsequent layer should overlap the previous one by half. The final coating is applied in 2-3 layers, with mandatory drying and complete drying of each layer.
The lack of the necessary skills in painting the wheel arches of a car with your own hands leads to the fact that unwanted streaks, shagreen, and adhering dust can sometimes appear on their surface. Such defects can be easily eliminated by grinding and polishing.
You should remove electrical tape and masking tape without waiting for the parts to dry completely, so as not to get a torn outline of the paint.
This technique can be used to perform both local painting and complete repainting of car arches.
- Absolutely legal (Article 12.2);
- Hides from photo and video recording;
- Suitable for all cars;
- Works through the cigarette lighter connector;
- Does not cause interference to radios and cell phones.
Before working with the welding machine, you need to disconnect the power supply, that is, the battery. The problem we have is this: we need to heal the corroded arch.
First of all, we clean everything with an emery machine and cut out the damaged area with a grinder.
After we cut out the damaged area, we treat everything with acid so that there is no more corrosion. We make blanks, cut out patches. Made from food grade stainless steel 0.8 thickness.
We scald it from the inside and cover it with baxite soil. Carefully, even under the seams.
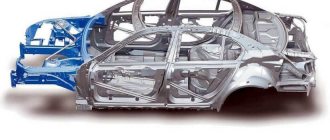
Body on the conveyor
Before entering the tin-body paint shop, the car body is first of all thoroughly degreased and washed to get rid of contaminants obtained during steel rolling and production of the body on the conveyor.
Then the body is sent for chemical treatment - phosphating. This procedure is carried out by immersing the body in a phosphating solution, after which a thin film of iron and zinc phosphates is formed on the metal surface, which protects the metal from corrosion and ensures high adhesion both to the metal itself and to subsequent layers.
Degreasing and phosphating are also mandatory for galvanized sheets, which today are increasingly used in the manufacture of bodywork and its parts.
After phosphating, the body is again washed and dried, after which a layer of water-based primer with anti-corrosion additives is applied. Application is carried out by cathodic or anodic deposition. In the first case, the process is called cataphoresis, in the second - anaphoresis.
Cataphoresis is better than anaphoresis - it provides more reliable anti-corrosion protection for welds and hidden cavities. The thickness of the cataphoretic primer layer reaches 20 microns, and application by electrodeposition ensures the formation of a uniform coating on both horizontal and vertical surfaces. Hard-to-reach places, hidden cavities and crevices are also perfectly primed.
Today, there are practically no anaphoretic installations left for painting bodies; they have all been replaced by cataphoretic ones.
Next, the cataphoresis layer undergoes high-temperature drying (180°C), after which another, final primer is applied to it - leveling. It performs a double function: firstly, it fills and smoothes out micro-irregularities, creating a uniform substrate for the paint, and secondly, it serves as a kind of shock absorber that protects the paint from chips and cracks. Unlike cataphoretic primer, leveling primer does not protect against corrosion.
Finally, after drying and sanding, a decorative coating is applied to the primed surface.
Bodywork at the factory (BMW 7 Series)
Factory technologies show us in the best possible way that it is impossible (at least for now) to combine anti-corrosion, leveling, shock-absorbing, and decorative functions in one material to a sufficiently high quality degree. Even the most modern car enamels will not give a high-quality and durable result without careful preparation of the surface, without forming a reliable base for the decorative coating.
And now it’s time to move on to the main topic of our conversation - repair soils.
Dent Removal
The technology for straightening dents depends on the wing material. Dents on plastic fenders are pulled out by heating the area and using a spotter. You can use PDR technology.
If the plastic wing has small cracks, then a specialized service station may suggest a method of welding plastic at high temperatures. In this case, the price of painting a car wing will be much higher.
Plastic front parts are made of either thermoplastic or fiberglass. Depending on the material, dent extraction and crack repair are carried out differently.
Thermoplastic panels are glued together with special electrodes when heated with a hairdryer. Dent extraction also occurs after the part is heated. When you repair it yourself, you can only straighten the dent; after heating, the part takes its original shape, but without special equipment it is impossible to glue the crack.
Fiberglass elements are restored with epoxy or any other polyester glue without preheating.
The technology for removing dents on a metal fender depends on the depth of the defect. If there is no tear in the metal, then you can restore the surface in the garage:
- reverse hammer;
- using PDR technology;
- use vacuum suction cups and hoods.
Aluminum wings are lighter in weight than metal ones, but harder to repair and paint. The material is flexible, it is difficult to level it, in order for the auto enamel to fit well on the aluminum wing, it is necessary to treat the metal with several layers of putty, which will ensure optimal adhesion.
Preliminary wing straightening
Before work, it is necessary to remove the wheel from the side of the damaged wing. Place a wooden strip under the jack extension and use it to begin pressing out the dent in the fender from the inside. When the main serious dent decreases, you can try to remove small and smooth ones with your hands. Remaining dents and creases are removed with a hammer. If necessary, bend the edge of the arch with pliers. Serious creases are straightened using a metal hammer, which must be tapped directly on the crease.
Applying paint to the roof and varnishing it
Painting the roof of a car is done using a spray gun. The work is carried out in several stages:
- Applying the first layer. The composition is distributed evenly. Spraying begins from the front of the roof, moving towards the rear window. Movements should not be too slow, as this promotes the formation of stains and drips. The first layer of paint is dried for at least half an hour. Depending on the type of paint and ambient temperature, drying time may increase. The necessary information can be found on the label of the paint product.
- Applying the second layer. At this stage, paint of a thicker consistency is used. It is necessary to avoid the formation of drips that are difficult to remove from a horizontal surface. Painting begins from the edge, after which it gradually moves to the central part of the roof. When moving to the other side, paint is sprayed from the middle. After this, the gaps are eliminated by applying the composition perpendicular to the front and rear parts of the roof. Two layers are enough to obtain an even coating.
- Applying varnish. It is recommended to spray the composition 8-12 hours after painting. If the paint dries out, the varnish will lie unevenly on the painted parts. 2-3 layers are enough. The varnish is applied in the same way as paint.
After the coating dries, the surface is polished, giving it a glossy shine.
Read further:
Technology for painting scratches on cars: surface preparation, choice of composition and methods of applying it
Roof paint: types, methods, expert advice.
Choosing paint in a spray can for painting a car: main problems and methods for choosing the composition
Features of painting car brake calipers
Basic principles of painting a car fender
How much does it cost to paint a car fender?
If you don’t want to waste your time painting the car yourself, you can turn to professionals. There are many specialists on the market - from single craftsmen to large firms.
The approximate price for painting the wing will cost from 3500 rubles . Of course, it’s up to you to decide what is more preferable for you.
Theme Options
Display
- Linear view
- Combined view
- Tree view
How to remove saffron milk caps from a car body with your own hands? Simple step by step method
A master class on how to remove saffron milk caps from a car body with your own hands may probably be of interest not only to owners of fairly old cars, where such flaws begin to appear from a long time of use.
Spring is coming, and it's time for owners of even recently purchased cars to inspect their vehicles for possible rust. The fact is that winter reagents, scattered in abundance along our roads, of course, remove such a problem as ice. But, as they say, you have to pay for everything in this life. And the paintwork of the body is the first to suffer from such chemicals. And if you also add tiny chips of paint that arise from the mechanical impact of small stones and branches, then a completely new car can begin to rust immediately after the first winter season. And it all starts with the so-called saffron milk caps, specks of rust spreading in various places throughout the car body. How to remove saffron milk caps from the car body with your own hands? Some drivers, of course, will prefer to turn to professional technicians at a service station, where they will restore the car to its original condition for a fairly tidy sum. But it is expensive, and it makes sense when your car is almost new. With used cars, some owners do it much easier: they prefer to remove the rust themselves. It will cost several times less, and, no matter what anyone says, if you follow certain rules, you can get a fairly stable effect. What is needed for the work? First, you need to purchase sandpaper, coarse and fine. Fine, soaked in water, is used for final sanding. Secondly, a can of putty with a hardener (any car putty, a whole can is enough to get rid of saffron milk caps all over the body). You will also need a small spatula to apply it to the body. Next is the paint for touching up. It should be matched to the color of the body (help article “What paint to paint a car?”). If your car is an original color, take the gas tank cap and go to the car market and pick it up. You also need masking tape, degreaser, rags, a rust converter (any available one), a drill with a sanding attachment or a small sander. Let's get started The very first thing you need to do is wash the car thoroughly. Then inspect it for rusty spots on the body. If quite a lot of them have appeared over the winter, then we begin to gradually carry out the work, choosing, for example, one of the wings. Here we select a specific camelina (you can mark the surface to be cleaned with a glass marker). Using a drill with an attachment or a grinder, we begin to remove rust from the given surface. This procedure must be done until pure metal appears. We clean a little with reserve, taking lightly the surface that is not yet damaged, in order to completely remove corrosion. The next stage is degreasing the surface that has been cleaned. Take a cloth, dip it in the product and scrub thoroughly. Before that, some craftsmen advise to blot the stain to be removed with a liquid rust converter, wait a little (15 minutes), wipe it dry and then degrease it. And some say that such a procedure is practically useless. So it's up to you. In our case, we’ll treat it just in case. Next, you need to apply masking tape, covering the perimeter of the former saffron milk cap with it. Why is this being done? Firstly, in order to avoid making too large strokes when applying putty (the more, the more visible). We paste over the tape a little with a margin (1-2 mm), smoothing out the corners. The next stage is putty. You only need a little bit of it - literally smear it on. Don't forget the hardener! Using a small spatula, carefully cover the former saffron milk cap and smooth it out. We apply it quickly enough, with a longitudinal movement, because it begins to dry out. When the putty is completely dry, you need to tear off all the tape. And glue the new one in the same way as the first time. Using coarse sandpaper, sand the putty, starting from the edges, carefully comparing it with the paint. Next, we use a zero pad soaked in water for final sanding. After leveling the surface, remove the tape. Wipe the stain dry and degrease. Touch up the paint horizontally with a brush. If you have a spray can, you can blow out the area being restored. The process is carried out in several stages. How to do this, read the article “How to paint a car with your own hands from a spray can.” As you can see, the problem of how to remove saffron milk caps from a car body with your own hands turned out to be completely solvable. Of course, you will not achieve such an even tone as with service painting, but if you follow the above recommendations, it looks quite decent. AutoFlit.ru
see also
- Video on how to update a car interior with your own hands
- Do-it-yourself removable tow bar
- DIY fenders for arches
- DIY engine start button
- Installation for washing the injector with your own hands
- Do-it-yourself injector washing
- Checking the injector yourself
- DIY heated wiper blades
- Do-it-yourself washing of injector nozzles
- DIY steering rack repair of a new VAZ 2110 model
- Do-it-yourself kenguryatnik