In accordance with the general trend, on Russian-made VAZ 2113–2115 cars, bumpers made of plastic and painted in the color of the car are installed. These are the most vulnerable body elements, located low above the road surface and taking on all kinds of mechanical loads. The front body kit suffers especially, where stones often fly from under the wheels of oncoming traffic, which is why parts have to be removed for repair or replacement. But thanks to the simplicity of the design, any motorist with the time and desire can handle the removal. Let's consider the task of removing the front and rear bumpers using the example of the VAZ 2114 and analogues.
Why remove bumpers on VAZ 2113-2115
What kind of “blows of fate” do the front and rear body kits experience during operation? Either a stone will fly, then someone in the parking lot will catch it and scratch it, or even the driver himself will drive into a snowdrift where an iron pipe is hiding. Not to mention such little things as traces of insects crashing on the front. Some of the listed defects can be eliminated without removing parts from the car, but in case of serious damage, dismantling is inevitable.
Such damage cannot be repaired, the body kit is easier to change
A separate story is a collision during an accident, as a result of which the bumper often turns into outright trash, unsuitable for repair. Fortunately, spare parts for Russian cars are freely available and their prices are quite affordable.
Reference. The cost of the front and rear body kits is almost the same and starts from 2,600 rubles. for an unpainted part. Prices for products with color coating start from 3,250 rubles.
The main reasons why owners of the “thirteenth” and “fifteenth” VAZ models have to dismantle the bumpers are as follows:
- It is necessary to completely repaint the car and perform body repairs.
- To repair or replace a broken body kit.
- It is easier to install fog lights on the removed front element.
- You need to get to other body parts located under the bumper.
- It was decided to throw away the stock factory body kits and install beautiful elements of the original shape, that is, to do partial styling of the car.
This is what the VAZ 2115 styling front body kit looks like
Note. To this day you can find budget black bumpers on VAZ 13-15 series cars. The owners of these cars, as soon as possible, remove unsightly parts in order to paint them in the desired color or replace them with painted ones.
The first 2114 models came with black body kits
What is important to know when purchasing new products for VAZ 2113, 2114 and 2115
Unlike foreign-made cars, it is easy to buy the necessary spare parts for the VAZ 2113, including new bumpers. In the retail chain, these parts are found in two forms:
- black, without painting;
- painted in any color of your choice.
Body kits of different colors and shapes
Advice. If you decide to change body kits because of their unpresentable appearance, then it is easier and cheaper to buy ready-made products painted in the color of the car. The difference in price is 700-900 rubles. will not allow you to save a significant amount on painting a black bumper.
Unpainted parts are usually taken during a major body repair with full painting or in the case of repainting the car in some individual color. It is also appropriate here to remember those owners whose cars were equipped from the factory with unpainted elements, which, if they break down, are easily replaced with similar ones.
Standard front bumper VAZ 2113—2115
When choosing a new bumper for VAZ 2113 (2114, 2115), consider several recommendations:
- There are several manufacturers on the market that use various raw materials, including recycled ones, to produce plastic body parts. Therefore, when purchasing, pay attention to the elasticity of the plastic. If it is initially rigid, then at negative temperatures it will become very brittle.
- Before purchasing a new product, remove the old body kit to check the condition of the amplifier underneath. If the disassembly was caused by the plastic breaking due to an impact, then the amplifier could also be damaged. In addition, it will be possible to compare the factory bumper with the part offered in the store.
- Check the element for minor paint defects. It happens that plastic parts are damaged during transportation.
- If you notice that the design of the new bumper is additionally reinforced from the inside, then buy it with confidence, since such products are more reliable in operation.
- Please note that there are openings for installing fog lights. There are products on sale for the VAZ 2114 that are not equipped with holes.
- When purchasing, make sure that the items fit your car in size. You should not purchase bumpers for a VAZ 2115 from a VAZ 2114 and vice versa, since they differ in dimensions, although they are mounted in the same way.
Factory bumper VAZ 2113—2115
Wanting to give their cars individuality, their owners often do partial styling, replacing the stock (factory) body kits with more original and attractive ones that differ in shape. As a rule, such elements can be easily installed on standard mounts and do not require modifications.
Reference. The prices of serial styling bumpers are not much higher than stock ones and start from 3,500 rubles. (for an unpainted product). Original works can cost significantly more.
The rear styling kit looks impressive
Materials and methods
Options for tuning a VAZ bumper are limited only by the imagination of the motorist himself. For VAZ 2115, 2114, 2113 you can order ready-made body kits that are significantly different from those installed at the factory, or you can design the element yourself (change the standard one).
The bumper is one of the Lada spare parts that is often modified. Among the changes is the use, in contrast to the factory version, of other materials.
Tuned body kits have a positive effect on the aerodynamic properties of the car by pressing the vehicle more tightly to the road surface. As a result, the car accelerates much faster with standard engine power.
To create a unique body kit, fiberglass, plastic, construction foam and polystyrene are used. In some cases, the structure is reinforced with metal elements (reinforcement is carried out).
Design Features
The design and method of attaching body kits on Lada 13-15 series cars differs from other models of the “tenth” VAZ family. Design features are as follows:
- Additional metal brackets for fastening to the body are installed inside the plastic elements;
- the brackets are held on by threaded connections and screwed to the bumper with self-tapping screws;
- plastic latches appeared on the central part of the front bumper;
- the edges of the rear body kit are pulled to the body by nuts hidden behind the wheel arches;
- It is easier to remove the front and rear parts together with the amplifier, and then unscrew it if necessary.
Rear body kit
In order to tune the rear body kit, you need to use the same technique as with the front one. Only, when lengthening this part, it is worth remembering the muffler. If the extension is about 40 mm, then the rear bumper will simply cover it. Therefore, there are two options to resolve this problem. The first is to redo the exhaust system itself, lowering the muffler a little lower, or directing its outlet downward. The second is to change the rear body kit itself, make it either shorter so that it does not cover the exhaust hole, or make a semicircle under the muffler. Otherwise, the tuning operation is no different.
Instructions for dismantling the front body kit with your own hands
To disassemble the bumper mounts you will need the following tool:
- Phillips screwdriver;
- 8 mm socket wrench;
- the same, size 10 mm.
Disassembly tool
Advice. Instead of separate keys during disassembly, it is more convenient to use heads with an extension and a wrench equipped with a ratchet.
It is more convenient to work with sockets and a ratchet wrench
Since most threaded joints are likely to be rusty, you will need to use WD-40 spray lubricant to rotate them. Apply it to all bolts and nuts before unscrewing.
It is more convenient to work with the lower mounts of the front body kit from the inspection ditch, from where they are clearly visible, although if necessary, you can dismantle the bumper without a pit. At the final stage, when the element is removed from the machine, it is worth having an assistant support the part by the second edge.
This material will help you install and dismantle the bumper on VAZ 2110, 2111 and 2112 cars: https://vazweb.ru/desyatka/kuzov/kak-snyat-bamper-na-vaz-2110.html
If the car is equipped with fog lights, the process begins by disconnecting the battery from the on-board network. Further work is performed in the following sequence:
- Open the hood and use a screwdriver to unscrew the 4 screws holding the upper part of the radiator grille. Remove it from the car.
- The lower part of the radiator grille is held in place by 4 self-tapping screws - a pair from the outside and two more from the engine compartment. Unscrew them and remove the grille part.
- Unscrew the 6 screws of the lower body kit mounting. They are located on the rounded parts of the element, 3 on each side.
- Remove the plastic protection installed under the wheel arches by unscrewing the bolts and nuts with a 10 mm wrench. For greater convenience, you can remove the wheel. Unscrew the front part of the fender liner.
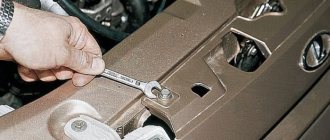
- Now you have access to the bracket, where you need to loosen and unscrew 2 10 mm nuts. Don't forget to treat the joints with WD-40.
- Remove the license plate, underneath it you will find 2 more front mounting bolts. Unscrew them, as well as the 2 screws located near the air intake opening.
After disassembly, you will see plastic latches on the horizontal plane of the body kit. Unlock them and, together with an assistant, remove the bumper from the car, pushing it forward and holding it on both sides. Before doing this, disconnect the power wires for the fog lights so that you don’t have to do it while hanging.
Note. After dismantling the element, access to the plastic amplifier mount will open. If it is damaged and needs to be replaced, you need to unscrew the 4 nuts with a 13 mm socket and remove the part from the studs.
If you need to install a new body kit instead of a broken one, then you need to twist the metal brackets from the latter. To do this, just unscrew the 3 fastening screws. The brackets themselves should be cleaned of rust and painted so that they do not rot prematurely. The bumper is installed in the same way, only in reverse order.
The order of work in the photo
Video about disassembling the front part of the car
How to remove the rear bumper
To replace the rear body kit, an inspection ditch is not needed, since there is fairly easy access to the lower nuts and screws. But the set of necessary tools will have to be supplemented:
- 13 mm head;
- jack;
- wheel wrench;
- wooden stands for the rear wheel hubs.
Advice. It doesn’t hurt to stock up on a brush with metal bristles to clean the fasteners from dirt or anti-corrosion coating.
The problem is that with the wheels installed, it is difficult to get to the threaded connections located on the back side of the wheel arch. Therefore, before carrying out work, you need to secure the car at the front with wheel chocks and remove both rear wheels, resting the hubs on stands. The next procedure is as follows:
- Remove the plastic wheel arch protection by unscrewing the screws holding it. Perform the operation on both sides.
- Looking under the back of the arch, you will find 2 studs with tightened nuts. Treat them with a brush and WD-40, and then unscrew the socket 10 mm. Remove the plastic trim. Repeat on the other side.
- Loosen and unscrew the 4 13mm socket nuts that secure the bumper reinforcement to the steel body parts. They are located under the body kit in pairs.
- Together with an assistant, grasp the edges of the bumper, remove the side mounting studs from the holes and remove it by pushing it backwards.
Note. In this way, the part is removed along with the amplifier. If you want to dismantle only the body kit, you will have to lie under the car to unscrew the 4 mounting screws, which is inconvenient.
When the element is removed from the car, it is easy to dismantle the amplifier and brackets and move them to a new bumper. There are no electrical wiring or lampshades here, so you don’t have to disconnect the battery or disconnect the connectors.
With the rear body kit removed, the condition of the steel body elements is clearly visible. If you find traces of corrosion, then there is no better time to remove it and touch up the paint. Pay attention to the condition of the side bumper mounting brackets; replace them if necessary. The element is placed back together with an assistant, the task is to simultaneously insert the studs into the holes of the arches. You can tighten the nuts and screws in any order; at the end, put the protection and wheels in place.
Photo instructions for dismantling
How to change the rear aero without any problems - video
For car service specialists, replacing bumpers on VAZ 2113–2115 cars will take a maximum of an hour. The owner of the car will need twice as much time to disassemble it independently, but will be able to save at least 2,000 rubles on the cost of work. Hence the conclusion: it is not advisable to contact a car service center with such questions, unless you do not have the required amount of time.
Carrying out work, checking dimensions, reworking
At the stage of work execution, it is quite important to control quality. This is due to the fact that mistakes made can lead to the unsuitability of the final result. It is recommended to divide all the work into several stages, after each one measure and check by applying the bumper to the car. In some cases, an error in maintaining the wrong dimensions can result in the work being done in vain. Particular attention should be paid to the correct placement of fasteners.
The final stage of work is puttying and painting. It is carried out after the bumper has been installed on the car and checked.
Tuning VAZ 2114 (Lada 2114 tuning)
When tuning a VAZ 2114, remember that there are certain standards, the change of which requires approval. Before starting tuning with your own hands, the car owner is obliged to contact the State Traffic Inspectorate with an application, which will detail all the changes that are planned to be made to the design of the car.
By decision of the traffic police authorities, a permit is issued, which specifies the conditions for registration and the procedure for issuing a certificate of compliance of the vehicle with safe operation techniques. In some cases (when the changes are too significant), a conclusion from specialists will also be required, who are required to attach technical documentation to the conclusion.
Upon completion of the technical work, the car owner is required to submit a declaration statement about the changes made, their volume and quality. In addition, the car owner presents the car itself for a technical inspection, after which appropriate changes are made to the registration documents.
When considering the issue of tuning a VAZ 2114 , it should be noted that this car is perfect for such an event. It reaches speeds of up to 200 km/h and is very easy to drive. In addition, for the “fourteenth” Lada, several ready-made package options have been developed, created taking into account different needs.
Tuning the VAZ 2114 engine
Tuning the VAZ 2114 engine is one of the key operations. In order to slightly increase its power, it is enough to simply reflash the control unit and replace some parts with sports analogues.
Taking into account such work, the output of the power unit can be increased by 10-15% compared to the standard version. To further increase the output, the cylinder head, gas distribution mechanism will have to be replaced and the valves will be bored out. And the most extreme way is to install a turbine on the Lada 2114 engine.
Another way to increase the power of a standard fourteenth engine is to replace the standard crankshaft with a new one, with an increased piston stroke, providing more torque.
Tuning the 2114 gearbox involves changing the gear ratios. Remember that a number of gears, as well as the final drive, should be selected based on the specific engine. And with the help of a self-locking differential, you can significantly increase the transmission of torque to the wheels, which will increase traction “at the bottom” during intense acceleration.
VAZ 2114 suspension tuning
It's no secret that when tuning the chassis it is necessary to adjust the suspension as stiff as possible, which requires replacing the standard shock absorbers with stiffer ones. To reduce roll angles, stiffer anti-roll bars should be installed.
In addition to tuning the VAZ 2114 suspension, we must not forget about the wheels. When choosing wheels and tires for the fourteenth, you should be guided by the operating conditions of the vehicle.
External tuning of VAZ 2114
External tuning of the four includes the installation of aerodynamic body kits, alternative front and rear bumpers, replacement of standard moldings, door handles, rear-view mirrors, as well as removal of the rear spoiler or replacing it with a more stylish one.
Of course, no tuning is complete without installing alloy wheels, of which there are a great variety available for the fourteenth Lada, and the replacement of standard rear lights with new ones, of which there are many offered in stores, has also become widespread.
The most radical external tuning of the 2114 with your own hands is achieved when the owners, on their own or with the help of specialists, modify the body parts according to their own program. For example, you can add air intakes to the hood or front fenders, or partially or completely paint individual parts in contrasting colors.
Tuning the interior of the VAZ 2114
Until recently, we could talk about window tinting, but with the adoption of technical regulations, requirements have been established: the transparency of the windshield and front side windows must be at least 70 percent, but the tinting of the rear and side rear windows is not regulated.
Tuning the 2114 interior may include replacing the standard front seats with sports ones, or simply more convenient and comfortable seats. LED lighting will help give the interior a stylish look, as well as tuning the instruments by replacing the original panel with an alternative one.
It is also possible to replace the standard on-board computer, install a GPS system in the center console, a quick-release coupling for the steering wheel, a braid for the steering wheel, and finally, you can lay down comfortable floor mats with a modern design.
Below is a selection of photos of white and black VAZ 2114, the tuning of which is the most popular. But the fourteenths and other colors are not deprived of attention.
Stages of making a bumper yourself
You can carry out the production of a bumper on a VAZ 2114, tuning yourself. You should immediately take into account the fact that it will take quite a lot of time to complete the work, and the cost of the final result due to mistakes may be higher than ready-made kits. Also, to carry out the work you need to have your own workshop, equipped with various equipment. There are several main stages of work:
- Formulation of the problem.
- Taking measurements.
- Creation of designs, drawings and specifications.
- Selection of necessary materials.
- Completing of the work.
- Checking the results of the work at each stage.
- Rework if necessary.
- Puttying and painting work.
- Installation.
Each stage should be approached with great responsibility. This is due to the fact that making a mistake at one of the stages can lead to very serious consequences. That is why you need to create a clear plan and follow it.
VAZ 2114 front bumper - how to replace
It was a day off and I decided to replace the bumper and removed it without any problems. But installing the new one took 2-3 hours. They installed it, it went in on one side, but it didn’t work on the other, I was still afraid that I might break the new one by moving it back and forth. I install the broken one, everything is fine, but the new one doesn’t fit at all as it should. In the end, I installed it and crawled under the car to twist the triangles (in the 4th photo), since there was no hole, I had to crawl under the car and wriggle like a snake. Fortunately, I was alone with my father; I wouldn’t have placed him alone.
How to remove and replace bumpers for a VAZ 2114
The appearance of your car largely depends on the integrity and condition of the body. But body elements serve not only as decorative parts of a car. They play a number of protective functions.
A striking example of a simultaneously decorative and protective body part is the front bumper. In case of collisions, the bumper takes part of the force of the impact and absorbs this impact.
A mistake many people make is installing a metal bumper. They believe that metal is stronger than plastic, so protection will be more effective. This is wrong. Metal can cause even greater harm to the driver in an accident. Therefore, choose exclusively plastic or synthetic bumpers.
Functions
The front bumper has three main functions that it performs:
- Decorative;
- Protective;
- Covering other elements of the car.
In addition to the front bumper that we see, there is a beam or reinforcement hidden behind it. It creates the necessary degree of protection that allows you to avoid serious injuries and damage in collisions. Therefore, if the front end was broken, you should definitely pay attention to the current condition of the amplifier. This will allow you to understand whether, in addition to the plastic lining, you also need to change the beam.
Reasons for withdrawal
In fact, there can be many reasons for removing the front end of your car. Everyone has their own views on this issue.
But let’s still name the main reasons why car owners most often turn to car services or decide to dismantle and even replace the front bumper on their own.
- The replacement was caused by damage to the element as a result of a collision or accident. The integrity of the structure is compromised, and driving with a broken front end is not particularly pleasant.
- Dismantling work with the subsequent return of elements to their place can be carried out due to engine repairs, when replacing the radiator and other components of the engine compartment.
- External modification in the form of tuning the front of the car.
- Replacement of headlights, installation of new optics.
- Installation of decorative overlays, mesh.
If the bumper is broken, then you have two ways to solve this issue - replace it with a new one or try to restore the old one. This largely depends on the desire and degree of breakdown of the previous element.
How to choose
When choosing a new bumper for the front of your car, you should adhere to several of the most important, but fairly simple rules and recommendations.
We will be happy to share them with you.
| Selection criterion | Peculiarity |
| Plastic thickness | Try to choose elements made from the thickest layer of plastic. This has a positive effect on quality and protection |
| Color | If you buy a bumper that is already painted, carefully match it to the body color of your car. If it's unpainted, then you'll have to guess with paint |
| Compatibility | Many people purchase body parts from other VAZ models or from foreign cars. For the 2114, many people call the Sniper bumper, designed for the VAZ 2115 model, ideal. Moreover, choose a design with holes for fog lights |
| Manufacturer | There are many companies producing bumpers today. But experts agree that native elements are best suited for VAZ |
| Price | The cost of domestic native bumpers is significantly lower compared to imported analogues. Moreover, the quality may be even higher than that of foreign models. The average price for a VAZ front end is 2000-2500 rubles |
An unpainted bumper is usually 500 rubles cheaper, but there may be problems finding suitable paint. Therefore, we advise you to pay a little more. AvtoVAZ produces elements painted exactly to match the colors of the cars they produce. Problems may arise here with foreign analogues.
Removal and replacement
Now let's talk directly about how to remove and replace the front bumper on a VAZ 2114 car. We advise you to first watch the training video, which will give you a visual idea of the upcoming work.
To work you will need a certain set of tools. It includes:
- A set of screwdrivers or a Phillips screwdriver;
- Open-end or socket wrench 10 by 8 millimeters;
- Head with a 13 mm collar;
- Free time;
- Pit or lift.
Clearly in need of restoration
On average, the replacement job takes about an hour. But if you are new to this business, then get ready to spend a little more on the procedure. Regardless of the time spent, you can save a lot on car workshop services. In addition, you can never be completely sure that specialists will do a better job than you could do with your own hands.
The sequence of work is now as follows.
- Unscrew the protection on the front wheels. To do this, remove three screws using a screwdriver.
- Move the protection aside and give yourself access to the inside of the bumper.
- Using a 10 mm wrench, unscrew the two mounting nuts located inside.
- Carry out dismantling work on the side of the second wheel in the same way.
- Remove the license plate. Everything is simple here. Unscrew two screws under the number and two more of the same screws in the windows just below the license plate.
- Using a little force with your hands, remove the front end.
- The assembly procedure is performed in reverse order. You can first repair the damaged bumper, or immediately install a new body element. The choice is yours.
Amplifier replacement
In the case of the front bumper, everything is very clear with the fasteners and their dismantling. But before installing a new body element, be sure to check the condition of the amplifier. If it is damaged, we strongly recommend that you replace the front end component.
To replace the amplifier yourself you will need:
- Remove the front bumper following the instructions above.
- Remove the two mounting nuts using a 13mm socket. In the case of the VAZ 2114, there are two such nuts on each side.
- Leave the adjusting washers on the studs.
- Unscrew the brackets located on the sides from the old bumper and install them on the new one. There are a total of three screws on each side.
- Adjust the new amplifier to the required height, set the gaps between the amplifier, fender and headlights. This is done through slits.
- Put the entire structure back together.
Obviously, removing the front bumper is not that difficult. This must be done if this element of the front part of the car is damaged. Operating a car with a damaged bumper can lead to serious consequences.
Reviews
Delivery of goods is carried out throughout Russia and the CIS:
1. Russian Post (from 350 rubles and above)
Delivery to all regions of the Russian Federation and CIS countries
2. Transport Companies (from 400 rubles and above)
Delivery throughout Russia and the Republic of Kazakhstan
- TK Energy (nrg-tk.ru)
- TC Business Lines (dellin.ru)
- TC SDEK (www.cdek.ru)
- TK PEK (pecom.ru)
- TK KIT (tk-kit.ru)
3. Pickup
The order can be picked up at the office at Tolyatti, 40 Let Pobedy 38, TD “Malachite”, 1st floor.
After dispatch, we send a tracking number to track the parcel.
Payment can be made in the following ways:
1. Payment to a Sberbank card
You can pay using the SBERBANK-Online application and other Bank applications.
After placing an order, making payment, do not indicate comments , we ourselves will understand by the amount of the order and the name of the sender. After receiving the funds, the status of your order will be changed to paid until 17.00 of the current day, or from 9.00 of the next Moscow time.
2. By bank card
Automatic acceptance of payments using MIR Bank cards, VISA International, Mastercard.
You can also pay with credit cards with a grace period.
To select payment for goods using a bank card, on the corresponding page you must click the “Pay for order by bank card” button.
2. Payment to QIWI wallet 89272115207
3. Payment on Yandex.Money 410013993950891
4. Cash on delivery of Russian Post (commission from 4%)
IMPORTANT! When sending by cash on delivery, RUSSIAN POST will take a commission for providing the cash on delivery service of 150-300 rubles, and the delivery cost also increases due to the evaluation of the goods.
Cash on delivery delivery is possible only within Russia.
ATTENTION! When choosing cash on delivery, the delivery cost is paid in advance before shipment, for the product itself upon receipt.
The amount of the order by cash on delivery should not exceed 5000 rubles; also, painted parts, goods made to order, covers, upholstery, door inserts, EVA mats, steering wheels, etc. are not sent by cash on delivery. (minimum 50% prepayment).
Be sure to save the payment receipt or a screenshot of the transfer.
The best guarantee of order fulfillment and quality is the feedback from our customers.
Reviews of our work can be found in our VKontakte group https://vk.com/topic-136384247_36675422?offset=180
We guarantee product quality, integrity and timely fulfillment of all requirements for the shipment of goods.
Source
Bumper amplifier VAZ 2114 - installation
Due to the fact that the old bumper was cracked in several places, and the amplifier was also cracked, we bought a new one. Since it is not expensive and is sold in color, with a painted stripe, and even with a one-year warranty on the paintwork. We decided to take one without holes for the PTF. Because there are plans to install PTF from Priora. We immediately took a net to install it in the bumper, so that all sorts of stones would not fly into the radiator.
The mesh is sold standard 100x25 cm. Cut a piece of it measuring 70x20. We try it on and bend it in the places we need.
WE also removed the mesh from the radiator grille trim, it was all rusty. And they painted it and the bumper mesh in the body color.
Next, we attach the bumper mesh with plates to the holes of the license frame (since we don’t have one) with self-tapping screws on one side, and on the other we simply bend it so that the mesh does not dangle.
The only thing left to do during installation is to screw it with two bolts into the holes securing the bumper to the amplifier.
Taking measurements
Designing a bumper for a VAZ 2114 tuning should begin by taking measurements of the installation site. The point that should be taken into account is that the project being created must be as accurate as possible: the design is carried out to scale, all dimensions are indicated.
The exact measurements should be very large. Before performing this stage, you should dismantle the old bumper, then check the body for defects, clean the surface from corrosion and debris. When measuring the body, the location of the mounting dimensions, vehicle clearance, its width and many other points are taken into account. To begin with, it is enough to note the main dimensions; additional ones can be obtained during the design.
