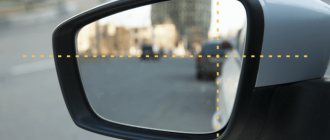
It often happens that the rear view mirror mount becomes loose and the mirror does not hold well or falls off (perhaps someone caught it while driving). It happens that the side mirror is broken or cracked - it needs to be replaced. The mirror angle adjustment drive may need to be repaired.
You can contact a car service center and they will attach the mirror in place. But if there is no service nearby, you will have to act independently. A rear-view mirror is extremely important on the road: the driver can monitor the situation on the roadway in the viewing area behind the rear fenders and rear bumper. Mirrors on different brands of cars are different: interior mirror and side mirrors, regular, folding, electrically driven and others. When removing and disassembling any mirror, you need to be extremely careful not to damage the mirror itself.
What is needed for disassembly
In order to disassemble the mirror, you will need the following tool:
• 2 flat screwdrivers (they are used to release the latches).
• A thin, long screwdriver and a piece of soft cloth (to wrap the screwdriver).
• 10mm star wrench or regular screwdriver with interchangeable bits.
Attention! It may take 15-20 minutes to disassemble one mirror.
How to remove a mirror
How to remove the electric side mirror (assembled):
1. Remove the triangular trim from the front door.
2. Disconnect the mirror wiring connector. Do not damage the mirror heating wiring!
3. Holding the mirror, remove the 3 mounting screws.
4. Remove the mirror assembly.
5. We install the mirror in the reverse order.
Removing the side rear view mirror with a mechanical drive:
1. Remove the mirror adjuster locking bracket.
2. Holding the mirror, remove the 3 mounting screws.
3. We remove the mirror.
4. Installation is carried out in reverse order.
How to remove a rear view mirror in a car
The most common option for fastening the rear view mirror to the windshield is 2 bolts. Such fasteners are found on domestic cars. To remove the interior mirror, proceed in the following order:
1. Remove the caps on the bolts (if any).
2. Holding the mirror, unscrew the mounting bolts.
3. Remove the mirror.
4. Wipe the area where the mirror meets the windshield with alcohol.
5. When installing the mirror, you need to make sure that the mirror “sits” in the same place (the spot on the windshield).
On a foreign car, the rear view mirror is glued to the windshield. To remove the mirror from the windshield, follow these steps:
1. We remove all the plastic plugs with our hands.
2. Moderately pull the mirror up (toward the ceiling).
Attention! Monitor the condition of the glued fasteners. If everything is done correctly, the mirror will remain in your hands, and the bracket (it cannot be removed) will remain in place.
Apply proper force (when pulling the mirror up). If you overdo it, the windshield may crack. If the mirror has already moved out of place (has come out of the runners of the bracket), and you are still pulling it with force, then you can accidentally cut through the upholstery on the ceiling with a sharp edge. On some car models there is a special lock in the form of a button (you need to press it).
How to disassemble a mirror, 2 ways
To replace a cracked mirror, you need to know how to disassemble a rear view mirror. You can only disassemble a removed mirror: it is both convenient and safe for the mirror itself. Disassembling a rear view mirror can be done in two ways:
• Having previously removed the mirror from the door or windshield. This disassembly method is safer for the entire mirror unit.
• Disassemble the mirror without removing it from its mounting location.
Attention! It is not recommended to do such disassembly without skills. Disassembling the side rear view mirror is quite feasible. But disassembling the mirror on the windshield is extremely undesirable: any clumsy action with a screwdriver will result in a crack in the windshield.
If you need to replace any element of the mirror unit, you will have to disassemble the rear view mirror. You can completely disassemble the rear view mirror (side or from the windshield) using the following diagram:
1. Use a hairdryer to warm up the body of the mirror (in the heat, the glue holding the mirror in place will soften and make it easier to pry off).
We recommend: How to choose tires for a car?
2. Using a wooden spatula or a flat screwdriver wrapped in soft cloth, we try to separate the mirror itself from the body. To do this, carefully (up and down) pry off the mirror with a thin tool.
3. Now we disconnect the mirror heating wires (there are 2 of them).
4. There are 3 bolts on the adjusting mechanism. They need to be unscrewed.
5. Disconnect the wires from the adjusting mechanism.
6. We put the adjusting mechanism aside. There are fastenings under the mechanism.
7. First, remove the rear top cover. The lid fastenings are made in the form of tongues. They need to be pushed towards each other. On the right side, you need to press the tongue to the side (push it outward).
8. Slowly and carefully pull the lid towards you.
9. Now disconnect the rear bottom cover. There is also a fastening tongue here. Press the tab with a screwdriver and at the same time use a knife (or flat-head screwdriver) to push the tab away from the back cover.
10. Carefully remove the back cover. To glue rear view mirrors, it is better to use chemically hardening glue.
Repair rules
The rules for repairing rear-view mirrors are the same for all types of mirrors:
• It is better to repair a mirror by first removing it from its mounts.
• It is safer to disassemble mirrors when they are removed.
• Before picking up and pulling out the mirror itself, warm up the body with a hairdryer.
• Do not press too hard on the mirror - it may crack.
• Be extremely careful when removing the mirror from the windshield (you may break the windshield or damage the upholstery on the ceiling).
• Do not make sudden movements when disassembling the mirror unit (the heating wires may be broken).
• If it is impossible to replace the broken part of the mirror unit, you will have to install a new mirror unit.
Did you know? To glue a fallen mirror back into place, you first need to remove the remaining old layer of glue. But before that, make marks on the outside of the windshield with a marker (the mirror should sit in its place).
Subscribe to our feeds on social networks such as Facebook, Vkontakte, Instagram, Pinterest, Yandex Zen, Twitter and Telegram: all the most interesting automotive events collected in one place.
| Rice. 8.49 . Disassembling the electric rear view mirror |
Press on area A of the mirror so that area B moves towards you (Fig. 8.49).
Insert a screwdriver into the slot and remove the glass from the base of the mirror.
| Rice. 8.50 . Rear view mirror components: 1 – exterior mirror glass; 2 – connector; 3 – cover; 4 – exterior mirror holder |
Remove the remaining components in the order shown in Figure 8.50.
| Rice. 8.51 . Disassembling the mirror housing |
Bend the ear of the mirror holder with a screwdriver, press the ear of the holder down and disassemble the body (Fig. 8.51).
| Rice. 8.52 . Installing a mirror into the housing |
Press the mirror into the body so that the pin does not move (Fig. 8.52).
Finally reassemble in the reverse order of disassembly.
Dismantling
You have decided to carry out dismantling work with your own hands and then reinstall it. The only question now is how to remove and disassemble the element, so that later everything can be returned to its place without any risks. In the meantime, glass replacement or another procedure will be carried out, depending on the specific situation.
To carry out dismantling work, you need to take:
- curved screwdriver;
- flat screwdriver;
- wrench to match the size of the fasteners;
- hair dryer;
- degreaser;
- rags;
- high-quality glue;
- some free time;
- clean garage;
- good mood.
Add to this set of tools a couple of skillful hands, and everything will go great.
As you understand, rear and interior mirrors are removed differently.
Work in the salon
Let's start with the interior design. A lot depends on what kind of car you are working with.
Automakers use different mounting systems. Therefore, start from the specific situation. So, for example, different fasteners are used on cars such as:
- Deo Lanos;
- VAZ 2110;
- Niva Chevrolet;
- Ford Focus;
- Renault Logan;
- Chevrolet Cruze;
- Lada Priora;
- Lada Kalina;
- Hyundai Solaris, etc.
Still, owners of inexpensive cars mostly do this work on their own.
And here you may encounter glue and suction cups, or bolts and screws. These are the most common installation methods.
Domestic cars mostly come with bolts. Therefore, it will be easy to remove the structure. The plug is removed, the key is taken and the fasteners are unscrewed.
But there are also brackets glued to the glass. Here you will first have to figure out whether it is actually possible to separate the fastening element from the glass. Most often, designers use clamps or rotating mechanisms. If this is not possible, you will have to remove not only the bracket, but also the windshield itself. The glue holds the element very tightly, and therefore it will not be difficult to damage the front cover.
We recommend: DIY tips for replacing the Granta liftback fuel filter
Please refer to the instruction manual. There you will probably find a hint on what exactly to do in this situation. Sometimes it’s better to visit a car service center, where specialists will do everything carefully and clearly.
Side dismantling
Everything is clear in the cabin. Now you need to dismantle the exterior mirror structure. Left or right, it doesn’t matter much here. What is more important is what type of design is used. The side mirrors are power driven. And it can be mechanical and electrical.
Almost any car is structurally designed to allow access to fasteners through the doors. You just need to remove the casing. Again, look in the manual for your car, since there are no universal instructions on this matter.
If you have a mechanical drive, then:
- The locking bracket of the existing regulator is removed;
- The fastening screws are tightened on the inside of the door;
- The mirror itself is removed.
In the case of an electric drive, everything is somewhat different. You need:
- raise the hood;
- find the battery;
- remove the negative terminal from the battery;
- disconnect the block with wires;
- remove the door trim;
- unscrew the mirror fasteners;
- remove element;
- rejoice at the result.
The last point is especially important. Know how to be enough for yourself even for small achievements.
Installation and fastening of rear view mirrors
Before you begin to independently repair and disassemble the external and internal viewing elements, you need to understand the principle of their fastening. The interior rear view mirror is mounted in the car interior above the dashboard. Depending on the type of design of the part, it can be installed either using special suction cups on the windshield, or mounted in the ceiling. In the latter case, the part is held in place by bolts or screws. Sometimes it can be quite difficult to unscrew them, especially if the fasteners are located above the ceiling trim. In such a situation, you will have to disassemble the entire roof of the car. It is especially difficult to do this if the car’s interior has previously had lighting tuning done.
External viewing elements are installed on the driver's and front passenger's door pillars closer to the hood of the car. On older cars, most of which are already recognized as rarities, exterior mirrors are mounted on the front fenders closer to the radiator.
Adjustment of viewing elements depends on the price range of the car. If the car belongs to the budget segment, then the mirrors can be adjusted exclusively in manual mode. If the cost of the car exceeded 20 thousand dollars, then its owner has the opportunity to adjust the mirrors either manually or remotely. By the way, it is in the latter case that the driver is forced to repair the viewing elements. This is due to the presence of fragile microcircuits that the manufacturer installs in the rear view mirror housings.
Important Details
Please note that sometimes it is not possible to disassemble the rear view mirror yourself. The latest generation Mercedes, Audi or BMW do not give such an opportunity to the owner. The mirror element separately from the body can only be found from a used disassembly, and it will not be cheap. Often only the assembled product is sold.
Some motorists try to perform work on mirrors without removing them from their places. You shouldn't do this. First of all, it's inconvenient. Secondly, the likelihood of damage to the car’s paintwork increases. For example, a screwdriver may come off while detaching a mirror element. If she scratches the body, it is very unpleasant. That is why, before disassembling the rear view mirror, it is recommended to first remove it from its mounts.
Removing the outer and inner rear view mirrors
Rear view mirrors are an integral part of the car. Even those drivers who have equipped their “swallow” with a monitor or camera cannot do without mirrors. Therefore, keeping them in good condition is the primary task of every car owner. Before moving on to the procedure for dismantling the mirrors, we will list the tools that we will need for the job.
Tools required for dismantling
- Phillips screwdriver;
- flat blade screwdriver.
How to disassemble an external mirror
It is advisable to dismantle the exterior mirrors in a certain sequence.
- Using a screwdriver, remove the locking bracket to which the mirror angle adjuster is attached.
The side mirror retaining bracket is removed using a Phillips screwdriver.
- Use the same screwdriver to remove the fastening screws. There are only three of them. Be sure to hold the mirror while removing these screws.
The screws holding the side mirror are unscrewed with a Phillips screwdriver
- After removing the screws, the mirror is removed. To do this, you need to slightly pull it towards you.
After removing the screws, the mirror is removed manually
How to properly remove the interior mirror
Changing the rear view mirror in the cabin is a little more difficult. Work must be carried out in the following sequence:
- The plastic plugs above the interior mirror mounting screws are carefully pryed off with a flat screwdriver and removed.
- The mounting screws are unscrewed with a Phillips screwdriver.
The mounting screws for the interior mirror are unscrewed with a Phillips screwdriver.
- The mirror is carefully removed.
How to remove a mirror from a windshield
Dismantling a glued mirror does not require any special skills. Proceed as follows:
- In some modern cars, the bracket with the interior rear view mirror is glued directly to the windshield. To remove it, you must remove all plastic plugs from the bracket (if any).
- After this, the mirror is turned counterclockwise with both hands and removed from the socket.
The glued mirror rotates 90 degrees and is removed manually
How to dismantle a mirror
They disassemble the mirror without removing it from the car: the two latches (red) need to be moved aside with a little force, then the guides (marked yellow) must be moved apart using a flat-head screwdriver. Such actions are carried out on four sides until the mirror “hangs” on the heating wires.
Now you need to remove the decorative trim and unscrew the three screws. After this, very carefully, shaking slightly so that the latch does not break, the mirror is removed.
You can start troubleshooting.
To remove the drive from the housing, just unscrew three screws.
Next comes the turn of the boot and the back cover, which need to be removed. Unfasten the connector.
We also remove the white part, relative to which the element holding the mirror rotates.
Now, in order to extend as much as possible, we move the drive to the side (shown by the arrow), connecting it to the connector on the door and again to the body.
One reason could be that part of the groove has broken off.
To eliminate such a breakdown, it is enough to use a dropper tube that has become “stiff” from petroleum products (gasoline).
We put the tube, with glue pre-applied on it, onto the broken groove and cut it in place. For a more reliable connection with the ball joint, blow on the tube with a hairdryer - under the influence of hot air, its upper part will narrow.
This is what it looks like.
Now all that remains is to reassemble everything carefully in reverse order. The drive is working.
Disassembly procedure
Once the structure has been removed, disassembly can begin. If it is required, of course. Perhaps you have found a new mirror whose price suits you completely. Then you can skip this point.
If it is necessary to disassemble an element, we start from whether it is internal or external.
The interior mirror is disassembled as follows:
- there is a place where the glass and the body are connected;
- spin is inserted;
- pressed with little force;
- a gap appears;
- use a mediator to pass along the entire length of the gap;
- the body is divided into 2 parts;
- the mirror is removed;
- everything else is located underneath it;
- We carry out the necessary work.
You may also need to disassemble the car side mirror. It doesn't matter whether it's left or right.
The task here is to remove the reflective element. Be prepared for the fact that the instructions below will not fit your specific car. There are cars on which everything is not quite like that. Sorry here, the guide is not universal.
But it is the following scheme that is suitable for most cars.
- Using a hairdryer, the area between the case and the glass is heated;
- Do not heat to high temperature. Use a household hair dryer on medium power;
- Use a flat-head screwdriver to separate the body into 2 parts;
- Sometimes it is necessary to bend the terminals;
- If you are afraid of damaging the mirror, wrap the instrument with electrical tape;
- On some cars you need to slightly press the mirror to the center and move it to the side;
- The glass is carefully removed;
- Remove the screw from the plastic frame, if there is one;
- Under the frame we see the entire mechanism;
- Use a screwdriver to remove the broken structure and replace it with a new one.
That's it, the work is almost completed. But since we disassembled everything and changed the necessary components, now we need to assemble the structure and install it back on the car.
Reassembly
I will say right away that the assembly is carried out simply in the reverse order of the previously carried out dismantling work. Therefore, I see no point in talking about this separately.
With mirrors on special mounting brackets, everything is also extremely simple. All that remains is to tighten the fasteners and fix the mirror on the ceiling or side of the car.
But what’s really more difficult is gluing a car mirror. To begin, choose the appropriate composition. Household superglue or double-sided adhesive tape will not work. Tested by many car owners. It's better to ask for the appropriate adhesive at an auto parts store. If found, for gluing you need:
- choose a warm and sunny day without high humidity;
- create a temperature in the garage of 25-27 degrees;
- remove all dirt and traces of old glue from the body;
- walk a little along the joint with sandpaper;
- sand the gluing area on the mirror;
- degrease all surfaces;
- Apply the required thin layer of glue to the holder;
- spray the purchased activator on the fastening area;
- attach the glass to the surface;
- press the mirror to the glass;
- keep as long as the glue manufacturer said;
- remove the remnants of the used activator and glue from your mirror and also the holder itself;
- put the entire structure in its rightful place;
- use as intended.
Reasons for mirror breakage
The most common reason for replacing rear view mirrors is the appearance of cracks as a result of impacts. First of all, this concerns external elements of visibility, since they are the ones who most often interfere with the movement of other road users. In most cases, both external and internal damage to side mirrors can be avoided by installing a special decorative film. However, this method will not always help out. Especially when it comes to a strong blow. Another reason for replacing external mirrors is deformation of the cables. To install new cables, you will have to completely disassemble the part.
We recommend that you read
- Adjusting car side mirrors
- Interior rear view mirror - improving visibility in the car
- Car mirrors – adjusting and repairing
The interior mirrors also fail. In most cases, failure is the result of frequent adjustments to the part. At the same time, when re-adjusting the element, the driver does not even suspect the damage.
In fact, you need to start repairing the mirror and try to disassemble it only when the part has deviated at least slightly from the previously specified position. If this happens, it means that the mounting legs have moved. They often come off completely and the driver can only notice this by looking closely at the windshield from the outside of the car.
Useful tips
You need to place a small piece of soft cloth under the spatula or screwdriver, this will help avoid damaging the outer part of the mirror.
When removing the mirror surface from the fastenings with a screwdriver, it must be wrapped with electrical tape. This reduces the risk of damage to other elements.
side rear view mirror
If the mirror was attached using glue as well, it is necessary to return this layer. It is important to use the correct, suitable adhesive. For these purposes, there are three types: chemically cured, light-cured, and epoxy compounds. The latter will work as it should only if it dries well. In other words, the part must be pressed in the desired state for ten hours. Light-curing adhesive mixtures must be exposed to ultraviolet light. It will require a lamp; sunlight is not enough. An adhesive mixture that has the ability to harden using chemical processes is ideal.
Common device problems
Let's look at a few troubles that every car enthusiast may encounter.
Peeling off the mirror surface
Sometimes this kind of trouble happens even on new cars. The reasons can be very different.
- the manufacturer decided to save money and used a low-quality adhesive;
- during the work, the master did not allow the glue to set properly;
- the mirror came unstuck due to too sudden temperature changes (and this is the most common reason, especially in frosty winter).
In all these cases, the car owner will have to use two-component glue, as shown above.
Glass replacement procedure
The mirror element of both the exterior and interior mirrors may be damaged. Below is the sequence for replacing it:
- The glass is removed from the mirror body.
- The new mirror element has several plastic hooks (in our example there are 4). These hooks are inserted into the mounting holes in the mirror body, after which you need to press very carefully on the mirror element.
The new mirror element is installed into the mirror housing manually
- A characteristic click will be heard, indicating that the plastic hooks have engaged and the glass has “settled” into place.
The procedure for replacing mirror elements in interior mirrors is similar to that given above (the only difference is that there are usually 2 plastic latches in the interior mirror, not 4).
Rear view mirrors can cause car owners a lot of trouble. But fortunately, most of these problems can be solved on their own. Removing and securing the mirror element can be done on your own. The main thing is to act as carefully as possible and do not forget that glass is an extremely fragile material.
Recommendations
Different car models may have different side mirrors. This means that before removal it is necessary to take into account individual design features in advance. In some cases, it will be necessary to remove decorative trims, panels, etc. Only after this will access to the screws securing the mirror housing be available.
When removing the mirror element, it should be taken into account that the space under the mirror element does not have to be “empty”. As a rule, modern cars have hidden adjustment mechanisms, turn signal indicators and other elements inside the mirror housing. For this reason, replacing a side mirror should be carried out taking into account the design features of the mirrors on the car.
Also, provided there is a heating function, a non-original mirror may take a long time to warm up, the heating zone may be limited (heating does not cover the entire area), etc. To avoid such troubles, experts recommend using only original mirror elements for replacement, even taking into account their higher cost.