About Matiz
05/22/201505/22/2015 HTC-Expert 1 Comment
Almost every car can have some flaws, and the mini city car Daewoo Matiz is no exception. This car has as many disadvantages as advantages. This article presents simple and useful improvements with which you can start transforming your car. Moreover, all of them can be completed independently - such modernization will not require any special skills or significant costs.
- 3 Cabin ventilation valve
- 4 Trunk space
Engine tuning
The Daewoo Matiz is a small car with good technical performance.
Depending on the configuration, the Daewoo Matiz is equipped with a 3- or 4-cylinder engine with a volume of 0.8 - 1 liters. Fuel consumption of Daewoo Matiz ranges from 5.0 to 5.5 liters. on the highway (speed 90 km/h), and in city mode 7.4 - 8.0 liters. per 100 km. If desired, you can tune the car engine:
- chip tuning;
- installation of tuned camshafts and drive gears;
- increase in cylinder displacement.
The last two points are possible when installing a crankshaft, connecting rods, and pistons from a Chevrolet Aveo, the engine capacity of which is 1.2 liters. The cylinders can be bored up to 1.2 liters, and the power will increase to 70 hp. With.
Optics, wheels, body kit
The optics of any car are its calling card. The installation of front tuning optics is completed in both the Angel Eyes style (angel eyes) and the Day Line style (LED eyelashes like the Audi R8). Tuning Matiz taillights is most often done using LED technology. It should be noted that all tuning optics on the market can be easily installed into standard connectors.
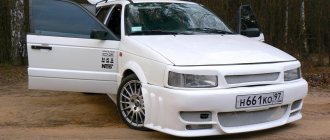
The most effective way to modify your car is to install an aerodynamic body kit, which includes installing rear and front bumpers, door sills, spoilers, a mesh for tuning the radiator grille, hood deflectors and much more.
Please note that these elements are made from a number of materials: fiberglass, polyurethane, plastic. A separate issue is the choice of wheels for a car.
When choosing wheels for a Daewoo Matiz, you must take into account the required diameter of the disk and its type (cast or steel). The main parameter when choosing wheels for Daewoo Matiz is the number of mounting holes and, of course, the diameter of the circle where they are located. Wheels with a diameter of R13, R14 are perfect, it depends on the year of manufacture of the car and its configuration.
Suspension
Installing a sports suspension on Daewoo Matiz from manufacturers from leading European companies (TA Technix, FK-Automotive, MTS Technik) will provide not only excellent technical characteristics, but also reliability and durability. Installing a proprietary suspension provides better vehicle stability and reduces body roll. You can also install a coil suspension on this car, which will allow you to change its characteristics to suit specific situations. In addition, some kits of this suspension provide adjustment of both the ground clearance and the degree of shock absorber stiffness. Springs lowered by 25 or 30 mm are easily installed on the “native” Daewoo Matiz shock absorbers. It should be noted that the springs not only emphasize the sporty character of the car, but also provide comfortable driving conditions for the driver and passengers.
As a result, thanks to such a popular car modification as auto tuning, you can create a unique car even from a modest compact car. Which will highlight the individuality of the owner and stand out from the crowd.
Let's sum it up
The car in question, the first and second generations, enjoyed great popularity for a long period. This is because it has a low cost and is also the most economical offering in its class. However, after purchasing this car, many people have a desire to modify the vehicle. Most often, changes concern technical issues and the interior, as well as the exterior. The cost of modifications depends on the type of materials used.
Different types of varnishes for different materials
How to distinguish original ngk candles from fakes
If you need to protect painted or new, untreated material with a transparent or colored varnish composition, you need to choose the right mixture based on what material will be processed. Varnish solutions are produced for wood, metal, stone, brick, plastic, and other materials. Next, the main properties of varnishes will be considered, based on what kind of material will be processed.
For wood
Matte wood varnish is used to emphasize and highlight the natural texture and pattern of the wooden product. In addition to its attractiveness, the varnish layer protects the wood, gives it strength and resistance to the harmful effects of external factors. A matte varnished finish, such as a wooden floor or furniture, will extend the life of the product and also preserve the original wood shade for a long time. The tree will be reliably protected from rot, fungi, mold, drying out and cracking. And if matte wood varnish is applied to a layer of paint, the varnish film will also protect the paint shade.
For stone, brick
Colorless varnish mixtures are specially produced for processing artificial and natural stone and brick walls. By varnishing these surfaces, they will be protected from destruction, chipping, and other damage. Certain types of varnish compositions create the effect of wet stone.
For metal
Varnishes are rarely used to coat metal surfaces. However, thanks to varnishing, the metal acquires additional resistance to moisture, water, chemicals, and oils. The product is strengthened and protected from rust and corrosion.
Universal
Nowadays, they produce a universal varnish with a matte effect; this composition is suitable for application to any type of surface. However, experts recommend using universal varnish mixtures only when the structure is made of different materials, for example, plastic, wood and metal. It is much better to use a varnish mixture that is individually suitable for the type of material. Among universal compositions, acrylic universal matte varnish is very popular; it is applied very simply and quickly, creating an even, protective, durable layer on the surface.
Accessories
Trunk net Universal
Mesh var No. 3 Bentley Style (closed honeycomb)
ABS mesh var No. 1 Honeycomb
Mesh var No. 2 Bentley Style (open honeycomb)
Adhesive tape “3M” (12 mm x 5 m) (acrylic double-sided adhesive tape) (packaging 130*130*12mm)
Adhesive tape “3M” (6 mm x 5 m) (acrylic double-sided adhesive tape) (packaging 130*130*6mm)
Adhesive tape “3M” (6 mm x 2 m) (acrylic double-sided adhesive tape) (packaging 105*105*6mm)
Adhesive tape “3M” (8 mm x 3 m) (acrylic double-sided adhesive tape) (packaging 130*130*8mm)
Adhesive tape “3M” (8 mm x 2 m) (acrylic double-sided adhesive tape) (packaging 130*130*8mm)
Adhesive tape “3M” (8 mm x 5 m) (acrylic double-sided adhesive tape) (packaging 130*130*8mm)
Adhesive tape “3M” (12 mm x 3 m) (acrylic double-sided adhesive tape) (packaging 130*130*12mm)
Primer "3M" 30 ml (adhesion activator)
Primer "3M" Cloth (adhesion activator)
Chip tuning
New amendments to the law on compulsory motor liability insurance, limiting the period for applying for payment under compulsory motor liability insurance Post navigation
In one of the trim levels, in particular MX, a gasoline power unit (0.8) with a capacity of 51 horsepower (3 cylinders) is installed under the hood of the car. Next to it are the power steering and air conditioning system. According to users, the small displacement in no way affects the driving performance of the car. However, will such parameters be enough for everyone to travel in a Daewoo Matiz?
Tuning (see photos of models in the article) for Matiz 0.8 is limited only to optimization, but for version 1.0 it is proposed to replace the crankshaft and pistons. Spare parts for Chevrolet Aveo will fit perfectly. You can install a camshaft, which will increase the torque. In short, for a tuning specialist, this model is the embodiment of a variety of ideas.
Switching octane number: using a jumper
This car of recent years of production can be filled with gasoline with different octane numbers:
- AI-92;
- AI-95.
Moreover, in the usual case, when the engine is configured to use 92 octane gasoline, the car can also be filled with fuel with a higher octane number. However, the increase in power is almost unnoticeable. However, if necessary, you can install a special jumper - it allows you to switch the electronic control unit (ECU) to the mode of using 95 gasoline.
You need to use a special “chip” - it is a three-pin connector. It allows you to select the desired octane number. After switching to 95 gasoline, consumption decreases by approximately 10%. You can use the following details:
| Manufacturer part name | vendor code | Cost, rubles |
| Genuine | 96210840 | 150 |
| Genuine | 96273781 | 170 |
The price may vary up or down. On sale you can find marked chips - they have special labels with marks for the type of gasoline. They look like this:
You just need to insert the one you need and calmly fill in the appropriate gasoline. An important point: in order for the electronic control unit to “understand” after installing the chip that a switch to a different octane number has occurred, you should temporarily disconnect the positive terminal from the battery. If necessary, you can install a special electronic component and connect such a switch to a special button.
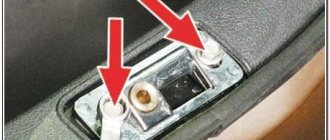
On newer Daewoo Matiz cars, the installation location is next to the electronic control unit.
On older cars, the place to install the switch is in the passenger compartment, under the panel, above the clutch pedal.
There are only 3 contacts. Switching is carried out as follows:
Tuning Daewoo Matiz
Peugeot 405 1.6 XU5JP Logbook New piston rings and repair of crankshaft thrust half rings
However, car enthusiasts who want to make their car stand out from others can easily get their Daewoo Matiz tuned. Since the car is very popular, which means that it is not so difficult to meet it on the roads, there are not so few people who want to change the Matiz.
If you already have at least a little experience in tuning cars, then tuning this model will not be difficult for you, and you will be able to carry out upgrades of any level of complexity.
It is best to do Matiz tuning yourself, so that you can avoid unnecessary costs for specialists in special tuning centers.
The appearance of the car is greatly influenced by the wheels. Stylish wheels will give the Daewoo Matiz some solidity. Selecting the right model of disks will not be difficult, since they are available in a fairly large assortment in stores.
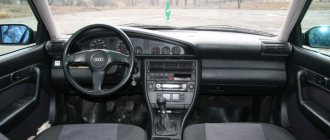
Tuning the Matiz interior
Both the driver and passengers want the interior of the car to be quite comfortable, so it is necessary to do tuning of the Matiz’s interior. To do this, you can replace the standard upholstery with upholstery made from the material you need. The interior can be upholstered in leather, which will give the car a more luxurious look, but it will be quite expensive. Therefore, many car owners prefer to use leatherette as upholstery.
Much attention should be paid to the color scheme. There are no special recommendations in this regard, but everything should be done quite harmoniously and stylishly
It is imperative to make high-quality sound insulation in the cabin by installing special sound-proof seals for this.
One of the most important parts of the interior is the steering wheel, so when tuning it is necessary to improve it. A sports steering wheel is perfect for Daewoo Matiz. Such steering wheels are often sold with additional devices and gadgets that will be very useful and make driving more convenient.
Body tuning Daewoo Matiz
Nothing changes the appearance of Daewoo Matiz more than body tuning. In order to perform tuning of Daewoo Matiz, you will need to purchase various plastic linings, which can be attached with special glue without any problems. Such linings will not scratch the interior of your car, and if necessary, you can easily remove them. You can give your car a more sporty look by installing new fender liners on your Matiz.
Tuning headlights Daewoo Matiz
The headlights of the Daewoo Matiz should not be overlooked either. To do this, you need to install additional lighting, as well as select new headlights. The car in its original form is equipped with oval headlights, which make the appearance of the car quite attractive and fit well into the overall design. The lighting from these headlights suits almost all car owners.
There should be no problems with choosing new headlights, since their range is quite wide. If you think that the car's standard lighting is not strong enough, you can enhance it with xenon lamps.
A set of tuned headlights will make the car original and set it apart from other Daewoo cars.
Daewoo Matiz engine tuning
Of course, tuning the exterior and interior is a very important task, but technical tuning is no less, and maybe even more important. Technical tuning allows you to improve dynamic characteristics, reduce fuel consumption, and increase driving comfort.
Any major change in the technical parameters of the car requires chip tuning. Chip tuning is a re-flashing of the electronic engine control unit, which leads to significant improvements in the performance of the car. Now chip tuning is done on all cars, including Daewoo Matiz.
After tuning the exterior, interior, and engine of the Matiz is done, you should definitely supplement the car with various accessories and little things that will make trips even more convenient and enjoyable. For example, one of these accessories could be a carpet for the interior. You can see how much this car can change in the Daewoo Matiz tuning photo.
- Tuning Mazda MX-5, photo of Mazda MX-5 interior tuning
- Tuning Daewoo Nexia with photo
- Tuning Ford Focus with photo
- Tuning Chevrolet Niva with photo
Interior insulation for increased comfort
After preparing the surface, you can begin the actual work. Among the features of such a procedure, the following points can be noted:
- First you need to prepare the material. The first layer to be laid is the one used to absorb vibration.
- When applying sheets of material, care is taken to ensure that it does not cover air ducts and other technical elements of the body.
- The wiring must be laid over insulating material, as in some cases it is necessary to replace it.
- Some insulation requires exposure to high temperatures. For this, a high-power construction hair dryer is used.
As a rule, there are no problems with carrying out such work. Various sharp objects can be used to divide the insulation into separate parts. When laying individual sheets, care must be taken to ensure that large joints are not formed. Otherwise, the effectiveness of the work performed is significantly reduced.
Photo gallery of matte nail designs
When you have mastered the technique of performing nail art, it’s time to move on to the most interesting part - the creative process of implementing nail design. We have collected for you the best matte manicure ideas for every taste. What design do you choose: light or dark, delicate or catchy, monotonous or with decoration – there are a huge number of options. To get creative inspiration, just look at stylish photos of matte manicure.
The top most popular designs are, of course, black matte manicure. This design has gained incredible popularity in recent years. Many girls are tired of glossy shine and are increasingly giving their preference to “anti-glossy” nail art. Black matte nails look very stylish. An important advantage is that this design is extremely versatile and can be used in completely different situations.
Turquoise, blue, lilac, violet and blue matte manicure look great in a monotonous design. Designs in blue tones are attractive and self-sufficient, but no one forbids you to further decorate your nail art. For example, purple and lilac nails are often complemented with gold designs, sparkles or rhinestones. You can see several options for a stylish blue manicure in the photo.
Red matte manicure is a romantic and passionate design. But, unlike gloss, nail art will be more elegant and not so flashy. If we talk about the palette, young girls really love pink and raspberry colors, while older women prefer wine shades of cherry and burgundy matte manicure. Take a look at the photo to see how stylish red, burgundy and pink nail designs look.
If you prefer nails in light shades, then pay attention to white and gray matte manicure. Both light and darker gray designs look very fashionable and are great for both strict business style and everyday wear.
To create cool nail art, you need to have certain skills when working with matte finishes of these colors. You can see what the result will be in the photo.
For those who like a warmer and more cozy design, there are brown and beige matte manicures. You probably know how great brown and beige colors combine with each other. This applies not only to the glossy finish, but also to the matte finish. Among the beige designs you can find incredibly delicate nail art that will add a touch of calm and completeness to your look.
We understand very well that there are girls who, despite the dullness of their nails, want to make the design brighter. There are green, yellow and orange manicures with gold or emerald notes for you. Bright nail art is quite compatible with matte nails. For example, on lush green nails you can apply gold glitter or add a few bright rhinestones. Want more brightness? Avoid monotony by adding drawings and additional decor to your design.
Our photo gallery ends with a design that deserves special attention - French matte manicure. The most popular French manicure in the world will receive a new round of development thanks to the move away from gloss towards matte. Matte French nails look chic; the design can be made in different colors, but black is considered the most popular. The combination of a matte nail base and a glossy smile line is an example of a reference design in modern nail art.
A matte nail coating can also be successfully used in a lunar manicure. Unusual nail art will make your image mysterious and enigmatic. In the next video, you'll learn how to give a classic retro design a fresh, modern twist. Always be on the same page with fashion trends.
Now you know another way to please yourself and surprise others. Try adding a new twist to your style. Believe me, your efforts will be appreciated. Are you ready for a stormy influx of compliments and admiring glances? Then enjoy the splendor and luxury of elegant design!
Body transformation
Among the external restyling of the model in question, the most popular are the following manipulations:
- painting the grille on the bumper;
- installing other disks;
- installation of mudguards, spoilers and other accessories;
- improvement of optics and turn signals.
Tuning a Matiz allows you to create a unique and one-of-a-kind car using external modernization.
The standard design of the car can be called “good-natured”. The model is equipped with expressive lighting elements that are combined with a “smile”-shaped bumper grille. If you add additional LED lighting, you can achieve an emphasis on this design solution. Power is supplied from side signals and is switched off if necessary. The expressive part of the car will look especially beautiful in the dark.
How to make a matte manicure with gel polish at home, step by step with photos
1) First, prepare your nails for applying gel polish. We go over the surface of the nails with buff No. 240, removing the gloss.
2) Next you need to degrease your nails. Allow the degreaser to dry for about 5-10 seconds. Then we apply ultrabond; you only need a little bit of it; as they say, we are “greedy” when applying it.
3) Next, cover the nails with base. We apply it in a thin layer and try to rub it into the nail plate with a brush. The base can be applied in two thin layers. The first one will be the connecting link between the nail plate and the gel polish system, and the second layer will be the basis for the gel polish system. We try to “seal” the edges of the nail every time. This way the surface of the coating will be solid and there will be less chance of chipping. You can easily wear this coating for 3 weeks, and you will only have to remove it because your nails have noticeably grown.
4) Each layer must be dried in a lamp.
5) I decided to do a French coating and make the nameless one completely black. So we apply beige gel polish for the jacket.
6) Next, draw a French pattern with a brush.
 Cover the ring nail completely with black and dry it in a lamp. Then we cover all the nails with a glossy top...
9) ... and apply a matte top coat to the nameless one.
10) Add some pebbles to the little finger to make the manicure irresistible.
11) After drying in a lamp, remove the dispersion, that is, sticky layer from the surface of the nails with a special liquid.
12) Soften the cuticle around the nails with oil.
This is the matte manicure I got. Of course, you could draw a pattern on the ring nail with a glossy topcoat or make a French manicure with the same topcoat, but it seems to me that it looks very good anyway.
This is what a manicure looks like in bright sunny weather.
Try it - you will like it too.
You can experiment a little and decide to paint all your nails black and make your thumb and ring finger matte. This option looks great too.
This is the manicure I got. Try it, I think you will like it too.
Good luck!
Trunk space
Another significant “minus” of a Daewoo car is the small trunk. What to do if there is sorely not enough space for various small things such as a pump, first aid kit, key, etc.? The answer is simple - turn the spare tire over, especially since it won’t take much time and effort.
Initially, you should prepare the trunk for transformations. To do this, you need to completely clean it, not forgetting to remove the ill-fated spare wheel from it. Now you can safely begin modernization. First of all, you will need to cut off the factory bracket used to attach the spare tire with a grinder. Next, you should cut the stiffeners and bend the upper edges at an angle of 90º to the middle.
Preparing the trunk
Then you need to select a stainless steel plate about 5 mm thick (it should fit between the curved edges). After this, you should bend the edges again and drill 4 holes with a diameter of 6.5 mm in them, change the drill to a larger diameter and make a chamfer. Next, you will need to install a plate between the homemade brackets and drill holes in it with a diameter of 5.5 mm, corresponding to the holes of the brackets, and cut threads into them with a 6 mm tap.
The plate must be screwed with 6 mm flat head bolts. Next, the spare wheel is placed with the disc down, and one of the holes in the disc should be on the plate. Use a marker to mark the center of the hole and then remove the wheel.
The only thing left to do is to drill a hole with a diameter of 10.5 mm along the mark, take a long 10 mm bolt, cut off a part of the thread 45 mm long from it, insert it into the plate and weld it. Then paint the entire structure, except the threads, and cover everything with a piece of rubber to avoid scratching the disc.
Spare wheel in a new place
In addition to the above modification methods, you can take care of engine protection, fender liners, daytime running lights, sound insulation and much more that does not give you peace or complete comfort.
Preparation and application
Before applying paint and varnish material, you need to carefully inspect the base. If there are defects, unevenness or cracks on it, then the surface must be leveled using putty or another mixture. Before applying the varnish solution, it is advisable to prime the base. If there are many defects on the surface, it is better to use a semi-matte composition, which helps hide unevenness.
The varnish mixture can be applied either to the base or to the painted surface. If the paint layer holds up well, then dust and dirt are simply removed from it, after which the varnish mixture is applied using a spray gun, brush or roller. You can also purchase the composition in an aerosol can. If the paint is old and already peeling, it must be removed using sandpaper or an electric sanding tool. Only when the surface is smooth, clean and dry can you begin varnishing. Experts recommend varnishing not in one, but in two or three layers, so that the protective layer will be as strong and durable as possible.
Deflectors
For Daewoo Matiz, it would be useful to install deflectors on the doors - plastic products that provide reliable protection from the powerful air flow that is formed when driving. Such devices are attached in two ways:
- using tape;
- using special latches.
In both cases, before installing the deflector, it is necessary to prepare the surface of a certain area of the car. To do this, wash it with soapy water and wait until it dries completely. If you choose a product that is fixed with tape, then you will also have to degrease the surface with a solution containing a high percentage of alcohol.
Next, you should determine the mounting locations: attach the deflector to the door frame and trace the outline with chalk or a pencil.
Experts recommend installing these products in the center of the frame located above the glass, as this position will create optimal air flow.
The next step is to remove the protective film from the tape, after which you can apply glue to it for a stronger fixation. The final stage is the installation itself: the deflector will need to be attached to the door, guided by the previously applied marks, and held for several minutes. If you used glue, it will take approximately 12 hours for it to dry completely.
As for the insertion device, it is mounted into a groove on the top of the door. It should be slightly compressed in the center and inserted into the place intended for it. After you open your fingers, the clamps that will firmly hold the deflector will automatically open.
Insertion device
Check and... Matt Black matte varnish from Divage... Or still not quite black
This polish was a pure coincidence; I bought it while standing in line at the checkout. The price is about 70 rubles, I was attracted by the cube-shaped bottle, matte, pleasant to the touch.
Shade No. 5601 looks black, but it turns out to have very fine blue shimmer. Of course, it’s a little different from what I expected, because I wanted black, but in the light it plays with the tints of dark blue. This gives it some depth, especially if you apply a top coat on top of the varnish and make it glossy rather than matte)
The brush is ordinary, medium, quite comfortable. You can buy a diploma on the website https://kupit-diplom.com.ua/ without prepayment
The varnish is not very liquid, but in 1 layer it applies very poorly, in stripes, and the nail is visible (all this can be seen in the photo).
The first layer dries very quickly, but I took 10 minutes to dry the 2-3, and then I smeared one nail.
But in 3 layers the coverage is perfect, the coloring is even.
After application, I do not recommend immediately changing clothes, washing dishes, etc., I personally take precautions and try not to touch my nails for about 20-30 minutes after application (I’m sitting at the computer, for example). If you smear the varnish, it will be very difficult to correct it, unlike glossy varnish (the flaws are more visible on it).
Yes, finally, it is better to apply it on top if the nail is not even, because... this varnish will highlight all the unevenness and chips much more than a glossy one.
Durability is good in my opinion. I don't wear polishes for more than 3 days, and it lasted 3 days without chipping, but the ends were a little worn.
Unfortunately, the matteness faded by the end of the second day, and the shimmer became much more visible. But I’m not discounting it because it still looks beautiful.
Plus, I had a Korean matte polish, and it also lost its matte finish after about 2-3 days, so this seems to be the norm.
So, varnish:
- inexpensive
- beautiful shades
- Requires a couple of coats of application
- It dries quickly in one layer, and takes longer in several layers, so do not apply in a hurry
- durability by 4
- matte does not last completely
I would give it a 4+, but there is no such option.
Still, I see no reason to lower the rating, the varnish is beautiful, not capricious, and the fact that it does not last ideally for a long time is not a problem for me, because I wear polishes no more than 3 days.
More reviews of polishes:
H&M 5-Pack Nail Polish - a set of five bright, juicy polishes
ETUDE HOUSE Ice Cream Nail Polish - ice cream-shaped polish, cute and delicate)
Sally Hansen salon effects varnish strips – snake manicure
Mavala - blue varnish, not the best
Eva Mosaic Fashion Color - budget, but very high quality, my favorite
SKINFOOD Nail Vita - Korean polish, amazing quality
ETUDE HOUSE PETIT DARLING NAILS POLISH ART MATTE - matte Korean varnish
Advantages
- beautiful colour
- low price
- looks original
- nice tube
- comfortable brush
Flaws
- dullness does not last long
- Some shades don't apply well
Onyria recommends
Improvements in Matiz
TUNING DAEWOO MATIZ. PHOTO REPORT
1.Installation of leather seat covers.
We contacted the B&M office mentioned in the forum on Dubnenskaya https://www.avtobm.ru/. We studied the range of products offered - we didn’t like it. We agreed that they would sew the covers from the materials we bought (they just refused the warranty). We found out from them where you can buy high-quality leather. https://www.confy.ru/ We bought the required quantity (1.5m) and took it to the studio. Installing the covers yourself is not difficult. A good assistant, a couple of pins, a little patience and 1 hour of free time.
We remove the seats and the plastic side panel (see photo 1.1).
Photo 1.1
We put the cover on the seat. We pull the lower edges down and towards the back, at the same time smoothing and straightening the cover with our hands so that it sits exactly along the contour of the seat (this is where an assistant is needed). We put the laces through the side. Turn it upside down. We pull the strings (see red arrows in photo 1.2) and at the same time tuck the excess seat fabric under the lace (see blue arrows in the photo). We smooth out the covers (so that there are no wrinkles) and tie the laces. We hook the elastic bands as shown in the photo.
Photo 1.2
We put on the back like this: put on the cover, carefully, smoothing it with your hands, put it on as tightly as possible (don’t overdo it and don’t tear it!!). We tie the ropes at the bottom. When tying, do not tighten too much, otherwise unsightly “constrictions” will appear around them. Do not try to tighten the backrest so that the holes coincide with the grooves for the headrest - this is almost impossible. The rear seat can be tightened quite simply. Again, when pulling the cord, be careful not to tear the cover. Another tip - carry out all work at a temperature of at least 20 degrees. The skin is more elastic and stretches better.
Photo 1.3
Finances:
1. Production 3000 rub. 2. Leather replacement 165 rub. 3. Beer 100-200 rub. Total: 3365 rub.
2. Covering the inside of the doors with velvet. (oval part of the Matiz MX door trim)
Material: velvet 1m/pg (for 4 doors), moment universal glue 3pcs, manicure scissors.
We remove the door trim and unscrew the panel with the power window buttons from it. We lay the trim horizontally, cut off a piece of material approximately 50x80cm, apply a thin layer of glue to the inside of the oval outline (the amount of glue is determined experimentally - it should not be abundant otherwise, when gluing it will come out through the fabric). Using four hands, carefully place the velvet on the adhesive surface at an angle (it’s better to start with a flat surface, and gradually lower the fabric to smooth it towards the convex part). The resulting folds must be carefully removed by stretching the fabric to the sides. Next, without wasting time, you need to cut off the excess parts of the fabric clearly along the hollow in the lining (this is where you will have to tamp the edges of the velvet), for this we use nail scissors, and slowly, we begin to cut off the fabric 1 cm at a time (you need to cut the fabric with an indentation of about 3 cm from the hollow). 5mm). Having cut off all the excess, we take a tube of glue and apply it to the inside of the hollow of the casing (try not to fill it entirely, otherwise, when pushing the material there, the glue will come out) and with the tips of the scissors we begin to compact the fabric (the procedure is quite tedious, but by the second door your hand will already be “ stuffed"). And finally, we cut out the holes for the door handle and the panel with buttons. We screw everything into place. READY. (When I first took up this task myself, I spent only 2.5 hours finishing four doors).
Photo 2.1 Photo 2.2
Photo 2.3
Finances: 1. Velvet – 400 rub. 2. Glue – 120 rub. Total: 520 rub.
3. Covering the internal pillars with velvet and leather.
Material: velvet/leather. 0.6 m/pg, universal moment glue, scissors.
We remove the plastic racks (6 pieces), to do this we unscrew the seat belts, and the racks themselves are held on by pistons - we pull them off. If you have an alarm LED on the front driver's pillar and it just won't come out, you'll have to bite off the wires from the diode and twist or solder them back in the future. We lay the stools horizontally, apply glue, apply velvet, cut off the edges with an indentation of 1-2 cm and turn it over to the reverse side. It takes about 1 hour. Covering each side is carried out according to the same principle. Only so that the glue does not corrode the rubber base of the leather. You will have to first coat the back side with a layer of PVA glue (it will serve as a primer), let it dry and get to work.
Photo 3.1 Photo 3.2 Photo 3.3
Photo 3.4 Photo 3.5
Finance: 1. Velvet 240 rub. / Substitute leather 66 rub. 2. Glue “moment” 80 rub. (PVA – 60 rub.) Total: max 320 rub.
4. COVERING THE ROOF WITH PLUSH OR VELVET
Material: fabric 2m/pg., liquid tape (glue) (see Photo 4.1)
Photo 4.1
Removing the roof takes about 10 minutes: unscrew the seat belts, pull off all the pillars, unscrew the ceiling handle, the visors and the interior lamp, take out all the pistons (you will have to tinker with the central ones, see Photos 4.2, 4.3), pull off the door seals. All. Carefully pull the roof out through the back door. To stick the material we use Aerosol Adhesive (as a rule, sold in large spare parts stores, such as “Rus”), if the material used is quite heavy - for example plush, then you need to add a couple of tubes of “moment” or purchase more expensive liquid tape. We apply the adhesive to both surfaces to be glued, if necessary, add a “moment” by squeezing the tube in an S-shape over the entire surface of the roof, apply the fabric, smooth it out and let it sit for about 4 hours. It will be better if you provide a load, for example: throw a bunch of pillows. Next, if you value aesthetics, you will have to paint each piston in the color of the future roof. This can be done with a marker or spray paint as required, but in any case you will have to splurge on varnish, otherwise the paint will fly off and the marker will rub off from your fingers. We cut out all the technical holes in the fabric. We screw everything into place and enjoy the beauty))
Photo 4.2
Photo 4.3
Finances: 1. Plush material 500 rub./velvet 800 rub. 2. Liquid tape 180 rub. / 480 rub. 3. Marker/paint 90 rub. 4. Varnish 90 rub. Total: max 1460 rub.
5. Painting the center console, the insert at the gearbox and the interior lamp.
Material: Degreaser-solvent (not the domestic WHITE SPIRIT!!! It dissolves the paint and does not degrease the surfaces. It leaves greasy stains) 1 pc., primer for plastic (spray) 1 pc., paint (spray) 2 pcs., varnish (spray ) 1 pc., 1 roll of masking tape, 10-15cm plastic tie – 2 pcs.
Photo 5.1 Removing the central console of the instrument panel: 5 screws, carefully but firmly pull the console towards you; when it is disconnected from the dashboard, you will need to turn off the 2 top buttons on the back side. Then unscrew the air duct nozzles.
Removing the insert from the gearbox: first, use pliers to cut off the tie that holds the gearshift knob housing on top. Next, use your index finger to hook the insert in the hole under the handbrake and pull it up; when the first latches come off, take the insert on the sides and swing it to the sides and continue to pull it up. Having removed the insert, unscrew the four screws holding the frame with the casing from the back side.
Removing the lampshade: use a slotted screwdriver to hook the plastic glass (see photo 5.2), find and unscrew two screws behind it, remove the lampshade from the roof and disconnect the terminals.
Photo 5.2
Preparation for painting: from the outside we seal the glass of the interior lighting lamp with masking tape, turn the edges of the tape over to the back side and insert the glass into place (this is necessary so that when painting we do not paint over the internal parts of the lamp, where the light bulb and terminals are located). We prepare the room for painting. This should be a clean room, without drafts and preferably with a minimum amount of dust and insects. We degrease the surfaces of the parts with a solvent, thoroughly rubbing it into the surface, repeat the process several times, this is important - otherwise neither the primer nor the paint will adhere and unpainted bubbles will appear. Arrange the prepared parts so that you can approach them from all sides without touching them with your hands. It is better to work alone in a room to avoid the movement of dust in the air.
Painting:
1. Apply primer for plastic, holding the can at a distance of about 80-90cm. (if you bring the can closer, the soil will fall too heavily on the surface and take longer to dry). It is better to apply the primer in two or three thin layers than to try to cover it generously with one layer. Wait for it to dry completely (15-30 min.)
Photo 5.3
2. The paint is applied in thin layers at a distance of 30-40 cm, with a break of 20-30 minutes. The number of layers varies from 6 to 10. Between painting 6-10 layers, you need to take breaks of about 1 hour, because in the aggregate of layers they dry much longer.
Photo 5.4
3. The varnish is applied only AFTER THE PAINT HAS COMPLETELY DRY! (if possible, you should start applying varnish only the next day, this guarantees the quality and durability of the future part). We also apply in thin layers, holding the balloon at a distance of 30-40cm. with a break of 10-20 minutes. If the varnish is applied generously, it can simply wash away even completely hardened paint, so there is NO RUSH HERE.
Photo 5.5
Recommendations: having no experience in this area, it is better to set aside two free days for the entire painting procedure, stock up on beer and kebabs, so as not to rush and not spoil your work.
Photo 5.6
Photo 5.7
Finance : 1. Solvent 60 rub. 2. Primer for plastic 240 rub. 3. Paint 190 rub. 4. Acrylic varnish 100 rub. 5. Painting tape 60 rub. Total: 650 rub.
6. Covering sun visors and gearbox
Of course, this is not a man’s job - you’ll have to use a sewing machine, although you can try.
Materials: velvet/leather. 0.5m/pg., plastic ties (a couple of pieces)
Remove the sun visors (4 screws). To remove the gearshift knob casing, we bite off the tie at the knob itself (see photo 6.1), pull out the insert from the gearbox in the same way as when painting, unscrew the four screws on the back side and disconnect the frame with the casing. Next, use a knife or screwdriver to bend the paper clips that attach the casing to the frame. To make a new casing and “covers” for the sun visors, you will need patterns; you will have to make them yourself. Getting a pattern for the gearshift knob is very simple - you need to rip open the old cover and attach the pieces to the material from which you will sew the cover. But you will have to work hard on the visor patterns.
The finished gearbox cover is placed on the frame (where the paper clips were) and sewn around the perimeter with regular threads. There are enough holes there. Don't forget about the plastic tie at the top of the case.
Photo 6.1
The visor case is similar to a regular soft glasses case. Only it is sewn under tension and then the edge is sewn up with threads (see photo).
Photo 6.2 Photo 6.3 Photo 6.4
7. Installing the ProSport tachometer in the air nozzle hole
Materials: plastic DVD box, screwdrivers, cutter, insulation, masking tape, black marker.
Tachometer ProSport 6.5 cm. tinted glass bought in the company store https://www.pro-sport.ru It is not on the site itself. You need to call and ask.
Photo 7.1
Removing the central console of the instrument panel: 5 screws, carefully but firmly pull the console towards you; when it is disconnected from the dashboard, you will need to turn off the upper buttons on the back side. Then unscrew the air duct nozzles and remove the air guide grille from the nozzle cylinder.
1. To secure the device in the left hole of the air duct, you will need to make a plastic insert between the tachometer and the nozzle cylinder (this is a kind of washer that serves as an adapter, into the inner part of which the tachometer itself is inserted, and with its outer edge it fits into the groove of the air duct cylinder). I made it from a black plastic DVD case. To do this, we apply the front part of the nozzle cylinder to the plastic and trace it along the outer contour with a nail. The result is a circle of the outer radius of the nozzle. Next, we retreat 1-1.5 mm into the inner part and cut out a circle with a cutter, then we adjust the part so that it fits neatly into the grooves on the outer part of the air duct. After this, you just need to cut a hole in the plastic for the tachometer itself, shifting it from the center. We insert the tachometer into the adapter made and wrap it with electrical tape so that it does not fall out, insert it into the nozzle and fasten it with screws. Then it is important that the device, while in the air duct nozzle, is not damaged by hot or cold air, so it is necessary to place a porous material (for example, a dishwashing sponge) in the free space behind the tachometer and then seal the back with several layers of masking tape.
Photo 7.2
Photo 7.3. Nozzle from the front panel. We cut out a plastic washer for it
Photo 7.4. This is what happened Photo 7.5. The washer should fit clearly into place Photo 7.6. We put the washer on the tachometer Photo 7.7. The washer should fit TICK.
Photo 7.8. We wrap several turns of electrical tape so that the tachometer does not jump out of the washer
Photo 7.9. This is what happened Photo 7.10. We lay porous material for thermal insulation Photo 7.11. Cover with masking tape and cut off the excess Photo 7.12. Color it in with a marker. Photo 7.13. Putting it in place
Photo 7.14. Disconnect the reel connector Photo 7.15. This is where you need to connect Photo 7.16. Pull off the rubber cap. there is a green wire underneath it. We carefully cut it and wrap (or better yet, solder) the wire, which we place in the corrugation going into the interior.
2. Connecting the tachometer. As a rule, the color policy of wires is the same everywhere. In my case it is: - green - to the reel - red - to “+” - black - to ground
Now, in order. The green wire is led from the positive terminal on the chassis into the passenger compartment through a hole under the steering column. When laying a wire in the engine compartment, it is advisable to stuff it into the factory corrugation (so as not to attract the attention of service technicians), and in the car interior to the installation site, it is better to attach it with zip ties to any accessible parts higher from the driver’s feet. The red one needs to be connected to the positive wire on the terminal block of the alarm button (brown with a white stripe), and the black one - on the same block to the black one. This way the device will turn on along with the side lights.
Types of varnishes by composition
Manufacturers add various components to the composition of varnish products; depending on this, matte solutions are divided into the following categories:
- hardening under the influence of ultraviolet light. This category mainly includes matte varnish for furniture and other wood products. The advantages of such compositions are non-toxicity, quick drying and high strength. Their disadvantage is that you need to have special equipment to dry such varnishes. Typically, these solutions are used in furniture manufacturing factories; they are rarely used at home;
- acrylic. These varnishes are very popular among consumers these days. The common matte acrylic varnish has a high strength index, it is resistant to solvents, and makes it possible to maintain the original shade of, for example, walls, furniture, or other products for a long time. Acrylic solutions can be applied indoors and outdoors; they are non-toxic, environmentally friendly and safe for humans. These varnishes are suitable for protecting various materials, including wood, stone, and even polymer clay;
- nitrocellulose. This variety is the fastest drying. No special tools are needed to apply matte nitrocellulose mixtures. Their disadvantage is poor resistance to humidity and temperature changes, so they are most often used for internal processing of products. Typically, painting with matte nitrocellulose-based varnish is not performed for treating floors or parquet; most often, these solutions are used to protect decorative products and objects;
- polyurethane. These mixtures are very durable and strong, and are used in finishing work performed at a professional level. Matte polyurethane parquet varnish is one of the best options for floor treatment. When choosing such a composition, you must carefully consider the shade, since after years of use the polyurethane may acquire a yellow tint. If you are choosing a matte varnish for parquet, it is advisable to first paint the parquet in the required color, and after the paint has dried, apply a matte varnish composition, without any tint.
Crankcase gas removal
Many Matiz owners have probably encountered the problem of the ventilation valve freezing in winter. Its consequences include, at best, knocking out the dipstick, and at worst, squeezing out the seals.
There are several ways to prevent this problem. One of them is to install a special ball in the tube going to the air filter. This is done in order to limit the supply of cold air to the valve in winter.
Some car owners make their own adjustments to this process, since many simply do not understand how to remove the inserted ball from the tube if necessary. That is why particularly inventive car enthusiasts cut the channel closer to the valve, insert a small piece of copper tube, thus connecting the ends of the cut hose, and in winter they screw a bolt into one end of the tube.
Connection example
Judging by the reviews, even such a modernization really helps: the dipstick does not knock out, and the valve does not freeze.
However, after a certain period of time the problem may appear again. In this case, most people wonder whether to remove the ventilation valve altogether, especially since there is plenty of information on how to do this on the Internet. The most common method includes the following steps:
- purchasing a hose with a length of 300–400 mm and an internal diameter of 10 mm;
- attaching one end of the hose to the valve cover, and the other to the air filter housing with a pre-drilled hole;
- hose plug at both ends (for this you can use a dispenser ball made of any elite alcohol);
- making a hole in the air filter (directly under the tube) to drain condensate;
- eliminating the resonator to take in warmer air and minimize the chances of the outlet tube freezing.
With this minor improvement, you no longer have to worry about the valve freezing. In addition, another advantage of this design is the protection of the throttle assembly from clogging. True, in this case you will have to replace the filter more often, but this is much easier than changing the seals.
Matte manicure ideas with glossy decor
Matte French manicure. The French jacket, beloved by many, will get a new variation! Cover your nails with a layer of shiny varnish
Carefully cover the smile line with special French stripes. Apply matte varnish to the free area
Once dry, remove the strip! You will get a delightful matte manicure with a shiny smile line! In a similar way, you can make a glossy base and a matte tip of the nail. If desired, you can create a reverse French in the same way!
Glitter patterns using tape. You can do other designs on your nails in the same way. Cover the surface with matte varnish. Apply strips of tape directly or diagonally to the dried nail plates, make horizontal or vertical lines, cut teeth on it, display a checkerboard field, divide the nail exactly in half, come up with other options. Apply a glossy varnish over the coating. Wait until it dries completely so as not to spoil the drawings. Get shiny patterns and lines on a matte surface! There are many different variations of a matte-gloss finish using tape. You can choose one of them or come up with your own. Feel free to experiment! After all, glossy designs on a matte background are now in trend!
Glossy stamping drawings. You can print shiny patterns on a matte background using a special stamp. Creating drawings takes place in several stages:
- applying a transparent base, two layers of matte base;
- choosing a pattern, coating the stencil with glossy varnish;
- transferring the design onto the nails with a special stamp.
Dots or tassel patterns. If you have artistic abilities, make your fantasies come true with a special manicure pen! Create simple zigzags, polka dots, geometric shapes. You can experiment with more complex designs.
If desired, the matte finish can also be decorated with other small details. Decorating with rhinestones, sparkles, liquid stones, gold or silver patterns will make the manicure more expressive and bright. This option will be perfect for evening wear on special occasions.
But on the contrary, a shiny coating can disguise all the flaws of the record.
And yet, women are not afraid of this feature of matte varnish, because it looks incredibly beautiful! Feel free to take on the task of creating a manicure, admire the impeccable appearance of your nails and get ready to receive compliments!
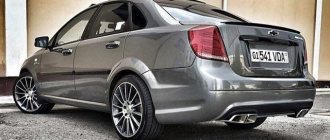
Restyling of the compact model
The most popular options for external tuning of Matiz are painting the bumper grille, turn signals and mudguards. In addition, the Daewoo owner has the opportunity to replace the standard optics, rims and install a spectacular spoiler. In a word, this model is an excellent platform for realizing all the driver’s wishes.
New spectacular spoiler
The standard design of the car was developed by the ItalDesign design studio. Its employees gave the car a “cartoonish” appearance, adding large expressive headlights and a “wide smile” bumper grille. A good restyling option would be to continue the design idea and install spectacular LED lighting on the car. To do this, you need to purchase a strip with additional bulbs and attach it to the front bumper. For secure fastening, you should use special suction cups. The LED strip is powered by Matiz side lights. Thus, as the evening approaches, your car will “smile” more and more brightly, attracting the attention of other drivers and pedestrians.
LED front bumper lighting
If you want to make the appearance of your car more aggressive, you can install new fender liners and plastic body kits. To do this you will need:
- glue;
- soap solution;
- degreaser;
- set of plugs.
First you need to clean and degrease the lower part of the Daewoo Matiz body. After complete drying, take plastic glue and apply a thick layer of it on the bottom of the body. Then we apply the body kits, trying to align them with the body until the glue dries. After this, we check the reliability of the fastening. If the body kits “grab” with the body, then take the plugs and insert them into the holes of the linings.
How to add matte to dye
Are there ways to make a matte varnish from a shiny glossy one? Craftsmen have come up with several ways to create matte varnish at home.
Polishing
This method is often used by car enthusiasts to give a new image to the car; it can be easily matted by polishing and using a glossy floor varnish. Polishing is applied immediately after the varnish for parquet or car body has dried. To cover the floor, you can use the usual polishing products for caring for parquet, and for the car body, it is recommended to purchase a car spray in a can and apply it as indicated in the instructions.
Gasoline use
It is possible to make a glossy varnish matte if you wash the surface with gasoline immediately after drying. But this method is inconvenient because gasoline is flammable and retains a pungent odor for a long time. If the floor varnish coated with gasoline has an alkyd base, the risk of fire increases. In addition, it is difficult to apply gasoline evenly, and the surface will have different shades of dullness after drying.
Adding chalk
Take a glossy regular varnish and add finely crushed chalk to it in an amount of 10% of the volume and mix thoroughly until smooth. It is not recommended to add more than 10% chalk, otherwise, wanting to create a super matte tone, you can only lighten the shine too much, and such a coating may acquire an ugly whitish tint after drying.
Applying a matte chalk solution can only be done with a roller or brush; the aerosol method is not suitable: chalk particles will quickly clog the spray gun nozzle, even if the composition is first filtered.
Use of fine rice flour
Rice flour, like chalk, removes gloss well and is used in the same proportion. Recommended for water-based paints and varnishes. For example, water-based wood varnish with rice flour has no shine after drying and looks silky velvet. Rice flour is also well suited for polymer clay compositions, giving decorative items made from this material a beautiful soft tone. If you don't like the color of the product, you can paint the polymer clay.
Using tooth powder
If you have a sufficient amount of tooth powder at home, then this is also a good way to make a matte tone from a glossy one. Tooth powder contains chalk and some additives. A composition made with tooth powder will cover the surface with an even layer due to the abrasive properties of the additives contained in the powder.
If various additives are introduced into the paint and varnish product, then it is necessary to determine how to apply them: if the aerosol method is acceptable for flour and powder, then if chalk was used, you can only use a brush or roller.
Giving various items a matte finish will help highlight their beauty and provide longer-lasting protection from adverse external factors. Or you can simply quickly update the interior of a room or the body of a car by applying matte varnish over gloss - the color will remain the same, but the walls, floor or car will look different.
We begin the transformation of the car in question
As previously noted, it is recommended to start upgrading the car in question from the technical part. Features of the work carried out include the following points:
- The standard shock absorbers are being replaced. Such a suspension element ensures vehicle stability on the road surface. Due to too much wear and for many other reasons, there is a possibility that the mechanism will no longer cope with the task, resulting in a significant reduction in controllability. In order to solve the problem, it is recommended to install versions from VAZ Kalina. This recommendation can be associated with the fact that the domestic mechanism is characterized by greater resistance to mechanical or other impacts. The procedure for replacing shock absorbers is quite simple; you need to lift the car on a lift or jack, and then unscrew several fasteners. To dismantle the required element, you will also have to remove the silent blocks. Thanks to this modification, it will be possible to safely drive over the bumps that are found everywhere on domestic roads.
- In order to make a small car more playful on the road surface, you need to consider increasing the power of the installed engine. An excellent modification option can be considered the installation of a compact crankshaft and piston from the more practical Aveo. The camshaft can be taken from a Ford Focus. Many specialists also replace the throttle valve along with the corresponding sensor. In addition, spare parts from Fiesta and Solaris are ideal for the car in question. Due to such modifications, it is possible to significantly increase the power and number of revolutions, however, it is practically impossible to do without chip tuning in the case of working with a 1.0 liter power unit. Changing the basic parameters of engine operation by introducing other coefficients optimizes all modes, increases the service life of the structure and its main characteristics.
- It is worth considering the fact that chip tuning can only be done on an engine with a volume of 1 liter or more. This problem can only be solved by purchasing a special chip, the cost of which is more than 5 thousand rubles.
- In some cases, incomplete chip tuning is carried out, but only optimization of the operation of some elements. An example is the removal of the air flow restrictor, which can significantly increase engine torque. This modification also includes a transition to AI-95 fuel. This is due to the fact that AI-92 contains too few benzene molecules, and when mixed with a large amount of air, the mixture may not turn out to be enriched.
Sidebar: Important: Each type of rework should be given quite a bit of attention. Problems may arise with the option of completely replacing the power unit, since there are a small number of similar products on the market
serj_atarov
We bought front springs for an OKA car, produced by Phobos, with variable pitch for 800 rubles. KYB Exel-G gas-oil shock absorbers were purchased. After installation, the opinion was twofold: it became tougher, but more comfortable. When they told me that this could happen, I could not understand how it could be. Now I understand and feel it.
So, in order: 1. Normal vegetable mode, with smooth movements in the flow - they go perfectly, softer than standard, minor defects in the road surface disappear. There are no shocks to the suspension at all.
2. Dynamic mode with sharp turns and sharp steering - they go well, the speed is a little higher, the turn is a little faster and the elasticity immediately increases. Nose-dive when braking has become significantly less, roll in corners has also decreased, but not as much as we would like.
3. Garage - yard mode (it’s quite large for me, it can also be called a country road) - it’s just great. There are no knocks in the suspension, little things are not felt at all, large bumps go over elastically, but if the speed is exceeded, it starts to throw, to be honest, and before replacing the springs I had never driven at high speed on a country road.
4. The track - at speeds of more than 90 km/h is absolutely delightful, if you turn the steering wheel a small degree, then the reaction is smooth, if you go around the pits, then you listen clearly, without hesitation and rolls to the side.
On a rough road surface, with small bumps and potholes, they walked as if on a flat surface, and my relatives could feel all this. When turning, the car stands still and does not fall to one side. Roll has decreased very noticeably, especially in deep turns. Previously, in sharp turns I thought: it will turn over or not, but now I’m thinking about pressing the gas and turning the steering wheel. In general, the control can be described as I read in an article about a Mini Cooper: I just thought about turning there and the car was already there. It became pleasant and easy to drive, as soon as I turned it, I got it.
There are of course also negative sides. Like two scales, softness is on one side, controllability is on the other. Fortunately, the scales have not shifted so much. And there are conditions for negative factors. If you exceed the speed on a bad road, it becomes very stiff; on standard springs it was softer. New crickets have appeared.
I want to dispel the myth about ground clearance. I didn’t measure the clearance at the rear, but the wheels behind the small ones do not hide in the arch; at the front, the clearance is 30 mm lower. I don’t catch anything anywhere with the bottom. I use protection to grab it in the same places where I grabbed it before, again foolishly. Everything else: ruts, snow, hillocks, descents, ascents, entry into garages, etc., are completely unchanged. So -30 mm in the front and somewhere around -50 mm in the rear without consequences.
Stiff springs back. Quite a long way has been covered from the moment the idea appeared to the final rollout, and obtaining an adequate result.
It all started like this At the Matiz club, someone said in half a word that they raised the back of the car a little by replacing the standard springs with springs from the nine. And then (as always) sleepless nights began for me.
The first attempt was to install sports lowered springs from the nine. This was perhaps the worst idea. Since the springs were so stiff that they practically did not work for their intended purpose, the bottom-up control was phenomenal. The next set was also not ideal. Since these were cooperative springs for front-wheel drive domestic cars, without designation for which ones. There is more softness, the handling is a little softer. Next, a friend at the tag gave me his springs. The springs were factory, but not original Tolyatti ones. Were installed. In principle, this was already good. The car drove smoothly, it was possible to load, and the handling was excellent. But as they say, the best is the enemy of the good. The last step was the acquisition of new, factory-made, rolled Togliatti springs for the VAZ 2199. Compared to all the previous ones, they turned out to be ideal.
With them on a bad road, the car goes just as smoothly as with the standard ones, but the roll in corners is several times less, the rear does not hang out behind the car, when loading the suspension does not sit on the bump stops but works normally, and this despite the fact that the rear is lowered by 50mm. In short, there are continuous advantages, despite the fact that no disadvantages were found!
There are still a couple of little things worth paying attention to. The upper rubber bands that stand between the spring and the body need to be replaced with an elastic band for the nine, it is thicker and more embossed. You need to put a rubber hose on the lower coil of the spring; a reinforced hose for the Zhiguli fuel system is ideal. With it, the spring is better centered in the cup, and does not make the slightest sound when driving.
To all the impressions described above are added the impressions of turns. So, Matiz can drive not only in a straight line! There are rolls, but not heaving like before, there is no danger of turning over, there are no drifts at all, the car clearly follows the trajectory. The rubber is held by my dear mother, on high-speed turns I was afraid that the levers would rip out with pieces of the body. The overload is not for children.
The Daewoo Matiz model is designed on the Tico platform, the production of which was launched back in 1988. The design of Matiz was developed in the ItalDesign studio. It is noteworthy that the studio initially planned to give the body created to Fiat. The compact five-door car Daewoo Matiz was promoted only in Western Europe. The first production model was shown at the Geneva Motor Show in 1998. The car was equipped with a 0.8-liter engine with a capacity of 50-56 horsepower, depending on the market in which it was sold. Initially, the car was equipped only with a five-speed manual transmission, but in the summer of 1999, models with automatic transmission began to be produced. In 2000, at the Paris Motor Show, the manufacturer presented an updated version of the Daewoo Matiz, which became taller and more spacious. In 2001, car production was launched in Uzbekistan. A year later, the car was modernized again, installing a 1-liter engine under the hood. At the end of 2004, General Motors decided to sell cars under the Chevrolet brand. This is how the Chevrolet Matiz model appeared on the market, known in Russia and in several other countries as the Chevrolet Spark. The car is equipped with 0.8- and 1-liter power units with a capacity of 52 and 66 horsepower, respectively.