Front bumper
On the VAZ 2107 model, both bumpers are supported by 4 brackets. Side fastenings are used for lateral connections to the car fenders.
Attention! To avoid damage (scratches, dents) on the fenders, replacing the front bumper should be carried out carefully.
Removal process
When dismantling the façade buffer, you must step by step perform the following sequence of actions:
- Secure the car so that it cannot move anywhere during repairs, or jack it up.
- The wheels must be turned in such a way that it is convenient to work when unscrewing the nuts on the side securing the buffer to the bracket.
- From inside the front wing, use wrench No. 13 to unscrew the bolt securing the buffer to the body.
- On both sides of the wheel arches, use a chrome wrench No. 22 to unscrew the nut holding the buffer to the body on the brackets. If you turn the nut, you need to hold it on the reverse side with a similar wrench.
- When finished, remove the bolt.
- To reduce friction on the rubber seals and prevent their wear, lubricate the brackets with a solution of soap or shampoo.
- Holding the bumper carefully with both hands, pull it out of the housing sockets with a “pull towards yourself” motion. The lubricated support tubes will slide out of the installation site with ease.
Procedure for dismantling
To disassemble the buffer, use a No. 13 wrench to unscrew the nut and bolt of the upper and lower fastenings of the tube connector and remove it from the bumper.
Unscrew the bracket bolts
After this, use wrench No. 3 to unscrew the 3 nuts holding the chrome trim.
Removing the decorative trim
To complete the disassembly, use a number 13 wrench to unscrew the nut of the side bracket and disconnect it from the main part.
Installation
Installation of the bumper is carried out according to the same scheme, but the actions are carried out in the reverse order, that is:
- The car is fixed;
- The disassembled bumper is being assembled;
- Everything is inserted into place and after turning the wheel or removing it, use a No. 22 wrench to screw in the bracket bolts on both sides;
- When everything is screwed down, you need to install the decor overlay in place.
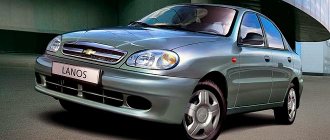
How to change the bumpers of a VAZ 2107 yourself
Traditional Zhiguli cars were equipped with unsightly bumpers of the old standard, protruding beyond the boundaries of the body. Unlike earlier models - the “kopek” and the “six”, the body kit elements of the VAZ 2107 have changed and began to look more representative. Long-term experience in operating the “Seven” has shown that standard parts can be improved using different methods or replaced with bumpers of a different shape. Moreover, the modernization and installation is carried out by the car owner without the help of others, without unnecessary calls to the service station.
Installation of tuning elements
The proposed modernization option allows you to change the appearance of the VAZ 2107 for the better by getting rid of the protruding standard buffer. Instead, a streamlined body kit of a different shape is installed, imitating a continuation of the body. During installation, factory fasteners are used.
List of more popular models of tuning body kits for the “seven” available for sale:
- PRESTIGE;
- SNIPER;
- ROBOT;
- VFTS from the ABS plastic brand.
The least expensive and time-consuming option is to install a “lip” from the bottom of the standard bumper - a plastic apron that protrudes slightly forward. The element covers the “beard” of the body, usually damaged by pebbles and corrosion, and also creates the appearance of a continuation of the body kit. Installation of the part is very simple - the apron is screwed to the car body with screws.
Refinement by strengthening method
Since the standard elements of the “Seven” began to protect the body only from minor damage, but did not gain any special beauty, many car owners will improve the bumpers by strengthening them with an iron insert. This is a metal profile - a corner 1300 mm long with a shelf width of 7 cm, metal thickness - 1.5-2 mm. For fastening, prepare 4 M8 bolts with nuts and the following tools:
- electric drill with a drill bit 8 mm in diameter;
- a set of spanners and open-end wrenches;
- pliers;
- hammer;
- aerosol lubricant such as WD-40.
READ Replacing rear arms Ford Focus 2 restyling
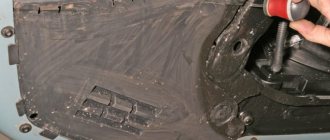
First, remove both bumpers from the car according to the instructions below. Take this opportunity to clean the parts from dirt and replace the shiny linings if they have become unusable. The black shine of plastic can be restored using a hair dryer - simply treat the surfaces with a stream of hot air.
Before unscrewing, treat all threaded connections with WD-40 aerosol, then wait 5-10 minutes until the lubricant dissolves the rust.
Installation of the amplifier is done as follows:
- Attaching a metal corner to the mounting flange of the bracket, mark and drill 2 holes in it. Place them closer to the edge of the profile.
- Secure the corner by inserting standard bolts through the prepared holes. Repeat the operation on the second bracket.
- Drill 2 pairs of holes flush against the outer shelf, using the removed body kit as a template.
- Screw the profile to both brackets using standard fasteners.
- the bumper to the corner with the prepared bolts and nuts. Since the buffer has moved forward, there is no need to install side mounts - just screw the standard bolts into the holes and tighten.
How to remove the front bumper on a seven
The dismantling of the device in question on the seven is carried out due to the need for repair or replacement. Repair, in turn, comes in two types: restoring the integrity of a part or modernizing it. To remove and disassemble the device on the VAZ 2107, you need to find out what it is. The photo below shows a diagram of the front bumper of the seven.
If the front bumper is removed and replaced, it is recommended to do this together with the front brackets. After removing the device in question, you can continue the disassembly process by removing the mounting fasteners. To remove it from the car, you will need the following set of tools:
- Spanners.
- A can of WD-40 lubricant.
- Metal brush.
- Soap solution.
When we have the necessary tools, we proceed to dismantling the part in question:
- To begin with, the steering wheel should be turned in one direction until it stops, unscrew the bracket (more on this below), and then do the same on the other side.
- Using a metal brush, you need to clean the bolts and nuts that secure the bumper mounts. They are located under the left and right wheel arch.
- Treat fasteners with WD-40.
- Using keys “22”, you need to unscrew the bolt and nut that secure the fasteners.
- Using the key on “13”, you unscrew the fastening of the plate, which strengthens the very edge of the bumper to the wing of the seven (many drivers, after repairing or replacing a part, do not screw this plate in – considering it unnecessary).
- Using a soap solution, you should treat the rubber bushing with it to make removing the bracket pipe more comfortable.
- After unscrewing all 4 bumper mounts on the VAZ 2107 , you need to grab it with 2 hands (preferably with an assistant) and remove it from the corresponding sockets in the body.
To separate the fastenings from the bumper, you need to unscrew the 4 fastening nuts to “13”. After disassembly is completed, the necessary manipulations are carried out, and then a restored, modernized or new body kit is installed.
Rear bumper
The main difference between the rear bumper is that the mounts are hidden by rubber seals. To remove it, you need to open the trunk and remove the upholstery.
Step-by-step dismantling instructions
Removing the rear buffer is carried out according to the following scheme:
- After opening the trunk, use a screwdriver to dismantle the rubber floor fastenings.
- Using a Phillips screwdriver, the entire trunk upholstery, made of plastic, is removed. After unscrewing the screws, you need to remove the cover and take out the spare tire.
Removing the decorative trunk trim
Unscrew the mounting bolts and remove the bumper from the car
How to put the bumper back
As in the case of the front bumper for installing in place of the rear bumper, similar steps are carried out in the reverse order. Before this, you need to carefully inspect the integrity of the rubber seals. If they are worn out they must be replaced.
Necessary tool
You can remove the buffer from 2107 using almost two keys (although it is advisable to have other tools). If it is more convenient for someone, then you can jack up the car. This will make it easier to get to the fastenings.
The complete list of required tools consists of:
- Keys for 8, 12, 22;
- Flat screwdriver;
- Phillips screwdriver.
A screwdriver is needed to remove the rubber seals.
Front bumper
On this model, the front bumper (as well as the rear) is supported by only four brackets. On the sides they are connected to the car body (with wings) using side mounts. Replacing the front bumper requires caution, since the side elements of the bumper can scratch the fenders.
Compared to previous models, the design of the 2107 (injection version) was slightly modified. The modified body kit is now a solid plastic element with a small metal insert on top.
Removal process
To remove the front protection, you need to follow simple step-by-step instructions:
- We securely fix the car so that it does not roll anywhere during the repair process. If it is inconvenient, you can jack up the car.
- Using a 13mm wrench, unscrew the nut of the decorative bolt and remove it.
- If you have not removed the wheels, then turn them in such a way that they do not interfere with your access to the nuts of the side fastening of the bumper to the bracket.
- In the wheel well, use a 22mm chrome socket to disconnect the nut that is held on the brackets securing the bumper to the body. If the bolt turns inside, you need to hold it with the same key on the other side. We take out the bolt.
- We carry out similar work on the other side.
- To prevent the brackets from rubbing less during the process, you can pre-lubricate them with a soap solution.
- We carefully remove it.
- If at first it was not possible to completely unscrew the decorative bolt, then we do it now.
- We take out the bolt and dismantle the bracket.
- Using a size 8 wrench, remove the chrome trim.
Installation
Installation occurs in the reverse order, after first removing the front bumper trim from the bumper.
- We fix the car.
- Let's put everything in its place.
- We turn or remove the wheel and use a 22mm wrench to tighten the bracket bolts on its side.
- We install the bolts and use a 13 mm socket wrench to tighten the nuts of the decorative bolt.
- When everything is screwed in, we put the decorative trim in place.
front bumper of a VAZ 2107 car - removal and installation
download photo to mobile phone
Contents: - maintenance and repair manual for the VAZ 2107 car
Section 27: - instructions, repairs, body structure of the VAZ 2107
| We remove the front bumper from a VAZ 2107 car to replace its parts or perform body repairs on the front part of a VAZ 2107 car. Removing the front bumper from a VAZ 2107 car 1. We prepare the VAZ 2107 car for operations (see “Preparation of the VAZ 2107 car for maintenance and repair”). 2. Using a 13 mm spanner, unscrew the nut of the decorative bolt of the side fastening of the bumper to the body bracket. 3. Remove the bolt from the hole in the front bumper. | 4. Turn the steering wheel of the VAZ 2107 all the way in the direction where the work is being done. 5. In the wheel well, use a 22 mm wrench to unscrew the nut of the bolt securing the bumper bracket to the body bracket, holding the bolt from turning with a socket wrench of the same size. We take out the bolt. 6. We carry out similar work on the other side of the VAZ 2107 car. 7. To reduce the friction of the brackets on the rubber seals when removing the bumper, apply penetrating lubricant or soap solution to the brackets. 8. Removing the pipes from the seals in the body, remove the front bumper. | 9. Using a 13 mm socket wrench with an extension, unscrew nut A and bolt B securing the bracket. 10. After removing the decorative screw with a chrome head, disconnect the bracket from the bumper. Similarly, remove the bracket on the other side. 11. Unscrew the three nuts with an 8 mm wrench and remove the chrome trim of the front bumper. Installing the front bumper on a VAZ 2107 car Assembling and installing the front bumper on a VAZ 2107 car is performed in the reverse order. |
car brands When using site materials, an active link to car-exotic.com is required!
Rear bumper
The main feature of the rear bumper is that the fasteners are covered with rubber seals. In order to remove it you will have to open the trunk and remove the door locks.
Step-by-step dismantling instructions
Removing the rear bumper is as follows:
- The trunk needs to be opened. Using a screwdriver, dismantle the clamps of the rubber floor and take it out.
- Now remove all the plastic trunk trim using a Phillips screwdriver. We unscrew all the threaded connections secured with self-tapping screws, remove the cover, and take out the spare tire.
- Now you can freely get up and unscrew the left bracket.
- Remove the fuel tank trim, loosen the clamps a little and move it a little to the side so that you can reach the bracket.
- Unscrew the fastenings
- Now we just remove the central brackets.
- Carefully remove the buffer. You need to gently pull it towards you until the pipes finally come out.
How to put the bumper back
Similarly with the front buffer, to put everything in place the process is performed in reverse order. Before installation, you need to carefully check the condition of the rubber seals. If everything is bad, then it is advisable to replace them.
Features of bumpers of various series
On other VAZ models (for example, VAZ 2105, VAZ 2104 and others), the protective elements resemble those installed on the 2107. The difference lies in the number of fasteners. There are only two of them. They are secured with special tubular reinforcements and brackets. The ends are removable. The elements themselves are made of synthetic materials.
Front bumper on VAZ 2107 - remove, repair and install
The front bumper plays an important role in the design of the exterior of any car. VAZ 2107 cars are also equipped with these devices, which not only perform a decorative function, but also protect the body in the event of a collision. The part in question is also called a body kit, and if repair, modernization or replacement is necessary, the front bumper on the VAZ 2107 must be dismantled.
About the design of the rear part of the VAZ 2107 body kit
The rear body kit on the seven has a similar design to the front, so its dimensions are also 160x20x15 cm. The device is made entirely of plastic, and on top there is a decorative chrome plated metal trim, which stands out significantly and emphasizes the contour of the car body.
This is interesting! The rear unit does not have a place to attach a license plate, which is the main difference from the front bumper.
Like the front, the rear bumper of the seven is necessary to perform the following tasks:
- Protects the paintwork from scratches and impacts. Such consequences may arise due to a collision with obstacles.
- Improving the appearance of the VAZ 2107 car.
- Protection of the body from dents and impacts in light collisions with other cars.
Design features of the seven bumper
The main distinctive feature of the front bumper on the VAZ 2107 is that they extend slightly beyond the side of the body, which is why they are also called “buffers”. This part has the following purposes:
- Improving the design and appearance of the car.
- Lateral protection of the corners of the front wings from light contact with obstacles. If such contact occurs, the body kit (plastic part) is damaged, but the body is not damaged.
- Protecting the body from damage in the event of a light frontal collision with obstacles or other vehicles.
The seven bumper is made of two types of materials - plastic and chrome-plated metal inserts. The predominance of plastic in the design of the front body kit contributed to a decrease in the protective properties of the element. The reasons for the predominance of plastic in body kit design are the following factors:
- Plastic looks more modern and elegant.
- The chrome trim remains to maintain design integrity, along with the chrome grille, door handles, window surrounds and velvet covers.
- Cheap and easy to repair.
The design of the front bumper has a special platform designed to accommodate a state license plate. The dimensions of the body kit are 160x20x15 cm, and the platform area has been increased in width by 50 mm.
How to remove the front bumper on a seven
The dismantling of the device in question on the seven is carried out due to the need for repair or replacement. Repair, in turn, is of two types - restoration of the integrity of the part or modernization. To remove and disassemble the device on the VAZ 2107, you need to find out what it is. The photo below shows a diagram of the front bumper of the seven.
If you are removing and replacing the front bumper, it is recommended to do this together with the front brackets. After removing the device in question, you can continue the disassembly process by removing the mounting brackets. To remove it from the car, you will need the following set of tools:
- Spanners.
- A can of WD-40 lubricant.
- Metal brush.
- Soap solution.
When we have the necessary tools, we proceed to dismantling the part in question:
- To begin with, you should unscrew the steering wheel in one direction until it stops, unscrew the bracket (more on this below), then do the same actions on the other side.
- Using a metal brush, you need to clean the bolts and nuts securing the bumper brackets. They are located under the left and right wheel arch.
- Treat fasteners with WD-40.
- Using wrenches “22”, you need to unscrew the bolt and nut that secure the brackets.
- Using the key “13”, you unscrew the fastening of the plate, which secures the very edge of the bumper to the wing of the seven (many drivers, after repairing or replacing a part, do not screw this plate in – considering it unnecessary).
- Using a soap solution, treat the rubber bushing with it to make removing the bracket pipe more convenient.
- After unscrewing all four bumper mounts on the VAZ 2107, you need to grab it with both hands (preferably with an assistant) and pull it out of the corresponding sockets in the body.
To separate the brackets from the bumper, you need to unscrew the 4 fastening nuts to “13”. After disassembly is completed, the necessary manipulations are carried out, and then a restored, modernized or new body kit is installed.
Installing the front bumper
When the repair or upgrade is completed, all that remains is to return the part to its place. Many car owners prefer to drive without a front bumper, citing the fact that it makes the car look more modern. Others prefer to install tuned body kits, which usually consist of plastic, or more precisely, fiberglass. With the updated part, the seven looks much better, but in any case, the bumper must be installed on the car correctly.
The installation is performed as follows:
- First you need to prepare places for installation and fastening. To do this, they must be cleaned and signs of corrosion and contamination removed.
- Attach the brackets to the body kit, and then install the finished product into the body holes.
- Secure the part using threaded connectors.
After installation, it is recommended to treat the threaded connectors with Litol or Solidol lubricant. This will increase the service life of the connectors. After replacement or repair, you can continue to enjoy the appearance of your iron horse.
Features of removing and installing the rear bumper on a VAZ 2107
The design of the VAZ 2107 car provides for the presence of a rear bumper that performs different functions. During operation, it is often subjected to mechanical impact from third-party objects on its plastic structure, which leads to the need for repair or replacement. How to remove and install the rear bumper on a VAZ 2107 is described step by step in the material.
About the design of the rear part of the VAZ 2107 body kit
The rear body kit on the seven has a similar design to the front, so its dimensions are also 160x20x15 cm. The device is made entirely of plastic, and on top there is a decorative chrome plated metal trim, which stands out significantly and emphasizes the contour of the car body.
This is interesting! The rear unit does not have a place to attach a license plate, which is the main difference from the front bumper.
Like the front, the rear bumper of the seven is necessary to perform the following tasks:
- Protects the paintwork from scratches and impacts. Such consequences may arise due to a collision with obstacles.
- Improving the appearance of the VAZ 2107 car.
- Protection of the body from dents and impacts in light collisions with other cars.
When mechanical impact is applied to the device, it becomes deformed. If this happens, then it is necessary to restore the integrity of the body kit, for which you need to find out the specifics of its removal.
Removing the rear body kit of the seven
The photo in the material shows what the assembled rear bumper on a VAZ 2107 looks like. It is in this form that the device is removed from the car. It should be noted right away that if you had to remove the front body kit, then removing it from the rear will not be difficult. The devices have absolutely identical fastenings, therefore the dismantling algorithm is the same.
The instructions for removing the part in question from the seven look like this:
- To dismantle, you will need to open the trunk and find both bracket fastenings located on the sides on the trunk floor. If there is a trough there, then you will need to get it out.
- First you will need to unscrew the fastenings of the brackets, using “22” wrenches.
- If the connections are dirty and cannot be unscrewed, then they must be cleaned and treated with WD-40 lubricant.
- After 5-10 minutes, unscrew them on both sides, and then pull the bumper towards you, removing the brackets from the bushings. Remove the device by disconnecting it from the body.
- The fasteners are also removed from the body to clean them or replace them if necessary.
After removal, you can begin repair, modernization or replacement. If necessary, the brackets can be detached from the bumper structure by unscrewing the four nuts.
Self-installation of the bumper
After removing the part in question, various manipulations are performed - repair or modernization, restoration of integrity or replacement. Buffer tuning is very popular, which allows you not only to improve the part, but also to transform the appearance of the seven.
If you are replacing the rear bumper, you must do the following:
- Clean the holes in the body, as well as the places where the brackets are fixed.
- Attach the brackets to the part being installed, and then proceed with the installation in the reverse order of removal.
- Secure the part using threaded brackets with a key “22”.
- If you cannot fit the rubber bushing into the hole, it is recommended to treat it with a soap solution.
So that next time you don’t have to spend a lot of time breaking fasteners, it is recommended to treat them with lubricants such as Litol or Solidol. If you plan to paint the chrome trim, then it is not at all necessary to remove the bumper from the car to do this. You can try to remove it by reaching the nuts securing it to the bumper, which are located inside the bumper. Paintwork manipulations can also be done using fabrics or paper, using them to cover the plastic part of the part.
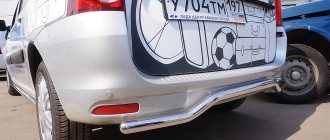
Self-tuning of the VAZ 2107 bumper
Car tuning is about improving its aesthetic or technical characteristics. Tuning the bumper of a VAZ 2107 car is one of the most common ways to give an individual appearance to your “seven”. Modifying bumpers does not require special skills or expensive equipment, therefore, very often, car owners do everything with their own hands. This includes the creation of new parts from fiberglass, foam plastic and plywood, as well as the modification of a standard bumper.
Refinement of the bumper first begins with its removal from the car.
Removing the bumper
To remove the front and rear bumpers from the car, you only need spanners.
The front bumper is dismantled in the following order:
- turn the steering wheel all the way to one side;
- unscrew the bracket nut that holds the bumper on the side where the wheels are turned out;
- remove the fastening bolt;
- turn the wheels the other way;
- unscrew the nut and remove the fastening bolt;
- free the bumper from the decorative bolts securing the side parts of the bumper;
- remove the decorative trims and dismantle the bumper from the car.
Removing the rear bumper is done in the same way. There is only one difference - there is no need to turn the wheels to unscrew the nuts of the supporting bolts.
Removing the rear body kit
The algorithm for disassembling the rear buffer completely repeats the removal of the front part, since the mounting method is the same. Accordingly, identical tools are used. Two internal connections are unscrewed on each side, then the element is removed from the bushings.
There is one difference in dismantling the rear bumper - the wheels do not turn, and access to the bolts and nuts is difficult. The problem can be solved in two ways - by removing the wheels one by one or by unscrewing the fasteners from the inspection ditch. If the threads are heavily rusted, it is preferable to use option one.
Video: how to improve the rear buffer
Since the era of the “classic” VAZ is gradually becoming a thing of the past, the production of spare parts for the Zhiguli is declining. Factory bumper assemblies are sold on the market and in car stores, but chrome trim is becoming more difficult to find. This creates the need to repair and paint existing parts; buying tuning body kits is unacceptable for many car enthusiasts.
source
Tuning the standard bumper
The front and rear bumpers of the VAZ 2107 are not very durable if you compare them with the earlier range of VAZ models. The plastic base with a chrome trim does not look particularly attractive and will not withstand a blow even in a light collision. By inserting a metal L-shaped profile, you can strengthen the structure. To do this, cut a piece of the profile to the required length, drill holes in it and bend it slightly so that it follows the shape of the standard bumper. Next, we insert the amplifier into the inside of the standard bumper and attach it to standard mounts. To avoid corrosion, the amplifier must be coated with paint.
An aerosol can of dark-colored paint is suitable for painting. The paint is sprayed evenly and will not leave streaks or drips on the surface.
This modification can be done for both the front and rear bumpers. With this modification, you will get a durable bumper that will not break or bend in minor collisions.
For more radical changes and to achieve an original appearance, you can make a new bumper yourself.
Making a bumper yourself
A tuned bumper can be made simply and quite cheaply from fiberglass. The individual design of your bumper can be made from plywood, parts of this design are connected together with glue or plaster putty, and foam plastic, or you can use programs for creating 3D models.
To make a bumper with your own hands you will need polyester resin and fiberglass or glass mat.
Pieces of fiberglass are laid on a matrix made of foam plastic or plywood, layer by layer, and they must be impregnated with polyester resin with a thickener, which will connect them into one.
Important: work must be carried out wearing a protective mask with an air filter and rubber gloves.
The thickness of the fiberglass should be selected based on the shape of the surface. It is better to make bends and small parts from a thin layer; a thicker glass mat will produce a more durable structure. For the manufacture of bumpers, glass mat with a density of 300 grams per m2 is most often used.
The bumper is made of several layers of fiberglass. The first layer must be laid very carefully, intensively impregnating it with resin. The inner corners are laid out with thin strips of slightly thickened resin, and the laid fiberglass is compacted with a flat brush. After the first layer has been laid, it should be left for a day to harden. After the first layer has hardened, it needs to be sanded with coarse sandpaper.
The next step is to apply two more layers of fiberglass, heavily impregnated with polyester resin. After 24 hours, after the resin has hardened, the bumper can be removed from the model. The finished bumper should be treated with polyester resin to create a smooth surface.
Do-it-yourself bumper tuning is complete. All that remains is to paint it with a spray can or spray gun and cut holes for fastening.
How to remove the front bumper on a VAZ 2107
A bumper, or as it is also called a buffer, is not only a necessary measure to protect the car body, but also its airbag. That is why they are not made as durable as many people think. When involved in an accident, their main task is to absorb the energy of the impact.
If you are the driver of the good old seven, then you will need information on how to remove the front bumper on a VAZ 2107.
You can remove the buffer from 2107 using almost two keys (although it is advisable to have other tools). If it is more convenient for someone, then you can jack up the car. This will make it easier to get to the fastenings.
The complete list of required tools consists of:
- Keys for 8, 12, 22,
- Flat screwdriver,
- Phillips screwdriver.
A screwdriver is needed to remove the rubber seals.
Replacement and disassembly of bumpers of a VAZ-2107 car
Car bumpers (buffers) are not only protection for other parts of the car, but also a kind of airbag.
Therefore, car bumpers are generally not very durable. In the event of an impact, they must soften the blow and protect the driver of the car, as well as the pedestrian.
With various frontal impacts, the bumper is crushed.
Replacing the front bumper
We hang out the front of the car. We recommend removing the front wheels.
From the inside of the front fender, use a 13mm wrench to unscrew the bolt for the side fastening of the bumper.
Holding the bolt securing the tubular connector of the bumper to the bracket with a 22mm wrench, use a second same wrench to unscrew the nut and remove the bolt from the hole.
In the same way, unscrew the two bumper mounting bolts on the opposite side of the car.
We remove the bumper from the car using a “toward” motion
We install the bumper in the reverse order, having first removed the rubber seals from the bumper and installed them in the holes of the body.
Front bumper
On this model, the front bumper (as well as the rear) is supported by only four brackets. On the sides they are connected to the car body (with wings) using side mounts. Replacing the front bumper requires caution, since the side elements of the bumper can scratch the fenders.
Compared to previous models, the design of the 2107 (injection version) was slightly modified. The modified body kit is now a solid plastic element with a small metal insert on top.
Removal process
To remove the front protection, you need to follow simple step-by-step instructions:
- We securely fix the car so that it does not roll anywhere during the repair process. If it is inconvenient, you can jack up the car.
- Using a 13mm wrench, unscrew the nut of the decorative bolt and remove it.
- If you have not removed the wheels, then turn them in such a way that they do not interfere with your access to the nuts of the side fastening of the bumper to the bracket.
- In the wheel well, use a 22mm chrome socket to disconnect the nut that is held on the brackets securing the bumper to the body. If the bolt turns inside, you need to hold it with the same key on the other side. We take out the bolt.
- We carry out similar work on the other side.
- To prevent the brackets from rubbing less during the process, you can pre-lubricate them with a soap solution.
- We carefully remove it.
- If at first it was not possible to completely unscrew the decorative bolt, then we do it now.
- We take out the bolt and dismantle the bracket.
- Using a size 8 wrench, remove the chrome trim.
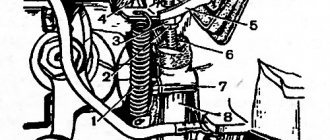
Front bumper VAZ 2101 and its mountings
- bumper
- side bracket
- bumper mounting strut
- right bracket
- rubber compressor
- bumper cover
- bumper buffer
To remove the front bumper of the VAZ 2101, unscrew the nuts of the bolts securing the linings 6 with the bumper and bracket 4, and the bolts securing the side brackets 2 to the body (see figure above).
On VAZ 2106, 2121 and 2104, 2105, the ends of the bumpers are removable, made of synthetic materials. The bumpers themselves are attached to the body at only two points, and depending on the car model, they are attached using brackets and tubular reinforcements.
On VAZ 2107 and 2104 cars (latest years of production, injection models), the design of the bumpers has been changed. The modified bumper is a single piece made of plastic with a metal insert in the upper part.
Rear bumper
The main feature of the rear bumper is that the fasteners are covered with rubber seals. In order to remove it you will have to open the trunk and remove the door locks.
Step-by-step dismantling instructions
Removing the rear bumper is as follows:
- The trunk needs to be opened. Using a screwdriver, dismantle the clamps of the rubber floor and take it out.
- Now remove all the plastic trunk trim using a Phillips screwdriver. We unscrew all the threaded connections secured with self-tapping screws, remove the cover, and take out the spare tire.
- Now you can freely get up and unscrew the left bracket.
- Remove the fuel tank trim, loosen the clamps a little and move it a little to the side so that you can reach the bracket.
- Unscrew the fastenings
- Now we just remove the central brackets.
- Carefully remove the buffer. You need to gently pull it towards you until the pipes finally come out.
How to put the bumper back
Similarly with the front buffer, to put everything in place the process is performed in reverse order. Before installation, you need to carefully check the condition of the rubber seals. If everything is bad, then it is advisable to replace them.