Wing arches vaz 2110
All national cars, objectively speaking, are not made using advanced technologies and innovative production methods. A distinctive positive feature of cars from the national automobile industry is their fairly low cost and average quality. However, there are also disadvantages, in particular, the wing arch of the VAZ 2110, which over a short amount of time is subject to severe corrosion and this, in turn, causes its active rotting. Subsequently, it partially or completely disintegrates. The arch of the rear wing of the VAZ 2110, like the front one, can be replaced with your own hands, although this will require time and effort.
General information about the structure and functional purpose of car arches
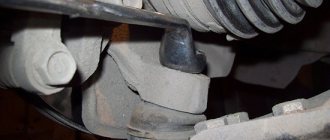
Arches on the wings of the VAZ 2110
Many motorists mistakenly believe that car arches are part of the overall decor and do not have any functions. In fact, this is not the case at all, because each element of the car performs a specific function. Main functions of the wing arch:
- protection of the wheelbase from external influences;
- is part of the body, maintaining its integrity;
- is a partial fastening element of a car, etc.
Reasons that violate the integrity of the car wing:
- low quality of the base alloy of the arch;
- improper manufacturing installation or replacement;
- rare use of anti-corrosion metal protection agents;
- passive care, etc.
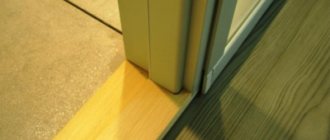
Arches for wings of VAZ 2110
And indeed, in practice everything looks very different than it might seem in theory. Most motorists, when they notice visual arch rotting, do absolutely nothing. They motivate their actions by the fact that when it completely falls off, they will simply change it. To begin with, it is objectively necessary to understand the negative consequences of replacing the arch:
- additional economic costs, and quite significant ones at that;
- installation complexity due to a number of specific features;
- multiple losses of time for forced repairs, etc.
Note. The anti-corrosion substance costs a small amount of money, and its constant use can extend the service life of the arches by at least 2-3 times. Prevention is always better than complete replacement later.
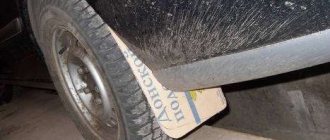
Wing arches of VAZ 2110
If traces of rust are visible visually on the car's wing arches, then this rust must be cleaned off and then coated with an anti-corrosion substance. This can significantly extend the final service life.
Note. It is possible to carry out restoration work on arches if they have local rather than general damage in the form of rotting. If there is an extensive corrosion process, then the only and most rational option would be to completely replace all damaged car arches.
Replacing the wing arch if necessary
Arches wings vaz 2110
Before you begin the actual arch replacement procedure, you must first make all the calculations and take the necessary measurements. Taking measurements:
- first you need to assess the extent of damage;
- then, the new contour of the arch must be attached to the old one;
- after the damage to the old contour, circle and make the corresponding marks on the new one;
- after which it is necessary to analyze the obtained measurement data in detail and briefly outline the general scope of the upcoming work.
Dismantling
Before the practical opportunity to install a new arch presents itself, it is necessary to properly dismantle the old one:
- First, the old arch is removed by cutting out the rotten part along a previously drawn line.
Note. It is possible and necessary to carry out any work on dismantling the arch only if the working surface is dry and does not even contain any traces of moisture.
- then, along the pre-drawn cut line, it is necessary to remove the rusted part of the arch using fortune.
Note. Fortune should be used extremely carefully, so that even accidentally it does not go beyond the cut line, otherwise unnecessary damage to the body cannot be avoided.
- after the necessary cut has been made, the edges of the healthy part of the vase body will need to be immediately coated with anti-corrosion substances in order to stop further corrosion.
Algorithm for performing welding work:
- first, the center of the new arch is welded to the car body;
- then, it is necessary to visually align both ends of the new arch in order to maintain the proper degree of symmetry;
- after which you need to weld both ends of the wing arch directly to the car body;
- Next, welding must be done from the periphery to the center.
Wing arch of VAZ 2110 and its replacement on your own
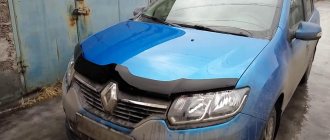
Wing arches vaz 2110
All national cars, objectively speaking, are not made using advanced technologies and innovative production methods. A distinctive positive feature of cars from the national automobile industry is their fairly low cost and average quality. However, there are also disadvantages, in particular, the wing arch of the VAZ 2110, which over a short amount of time is subject to severe corrosion and this, in turn, causes its active rotting. Subsequently, it partially or completely disintegrates. The arch of the rear wing of the VAZ 2110, like the front one, can be replaced with your own hands, although this will require time and effort.
Repair process
VAZ 2110 rear right fender
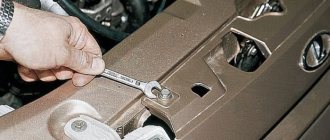
- Raise the car on a jack.
- Press out the wing.
- You need to level the surface using a heavy tool (this could be a hammer). Take a nozzle with a sharp flat end and apply it to the other side of the dent.
After this, hit the flat surface of the nozzle with a hammer. A slight leveling will be noticeable.
The outside needs to be straightened with a flat object.
Note: it is better to straighten using an iron tool, since aluminum will not work. All actions must be performed quickly.
However, you should not hit too hard. This can cause the metal to stretch, causing the wing to expand slightly.
- The edges need to be knocked out very carefully, along one line.
Complete rear fender replacement
VAZ 2110 right rear fender
In some cases, it is necessary to completely replace the rear fender. For example, if it is damaged to such an extent that there is no point in even trying to repair it.
Usually it is changed if:
- It was significantly deformed upon impact.
- It has small tears.
- Penetrating corrosion is observed.
VAZ 2110 rear right wing
Replacing a wing is a rather labor-intensive process, but it can be done at home by following the instructions:
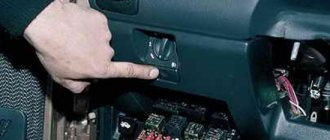
- You need to completely empty the trunk, remove the bumper, headlights (see Replacing headlights on a VAZ 2110 : do it yourself), the fuel tank, and also the trunk mat.
- Remove the rear fender.
Note: You can use a thin chisel for this. Using careful movements, you need to slightly squeeze out the rear wing, but try not to damage the car body.
- It is necessary to drill points at the junction of the wing with the transverse rear window frame. Now you can remove the rear wing.
- Carefully remove any strips of metal that remain on the wing. Nippers and a chisel will help with this. The edges need to be straightened and sanded.
Rear right wing of VAZ 2110
- If there is dirt under the wing, it needs to be removed. This surface must be thoroughly degreased.
- Attach the new wing by welding.
Replacing the rear wing 2110
VAZ 2110 rear wing replacement
,
rear
panel. Painting will be done later. Sorry for the long video.
VAZ 2110 replacement of the rear wing, rear panel.
Insta I VK Group VK.
Removing the front wing on the VAZ-2106 model
Finding factory welds on the wing is a major task for any repairman (they are usually visible to the naked eye). In order not to bend the wing or other body elements when “sawing” the weld, you will need an electric drill with a suitable drill, usually 12. We gradually go through each seam with the tool, making small entry holes on the outside of the wing.
Using a grinder, we cut off the lower part of the wing under the driver's headlight, not forgetting to put a protective cover on it, which will save your eyes from harmful sparks and eliminate the possibility of hand injuries.
Next, take an electric chisel and remove the top part of the metal between the previously drilled entry holes. If all actions are performed correctly, the wing itself will begin to separate from the body, so removing it will not be difficult.
If the rear wing arch begins to rot
Rear right wing for VAZ 2110
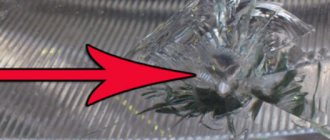
Iron very quickly undergoes corrosion, which, as it grows, can harm the entire car. It is advisable to start repairs when the rust has not yet seeped into the solon, as the consequences will be much worse.
The arch of the front or rear wing is most often affected by this problem.
To fix this problem you need to do the following:
- Disconnect the ground so that any welding work can be carried out without difficulty.
- The damaged part must be cut off, and the remaining parts must be cleaned properly.
- To seal the resulting hole, you need to attach a patch on the “wrong” side. This must be done by welding.
Note: before this, you need to treat the damaged area with acid to get rid of corrosion. And in order to make it easier to process this part in the future, you need to drill a small hole in it (preferably from the inside).
- The patch must be cut from stainless steel to prevent rust from appearing in the future.
Note: to make it easier to cut out the patch, you need to take a piece of cardboard, place it on the damaged part and press it so that its dimensions are transferred to the cardboard.
You will get a “fingerprint”. You need to cut a patch along it, slightly larger than it. Transfer it to the metal and cut it out.
- Now the edges of the patch need to be welded to the wing so that it holds well.
Painting the rear wing of a VAZ
Rear fender painting
If the car breaks down for any reason, it needs repairs. At the same time, if it is scratched, then it needs to be painted.
After the repair, the wing will have to be painted in any case.
So, this must be done according to the following algorithm:
- First, you need to highlight the damaged parts with a marker so that you can pay the most attention to them during the painting process;
- Then - primer. It is necessary so that the paint adheres better to the car;
- The next step is to apply the first layer of base paint.
Note: you need to spray the paint in a thin layer, so the sprayer must be held approximately 20 cm from the wing.
- Leave for 5-7 minutes to dry.
- Next is the second layer of paint.
- Let it dry slightly again.
- Apply a third layer.
Note: You need to wait about 20 minutes before applying the polish. At the same time, if dust has slightly settled on the surface of the wing, it must be removed with a sticky cloth.
- Now you can start applying the varnish. The first layer is applied.
Note: Don't try to create a glossy finish with the first coat. This may cause the remaining varnish to bleed.
- Leave for 7-10 minutes to allow the varnish to dry slightly.
Note: after this you can check for tack (if it sticks a little, but does not rub off, then you can start applying another layer).
- Second coat of varnish. Leave to dry thoroughly.
- Wipe with a damp cloth.
- Polish the vases.
Photos and videos found on the Internet will help you replace, repair, or paint the rear fender yourself. Any instructions will help you do any work quickly and efficiently, although you need to try a lot.
But the price of “home” repairs is noticeably lower than in a car service.
- Home
- Auto garage
- Replacing the Rear Wing of a VAZ 2112 with Your Own Hands
2110 VAZ: rear right wing, repair and replacement
VAZ 2110 rear right fender
If the car has a 2110 vase rear right fender, it will either be modified or repaired. The second option is, of course, cheaper, but it is more difficult to implement. All the same, on a VAZ 2110, the rear right wing can be repaired without problems if you know certain secrets that will be discussed in this article.
Installation of a new front wing on the VAZ-2106 model
Before installing a new body element, it is imperative to coat it with an anti-corrosion compound, which will prevent subsequent wear of the product.
Particular attention should also be paid to fitting the wing in order to avoid large gaps or mismatches at the seams.
We try to carefully and reliably weld the wing in the area where it connects to the driver's sill, since this is where the greatest load will be placed on the part being repaired.
We “grab” the element by electric welding at the joint points, if necessary, hammering it tightly to the body with a hammer. We try to carefully and reliably weld the wing in the area where it connects to the driver's sill, since this is where the greatest load will be placed on the part being repaired.
Subsequently, all welding seams are cleaned, and the resulting microscopic cavities are coated with a special sealing compound, which eliminates the possibility of water penetrating into the interior or engine compartment of the car.
Repair process
VAZ 2110 rear right fender
- Raise the car on a jack.
- Push out the wing.
- Level the surface with a heavy tool (this could be a hammer). Take a nozzle with a sharp flat end and attach it to the other side of the dent. Then hit the flat surface of the nozzle with a hammer. There will be a noticeable slight leveling.
- From the outside, a flat object needs to be straightened.
Note. It is better to straighten an iron tool as aluminum does not work. All actions must be completed quickly. However, not too much. This can cause the metal to stretch, causing the wing to expand slightly.
- The cantiras must be knocked out very carefully, along one line.
Final painting of the wing on the VAZ-2106 model
Before giving the replaced element the required color, all irregularities and dents are carefully puttied, after which the border areas that should not be touched by paint are covered with newsprint or masking tape.
An important stage of the restoration work will also be wet priming of the surface of the replaced wing using a special paint gun, on which putty was previously applied. This will allow the enamel to dry faster and cover the wing perfectly evenly. We wait 10-15 minutes and apply the required paint with progressive movements, which should dry within two to three days.
As a result of the measures taken, the new wing on the VAZ-2106 model will become an indispensable and ideally suitable element of the body, which will perfectly withstand aggressive mechanical or chemical influences, delighting the car owner with its durability and quality.
Repair of the rear wing on a VAZ 2112
Like and subscribe to the channel if you liked this video. We are VKontakte.
Back wing for VAZ 2110
Iron corrodes very quickly, which, as it expands, can damage the entire car. It is advisable to start repairs when rust has not yet seeped into the salt shaker, as the consequences will be much worse. This problem is most often caused by the front or rear fender arch. To fix this problem, you need to do the following:
- Disconnect ground so you can easily carry out any welding work.
- The damaged part must be cut off and the rest must be cleaned properly.
- To seal the hole, you need to attach the patch on the “wrong” side. This must be done by welding.
Note: Before doing this, the damaged area must be treated with acid to get rid of corrosion. And to facilitate further processing of this part, it is necessary to drill a small hole (preferably from the inside).
- The strip must be cut from stainless steel to prevent rust from appearing later.
Picture of Vaz rear fender
Rear wing picture
If the car breaks down for any reason, then it needs to be repaired. At the same time, if it is scratched, then it should be painted on. After the repair, the wing will need to be painted in any case.
- First, you need to mark the damaged parts with a marker to give them the most attention during the painting process;
- Then. primer The paint should adhere well to the car;
- The next step is to apply the first coat of base paint.
Note: Spray the paint thinly, so the sprayer should be about 20cm away from the wing.
- Leave for 5-7 minutes to dry.
- Further. second coat of paint.
- Let it dry again.
- Apply a third coat.
Note: You need to wait about 20 minutes before applying the polish. In this case, if the surface of the wing is slightly dusty, it must be removed with a sticky cloth.
- Now you can start applying the polish. The first layer is applied.
Note: Do not try to create a glossy finish with the first coat. This may cause the remaining varnish to bleed.
- Leave for 7-10 minutes to lightly dry the polish.
Note: After this you can check the tearing (if it sticks slightly but it doesn't rub off, you can start applying another layer).
- Second coat of varnish. Leave to dry well.
- Wipe with a damp cloth.
- Polish the vases.
Photos and videos found on the Internet will help you replace, repair, paint your rear fender with your own hands. Any instructions will help you quickly and accurately carry out any work, although you need to try a lot. But the price of “home” repairs is much lower than in a car service.