The best improvement to the standard UAZ Hunter heater is its replacement with a more advanced and efficient heater produced by NAMI. It has more advantages than disadvantages, the main one of which is the high price. If you want to save money, then you can increase the efficiency of the standard heater with the help of some simple modifications, which will be discussed below.
Refinement and improvement of the UAZ Hunter heater design.
You should start by sealing the heater housing. To do this, it must be removed from the car and all corners and joints of the body parts must be sealed from the inside using automotive sealant. And then, preferably, also from the inside, cover the walls of the box with thin, 2-3 mm, sheets of automotive noise and vibration insulation. All this together will eliminate air leaks, slightly increase heat transfer and somewhat reduce the overall noise of the heater during operation of the electric motor.
The next step is to try using any available method, for example by gluing a window seal around the perimeter, to seal the lower rectangular outlet hatch of the heater housing. This is necessary in order to eliminate air leaks when the hatch cover is closed, thereby increasing the strength of the air flow that will flow through the corrugated hoses to the windshield or through the lower side air distributors.
Well, in conclusion, you need to remove or simply bend to the left the rectangular protrusion located from the inside of the heater housing and partially covering the left outlet pipe supplying air to the windshield. The general purpose and functionality of this protrusion in the design is not entirely clear, but the fact that without it the force of air supply into the left corrugated hose increases, and therefore the force of blowing the windshield on the driver’s side increases, is a fact.
Rain water leaking from the UAZ Hunter heater housing into the passenger compartment.
Despite the plastic box installed under the air intake hatch, some of the rainwater, when the hatch cover is closed, can still get into the UAZ Hunter’s interior when parked. Initially, as a result of inspection and control during the rain, it seemed that water droplets were entering the cabin somehow through the drain hose of the box.
It was then assumed that the plastic box itself was damaged. In fact, it was precisely determined that water enters the cabin through the joint of the upper internal iron heater box, which exits to the outside of the body. There it forms a small side on which the lower seal of the hatch is installed.
Rainwater flows under this seal, then goes into the gap between the protruding side of the box and the body itself. And from there it immediately gets inside the heater housing and then flows through leaks under the feet of the driver or front passenger. That is, it does not initially fall into the plastic box, but bypasses it.
Therefore, the lower rubber seal of the hatch must be removed, treated well with body sealant around the joining seam that has become visible, and then put the seal in place. No more water will flow into the cabin through the heater.
Installing a door seal on the air intake hatch cover of a UAZ Hunter.
In any case, whether a plastic box is installed on the car above the heater radiator or not, the natural entry of water and dust into the heater, and then into the passenger compartment when the air intake flap is closed, must be prevented. A plastic cover installed on top of the hatch will best cope with this task. You just need to find out in advance whether it is suitable for the UAZ Hunter with a lower windshield wiper arm or not.
If you don’t want to drill additional holes in the car body to install such an overlay, then there is a simpler and cheaper method. It consists of replacing the standard rubber seal on the air intake flap cover with a seal that is installed from the factory on the inner door opening of the UAZ Hunter, its catalog number is 3153-6107018 or 3153-6107019. But in fact, this is an ordinary door seal from VAZ 2101, 2102, 2103, 2104, 2105, 2106, 2107, which goes under the numbers 2101-6107018, 2101-6207024, 2101-6207025.
There are no particular difficulties when installing such a seal. The only thing you need to pay attention to is that during installation the cover is raised as high as possible, as far as its adjustment holes allow. Now, when closed, the air intake hatch cover is maximally sealed around the entire perimeter and water ingress into the interior is practically excluded, even during very heavy rain.
Selecting and replacing the electric heater motor of the UAZ Hunter.
As standard, the UAZ Hunter heater is equipped with an ME236 electric motor with a power of 25 Watts. Its capabilities are frankly not enough to properly draw air through the radiator. The low performance of the ME236 also greatly affects the quality of windshield blowing.
Finding a more powerful electric motor to replace the ME236 is not difficult. For example, these could be electric motors 19.3730, 191.3730, 192.3730 and 194.3730 with a power of 40 Watts, or 197.3730 with a power of 60 Watts, or 51.3730 and 511.3730 with a power of 90 Watts. The main thing is that the diameter of the output shaft of the electric motor is 8 mm, so that a standard impeller can be installed without modifications, and also that it has suitable studs or threaded holes on its body for mounting it in the heater.
In addition, it would not be superfluous to take into account the load that, during operation, this electric motor will create on the on-board network and, accordingly, the generator. Thus, the current consumption of the 90-watt electric motor 511.3730 is 15 Amperes, versus 5 Amperes for the standard ME236. Therefore, perhaps the golden mean would be to install an electric motor 197.3730 with a power of 60 Watts and a current consumption of 8 Amps.
The impeller of the electric motor of the UAZ Hunter heater and the height of its installation.
If you do not take into account global alterations, then there are no easily accessible alternatives to the standard impeller. The efficiency of the impeller is greatly influenced by the height of its installation on the electric motor shaft.
If the impeller is installed high and its blades are almost completely hidden in the diffuser, then, all other things being equal, the air flow from the heater will be hotter and, accordingly, the interior will warm up faster. And if the impeller is installed low, the efficiency of blowing the windshield will increase and, accordingly, fogging will be eliminated faster. So, here you need to select the height of its installation based on personal preferences.
Installation of a remote control drive for a UAZ Hunter heater tap.
The heater switch valve installed on the UAZ Hunter allows you to remotely regulate the supply of coolant to the heater radiator, but for some reason this possibility was not implemented by the car plant engineers.
To correct this drawback, you can independently install a heater control drive in the cabin from some VAZ or ZAZ model. More details about this in a separate article.
Right choice
In winter you want comfortable warmth in the cabin
To insulate the interior of the UAZ 469, it is recommended to replace the existing heater with a more powerful analogue. You can buy such a radiator from Zhiguli. This will require some modifications, including the faucet.
Installation of an additional heater in the rear of the cabin of the considered models is allowed. The choice of stove depends on the personal preferences, tastes and finances of the owner of a UAZ 469 or UAZ Hunter. In any case, the heater configuration changes. It can serve as:
- KITB.3221-8110010;
- heater NAMI-4 or NAMI-7,
- stove from Zhiguli.
Auto mechanics recommend installing a NAMI-4 autonomous heater on this model, which will run on gas fuel. It is taken into account that, regardless of the choice made, the stove must have a power of 2-4 kW. The advantage of such a system is autonomous temperature control in the cabin. Disadvantage: complicated installation.
Before you start tuning the UAZ Hunter, you need to take into account that the crane also needs to be replaced. This is due to its inconvenient location and tendency to leak. The correct solution in this case is to insert a new unit into this system. The tap is installed closer to the stove.
You need to install the corner tap inside, otherwise it may become clogged with dirt. In this situation, one fitting is led into the box, and the second is connected to a similar radiator element. An important point in this matter is the correct choice of part. It is recommended to install an adjustable tap.
You can give preference to the solenoid valve from the BMW 5 Series. It must be mounted in the gap between the outlet and inlet pipes of the stove radiator. This part is not disassembled. To modernize it, you will need to drill 4 rivets in the cover. In this case, you will get a collapsible structure that will be easy to clean. Screws are used to assemble it.
How to install an additional stove on a UAZ Hunter yourself
The owners of UAZ Hunter cars themselves admit that the factory stove in the car is far from perfect. She doesn't have a whole range of shortcomings. But in some cases, just one minus is enough. In relation to the Hunter heater, the main disadvantage can be considered the low efficiency of the stove when warming up the interior. The problem is solved in different ways.
Some simply modify the old heater, others make certain design changes. And there are those who leave the old heater practically untouched, but at the same time there is an additional stove nearby. It is quite possible to install an additional stove on the Hunter yourself.
If you have experience in such matters, you have free time and are willing to follow the instructions, as well as adhere to some tips, you will definitely succeed.
Methodology for installing an additional heater on a UAZ Hunter.
Main works
Installing an additional heat source
Before installing the NAMI-4 heater or another model, the old stove is dismantled. If possible, the existing heating system is modified by blowing the side windows.
For this, a tee, flexible wiring, and drills are used. Initially, you will need to make holes in the torpedo by installing side air ducts from KAMAZ or ZIL in them.
If a NAMI-4 heater is installed in a UAZ Hunter or UAZ 469 as an additional stove, then it is connected as follows:
- In parallel: motor block - electric pump - tee - ball valves - heater radiators - tee - motor pump. It is necessary to take into account that each radiator has its own heat transfer and permeability. Upon completion of the dismantling work, the passage of antifreeze is adjusted using taps through the heater. This step will allow them to blow in the same direction.
- Sequentially: motor block - electric pump - heater radiator - heater radiator - engine pump.
When carrying out tuning, you need to remember that the electric pump works more efficiently when the antifreeze puts strong pressure on it. Therefore, the first element must be installed after the motor block. For better heating, hot antifreeze should go to the top of the radiator, and the remaining liquid should come out from the bottom. This is explained by a change in the density of the substance.
Another effective method of heating the interior of the UAZ 469 is tuning the cooling system. Its operation is designed in such a way that virtually no hot cooling liquid enters the heater radiator. For this purpose, an electric additional pump is installed. Initially she understands. Screws are used instead of self-tapping screws. This tuning will help get rid of the leak.
A new structure is installed before or after the stove. The pump is fixed to the UAZ Hunter body with 2 self-tapping screws. From an electrical point of view, this device will work from the moment voltage is applied. At the same time, the valve will close the line. Auto mechanics recommend controlling a modern heating system using 2 switches:
- The 1st is responsible for turning on the valve and supplying voltage;
- The 2nd turns on the pump.
I took everything apart - I love the space
Since the manual throttle control cable was no longer needed, I threw it out, and in its place I stuck a cable in a sheath from a VAZ 08, why in a sheath? The fact is that the cables pass through the stove air duct and all the moisture settles on them, and this is rust and wedge...
The faucet is assembled and ready for installation. You need to buy rubber seals for the body
For me, it fits very well into the overall atmosphere. I threw out the lower lever as unnecessary, I’m thinking of transferring the control of the heater motor to the right toggle switch, and installing a cigarette lighter in the empty space on the left instead of a stationary emergency light...
The cable sheath must be fixed on the crane body, there is even a special place there, but it does not suit me. I came up with the idea of making my own fasteners. I honestly admit, by trial and error, I came up with the fastening three times and all with the use of two pins, but they disappeared because it required a lot of manipulation with the metal. The solution came like an inspiration - the simpler, the more reliable! I made a template from paper, and then from cardboard, which I transferred to metal and, with the help of a Bulgarian, sculpted the mount!
Additional stove for the UAZ Hunter interior
The owners of UAZ Hunter cars themselves admit that the factory stove in the car is far from perfect. She doesn't have a whole range of shortcomings. But in some cases, just one minus is enough. In relation to the Hunter heater, the main disadvantage can be considered the low efficiency of the stove when warming up the interior. The problem is solved in different ways.
Some simply modify the old heater, others make certain design changes. And there are those who leave the old heater practically untouched, but at the same time there is an additional stove nearby. It is quite possible to install an additional stove on the Hunter yourself.
If you have experience in such matters, you have free time and are willing to follow the instructions, as well as adhere to some tips, you will definitely succeed.
Choosing a stove
First, you need to decide which stove on the UAZ Hunter will be used as an additional heater. Here everyone has the right to make their own choice, focusing on financial capabilities and the availability of certain options. But many Hunter owners note that its almost brother, the UAZ Patriot, comes with a very good stove from the factory.
It is this that can be used as an additional heater on the UAZ Hunter. At the same time, 2 stove options are offered for the Patriot, which are labeled OS 7 and OS 4. There are other variations, but they differ from each other only structurally, and not so significantly. When choosing between OS 4 and OS 7, you should take into account that these heaters differ in power.
In the first case we have 4000 W, and in the second we have 9000 W.
Their only drawback and limiting factor is cost. Depending on the store and region, the heater will cost from 4-5 to 10 thousand rubles. If you are ready to spend that kind of money on purchasing additional equipment in order to improve the quality of heating in the cabin, then feel free to order or go to the nearest auto store. The option under consideration provides for the use of an additional heater in the form of the OS 4 model.
Although a similar installation scheme can also be safely applied to the more productive OS 7 stove. In addition to the stove, do not forget to purchase a pump for it. In this regard, the Gazelle pump is perfect for Hunter. On the market it costs on average from 500 to 1000 rubles. Compared to a heater, the costs are not so high.
In addition to the basic elements such as a pump and a heater, to create an additional heat source in your UAZ Hunter you will need to purchase:
- 3 relays;
- hose 6 meters long for coolant;
- wiring with a cross section of 2.5 by 6 meters;
- wiring for 3 meters with a cross section of 0.75;
- contacts (about 20 pieces mom and dad);
- heater button;
- heat shrink kit;
- splitters for wiring.
Once you have collected everything you need, you can finally begin the assembly procedure. It would be a good idea to first consult with Hunter owners who have experience in installing an additional heater. Also contact familiar electricians if you doubt the correct connection and selection of the appropriate circuit.
Connection nuances
Using personal experience, or contacting an electrician, you will need to assemble the entire assembly connecting the new additional stove and pump. There is nothing complicated with the hoses, since they are connected to the radiator and pump, the pump itself is fixed and the wiring is removed. The standard circuit for such situations includes 3 relays, 1 of which is for the pump, and 2 more for speeds 1 and 2 of the heater, respectively.
As for the fuse from +, some install only one fuse with a rating of 15 A. But it will be better if you install 2 of these elements. One will be used for a pump with a rating of 7.5 A, and the second for a stove with a rating of 10 A. You can choose any circuit, since in reality there are quite a lot of options for installation and placement. Here everyone decides for themselves which path to take and what to choose.
Installation
There is a lot of controversy regarding the choice of location for installation. Someone is trying to put an additional heater in the Hunter directly between the front seats. But since the stove is inside a metal casing, it does not fit into this space. The handbrake acts as an obstacle, as does the front passenger seat. Yes, if you remove the protection and leave the stove without a housing, then the heater will definitely fit here.
Its Y-shape will prevent the equipment from resting against the handbrake. But another problem appears. In this condition, the stove equipment will stick out strongly in the rear, significantly affecting the legroom of the rear passengers. That is, when landing, someone will definitely touch the heater. A few careless blows can lead to damage and final failure.
But many people immediately rule out the option of installing it under the front passenger seat, arguing that the seat slides are too narrow. But don't rush to conclusions.
https://www.youtube.com/watch?v=NsWZHX5xKus
In this case, we will consider the option of installing an additional heater in the Hunter directly in the space under the front passenger seat. You only need to raise the seat a little without compromising the comfort of the front passenger. In this case, it is better to install it closer to the handbrake. Thus, the heater will stand directly in front of the slide, and will not interfere with anyone or anything in this position. If we talk about fixing equipment that acts as an additional stove on the UAZ Hunter, then:
- on the left side there is a bolted connection borrowed from the hand brake (it is also convenient to remove the mass here);
- on the right you can use a pair of self-tapping screws, supplemented with a press washer.
The good thing about this option is that you can use the bolt-on mounting from the standard handbrake. It fits there perfectly, there are no difficulties with fixation. On the right, everything is also quite simple. The only caveat is the need to raise the front passenger seat. In order for the heater to fit in well without touching anything, it is enough to lift the front seat by literally 15 millimeters.
This is extremely easy to do. The chair is installed on bolts, under each of which you should additionally put 5 washers. This will quickly resolve the problem. Just keep in mind that you will also have to change the original bolts, which are only 35 mm long. There are not enough of them to insert 5 washers and ensure reliable fixation of the seat. Here it is better to use extended bolts of 50 millimeters.
Site about off-road vehicles, SUVs, off-road vehicles
The ventilation and heating system for the interior of UAZ-31512, UAZ-31514, UAZ-31519 and UAZ Hunter cars is very simple and primitive both in design and in operating principle. The heater with its simplest air distribution system simultaneously, in one way or another, participates in both the operation of the heating system and the operation of the UAZ interior ventilation system.
Interior heater for UAZ-31512, UAZ-31514, UAZ-31519 and UAZ Hunter cars.
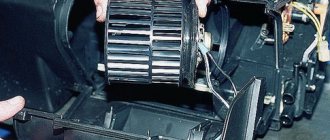
The standard heater of UAZ-31512, UAZ-31514, UAZ-31519 and UAZ Hunter cars is an extremely primitive installation consisting of a box with dampers, which contains a radiator, an electric motor with an impeller and additional resistance.
The simple incoming air distribution system includes an air intake with a mechanical control drive, two windshield blower nozzles, two corrugated hoses and heater box flaps.
On UAZ Hunter cars, since 2010, a plastic box has been added to the heater design, part number 3151-8101231, which is installed between the air intake flap and the heater radiator and is designed to collect and drain rainwater entering the heater when the air intake flap is open.
Rainwater entering through the air intake hatch into this plastic box is drained out through a rubber hose passing to the partition of the engine compartment inside the cabin.
And water or condensate from inside the heater is drained through a second rubber hose located in the lower part of its body and also discharged into the engine compartment through a hole in its partition.
The installation of a plastic box 3151-8101231 greatly reduced the intensity of the oncoming air flow entering the cabin when the car was moving and worsened natural ventilation, but rainwater no longer gets on the hot heater radiator and does not form steam in the cabin, which settles on the glass from the inside. In addition, this box prevents most of the dust, sand and dirt from entering directly into the heater, and through it into the interior.
Ventilation of the interior of UAZ-31512, UAZ-31514, UAZ-31519 and UAZ Hunter cars.
The car has natural and forced ventilation. With natural ventilation, air enters the cabin through open rotary vents or door windows. While the vehicle is moving, the incoming air flow additionally enters the cabin through an air intake installed in front of the windshield. The air intake is opened by a lever mounted to the left of the heater.
With the windows closed and forced ventilation, air is pumped into the UAZ interior by the electric heater fan without heating it. The air passes through the air intake, the disconnected heater core, the fan and exits to the driver and front passenger footwells, as well as the central part of the cabin to the rear seats. In addition, air enters the windshield blower nozzles through corrugated plastic hoses.
The intensity of forced ventilation of the cabin with the windows closed is regulated by turning on the heater electric motor to one of the modes, as well as by adjusting the amount of lifting of the air intake flap cover.
Practice shows that the capabilities of the standard ventilation system with the windows closed are very limited and it does not work effectively; there is no normal air circulation in the cabin, which leads to constant fogging of the windows. Therefore, like everything else in the UAZ, it is desirable to modify the ventilation system in some way; one of the options for such modification is discussed in this material.
Tuning UAZ Hunter
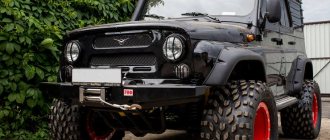
UAZ Hunter is a domestically produced SUV. Produced at the Ulyanovsk Automobile Plant since 2003. It is a modification of the legendary model under the designation 469, which is used in civilian life, the agricultural industry, law enforcement agencies, government services and organizations. This is a unique, versatile car - an excellent option for those who do their own car tuning. The SUV was popularly nicknamed “Bobik”. Despite numerous skeptical reviews, the car has proven that in terms of cross-country ability it has practically no equal in the jeep class.
Do-it-yourself UAZ Hunter tuning
Wide possibilities for processing, modernizing the interior and exterior, as well as improving the technical characteristics of the UAZ Hunter are opened up thanks to its simple design and spartan equipment. This is a real off-road master, it will go where its competitors in the foreign-made class get stuck. Therefore, tuning a UAZ Hunter for off-road use is the most common option. But there are still many options for modernizing the Russian Spartan.
External tuning of the UAZ Hunter involves the creation of exclusive thematic models, such as the “Hunter”, “Pathfinder”, Gelendvagen, and a VIP-class car. They all differ from each other in appearance, as well as in equipment.
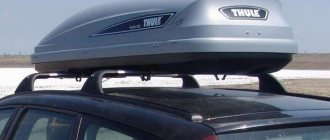
For example, off-road tuning of a UAZ Hunter is relatively simple. It is necessary to lift the suspension and install new wheels with tires designed for extreme off-road use. You can install a lattice roof rack on the roof, and install a powerful carrier and a winch forward. The ambience will be complemented by body paint in khaki or safari style.
Tuning a UAZ Hunter for the city may be limited to applying stylish 3D airbrushing and upgrading the interior. Accordingly, in parallel with this, it is desirable to improve the technical characteristics of the SUV. The same scheme can be used when tuning a UAZ Hunter for fishing or hunting. The technical characteristics of the car play a big role here, since the “Hunter” has a unique design.
FIST FIGHTS
On vehicles with Spicer axles, the pivot assemblies of the steering knuckles deserve special attention. Usually, by 30 thousand km, the plastic liners wear out and the wheels become small.
Using a 24mm wrench, unscrew the pin nuts and, separating the gasket from the knuckle, remove the washers. To unscrew the bushings you will need an original key 3160–2304. It is inconvenient because it only has a hole for the knob, which makes the handle stand in only four positions (if this hole is shifted relative to the hooks). And a convenient position for moving the bushings is very important, because the breaking torque is up to 300 N.m! It is better to make a similar key from a 23-mm impact socket, sanding off the excess and leaving two diametrically opposite tendrils 9.5 mm wide. It’s much more convenient to work this way - you can use a ratchet, providing yourself with a comfortable lever position. But first, let’s tap the fingers in the axial direction, only carefully so as not to jam the thread.
Following one search (2 stories)
2018-10-20Generator Generator 371.3701 Connection diagram of generator 371.3701 Generator 9412.3701 A generator of type 371.3701 is installed on the VAZ-21213 engine, and type 9412.3701 is installed on the VAZ-21214 engine. These generators are structurally similar and are synchronous AC electrical machines with electromagnetic excitation, with a built-in rectifier based on silicon diodes and an electronic voltage regulator. The generator rotor is driven by a V-belt from the engine crankshaft pulley. Technical characteristics of the generator...2018-10-17
Page contents In 2001, the VAZ-2121 underwent another restyling, relating exclusively to the power plant. More precisely, the fuel system.
Instead of a Solex carburetor, the car received an injection system - this not only reduced fuel consumption, but also slightly increased power and torque - in the VAZ-21214 it is 83 hp. and 129 Nm versus 82 hp. and 125 Nm for the VAZ-21213. The car is equipped with a 1.7-liter 4-cylinder, 8-valve engine that develops a power of 83 hp. and a torque of 129 Nm. Instead of a carburetor, it is installed...2017-12-22Page 1 of 2 The Russian SUV Niva has gained its popularity not only in Russia, but also abroad. An inexpensive and easy-to-maintain vehicle that can be successfully operated in all weather conditions, both in the far north and south.
Niva VAZ-2121 and its off-road modifications. All wheels are permanently driven (non-disconnectable all-wheel drive), and there is a center differential locking mode. The body is load-bearing, all-metal, welded. Rice.
1 Engine - four-cylinder, in-line, gasoline, four-stroke;...2017-12-17 I have already mentioned our “wonderful” old-style hydraulic compensators in many articles on my website. Let me clarify right away so that there is no misunderstanding of the question. I am not an opponent of hydraulic lifters and not an enemy of progress)) But in this engine they are superfluous, due to purely technical parameters. The most important of which is the oil pressure in the line. Let me remind you again, for supporters of hydraulic compensators on THIS engine. We are based on a Fiat engine, developed in the 60s of the last century. Initial volume 1.1l. And all the units and parameters were...2017-12-17
After the publication of my article on the topic of oil seals for the Niva, requests began pouring in to write the same regarding bearings and sensors for the 21214 engine, which is installed on Nivas, Niva-Ms, crocodiles and Shnivas.
I’ll begin to slowly talk about “trouble-free” sensors, that is, those that you install and forget about for a very long time. A few general words. Why did this question even arise? Let me give you an example: such garbage as a throttle position sensor (TPS). Since the electronics of our injector are taken entirely from their front-wheel drive counterparts, and theirs...2017-12-17 Elements such as the VAZ 21214 speed sensor can be replaced without much difficulty. It seems possible to quickly change this and other system parameter determinants and regulators with your own hands. You will learn how to do this from our article.
Characteristics and features of replacing regulators On products of the domestic automotive industry such as UAZ and Niva, various sensors are needed to transmit information to the dashboard. Also, some of them perform additional functions.
And each has its own characteristics of dismantling...2017-12-12Title VAZ 21214 is a widespread off-road domestic vehicle. Although this is not the first car to have four-wheel drive, it is the first to be quite comfortable. Mostly the interior there is similar to that of other Ladas, but it is still better than in the GAZ 69 and UAZ 69, where the interior is as spartan as possible. The Niva 2131 has implemented all the urgent developments to improve electrical equipment and modernize all components of the car. The installation of an engine injector was also implemented here, which made it possible to significantly increase...2017-12-09
Heading In the VAZ 21214 (injector) car, the generator is a synchronous alternating current machine. The voltage is electronically regulated. Built-in rectifier. Has a right-handed type of rotation.
The maximum value of the output current is approximately 80A, at a voltage of 13.2-14.7 V. The cover with the stator is secured using 4 bolts. The bearings that allow the shaft to rotate are mounted in the bolts. They are filled with lubricant that will last until the end of its service life. Replace the front bearing...2017-06-15 Contents of the article Detonation in an internal combustion engine is not only an unpleasant, but also dangerous phenomenon. It is usually caused by low-quality fuel, or malfunctions in the ignition system.
A low octane number of gasoline, as well as a violation of the ignition timing, lead to the fact that the fuel mixture does not ignite from a spark of a candle, but spontaneously explodes in the cylinder at the end of the compression stroke.
This process is accompanied by high shock loads on all elements of the piston group without exception. The most common sign of detonation...