Replacing a windshield with your own hands will be within the capabilities of the average car enthusiast if all operations are carried out carefully. But many motorists believe that replacing a windshield can only be done at a specialized service station equipped with professional equipment.
There are many myths and fears regarding the windshield removal and installation procedure. Therefore, car owners rarely dare to replace or reinstall it themselves. However, if all operations are carried out consistently, it will be possible to carry out the replacement efficiently, quickly and with your own hands.
How to remove a windshield
There can be many reasons to remove a car windshield: spider webs of cracks, a seal that is leaking water, severe abrasions, or a desire to stick a strip of dark film on it.
Removing a car windshield is a fairly simple operation that does not require special skills or professional tools. So why pay extra money to service station masters? Also read in this article: what you need to have with you when installing a windshield or rear window of a car.
There are several ways to remove glass:
1. Cut out the seal. This method is the simplest and safest. However, when installing glass you will need to buy a new rubber seal, which is not cheap.
If the owner of a domestic car can find this part in any store, then the owner of a foreign car will be forced to wait a long time for his order.
Procedure for performing the operation: using a sharp knife, make a cut along the entire seal along the contour of the glass
It is very important not to scratch the glass surface itself. After pressing a little on the glass from the inside, you can easily remove it
2. Squeeze out the glass. This method is somewhat more complicated, but after it both the glass and the seal will remain intact. The first step is to remove the external seal retainer, if there is one. The design of some cars does not provide for the presence of this element. Afterwards, from the inside, using a flat screwdriver, you need to pry the seal a little. It is best to do this at the top of the glass, and by lightly pressing on the surface of the glass with your palm, disengage the seal. Under no circumstances should you press hard on the glass. It may simply crack. Also, you should not hit the glass, the result will be disastrous. After this, you need to move a little to the side and release the seal. Moving 5-10 centimeters at a time, it is necessary to completely disengage the seal in the upper part. If after this the glass does not come out, then it is necessary to perform a similar operation with the seals in the side parts. To prevent the glass from breaking on the hood of the car, it is necessary to lay a soft cloth; if the operation is performed together, then an assistant should hold the glass from the outside.
3. Break the glass. If the glass is not of particular value. But on the contrary, a seal is needed, then the best solution would be to break the glass
However, when breaking glass, it is very important not to overdo it, otherwise you can cover the entire interior with fragments. It's better to hit from the inside
The operation of removing a car windshield is not fraught with any difficulties. It will be a little difficult only for beginners. Subsequently. Having dismantled the glass two or three times, any car enthusiast will remove the glass in 5-10 minutes. In a similar way, you can remove the rear window of a car.
Windshield installation
When installing a windshield or side glass, use a special glass gluing kit from Liqui Moly
Good luck on the roads!
How to replace a side window in a car with your own hands
The side glass does not need to be replaced as often as the windshield.
But sometimes unpleasant situations happen, after which you have to change it. The glass can be damaged, for example, by intruders who have their eye on something in the car, and the owner himself can break it, for example, when he finds himself in a hopeless situation, accidentally slamming the keys inside the car.
As a result, the choice will be small: go to a service station and pay a decent amount for a generally simple job, or replace the glass yourself. Such repairs do not require special skills or a long time to complete and will save your budget from unnecessary expenses. So, how to replace a side window on a car?
Helpful tips when replacing your windshield
Projection on a Car Windshield
1. A properly installed windshield is a guarantee of driver safety; this is a very responsible task, so not every professional mechanic undertakes to replace a windshield. One of the most important aspects of installation is the perfect fit of the glass.
When done correctly, you can reap the full benefits of this structural component of your vehicle.
2. When you go to order materials for installation, make sure that you check the model and make of your car so that the material you ordered does not turn out to be a pile of unnecessary junk.
3. One of the main materials in installing a windshield is, of course, glue. Each brand of car does not require a separate adhesive; it can be one for all types of vehicles. But since adhesive is one of the materials that will hold your windshield in place under different operating conditions and climates, make sure that it is truly a high-quality product.
An important point in installing a windshield is your safety.
4. Make sure you have a good pair of work gloves and safety glasses. You would hardly change a whole, undamaged glass, but you can expect anything from damaged glass. Therefore, it is better to be prepared for the development of events in the most unpleasant scenario.
5. Always follow the instructions and directions for installing auto glass found on the back of the adhesive package. It should also indicate whether the adhesive requires additional connections to create an even stronger bond between the glass and the vehicle body structure. Remember that before applying glue, the surface must be grease-free and dry. For degreasing, you can use acetone.
6. Learning how to install a windshield is the easiest procedure. All you need to do is apply glue and insert the glass into its original location. Give the material a day or two to dry thoroughly and properly bond the glass and iron, and then you can continue using your four-wheeled friend.
Of course, you can turn to a car workshop for professional help, but do not forget that you will have to pay not only for glass and other materials, but also for the work of the master, that is, replacing the windshield in the car. And how much he values his work at may remain a secret until the invoice is issued. However, if you still decide to do this yourself, that is, do everything yourself, then carefully read the following instructions.
Replacing car glass
The procedure for replacing car windows most often involves replacing the windshield or rear window, since side windows have to be replaced much less frequently (unless hooligans broke it) and the procedure does not require special tools and materials. Therefore, in our case, we will analyze the process of replacing the front glass on a car.
The process of replacing a windshield on a car.
Replacing front windows is much more difficult than it might seem at first glance, and only professionals undertake such work. Not only because certain materials and tools are needed, but also because your life depends on the correct installation of glass. The windshield is an important part of protecting a modern car in an emergency, as it represents an essential element of the strength of the body structure. It determines how deformation will occur in case of an accident. In a head-on collision or rollover, the strength of the glass is vital to stabilizing the vehicle's body. That is why car glass replacement must be carried out in compliance with all installation standards and technologies.
If you do not doubt your abilities and are confident that replacing glass will be possible, then read on to find out what set of tools and materials you will need to replace glass on a car, as well as understand the sequence of preparation and the glass installation itself.
Preparing for glass replacement
Honda Accord Logbook Sun protection on the windshield
Step-by-step instruction:
The first thing to do is to use a chisel and also a hammer to loosen the glazing beads that hold the fastening part that holds the glass.
You need to start the work process from top to bottom; this is the safest option. When all the beads are loosened, you can gradually begin to pull them out of the structure
This procedure must also be performed from top to bottom.
Carefully remove the upper structure of the doors and gradually, slowly, pull out pieces of damaged glass. Be sure to wear protective gloves when doing this.
When the damaged elements are removed from the base of the door structure, it is necessary to sweep up the remaining glass to make the workplace safe.
Replace glass in a window
How to make a heating element for auto glass with your own hands. Heated windshieldInstalling a heater
Be careful when working with glass. You cannot put glass on the floor, because it will not be easy to lift, and it can also be easily crushed if you step on it carelessly
The new glass is placed near the wall and covered with a fairly bright rag.
It is also better to stock up on gloves in advance that will protect your hands from cuts, from which no one is safe when it comes to glass.
So, if the glass was not completely knocked out, it is better to seal the remaining remains with tape. At the same time, it is not recommended to spare the scotch tape; here it is better to distinguish yourself with generosity. After this, you can protect the window sill from accidental scratches. To do this, you can cover it with a rag or newspapers.
The remains of the broken glass are removed and placed in the trash.
Now you need to free the frame from the remaining glass around the perimeter and insert a new one. To do this, you will first have to get rid of the window putty or glazing beads.
The putty is easily scraped off with a knife or screwdriver. If the putty has become very hard, it can be softened with a hot hair dryer, hot water or a soldering iron.
It is easier to remove the bead; you simply pry it up with a chisel, screwdriver or knife and pull it out
The main thing is to work carefully so as not to damage the frame
Once the frame is free of broken glass, the folds may need to be cleaned and sanded. The frame is also carefully inspected for possible defects and shortcomings. There should be no nails or their fragments on it, there should be no large irregularities, putty, burrs, and so on.
It is very important to measure the glass correctly so that the glass does not turn out larger or smaller than necessary. In the first case, the glass simply will not fit into the frame, and in the second case, it may simply fall out of it
The dimensions of the window frame should be written down and taken to the nearest glass cutting shop. This work is simple, it can be done within half an hour, but you can cut the glass yourself
If the old beads are in good condition, then they can be reused, but if not, you will have to purchase them. In this case, it is better to take with a small margin for pruning. You should also stock up on silicone-based window putty or sealant.
So, the glazing beads are sawed into blanks of suitable length, and small nails are immediately hammered into them at the same distance from each other. The folds are carefully coated with sealant, then new glass is installed, carefully pressed, after which the glazing beads are nailed.
We build and repair ourselves
Puttying walls Final finishing work, especially on the internal surfaces of walls, is always carried out only if they are leveled to a smooth, “finishing” state. When painting walls...
How to cut a mosaic Very often, even experienced craftsmen are baffled by this question, not to mention beginners. How can you cut a mosaic? However, everything is quite simple, for this there are...
Flexible stone What exactly is flexible stone? This is a layer of sandstone, one to three millimeters thick, applied to textiles. It can be made in the form of wallpaper and…
Radiant heating system Nowadays, there are several types of heating systems. The systems we are familiar with are based on the use of radiator systems, convectors and panels that are installed on…
Fireplace styles A fireplace, as a symbol of home comfort, is in demand not because of problems with poor-quality heating. The thing is that the atmosphere and mood in houses with an installed fireplace...
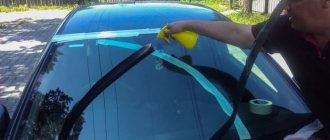
How to properly care for your windshield
The windshield must be carefully maintained as it is the main window in the vehicle's structure. It is responsible for safety and protection from strong air flow, snow, rain, hail, as well as from stones and even birds falling at high speed.
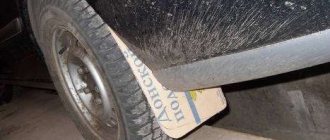
It is important to keep the window clean at all times. Even small dirt and dust can reduce the percentage of visibility in sunny weather or at night when cars with bright lights are moving towards you. If the car is stored not in a garage, but in the air, then by morning dirt and debris will accumulate on the windshield
Before getting into the car, carefully lift the wipers and clean the window with a cloth and water or cleaning fluid.
If the car is not stored in a garage, but outside, then by morning dirt and debris will accumulate on the windshield. Before getting into the car, carefully lift the wipers and clean the window with a cloth and water or cleaning fluid.
If you neglect this rule and immediately turn on the automatic windshield wiper, there is a risk of getting unpleasant scratches that impair visibility on the roads. In this case, the driver will need to allocate funds for professional polishing.
Remember that it is important to regularly add special cleaning fluid to the container under the hood of the car. Some drivers use ordinary water for this purpose, but it is not the best way to remove road dust and dirt.
When you go to buy such a liquid, do not be lazy to smell it. Sometimes there are such unpleasant-smelling compounds on sale that it is simply unbearable to be in the salon after glass treatment.
Make sure there is always liquid in the windshield wiper reservoir. Operating the brushes without water may not only fail to remove dirt, but also leave small abrasions on the windshield. The brushes must be of high quality, otherwise during operation you may be unnerved by the squeaking noise they make. To prevent the brushes from freezing to the glass surface in winter, many simply lift them vertically. But owners of old cars are not recommended to do this, since the spring responsible for the tight fit to the window may stretch, and they will need to be replaced.
If freezing of the brushes does occur, you should simply warm up the car without using force and they will gradually move away from the surface. You can also use a defroster or simple alcohol. Do not use boiling water under any circumstances, as the windshield may simply crack due to a sudden change in temperature.
If stones or other objects hit, small chips may form that require immediate repair. There is a special method for eliminating such defects: a small hole is made, air is removed from it, and the free space is filled with polymer material.
When cleaning your car's windshield from dirt, do not forget to pay attention to its inner surface. Use a liquid specifically designed for this work and a soft cloth.
If the glass fogs up on the inside, just open the side windows for a few minutes, then a directed air flow will quickly eliminate the problem.
Tips for choosing glass
You should be very careful when purchasing universal glass; it may be of poor quality.
Some tips for choosing:
- There are two types of glass: glossy and matte. The first option is cheaper, however, it can only protect the smartphone display from impacts. Before purchasing, check the strength of the glass; it should not bend too much;
- Frosted glass is more expensive and can protect the phone from shocks, falls, and even glare. The disadvantage of such glass is that the color rendering quality of the smartphone display may deteriorate;
- Good glass should have an oleophobic coating. It prevents the coating from getting dirty with grease;
- It is advisable to buy glass options that include special napkins and spare protective glasses;
- The thicker the glass, the higher its strength and level of protection for the phone during shocks and falls.
Installing a new windshield
Applying sealant
This is one of the important points of the process. It is recommended to use an air gun, because... The sealant is very tight. Or a professional hand gun. The sealant strip is applied evenly, without breaks. We apply the glass, aligning it with the marker marks.
Remember when we made them? Then we go around the perimeter and press the glass tightly so that the sealant “lays down” as it should and ensures contact between the groove and the glass. If the sealant comes out in some places, do not rush to remove it immediately. This can be done later after polymerization. It can be easily removed with film.
We fix the glass with tape. The following sequence is desirable: first attach the tape to the glass, and then to the body with a “lift”. That's all.
Important! For 6-10 hours, try not to open or slam the car doors. Go home and let the sealant “set”
And also, the temperature regime: at 0 degrees and below, the sealant practically does not harden, and at elevated temperatures it quickly polymerizes.
What can and cannot be done?
It is recommended to avoid strong door slams. Many cars are sealed, so immediately after the windshield is glued in, the pressure due to the pop can cause the seal to break, and the glass will move out of its seat. It is better not to visit the car wash for a certain time after replacement. It is recommended to wash the car after two days. Neither manual nor automatic car washes are recommended during this period. Air and water pressure should be avoided. If you ignore this, the seal may be damaged. Also, you should not travel often or far. Experts recommend not operating the car for an hour or two.
How to remove the windshield yourself. Adviсe.
We all know such situations in the life of our cars, in which you can often see a lot of glass fragments. The worst thing about all this is that many car enthusiasts neglect such an affordable and reliable means as correct window cutting. We will talk not only about the front glass, this will also affect the rear windows, let's take a look and reveal the secret of dismantling the glass. As we know, all modern glass samples are glued with a special glue, this is silicone. As car enthusiasts, we often neglect one available tool that makes the job easier when dismantling old glass. People who use this product make good money from reinstalling car windows, this is their right. You and I will take a different path, a path that will save us from problems with unnecessary costs. The tool and secret used by specialists in the field of glass reinstallation is called a simple copper string. Many of us have had to deal with broken glass in our lives, and the fact that after removal we scatter a lot of fragments, which are a huge problem for the interior. In order to avoid additional work on cleaning the interior from all kinds of residues, glass, which must be said is very difficult to remove, even with a vacuum cleaner, we will continue the conversation about how to properly remove car glass. So, if you are faced with a situation in which the car glass is broken into pieces, or is jammed by the car body, remaining intact and needs to be carefully removed, then the following recommendations are for you: To properly remove the glass and then install a new one, take one , copper string. Look carefully so that the string is braided; on a guitar it will be called 3, 4 or 5, this is the size. The braid will serve us for the powerful process of cutting the silicone structure. All glass, and especially that of foreign cars, sits on silicone, so we take an awl and carefully make a hole in one of the convenient corner parts of the glass seat. Then we’ll run a string there, and we need to add that two people should work on these, that is, when dismantling or installing glass, at least two people are needed. On the one hand, we pull towards ourselves and pull the edge of the string in the desired direction for cutting the silicone on which the glass is glued. We do it in the same way on the other side of the glass, therefore the person who will do this must be inside the car. Then, when you have gone through the entire area of the glass seat in this way and cut the silicone, small steps of silicone will remain at the cutting site; there is no need to remove them. This residual silicone will be of great help to you in firmly adhering to the new glass that you will be installing. Further, since we have not read the instructions on the technique of working with the string, I can assure you that this process is quite easy, just keep the string wrapped in a mitten. If someone tells you that you shouldn’t mess with this, that it’s better to trust the specialists, I’ll tell you openly, from my own experience I know that you will do it no worse than them, or even better, this is just a bluff with which they are trying to knock you off. to no avail. So, in fact, we have analyzed the entire process of installing a windshield or rear window, this does not matter much, since the installation is the same, and then you can freely apply this theoretical material in practice. Use the practical story of this article in practice, because it was worked out personally by me and my friend in one of the everyday situations with a personal car. And in conclusion, I would like to add that this method is simply irreplaceable; when we first had to face this problematic situation of dismantling glass, we did not know what to do. Only from our own experience, and with a little advice from specialists, who, by the way, still didn’t believe us, that together with a friend, we removed the windshield for the first time in our lives, we were able to calmly and simply dismantle it. And the gluing process is even simpler, you will need silicone glue in a special gun for these purposes, and degrease the surfaces of the glass edges and the edges of the body, the glass easily hardens within 24 hours, and your car is transformed before your eyes.
How to change car glass
An article about how to properly change car windows. Important nuances of the process. At the end of the article there is an interesting video about the intricacies of replacing auto glass.
Replacing car glass is not such a complicated procedure as experts try to convince motorists. Having a few tools at hand, high-quality glass, some skills and a little patience, you can replace auto glass yourself.
Why do you need to replace your windshield?
There are two main reasons that lead to the need to replace your windshield.
- Penetration of moisture from under the seal. Leakage between the glass and the body occurs due to the presence of an untaped area. If there is no warranty, you will have to carry out the repairs yourself. Repair manual for GAZelle - GAZ-2705, 3213, 33021 - Replacing the windshield. Sometimes it is possible to eliminate a leak when a hole is detected by filling the gap with sealant. If you cannot get rid of the leak, you will have to completely re-glue the glass.
- Damage to the windshield. Many motorists have encountered problems such as cracks and chips. They gradually grow, forming a whole “web” on the windshield. In this case, you will not be able to pass the state technical inspection, and the operation of the vehicle will be unsafe. If there is minor damage, chips and cracks can be repaired, otherwise the glass must be replaced.
Below we will tell you what tools and materials you will need for replacement, how to remove the old windshield and install a new one in its place. And at the end of this article, watch detailed video instructions on how to replace a windshield with your own hands according to all the rules.
Windshield frame repair from A to Z
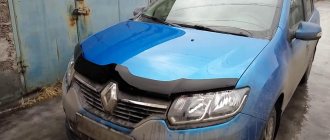
Welcome car enthusiasts to the website RtiIvaz.ru!
Today's video will be devoted to preparing the car for a complete repaint, where we will touch on body repairs and painting the windshield frame. Let's start the work with the roof of the car and the windshield frame, where some problems are visible. The frame on most cars is damaged in the form of individual pockets of corrosion and other defects.
The damage is caused by dirt and moisture collecting under the seal, which causes rust. It will be useful for car enthusiasts to learn how to deal with body corrosion.
This series of body repair and painting will tell you in detail how to properly clean the windshield frame from corrosion and remove the gloss.
There will be two options for working with glass:
- Frame processing when the glass is removed and access to the entire surface is open.
- When the glass remains on the body and methods for processing the frame without removing the glass, as well as with and without removing the sealing rubber.
We will look at all these options in this series, but let’s start the work, as mentioned above, with the roof of the car, that is, look for holes, clean out rust, etc. All this, as well as the tools and nuances of the work, will be discussed in detail in this video story. All this is so that you understand how to do this work correctly on your machine.
How to change With partial or complete removal of old glue
The glued glass can be replaced with complete removal of the old adhesive composition, or part of the old adhesive remains not removed. If the remnants of the old adhesive are polyurethane and adhere well, then this can serve as a good base for a new adhesive.
Remaining sealant can be left in the opening before installing new glass when:
- These are the remains of polyurethane sealant.
- The leftovers hold up well.
- There are no traces of corrosion in the opening where the glass will be installed.
- No significant damage occurred during the dismantling procedure.
In other cases, it is necessary to completely remove the remnants of the old sealant and, if necessary, remove corrosion and protect damaged areas from rust.
Before installing new glass, if there is any doubt that it was not glued with polyurethane sealant (maybe silicone), then all residues remaining after the cut should be removed, as they will impair the adhesion of the polyurethane sealant used to install the new glass. Places where bare metal appears after cleaning must be treated with a special primer.
How can you tell if the cut-off sealant residue is polyurethane?
- Press very firmly with your fingernail onto the remaining sealant.
- If it is polyurethane, then there should be no trace (depression) in the material.
- If it is silicone, then under pressure this material is easily deformed right up to the opening.
- Another way to determine the material is to cut a long strip and stretch it.
- If it is polyurethane, then significant force will be required to stretch and tear the strip.
- If it is silicone, then the strip will easily stretch over a long distance.
Lexa-97 › Blog › Repair of windshield frame on VAZ 2114
Hi all. Yes, this is the 14 that I painted a year ago, as promised, photos of the finished one. Over the course of a year, bugs actually crawled out from under her forehead (as expected), and that’s why she came to the room.
I pulled out the glass, it’s a thrill when they are on an elastic band and not pre-glued. After the sand, holes appeared, which I decided to eliminate by replacing the metal.
I welded it, primed it, puttyed it, lit it, primed it and realized that something was wrong with the grout, so I decided to clean everything down to bare metal. I bought some punishment and removed everything in about 5 minutes.
This time I used jet primer.
Then everything was as usual, I took it out, primed it, prepared everything and painted it. I painted it into the transition to the roof floor.
How to remove protective glass
Removing protective glass is much more difficult than removing film. If you glued it incorrectly, remove it using the tab located on the outside of the protective screen.
In most cases, the need to remove the protective screen arises after a serious fall of the phone. When the screen is broken, the glass must be removed as carefully as possible.
The easiest way is to take a plastic card (for example, a regular bank card) and pry off the edge. Then run the card under the entire surface of the screen, detaching it from the device.
Removing the protective glass
Advice! To make the peeling process easier, stick the phone screen in your palms.
Thematic videos:
How to stick a protective glass on an iPhone screen
How to stick a protective glass on the screen of an iPhone 5S Protective glass, excellent adhesion and excellent protection, scratch resistant.
https://youtube.com/watch?v=6q4j9Lp8AXA
How to stick a protective glass on a Samsung S4 phone
How to stick protective glass on your phone - Step-by-step instructions and selection tips
How to stick protective glass on the screen
How to stick protective glass on your phone - Step-by-step instructions and selection tips
8 Rating
Do it yourself
This material describes the detailed technological process of gluing protective glass to a smartphone. Even for inexperienced users, this process will take a maximum of 25 minutes. There is nothing complicated about this, the main thing is the right approach and careful preparation for the process itself.
Complexity
6
Time spent
6
Price
5
Types of glass
Today in the construction market there is not a single option for replacing glass in doorways. Before you decide on your own to replace the damaged glass in the door design, you need to study some types of materials and bet on the one that best suits your wishes
You can pay attention to the following glass for doors:
- Ordinary glass.
- Decorative glass.
- Organic glass.
In fact, each of the above types of glass is suitable for installation in interior doors. But it is worth familiarizing yourself with the features of each of them and betting on the one that is most suitable in all respects.
Regular glass
Among the advantages, the following facts can be noted:
- The cost of such glass is affordable to everyone.
- Installation does not require additional knowledge and equipment to cut the required part.
Among the shortcomings, we can name only one: ordinary glass requires additional finishing after installation, which means the purchase of additional materials.
Design of sliding doors with glass
Such glass is covered with a decorative film, which can be ordered or picked up in a store along with the main material.
In general, if you prepare all the necessary raw materials, then this option is quite worthy of attention.
Decorative glass
This type of material for work has the following advantages:
- exquisite design solutions, among which everyone will find an option for themselves;
- Installation is as simple as with conventional glass.
Among the disadvantages, the following facts can be noted:
- High price per unit of product.
- Difficulty finding a replacement if necessary.
- It is necessary to customize the design if we are talking about decorative glass with patterns.
Turning a blind eye to the shortcomings, this glass option for an interior door is worthy of attention.
Organic glass
The advantages are:
- this type of insert into an interior door has high strength;
- the cost of the material is average between ordinary glass and decorative glass.
Flaws:
- Organic glass is a transparent plastic structure.
- Plastic, more than glass, is susceptible to corrosion and mechanical damage. Therefore, over time, organic glass loses its aesthetics and becomes cloudy. To avoid such misunderstandings, the surface should be treated in a timely manner with special protective mixtures.
Design options for doors with glass
Having thought about what pricing policy is suitable and what skills you have for installing glass in an interior door, you can bet on a certain option. After purchasing, you can begin the process of installing new glass to replace the damaged one.
Important points
No matter how the owners and workers of the workshops frighten motorists with the complexity of installing glass in a car, and the latter insist on the opposite, the truth is somewhere in the middle. Of course, a person without experience can make a mistake and do something wrong, but with a careful approach and minimal skills, installing glass in a car is quite possible.
And to minimize the risk of error, you should follow some rules:
- Select glass, taking into account the make and model of a particular car.
- Strictly follow all instructions given on the adhesive package.
- Since the mixture is very dense, it is advisable to use a high-quality, reliable gun that will not break during the work.
- Before gluing the glass, you need to attach it to the installation site and check how well it fits by marking the places where it fits.
- For the first few days after installation, you should not slam the doors (this creates pressure on the windows) or make other sudden manipulations with the machine. It is best to leave it alone until the glue has completely hardened.
- It is advisable not to drive your car for at least 48 hours after installing the windows. If this is not possible, then you should wait at least a few hours before driving.
- Under no circumstances should you remove the fixing tape during the first two days; the glass will lose its support and may become loose. Therefore, if you plan to go on the road after installation, then you should choose transparent adhesive tape so that it does not interfere with your view.
- The car should not be washed for at least 48 hours, and should not be wet at all, for example in the rain. This disrupts the curing process of the sealant.
- Glue and glass for installation should only be purchased from reliable manufacturers.
- The surface to be applied must be completely dry.
- When removing old glass, you should wear protective gloves to avoid harming yourself. It is also advisable to wear a mask that will protect your eyes. Cracked, unstable glass can cause unpleasant surprises and serious injury.
When choosing auto glass, you should primarily focus on your financial capabilities. Of course, the ideal option is branded glass designed for a specific make and model of car. But the prices for such products are several times higher than the prices for licensed copies. And the latter are often in no way inferior to branded products. Even Russian-made auto glass has good characteristics, for its price segment, of course.
Video about the intricacies of replacing auto glass:
DIY replacement
Replacing a double-glazed window is somewhat more difficult than it seems at first glance. To work you will need a knife and a rubber hammer.
Glass replacement process
The cost of double-glazed windows is influenced by its size and quality of glass. Also, when calculating the cost of these works, you need to take into account the payment for the specialist’s visit to the site and delivery.
Sequence of work
Replacing double glazing in plastic windows involves the following sequence of actions:
Work must begin with dismantling the glazing beads. You need to insert the knife under the glazing bead and try to move it from its place. A plastic gasket is inserted into the resulting gap. While loosening the gasket, you need to snap off the glazing bead. After this, it can be removed fairly quickly. First, we remove the long side beads, then the bottom one, and only then the top one. Actions must be performed in exactly this sequence, otherwise the glass may fall on you
It is also necessary to remember the location of each bead. When removing beads, it is necessary to mark the places where the spacers are secured between the double-glazed window and the window frame, since then they need to be installed in place. Replacement must be carried out in a safe manner and all work must be carried out with care. The glass unit has a significant mass, so it will be difficult to cope without helpers
To avoid cuts, it is best to carry out work with gloves.
- The new double-glazed window is inserted in compliance with the previous location of the spacers. It is placed in a designated place and accelerated by straightening plates. The strength and resistance of the sash to sagging depends on the correct execution of this operation.
- We insert the glazing beads in the reverse order: first the short ones - top and bottom, and only then - the side ones. To do this you will need a rubber hammer. If you don’t have one, you can use a regular one, but before work you need to wrap it with a rag so as not to damage the glass and glazing beads. A characteristic click will indicate that the beads are installed correctly. Since the seal is fixed directly to the bead, no other sealing is required in this case.
After the replacement is completed, if necessary, the sash is adjusted for pressure and free opening and closing.
All work on dismantling the old one and installing the new one takes no more than 20-30 minutes
Replacing glass in windows
Replacing glass in plastic windows is extremely rare, since this type of work with the involvement of specialists will cost more than replacing an entire double-glazed window, and it is resorted to when it is necessary to preserve particularly valuable glass (for example, stained glass).
If you are going to replace the glass in a plastic window yourself, the complexity of the work will increase somewhat. After removing the glass unit, it must be placed on a flat surface with the broken glass facing up. Glass can be cut along the side surface with a sharp knife. A spacer frame will remain in the glass unit, which is replaced with a new one by gluing it with double-sided tape. It is necessary to provide for filling the frame with granules - air dehumidifiers. Otherwise, when the temperature differs, the windows will fog up. Now you should carefully cut another glass to size, trying not to stain it on the inside.
Install it on silicone sealant, which should be carefully spread, moistened with water. After the silicone has dried, the entire structure is installed in place and attached with glazing beads, which are nailed with a rubber hammer. Plastic spacers must be placed between the opening and the glass unit.
It is important to note that glass can be replaced with energy-saving or tinted ones. You can also install decorative overlays, frames or false bindings, which will be an excellent decoration
Thus, if necessary, double-glazed windows can be completely changed independently. You just need to be patient, and repaired plastic windows will protect your home from cold and noise for a long time.
https://www.youtube.com/watch?v=purOJZzPwdEVideo can't be loaded: Video on how to remove a double-glazed window from a plastic window._xvid.avi (https://www.youtube.com/watch?v=purOJZzPwdE)
Replacement of side windows
Side car windows are particularly fragile, so cracks rarely form on them - as a rule, they break into small fragments. To replace the side glass yourself you will need:
- new glass;
- a set of screwdrivers (you may need a flathead, Phillips, socket);
- a set of new latches for fixing the trim.
The replacement process is carried out in this order:
- The upholstery is removed from the door. For this:
Using a Phillips screwdriver, unscrew the bolts that secure the armrest and remove it;
- using a small flat screwdriver, unscrew and dismantle the window handle;
- remove the handle intended for opening the car door;
- To detach the upholstery, loosen the elements securing it.
- The window lifter lever is returned to its place, fixing it in the “window down” position.
- Use a socket screwdriver to unscrew the fasteners on the car window frame, after which the seal and the remaining glass are removed.
- The glass is raised a little higher so that the fastening screws of the pressure plate are visible.
- One screw is turned out completely, the rest are slightly loosened.
- The new glass is tilted with its upper part towards the interior and installed in place, secured with clamping bolts.
- In order to return the doors and upholstery to their previous appearance, all steps for dismantling them are repeated in reverse order.
Replacement of side windows
Windshield replacement. Video 5
Or any other car glass, be it the side window glass or the glass of the rear door, the so-called clapper? Those who are familiar with this procedure will say: “Nothing complicated!”
And he will be right! Indeed, nothing complicated, just a little accuracy and follow the saying “Measure twice and cut once!”
This article is specifically intended for those who want to try replacing car glass for the first time using the correct technology. Self-gluing a windshield is an operation consisting of several stages. Let's figure it out from the very beginning.
Removing the remains of old glass
So, the first thing to do is, of course, to remove the old glass, or what is left of it. For this action, there are a couple of devices that can be purchased on the market. This is either a faceted string or a special instrument in the photo. The principle of operation is the same and quite obvious. A string or cutting knife is threaded between the glass - inside and outside. And thus the sealant is cut, securing the now former glass to its final resting place. The photo shows how.
The main danger when cutting off old glass or what is left of it is damaging the Torpedo. Be careful in this place!
So, let's assume that it has become clear how to cut off the old glass, let's move on to the next step, and this is preparing the place for gluing in new glass.
We cut off all the excess sealant remaining after removing the old glass. The most convenient way to do this is with a regular retractable knife, which with replaceable blades is sold in any construction supply store for 20 to 100 rubles. It is not necessary to cut to zero. Whatever happens, so be good.
Not Gods pots…. I saw how official NISSAN dealers glued the front cover, “Mother of God! Where do their hands grow from? But this is so - a retreat.
When cutting a windshield, the windshield molding is almost always cut off (damaged). Elastic band worn around the perimeter. So, let’s assume that it has become clear how to cut off the old glass, let’s move on to the next step, and this is preparing the place for gluing in the new glass.
We cut off all the excess sealant remaining after removing the old windshield.
We are content with what we have achieved – this criterion is not very important. Now you should worry about purchasing the necessary materials for gluing the windshield.
What do we need to replace the windshield?
- Degreasing composition.
- Primer for glass sealant.
- Sealant for gluing glass.
- Adhesive tape for fixing glued glass.
- Activator (composition for applying to the remaining strip of old sealant)
- A powerful gun, or better yet a pneumatic sealant gun.
- Unbridled faith in yourself and that everything will work out!
Tools and materials
Before you start replacing glass, you need to collect all the necessary tools and materials for cutting out the old glass and installing (gluing in) new glass.
- A string for cutting glass and a knife for cleaning the landing site from glue residues;
- Special adhesive-sealant for gluing glass on cars;
- Mounting gun with which glue will be applied;
- Activator-cleaner and primer-primer , to prepare the area before applying glue;
- Masking or regular tape to secure the glass until the glue dries completely.
Stages of work execution.
Glass holders
1. Remove the damaged glass. To do this, using a special blade or string, we cut off the old glue over the entire area of the glass.
2. Next, we begin preparing the seat.
3. Using a knife, carefully remove all remaining sealant.
4. After the seat is ready for glass installation, we try on the new windshield.
5. If the seat on your car is not equipped with special stops, it is worth making marks on the body for correct and accurate installation.
6. Take the activator and finally get rid of the remaining sealant.
7. Using White Spirit, degrease the seat.
8. Prime the surface in one layer.
9. Installation of auto glass. To avoid accidentally damaging the new glass, place soft material on the hood.
Installing new glass
10. Next, apply sealant to the place where the new glass will be installed. For clear fixation, it is necessary to apply the material evenly using a special gun. Before you start using the composition, carefully read the manufacturer's instructions.
11. Align the window in the seat according to the previously prepared marks.
12. Install the glass and check the reliability of the fixation.
13. Now all that remains is to secure the window with tape. First, we glue some of the tape to the windshield, then fasten it to the body. This way you will achieve the most precise fixation and better tightening.
Now you can evaluate the results of your work from the outside and protect the treated area from mechanical influences while the sealant is drying. To determine the exact drying period of the composition, refer to the included instructions.
When performing work, be sure to follow all safety precautions. When replacing windows, be sure to protect your hands.
https://youtube.com/watch?v=cUpqK5BwsGU%3F
As it turned out, replacing the front glass is a fairly affordable procedure. With the proper level of responsibility and care, you will definitely cope with the replacement.
Good luck!
Side glass removal process
Step 1: remove the door trim
To do this, we sequentially dismantle:
- Armrest. It is usually secured to the door with three screws hidden under the plugs. Using a thin screwdriver, pry up the plug - it should come off easily. Now use a Phillips screwdriver to remove the screws.
- Window lifter drive handle. It is held in place by a small plastic element, which can be easily removed by prying it with a thin screwdriver. Next, it remains to remove the drive handle from the splined shaft.
- The handle that opens the door. To remove it, you need to remove the decorative trim.
The casing can now be removed. To do this, you need to press the latches with a flat-head screwdriver and pull the door trim out of the metal frame.
If your vehicle is equipped with side airbags, you will need to disconnect the wiring and remove the airbag sensor. If you have power windows, this will also require additional steps when replacing the glass.
Step 2: remove the decorative trim at the top of the door
To remove the decorative trim, you need to pry the latches with a flat screwdriver. Next, unscrew the plastic cap on the door lock. Now nothing holds the trim on the door; it can be removed. You must act carefully so as not to damage the upholstery. Pry the cover with a screwdriver (from the outside) and slightly lift it off the hooks.
Step 3: Remove glass shards
To remove the side glass or remove its remains, you will need to put the window handle back on. The glass (or what is left of it) must be lowered to its lowest position. Be sure to wear gloves to avoid cutting yourself. Now carefully remove the fragments from the seat.
It is better to collect small fragments with a vacuum cleaner. You can pull out fragments from the most inaccessible places using one trick. Take a thin screwdriver and wrap the tape around it with the sticky side facing out. This device will help collect fragments from hard-to-reach places.
If you leave the fragments in the car, then an unpleasant sound will probably appear when opening and closing the door. In addition, the driver and passengers risk injury. Therefore, after you have removed the side rear or front glass, you need to collect the fragments as carefully as possible.
How to remove an old windshield
A clean car must first be placed in a garage or box on a flat surface. The procedure for removing the windshield is as follows:
- Using a flat-head screwdriver, you need to remove the rubber seal located on the outside of the car.
- Wipers, plastic protection, and moldings are dismantled.
- In the cabin, the dashboard and front seats should be covered with film to protect them from dust and dirt.
- The seal is removed from the interior side, and the front pillar cards are pryed off in the area of the latches and dismantled.
- Now you need to unscrew the screws and remove the sun visors.
- The existing sensors and wires that go to the windshield must be disconnected and removed.
- An awl or sharpened wire is used to pierce the sealed seam (old glue).
- A faceted string is inserted into the puncture, after which handles are attached to its edges. It is more convenient to start cutting the old windshield from the upper left corner.
- It is more convenient to carry out the work of cutting the adhesive-sealant together. One is conveniently located inside the cabin, and the second is on the outside of the car. The principle of operation is simple: first, one person pulls the string towards himself, and the other holds his section taut. Then the string moves in the opposite direction. In this case, the string shifts along the windshield.
- In those places of the body where the string can touch the panel or trim, a piece of metal sheet should be placed.
- When a cut has been made along the entire perimeter, the windshield is removed from the car using suction cups.
- Now you need to clean the old glue from the body and glass (if it will be installed again). This requires a chisel and solvent.
Everything is clearly shown in the video at the end of the article.
Part overview and work to be done
So let's get started. As mentioned above, today we will repair the roof of a car. In our case, the surface of the roof itself is quite smooth without any significant damage to the plane, except for one place where the windshield frame begins.
Previously there was some damage in this place and this area was puttied. The putty will need to be removed, since there is a small difference at the damage site that needs to be leveled.
In addition, as can be clearly seen from the video, there is a strip of rust on the roof itself.
When repairing a roof, you should always pay attention to the glass openings, where, as a rule, rust always collects. The fact is that moisture and debris get under the installed rubber, which provokes the appearance of pockets of rust.
If, in the process of preparing the car for a complete repaint, you do not pay due attention to the window openings, then after painting, the rust will gladly come out. All this will require repeat work, especially on a freshly painted body.
Rust in this place appeared due to the fact that this area was not primed, or the primer was scratched when installing glass and the metal was essentially left without protection.
On this car you can see that the roof surface was primed without removing the windshield, this is confirmed by a kind of step at the transition of the roof to the window opening. The putty was applied under the rubber, as a result of which a kind of boundary remained between the plane of the roof and the window opening.
This is considered a mistake and during repairs it is always necessary to remove the glass, that is, either cut it out if it is sealed, or remove the rubber seal and remove the glass. Then you are guaranteed to reach all corners of the opening and do the work better.
How to bend the windshield seal
Master Vlad ShchCh showed, using the example of a rear windshield, how to correctly bend the rubber seal. Traces of soil near the opening are clearly visible, since here, too, when priming, the opening was simply sealed with tape and now the border where it was glued is clearly visible.
If you lift the rubber band, you can see where the primed area ends and then the untreated surface. In addition to the fact that the border will be visible after painting, it may begin to peel off and a pocket of rust may appear.
In addition to this, for example, when selling a car, knowledgeable people will immediately determine what was done to the body simply by bending the edge of the glass seal. They will see the paint line and say that the car has been repainted! And this already gives reason for thought. There was a bat, in an accident, etc., which can immediately give reason to reduce the price or, generally speaking, scare off potential buyers.
If for some reason the glass cannot be removed, the sealing rubber can simply be bent upward and then the paint will fall inside the opening without leaving a transition.
For these purposes, you can use a hose or rope of suitable thickness, which is placed under the elastic band, thereby lifting it above the opening.
Rope, wire, hose, etc. – choose a suitable diameter so that it neatly fills the cavity between the elastic band and the frame of the opening. Thus, we will give maximum access to work with the part.
The raised rubber band makes it possible to putty, trowel, apply primer and perform other necessary work. With this painting technology, if, when inspecting a car before purchasing, you bend the edge of the sealing rubber, then the border of the transition will not be visible to knowledgeable people.
Next, you need to cover the seal itself with tape so that there are no traces of primer or paint left on it. To do this, do not stick the adhesive tape on the edge of the elastic band, but tuck its edge inside the seal, thereby completely protecting the elastic band and leaving it clean.
You can bend part of the tape under the seal, for example, using a knife blade.
On this car you can see that the windshield rubber lends itself well to various manipulations due to the removed elastic lock, which is inserted into the internal cavity of the seal. This is done so that after installing the glass, use the lock to lock the rubber firmly in the opening, which will prevent the glass from “flying out” on any large bump or pothole.
Therefore, if the windows on your car are not glued in, but are held on by a seal, then if you do not want to remove the glass itself, you need to remove the glass lock. Ideally, it is best to remove the glass and work calmly, having access to all corners of the front opening.
A closer look at the video shows that the seal is well protected with tape. It was even possible to cover the inside with more tape so that the rubber itself near the cord, which also protects, would not be visible. In addition, due to the fact that the cord or elastic band is round, it does not give a large difference when painting and the paint will not be visible.