Step-by-step instructions for replacing thresholds on a VAZ 2114
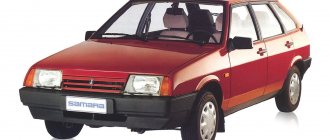
Serial production of the VAZ 2114 lasted from 2003 to 2013; the car continued the line of VAZ “nines” and became its restyled version. The five-door hatchback received updated front body lines, new headlights, and moldings.
Structurally, the Lada Samara of all years of production was built on the same platform as the VAZ 2109; the model received universal engines, an all-metal body with attachments. Considering that the car has been out of production for almost seven years, replacing VAZ 2114 thresholds is one of the most common types of body repairs today.
Replacing thresholds with your own hands
p, blockquote 11,0,0,0,0 —>
- When welding thresholds on flanges through holes, position the welding torch with wire in the center of the hole so that the wire touches the metal to which the panel will be welded. It is necessary that the electric arc forms precisely on the metal to which the panel will be welded, and not on the edge of the hole. Start welding in this position and do not move the welding torch until the hole is almost full. Next, move the burner in a spiral towards the edges. This way the penetration into the metal being welded will be good and the welded joint will be strong.
- Clean the welds. When stripping, do not remove too much of the seam as this will weaken it.
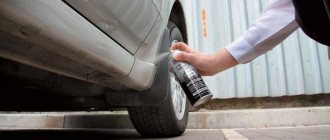
- Provide anti-corrosion protection. You can use epoxy primer directly on the weld area before applying subsequent coatings. Through the technological holes, treat the threshold from the inside with an anti-corrosion spray compound.
Preparing for replacement
For the entire VAZ family, thresholds are non-removable body elements; in 80% of cases, repairing an element involves completely cutting or cutting out the part. Overcooking requires preparation
- The car is installed on a flat surface.
- The negative terminal is removed from the battery. In some cases, the battery is removed.
- The wiring from the inside of the doors from the electric windows is dismantled, all sensors are removed.
- The seats are removed from the interior, the inner trim of the pillars and the floor covering are removed.
- Doors are dismantled.
When planning to repair only the threshold, drivers have to partially change the bottom, install new jacks, and strengthen the central pillar. The metal for the body of the VAZ 2114, as well as for other models in the Lada Samara line, did not undergo anti-corrosion galvanizing.
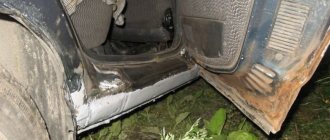
Rolled steel was puttied, primed and painted. The inner part of the bottom and the box were not treated with anticorrosive; the first layers of rust appear on the internal parts of the body in the second year of operation. If the threshold is being repaired for the first time, and the “youngest” VAZ 2114 model is 6 years old, we can confidently say that the owner will find completely rotten metal under the bottom trim.
To prevent the geometry from becoming distorted during repairs and the central pillar from falling, it is recommended to install spacers or weld a channel.
Do-it-yourself replacement of VAZ 2114 thresholds: step-by-step instructions
If you are dismantling the thresholds, as well as replacing the bottom of a VAZ 2114 with your own hands, it is recommended to drive the car into an inspection hole or turn the car on its side before starting work. If only the threshold needs to be replaced, it is enough to place the car on a flat surface. To work you will need the following tools and materials:
- Bulgarian;
- a sharp chisel with a wide blade;
- hammer;
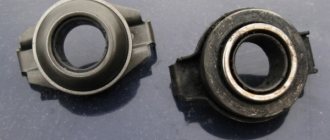
- set of thresholds with amplifier;
- automotive putty;
- primer;
- rubber spatula;
- sandpaper R-80;
- enamel for paintwork.
In car repair shops, welding machines are used for cutting: the metal is not cut, but welded along the old seams. This allows you to keep the old center pillar amplifier intact and does not damage the metal of the underbody. If the force plate under the strut needs to be replaced, the entire assembly is boiled down.
If you need to replace it yourself, the part is often cut off with a grinder or knocked out with a chisel. It is necessary to attach a new part to the old threshold and draw a dimension line in order to see the perimeter of the future cutting. The cutting is carried out from the central pillar to the left and to the right. Dismantling process:
- Remove old paint from the part using a grinder.
- Drill out weld points.
- Cut off the outer part.
- Check the seal and connector: if the metal is rotten, cut it off with a grinder.
- Clean the body from rust and sand it down to bare metal.
- Try on a new element, adjust it, cut off the excess edge.
- Mark the location for spot welding. Clear.
Preparation of the body for welding work has been completed. Before installation, the transport primer is removed from the parts.
How to replace the thresholds of a VAZ 2109 with your own hands
If a significant part of the thresholds is damaged by corrosion, then there are no options other than completely replacing these body elements. To carry out repair work you will need the following list of tools and materials:
- semi-automatic welding machine;
- new thresholds;
- Bulgarian;
- drill;
- sandpaper;
- putty and primer;
- anti-corrosion compound (mastic).
Features of replacement and preparation for it
When planning body repairs, you need to understand that the design of the VAZ 2109 thresholds consists of the following elements:
- outer box;
- inner box;
- amplifier
How to cook thresholds on a VAZ 2114
If the sills on a VAZ 2114 are rotten, in addition to replacing the main element, you will also have to re-weld the bottom by cutting out the old metal and installing patches. Step by step process:
- The connector or the lower part of the box is welded.
- The amplifier is installed.
- The outer part is welded by arc welding.
- Welding seams are cleaned with a grinder, primed and puttied.
- After 12 hours, anti-corrosion agents are applied to the bottom and outer part, and at the final stage, painting is carried out with auto enamel.
It is not recommended to operate the car for 24 hours until the paint has completely dried.
Square pipe instead of thresholds on a VAZ
To change the thresholds on a VAZ 2114 with your own hands, in half of the cases profile pipes are used. This method has proven itself well when replacing similar parts on classic VAZs. The profile has suitable dimensions of width and height, and the metal thickness reaches 2 mm, which ensures the reliability of the body for at least 7 years. In addition, profile pipes in 40% of cases have an additional zinc coating, which ensures the metal’s resistance to corrosion.
To work you will need:
- profile pipe 60x60x2 mm: 180 cm for one threshold, 70 cm for the cross member that will connect the spar to the part;
- profile with dimensions 40x20x2 mm: 70 cm for an additional cross member, 25 cm for jacks, if you have to reinstall the old ones;
- metal plate 15x5 cm to strengthen the part to the bottom;
- anticorrosive for the bottom - bitumen mastic 500 g;
- Bulgarian;
- electric or gas welding, 3 mm electrodes.
Experienced drivers recommend not using an inspection hole, but putting the car on its side, having first removed the battery, door, seats, and interior trim.
- Remove moldings and panels.
- Using a grinder, cut off the outer part along the top seam and bend the metal.
- Cut off the inside, remove the amplifier.
- Attach the pipe, cut off the excess part, weld plugs at the ends of the profile.
- Tack the profile to the bottom by welding at two points, front and back.
- Boil the outer part of the profile to the body, moving from the central pillar. If the body has a bend in this area, tap the pipe during welding to align the profile.
- Weld the cross members that will connect the threshold and the spar.
- Weld fasteners under the jack, weld plates to the bottom to strengthen the structure.
- Clean the weld seams with a grinder and treat with mastic.
- Paint and install decorative panels.
Power profile thresholds have maximum resistance to mechanical damage. If the original body elements bend under a strong impact, for example when driving incorrectly on a difficult section, on potholes, etc., then with installed profiles only the paintwork and plastic linings will suffer.
About decorative thresholds VAZ 2110 (overlays)
After you install new metal sills on your updated VAZ 2110, you may want to go even further, thanks to plastic sill covers, creating a stylish aerodynamic tuning. Of course, it will only have a decorative role, but such a fashionable solution often looks very impressive on the VAZ 2110. By the way, the plastic sills from Priora are also excellent in the top ten.
It’s worth mentioning right away that the use of plastic overlays, although intended not least to protect the VAZ 2110 sills from the effects of road dirt and splashes flying from under the wheels, can equally have the opposite effect. At the same time, your stylish body kit may turn out to be the main catalyst for corrosion. Now let's explain how this happens.
Lada Priora thresholds
The thing is that dirt and road moisture penetrate into the space between the plastic of the trim and the threshold of the VAZ 2110, which should be cleaned out regularly. If this is not done, the humid environment becomes the main catalyst for metal oxidation and the car body becomes unusable ahead of time. A similar situation occurs as holes form in the thresholds themselves: dirt and moisture penetrate inside and corrosion continues from the inside.
But this does not mean at all that it is better to simply abandon thresholds. VAZ 2110 cars are supplied with them from the factory
They are also an important part of external auto tuning and additional protection for the thresholds of the VAZ 2110. All you need is to promptly monitor the appearance of dirt under the plastic trim and get rid of it
https://youtube.com/watch?v=6AT7AEdVAEE
By the way, the original plastic linings of the VAZ 2110 come in two types: old and new. Previously produced thresholds were made of lower quality and thin plastic, and were attached to pistons. On cars released later, the linings fit more firmly to the body and are fastened with self-tapping screws. A full-fledged stylish body kit for the VAZ 2110 will cost the owner approximately 3-5 thousand rubles.
Some useful tips
To keep the thresholds of the VAZ 2110 in good condition, it is enough to regularly monitor them. If you do not allow rust to eat through the holes, the sills can last a really long time even with extremely intense driving on dirty and wet roads. There are special products on sale that prevent the spread of rust.
In this case, after washing the car, it will be enough to clean the affected area of rust and treat it with a neutralizer. By the way, these tips are suitable not only for servicing the thresholds of the VAZ-2110, but also for the entire car as a whole. The doors, bottom and wheel arches are processed in a similar way, but this is material for a separate article.
This is where our article comes to its logical end. We sincerely hope that you found it useful. Don’t forget to monitor the condition of the sills on your VAZ 2110 and let rust never bother you.
Repair without welding
If the car owner is not enthusiastic about the idea of overcooking the car, you can use several proven methods for repairing parts from corrosion. However, it should be understood that such repairs are only a cosmetic procedure that is used for minor corrosive wear. It will give the car a fresh look, but after 6-8 months you will need a full replacement of the part.
To repair a threshold without welding, you will need the following materials and tools:
- epoxy resin or glue;
- solvent, rust remover;
- fiberglass or fiberglass;
- aluminum powder or silver;
- sandpaper R-80;
- automotive putty;
- priming;
- paint brush, rubber spatula, roller;
- auto enamel.
Instructions on how to repair a threshold using epoxy resin and fiberglass, step by step:
- Mix epoxy resin and hardener in a glass container, add silver. Aluminum powder plays the role of internal reinforcement of the composition and prevents the glue from cracking after complete hardening.
- Clean the threshold from old paint, remove rust with a corrosion cleaner.
- Clean the surface with sandpaper and degrease.
- Cut patches from fiberglass that are slightly larger than the corrosion dents.
- Coat the surface of the threshold with glue, attach a piece of fiberglass, and smooth with a spatula.
- Depending on the thickness of the corrosion dent, apply as many layers of fiberglass as necessary. If a hole in the threshold is sealed in this way, there cannot be less than 5-6 layers. Impregnate each layer with glue and roll it with a spatula.
- Roll the surface of the threshold with a roller to remove excess air and let the epoxy resin dry.
- Polymerization of epoxy glue lasts up to 12 hours; after drying, treat the surface of the threshold with sandpaper.
- Prime if necessary. If the dent was significant, apply a layer of putty and level the surface.
- After the putty has dried, paint over it with auto enamel.
All repair work using epoxy resin is carried out with gloves, this is convenient if you don’t have a roller and you have to level the surface with your hands.
How much does it cost on average to repair thresholds at a service center?
At a car service center, you can either carry out a complete replacement or limit yourself to cosmetic repair of metal from rust. The average cost of work for a service station in the capital region is given; the price does not include the cost of the material used and the part itself:
- Complete replacement of thresholds - from 8,000 rubles. Customer details.
- Replacement of sills and rear wing - from 23,000 rubles.
- Cosmetic repairs with epoxy glue from RUB 2,000.
At a service station within walking distance you can buy all the necessary parts for replacement; the craftsmen will recommend sets of thresholds, moldings, install additional plastic body kits, and carry out tuning.
Why do thresholds wear out?
Thresholds are load-bearing elements that provide the body with additional rigidity. Due to the fact that these parts are located in the lower part of the body, they are constantly exposed to negative factors:
- water;
- dirt;
- sand;
- stones;
- salt;
- chemical substances.
All this significantly reduces the service life of the thresholds. In addition, the mediocre quality of painting and anti-corrosion treatment of body elements from the factory leads to the fact that almost every owner of a “Nine” is faced with the need to replace the thresholds on their car.
Signs of the need to replace thresholds on a VAZ 2109
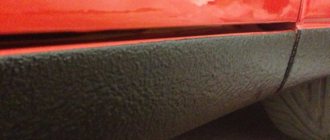
The appearance of even small areas of corrosion on the thresholds is the first sign that these body elements need to be paid attention to. Minor corrosion of thresholds may not present any problems at first glance
Minor corrosion of thresholds may not present any problems at first glance
At first glance, such areas may seem harmless, but if you examine them in more detail and clean them, it may turn out that under the layer of paint there is a serious source of corrosion or completely rotten metal.
With more detailed diagnostics of the threshold, through holes can be detected
It is important not to miss the moment when replacing the threshold is still possible. It often happens that the threshold rots around the perimeter and there is simply no need to weld a new part
In this case, more serious and labor-intensive body work will be required.
Threshold repair options
Repair of the body elements in question can be performed in two ways:
- welding patches;
- complete replacement of parts.
The first option requires less effort and financial investment. However, this is where its advantages end. If you follow the recommendations of specialists, then repairing the load-bearing part of the body with patches is not the best option. This is due to the fragility of such repairs.
If you do not have the opportunity to completely replace the thresholds or the body element in question has minimal damage, you can partially replace the damaged area. To do this, you need to cut out the rotten place, clean the metal as best as possible from corrosion and weld a patch of body metal of the required thickness or use a repair insert.
Partial repair involves replacing the damaged area with a piece of body metal or a repair insert
After this, the threshold is carefully protected from corrosion in order to maintain its integrity for as long as possible.
How to replace rotten thresholds with your own hands
The article describes an interesting method for solving the problem with rotten thresholds. Perhaps someone will need it for VAZs.
Cars often have problems with thresholds. This depends on the age of the car, and is also affected by various weather conditions. Water, dirt, and car sills begin to rot. There is a different attitude towards car repair now. Previously, to make a high-quality threshold for several years, it took at least two days, or even more. I want to describe a method of how to quickly repair a car threshold in 5–6 hours. The time also depends on what to do with painting the threshold or not. In this repair, I want to leave the top of the threshold and cut off only the lowest part, the most rotten, and also cut off the lower part of the second repair threshold and put it in place of the rotten one. To begin with, I change the threshold, and in the future I will make sure that the doors coincide with it. Although there may not be any problems since I will only be cutting off the bottom part, one way or another there may be some minor problems because the replacement threshold is not original. My car is M2141 or Moskvich 41.
Replacing thresholds with your own hands
Welcome to the kuzov.info blog!
p, blockquote 1,0,0,0,0 —>
In this article we will look at how to replace thresholds with your own hands.
p, blockquote 2,0,0,0,0 —>
The threshold is a stamped panel, which is a structural part of the supporting body of the car.
p, blockquote 3,0,0,0,0 —>
In a monocoque design, sill panels provide structural reinforcement that influences the vehicle's underbody rigidity and also provide torsional rigidity. While the front and rear parts of the body have zones of planned crumple, the sills provide rigidity to the middle part of the body, which should remain as intact as possible in a crash. Thus, the safety of the driver and passengers depends on the condition of the thresholds.
p, blockquote 4,0,0,0,0 —>
p, blockquote 5,0,1,0,0 —>
Thresholds, especially their lower part, are often ignored when washing. Road salt and other contaminants left on them accelerate the onset of corrosion. Also, these elements are constantly exposed to stones and sand that fly from the road while driving and act as an abrasive.
p, blockquote 6,0,0,0,0 —>
Since the thresholds are a closed, non-ventilated structure, they are vulnerable to corrosion. The worst aspect of threshold corrosion is that it starts from the inside and spreads outward. Thus, corrosion becomes visible when the threshold has already been significantly destroyed. In advanced cases, it may even be impossible to use special places for a jack to lift the car, since these areas have lost their strength due to corrosion. Another problem caused by both completely rusted sills and the bottom can be exhaust gases that can enter the car interior.
p, blockquote 7,0,0,0,0 —>
Threshold repair process
First, I will have to remove the driver's door, the left wheel, and also the front fender of the car. Next, you need to jack up the car, remove the front wheel, and then the wing. I need to remove the fender to make it easier to remove the car doors. My fender is screwed to the hood with six screws. From inside the hood, you also need to pull the “saber” and lower the bumper to free the lower part of the wing. The wing is also fastened from the inside with two screws and one near the door. I unscrew them. After all the screws are unscrewed, I have 9 of them, the wing is almost free. True, only mastic can hold it. To do this, you need to take a tool like a pry bar and try to slightly move the wing from the inside. Gradually I swing the wing from all sides, and after it moves away a little it can be removed. After the wing is removed, its strut usually needs to be cleaned of rust, dirt, plaque and other foreign bodies. In principle, you don’t have to clean it, but I usually always clean it. I usually clean the wing strut at the end of the job when I install it. Now we need to do the basics and repair the car sills.
Now that I have access to the door hinges, I begin to remove it. The doors should be wetted in advance with “WD-lubricant” and then begin to carefully knock out the hinges. More often than not, when I remove the hinges, I usually knock them down. If the top loop starts to rest against the wall, then you will need to bend the ends a little. This happens sometimes. After the door is removed, I proceed directly to repairing the thresholds.
I will cut the threshold right along the corner where it is connected to the upper threshold. I will attach the new threshold to the top one a couple of millimeters higher. If he performs, then we will have to come up with another line. I hope there won't be a protrusion. Before cutting off the threshold, I still decided to remove the rear passenger door in order to avoid damage to it when cutting and installing the threshold. During the inspection, I decided to slightly adjust my repair plan, namely: completely change the threshold, both upper and lower. There you still need to remove the plastic, but this is very simple and easy to do. I think everyone can handle this. Next, I carefully cut off the old threshold.
After I cut the sill off the fender strut, I remove all the old sealant that was there because it was clogged in places and if moisture gets in, it will stagnate. After I cleaned off the sealant, then I tap the rack so that all the dirt comes off and the rust falls down. Then the rack must be cleaned of all remaining debris. I have a problem with the stand; it has two or three layers, the layers are broken, and the metal simply falls off.
Next, I make an amplifier in the places near the front and rear left wings. I weld two plates, right on the roundness of the wings at the back and front. At the back, I welded a plate onto the inner layer of metal, and welded the second one, which I prepared, onto the outer layer. I also did the front.
Then, I do the first fitting of the new threshold. To do this, I hang the wing again and also the door to improve control. You don’t have to fasten it, just hang it, and that’s it. Well, whoever is not lazy can fix it. I measure it in order to look at the corner of the threshold on the front wheel. The wing should not catch or hit it. My threshold is completely fine. Next, I again remove the wing and door and begin the actual welding of the threshold. First, I “grab” it from below in different places. I usually weld the left side, right and center first. Next, I hang the doors and fender again to measure the threshold to measure the gaps.
I did well. It happens that the gap remains a little larger than expected, but this is not a big deal. The main thing is that the gap is not very large. And then what the customer says. Next, I remove the doors again and weld them completely. All that remains is to sort out the insides a little and make sure that dirt does not fly inside. It will be necessary to close this place under the wing later. After everything is closed inside, putty, primer, and painting proceed. The putty will also cover up all welding and other marks. It is advisable to putty immediately while the metal is fresh. Because if, for example, you come the next day, the metal will already be slightly covered with rust or dust. I use putty to cover all welding work.
I would also like to remind you that usually, when dealing with thresholds, the inner frame needs to be touched and changed too. The inner box is the inside of the threshold. Usually, when you touch the inner box, you need to disassemble the floor and remove the driver's seat. But since my car is in good condition, I don’t touch the inner box.
Next, after the first layer of putty had dried, all the bumps from welding became visible, and I smoothed them out with putty. After the second layer of putty has dried further, I prime the welded threshold before painting.
One more thing is very important: before painting, you need to take the car outside or to a less dusty place. Because it often happens that when painting a car, dust rises from the floor, and it can settle on the paint, and then there will be problems. Dust can appear on the paint, like dirt on a table. After I took the car to a place where there is no dust, I paint our sills and at the same time the fender.
Of course, I didn’t have time in 5-6 hours, I had to spend more time, but one way or another, I didn’t delay it for a day.
I hope I helped everyone who needs it. Happy repairs.
The thresholds of the VAZ 2114 have rotted
Will the side members be rotten if the bottom is rotten? VAZ 2115
- I wanted to buy a VAZ 2115 – 1 answer
- How to calculate the cost of body work - 1 answer
- Water flows through the rubber of the windshield of a VAZ 2114 - 7 answers
- When the bottom is scratched, does some kind of mastic or something wash off? – 5 answers
- How to adjust the trunk on a VAZ 2115? – 4 answers
If you want to give your car a second life, install it on chocks so that the body does not move during welding. Strip down everything inside, below and above.
You will see where you need to boil. Just don’t make double metal, it will rot in no time. Remove the rotten pieces and knock out exactly the same stiffening ribs. After welding, treat those places where you won’t go for a long time with ordinary lithol, it will penetrate even the smallest shells, in the places of arches, thresholds, pillars, pour it with a syringe using pressure (engine oil), the excess will drip off and dust will envelop everything inside.
The bottom is lithol from the inside, put it on silent, it won’t get into the cabin, but the bottom will live for a long time. On the outside, apply lithol directly with a brush, a thin layer of dust, and a crust will appear. In the side members, too, spray it with waste and the car will live for a very long time due to rot (have you ever seen rust in places where oil periodically gets in?). Don't be lazy and the car will thank you, it also has a soul.
The article describes an interesting method for solving the problem with rotten thresholds. Perhaps someone will need it for VAZs.
Cars often have problems with thresholds. This depends on the age of the car, and is also affected by various weather conditions. Water, dirt, and car sills begin to rot. There is a different attitude towards car repair now. Previously, to make a high-quality threshold for several years, it took at least two days, or even more. I want to describe a method of how to quickly repair a car threshold in 5–6 hours. The time also depends on what to do with painting the threshold or not. In this repair, I want to leave the top of the threshold and cut off only the lowest part, the most rotten, and also cut off the lower part of the second repair threshold and put it in place of the rotten one. To begin with, I change the threshold, and in the future I will make sure that the doors coincide with it. Although there may not be any problems since I will only be cutting off the bottom part, one way or another there may be some minor problems because the replacement threshold is not original. My car is M2141 or Moskvich 41.
Step-by-step instructions for replacing thresholds on a VAZ 2114
Serial production of the VAZ 2114 lasted from 2003 to 2013; the car continued the line of VAZ “nines” and became its restyled version. The five-door hatchback received updated front body lines, new headlights, and moldings.
Structurally, the Lada Samara of all years of production was built on the same platform as the VAZ 2109; the model received universal engines, an all-metal body with attachments. Considering that the car has been out of production for almost seven years, replacing VAZ 2114 thresholds is one of the most common types of body repairs today.
Preparing for replacement
For the entire VAZ family, thresholds are non-removable body elements; in 80% of cases, repairing an element involves completely cutting or cutting out the part. Overcooking requires preparation
- The car is installed on a flat surface.
- The negative terminal is removed from the battery. In some cases, the battery is removed.
- The wiring from the inside of the doors from the electric windows is dismantled, all sensors are removed.
- The seats are removed from the interior, the inner trim of the pillars and the floor covering are removed.
- Doors are dismantled.
When planning to repair only the threshold, drivers have to partially change the bottom, install new jacks, and strengthen the central pillar. The metal for the body of the VAZ 2114, as well as for other models in the Lada Samara line, did not undergo anti-corrosion galvanizing.
Rolled steel was puttied, primed and painted. The inner part of the bottom and the box were not treated with anticorrosive; the first layers of rust appear on the internal parts of the body in the second year of operation. If the threshold is being repaired for the first time, and the “youngest” VAZ 2114 model is 6 years old, we can confidently say that the owner will find completely rotten metal under the bottom trim.
To prevent the geometry from becoming distorted during repairs and the central pillar from falling, it is recommended to install spacers or weld a channel.
Do-it-yourself replacement of VAZ 2114 thresholds: step-by-step instructions
If you are dismantling the thresholds, as well as replacing the bottom of a VAZ 2114 with your own hands, it is recommended to drive the car into an inspection hole or turn the car on its side before starting work. If only the threshold needs to be replaced, it is enough to place the car on a flat surface. To work you will need the following tools and materials:
- Bulgarian;
- a sharp chisel with a wide blade;
- hammer;
- set of thresholds with amplifier;
- automotive putty;
- primer;
- rubber spatula;
- sandpaper R-80;
- enamel for paintwork.
In car repair shops, welding machines are used for cutting: the metal is not cut, but welded along the old seams. This allows you to keep the old center pillar amplifier intact and does not damage the metal of the underbody. If the force plate under the strut needs to be replaced, the entire assembly is boiled down.
If you need to replace it yourself, the part is often cut off with a grinder or knocked out with a chisel. It is necessary to attach a new part to the old threshold and draw a dimension line in order to see the perimeter of the future cutting. The cutting is carried out from the central pillar to the left and to the right. Dismantling process:
Replacing thresholds VAZ 2110
Some components of the tenth VAZ family are susceptible to corrosion. This is especially true for car bodies that have not been treated with an anti-corrosion agent, but the car was used in harsh climatic conditions.
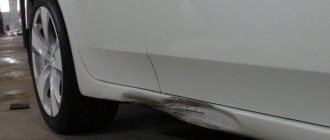
This threatens the owner of the car with the appearance of rust within a couple of years, and after 5-8 years the corrosion will become through. Another problem that VAZ drivers face is damage to the threshold as a result of an accident.
The appearance of rust on the threshold of a VAZ 2110 car
- In both cases, you can do the repairs yourself, saving several thousand rubles. For this you will need:
- discs for cleaning welding seams;
- grinder brush;
- Bulgarian;
- electric drill;
- car tool kit;
- semi-automatic welding machine 220 V;
- thresholds. In some cases, a repair kit (a component that goes onto the fender of a car right from the door);
- mastic;
- priming;
- anti-corrosion agent;
- solvent;
- brushes
Set of thresholds for VAZ 2110
Preparatory stage
Replacing the threshold of a VAZ 2110 first requires an inspection of the car. You may just need to do some cosmetic repairs or straightening work yourself.
To do this, place the car on the overpass. Please note that when replacing a threshold you will have to spend money not only on spare parts, but also on paint for the car's thresholds to prevent corrosion.
If only part of the threshold is damaged, you may need to replace a section of it after measuring it.
- The threshold consists of 3 components:
- connector;
- amplifier;
- panels outside.
- These components are connected to each other by welding.
The preparatory stage ends with stripping it down to metal with a carriage brush.
Changing thresholds for VAZ 2112
Dismantling process
To repair car thresholds with your own hands, dismantle them this way:
remove the locker, doors (rear and front), driver and passenger seats, car fenders with your own hands. Also remove seat belts, floor mats, remove sound insulation from the floor and remove wheels;
Protect your car windows with homemade curtains, which can be made from cardboard. This will be needed to prevent them from being damaged by sparks flying from the grinder. Otherwise, black spots will appear on the windows that cannot be removed;
- remove fusible and plastic components of the machine from the working area;
- disconnect the battery, preventing it from being affected by the welding machine;
- Using a grinder, cut off the old threshold, part of the bottom damaged by corrosion, as well as the threshold connector at the bottom and top of the VAZ threshold;
- Continue the repair by cleaning the surface where the new threshold will be located using a scrubbing brush, and then treat the surface with a corrosion neutralizer.
The metal of the car body often needs to be cleaned of rust after dismantling the part. If there are continuous areas of rust on the body, cut them out and weld patches there. It is also necessary to clean the area where the new part will be welded from any remaining paint, putty or primer.
Installing a new part
After preparing the surface, the repair process involves replacing the threshold, which begins with the amplifier:
Weld the connector of the new part to the subframe amplifier with a margin of a few millimeters, and connect it in front with the old part of the part that was left. Start working from the middle of the part, moving towards the edges. After this, clean the welding points;
- align the bottom edge of the amplifier with the connector;
- fit the front sill panel to the car. Then make the final adjustment, leaving small gaps and securing the place with clamps;
- clear the welding area of soil. Drill holes from the bottom of the panel, and then hang the outer part of the threshold on the car, securing it with self-tapping screws;
- weld the lower part of the part through the holes made to the panel from the outside, and a connector to the bottom of the body;
- weld metal on top of the threshold and, if required, patches on the side of the car bottom;
clean the formed seams, apply primer, putty and paint to them. Check them for leaks.
Replacing thresholds on a VAZ 2110 car
Peculiarities
- When carrying out DIY repairs for a VAZ car, please note that:
- to avoid distortion at the bottom of the car body, place the car on a flat surface;
- before carrying out welding work at the stage of installing a new part, first hang the doors to ensure correct installation;
- After installing the component on the VAZ with your own hands, be sure to treat the surface with anticorrosive or special primer.
Step-by-step instructions for replacing thresholds on a VAZ 2114
Serial production of the VAZ 2114 lasted from 2003 to 2013; the car continued the line of VAZ “nines” and became its restyled version. The five-door hatchback received updated front body lines, new headlights, and moldings.
Structurally, the Lada Samara of all years of production was built on the same platform as the VAZ 2109; the model received universal engines, an all-metal body with attachments. Considering that the car has been out of production for almost seven years, replacing VAZ 2114 thresholds is one of the most common types of body repairs today.
Preparing for replacement
For the entire VAZ family, thresholds are non-removable body elements; in 80% of cases, repairing an element involves completely cutting or cutting out the part. Overcooking requires preparation
- The car is installed on a flat surface.
- The negative terminal is removed from the battery. In some cases, the battery is removed.
- The wiring from the inside of the doors from the electric windows is dismantled, all sensors are removed.
- The seats are removed from the interior, the inner trim of the pillars and the floor covering are removed.
- Doors are dismantled.
When planning to repair only the threshold, drivers have to partially change the bottom, install new jacks, and strengthen the central pillar. The metal for the body of the VAZ 2114, as well as for other models in the Lada Samara line, did not undergo anti-corrosion galvanizing.
Rolled steel was puttied, primed and painted. The inner part of the bottom and the box were not treated with anticorrosive; the first layers of rust appear on the internal parts of the body in the second year of operation. If the threshold is being repaired for the first time, and the “youngest” VAZ 2114 model is 6 years old, we can confidently say that the owner will find completely rotten metal under the bottom trim.
To prevent the geometry from becoming distorted during repairs and the central pillar from falling, it is recommended to install spacers or weld a channel.
Do-it-yourself replacement of VAZ 2114 thresholds: step-by-step instructions
If you are dismantling the thresholds, as well as replacing the bottom of a VAZ 2114 with your own hands, it is recommended to drive the car into an inspection hole or turn the car on its side before starting work. If only the threshold needs to be replaced, it is enough to place the car on a flat surface. To work you will need the following tools and materials:
- Bulgarian;
- a sharp chisel with a wide blade;
- hammer;
- set of thresholds with amplifier;
- automotive putty;
- primer;
- rubber spatula;
- sandpaper R-80;
- enamel for paintwork.
In car repair shops, welding machines are used for cutting: the metal is not cut, but welded along the old seams. This allows you to keep the old center pillar amplifier intact and does not damage the metal of the underbody. If the force plate under the strut needs to be replaced, the entire assembly is boiled down.
If you need to replace it yourself, the part is often cut off with a grinder or knocked out with a chisel. It is necessary to attach a new part to the old threshold and draw a dimension line in order to see the perimeter of the future cutting. The cutting is carried out from the central pillar to the left and to the right. Dismantling process: