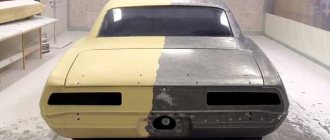
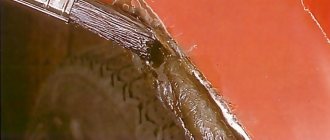
Our part is primed and, at first glance, is now definitely ready for painting. However, upon closer inspection, we will still see some shortcomings on it: uneven soil layer, areas of dry pollination, shagreen. To completely level the surface and give it the necessary roughness, the primer must be sanded before painting. Only then will the paint lay on the surface in an even layer, and, no less important, will it adhere well to the surface of the soil.
How to prepare a car for painting?
Hello, dear Masters, who are afraid of business! One day, while waiting for your beloved wife near the store, you suddenly pay attention to the condition of the paintwork of your car and briefly think that it wouldn’t hurt to touch it up. After some time, the thought of needing to touch up your car comes back to you when you see your neighbor in the garage driving out in his freshly painted, and therefore seemingly new, car. And you finally decide that you need to paint your car.
Types of primers for cars: primer, filler
To carry out body repair work, the same types of primers are used as in industrial enterprises during the production of a car. In general, there are 2 main types of mixtures:
- Primary or primer is used to protect the metal from the corrosion process and at the same time ensure reliable adhesion to the paint.
Primary primer - primer
- A secondary type of primer or filler is used to level out minor unevenness in the surface that will subsequently be painted. This allows you to create a uniform, smooth substrate. Fillers, in turn, are divided into sandable (most often used for body elements with defects that need to be hidden) and non-sandable (suitable for new and non-defective elements).
Secondary primer - filler
Today's range of formulations allows you to purchase a primer that has the properties of both a primer and a filler. For example, REOFLEX PRIMER FILLER (450-600 rubles).
Basic Concepts
Acrylic primer is a special mixture that contains acrylic and a certain amount of hardener. Depending on the number of elements, the soil can be one- or two-component.
A similar material is used to fill pores, and also as a protective layer when covering wood.
In some cases, it acts as a substrate for the main paint. The thickness of application of these solutions depends on the material being coated (50-100 microns or more). The amount of filler allows you to change the characteristics of the soil, which can be either adhesive or filling.
One of the most popular products on the market is Reoflex, which is used as a leveler. It can be applied to both wet and dry, pre-cleaned surfaces.
Dilute the mixture
Acrylic primers are component compositions. The technology of their dilution depends on this. For such purposes, experts recommend using several substances:
- The optimal thinner will be a special acrylic mixture that is compatible with a particular brand. Often, such solutions are recommended by the manufacturers of these products.
- Water. This mixture can only be used in cases where the soil contains a similar component. Water-acrylic mixtures are often diluted.
Some users recommend using a special thinner 647. But this issue is controversial, since the use of this product depends on the properties of the selected primer.
The amount of thinner often does not exceed 25% of the total volume of the mixture. Please note that it is important here to also consider the amount of hardener that is added to the solution when mixing.
You can find out the exact proportions and recommended solvent on the packaging. It is important to follow all basic recommendations to obtain high-quality and durable protection.
How to dilute acrylic primer
Many materials used in the external environment are susceptible to various factors. One of the methods of protection is to cover them with special solutions.
For such purposes, painting primers are increasingly being used, which reduce the risk of destruction or corrosion on the surface of the product. You can learn more about the characteristics of these products on specialized websites.
Correcting body defects and cleaning it from rust
The second question is how to paint a car, partially or completely. This determines how to prepare the car for painting, i.e. what equipment is needed, how much material and, accordingly, money is needed. As a result, the decision was made, and it was made in favor of full painting. Then we begin preparing the car for painting.
Preparation for painting a car can be divided into several stages. Our example is one of many options on how to prepare a car for painting, and in no case is it a dogma or the ultimate truth. Option.
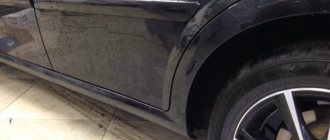
Troubleshooting . Wash the car thoroughly. Assessing the condition of the car will give you an objective answer to the question: partial or complete painting is needed. And when inspecting the car, do not try to deceive yourself or reassure yourself.
For example, if you see rusty bubbles of paintwork in the area of the sills or fender, do not regret, press on this place with a hard object. This rust came out from the inside, which means the process has gone deep. Or rather, it comes from the depths - welding may be necessary.
When preparing to paint a car, we carefully inspect risk areas: sills, underbody, fenders, pillars, joints of body parts.
Welding work . Don't hope for a miracle, and it is best to cut out the most problematic rotten areas of the body and apply patches. To do this you will need a grinder and a welding machine.
Cleaning the car body . First of all, using a grinder, we clean the welding seams until they are aligned with the plane of the body. Then we start cleaning with sandpaper. For this stage of preparation for painting the car, you will need a special plane and an orbital sander. And, of course, hands are where the mechanisms cannot reach.
The main purpose of sanding the body is to ensure that there are no sharp chips or drops left. In places with rust, remove it down to the metal of the body. In this procedure, a rust converter will come in handy. Deep cracks, dents, chips are treated with sandpaper p80-p120, large cracks - sandpaper p60. Read more about how to remove rust from a car body in this article.
Features of selection and application
If you are wondering which primer you can choose for a car and you are interested in how long it can be stored at home, then carefully study the videos presented on thematic sites.
Priming the underbody and body of the car before painting it prevents the occurrence of rust and corrosion on the surface of these parts, after which reliable adhesion and rapid “adhesion” of acrylic paint to the surface being treated is ensured. Today the market is overflowing with various products for body repair, including two-component putties, which can be epoxy or polyester.
Before using putty, prepare the surface (matt it and clean it from corrosion). At the beginning of mixing the putty, a pink hardener from a tube is added to it; its proportion should be 1:20. After this, the resulting mass must be diluted with a small spatula until a homogeneous consistency appears.
Advantages and disadvantages
Aerosol soil, like any other product, has its advantages and disadvantages. If we talk about the advantages of the spray, we can highlight the following factors:
- simplicity and ease of use;
- compactness;
- even smooth coating;
- the possibility of smooth transitions during local processing;
- lack of preliminary preparation of material for work.
Primer BLACK 400 ml aerosol
The disadvantages of the spray include 2 factors: low productivity and the ability to use only a fluid consistency. To paint the entire car, it is unlikely that you will be comfortable working with spray cans - it is troublesome, time-consuming and ineffective. It is much more rational to prepare a large container of a two-component product and use a pneumatic gun. But the aerosol is indispensable for local types of car repairs. If you are painting over a scratch, scuff or chip, the aerosol option is much more convenient. It is more efficient and will help to better process the desired area.
Sometimes liquid fluid mixtures are not suitable for treating a car body - they flow down the metal without giving the effect of a durable protective film. An aerosol auto primer will also not work for you here—you’ll have to buy viscous mixtures in cans.
Primer for cars in a can
Stages of preparing a car body for painting
Putty . (by the way, this word can also be pronounced as “putty”). An important stage in preparation for painting a car. Before puttying, the surface needs to be “matted”; for this we use sandpaper p220-p260.
To smooth out large body defects, we use coarse-grained putty with fiberglass (another type of two-component putty with aluminum filler may also be suitable). The putty is applied to deep chips or dents in several layers. It is elastic and can withstand mechanical loads. Can also be used for plastic parts. But, as a rule, there is putty for plastics for this purpose.
To smooth out minor body defects, a two-component universal putty is used. For final finishing of some surfaces, use finishing putty. To fill microcracks, a one-component acrylic putty is used (applied after the primer).
You choose brands and manufacturers of putties according to your discretion and preferences. It is important to strictly adhere to the manufacturer's instructions for using putties.
Grinding . Before starting, use developing powder (powdered graphite, carbon black) to determine the areas of the body where putties need to be added. Sanding is carried out using a grinder and sandpaper p80-p120.
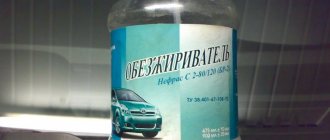
We polish the surface with sandpaper R240-R320 and degrease the areas ready for painting. Use masking tape and paper to cover all parts and parts of the car that you do not plan to paint.
Primer . For priming, a compressor with a pressure of 3 atm is required. and soil. We start the primer from the places that were puttied. The primer is applied in several layers. Each layer must dry. The most common primers today are acrylic. They guarantee high body protection against corrosion.
After the primer, a layer of “developing” is applied, that is, spraying paint of a contrasting color.
Primer treatment for painting. If we are preparing to paint a car with acrylic paint, sand paper p400-p600; metallic – p600-p800 plus gray scotch-brite (p500 – p600).
At this stage, unevenness or depressions may appear. We return to the putty again and bring the body to ideal condition (see above).
All. You can sit down and have a smoke. The car has been prepared for painting.
How to sand, with water or dry?
- It is better not to sand putty with water; it can absorb moisture (but not too much, as many people think). If water was used when sanding putty or primer, it is better to dry the surface with an infrared lamp. Sanding putty with water doesn't make much sense. Control over the condition of the surface is lost, and a developing coating cannot be used.
- When using sanding paper finer than P400 by hand (usually in preparation for painting or before polishing), the paper will quickly become clogged with material residue. These residues can clump and act as an abrasive. In this case, water is used, which helps keep the surface and paper clean. Sanding with water always helps the sanding paper last 3 to 5 times longer. In addition, water during sanding prevents the formation of dust.
- When sanding with water, the sanding paper should have a finer abrasive than when sanding dry. Sanding with water is more aggressive.
- When grinding with fine abrasive and water, the cross grinding method is used. The next pass is made 90 degrees from the previous one. First, sand the entire area in one direction only, then the entire area in another, perpendicular direction (see illustrations above).
We recommend: Do-it-yourself replacement of brake discs on a VAZ 2110
Preparation for matting
To improve the reaction between paint layers, the car body is matted. The depth of the scratches should be hundreds of micrometres, so careful use of suitable abrasives should be done to prevent excessive sanding. Before starting work, it is important to consider the following points:
- during work, it is necessary to protect the respiratory system from dust with a paint mask or respirator;
- the abrasive is selected after studying the instructions for it;
- for matting you will need several abrasives with different grain sizes;
- you should start with the coarsest abrasive, and the last pass is carried out with the finest sandpaper;
- Developing powder will help evaluate the quality of matting;
- Before starting work, welded seams in processing areas must be degreased.
Attention! When using a sanding machine, a soft backing should be used to prevent the edges from being washed down and accidental scratches.
What is the result?
So, the grinding process is the most important task during painting work. If everything is done correctly, the paintwork will adhere well and retain its attractive appearance.
We hope our set of rules will help you choose the appropriate abrasive, as well as carry out high-quality sanding of the putty before applying paint to your vehicle.
Video advice on what sandpaper to use to sand putty on a car:
Matting the car before painting is necessary to improve the adhesion of the paint layer, putty and primer. During the matting process, the old car coating is erased with abrasive materials. Small scratches increase the reaction area and increase the depth of mutual penetration of the layers, making the applied coating more stable and durable.
Surface matting
Matting should begin by sanding large flat surfaces with coarse sandpaper and a sander or plane. Treated and embossed surfaces are carefully processed by hand. In the process of high-quality matting, the old coating is removed and an even, polished thin layer remains.
The final stages of matting are:
- grinding;
- visual inspection of work quality using developing powder;
- rinsing with clean water;
- wiping with a sponge or felt;
- drying;
- degreasing.
It is better to check the quality of work with side lighting. Detected defects are marked with a marker and processed again. The quality of matting determines the reliability of adhesion of the paintwork to the surface of the car. At the same time, the matting of ordinary surfaces and transport soil are significantly different, so they should be considered separately.
Matting a normal surface
Matting is carried out at all stages of car painting. To apply primer, putty and paint, the surface is treated with abrasives of varying grits to improve the reaction between layers.
Before priming, the surface is sanded with sandpaper with a grain size of approximately P320. Before painting, treatment is carried out with less aggressive abrasives, within the range of P800-P1200, or using a special paste. For local repairs, the edges of the area are polished with a thin abrasive sponge P2000. For high-quality polishing, several abrasives of different grain sizes are used alternately in the same place, first for sanding and then for polishing. Matting is carried out dry, for example for polyester putty, or with wetting with a moderate amount of water to remove dust.
Reference! Technological details of processing can be found in the instructions for the selected abrasive from the manufacturer.
How to rub putty - sandpaper, a block and a little patience
The issue of how to grout putty must be approached with the utmost seriousness. The finishing layer of this finishing material must be perfectly even and smooth - especially if the surfaces are being prepared for painting.
How to sand putty? ?
You can level the surface of a putty wall manually or using special grinding machines. The first method, of course, is preferable, since it allows you to remove flaws even in the most inaccessible places, and the quality of work when using it will be higher. Experienced craftsmen recommend using the machine method only if the area is very large. However, you can’t do without manual work here either; in some places the master will still have to “go through” the sandpaper.
The main advantages of the machine processing method are high speed of work and convenience, because thanks to the long handle you can “reach” to the ceiling. However, it should be noted once again that it will not be possible to achieve the quality of handmade work using a mechanized method. In addition, such units cost at least forty thousand rubles, so there is no point in buying them to repair one house or apartment.
What kind of sandpaper should be used for putty? ?
So, let's focus on the manual method of rubbing putty. Typically, sandpaper or sanding mesh is used for this. It is best to choose sandpaper that is based not on paper, but on fabric, since it is more wear-resistant. In order to save money, it is worth buying sandpaper in rolls, because the consumption of this material during the grinding process will be high.
Matting materials
To work on matting a car, you will first need abrasive materials. When eliminating deep scratches, rust and other significant damage, you will need abrasives P120-P180, and even P80 for stripping down to metal. The standard set is sandpaper with numbers P320 for working on the ground, P800-P1200 for processing before applying paintwork and P2000 for eliminating minor defects and local repairs. You can also treat the paint before applying varnish with a soft abrasive P3000. When choosing a material, you should study the relevant recommendations from the manufacturer of the coating being applied.
You should choose an abrasive manufacturer based on cost and your convenience. It is important to take into account that high-quality ZM products are many times more durable than domestic brands. It is better suited for long-term work, but differs in markings and it is important to carefully study the instructions before use. Matting gels and pastes will help save abrasive and hours of work. For polishing difficult surfaces, a coarse polishing paste is a good alternative to P600 paper. After matting, it is advisable to degrease the surface with anti-silicone. Pre-degreasing is rarely used, but can help when working with alkyd enamel.
Important! If during work the abrasive often becomes clogged with old paint, there is no need to use coarser sandpaper. It is better to wipe and degrease the surface more often.
Features of manual grinding
This solution is suitable in the absence of special equipment. In addition, hand sanding is necessary when working in hard-to-reach areas. In the course of such activities, a number of features should be adhered to:
- using a long block you can smooth out defects that cannot be felt even after touching with your hand;
- using a block, make passes crosswise, up and down and back and forth five times in each direction. You should not sand one place, otherwise this will lead to the appearance of indentations;
- Use only clean sanding paper. Its operation is suitable until you feel that the material is being cut;
- It is important to gradually switch from coarser abrasives to fine ones (40-60 at a time, for example, from 120 to 180). As a result, you will save your time and effort;
Matting tools
To easily matte your car, sanding and polishing tools are useful. The choice depends on the area of the surface to be painted. For a complete repaint of the body, a sanding machine will be an indispensable assistant. An economical alternative for smooth surfaces are sandpaper blocks, also known as planes. With their help, it is easier to manually process the surface of the car.
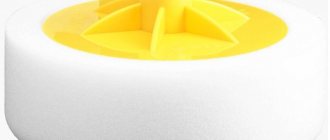
Manual matting is required in difficult and uneven areas. When matting embossed parts, Scotch Brites are useful. These are flexible and elastic felt-based abrasives that allow you to process hard-to-reach areas without changing shape. They differ in the degree of aggressiveness of the material in color - from red for rough work to green for polishing.
Manual matting
When manually processing the surface when matting, adhesive tape or flexible sandpaper is used. These materials make it possible to efficiently process complex relief areas. In this case, it is important to remember about the change in the sanding trajectory during bending and take it into account for uniform matting.
When working with abrasives manually, sanding with water greatly simplifies matting. A wet sponge is used to wet the body. An important condition for high-quality processing is the purity of the water, so it should be changed frequently. Adding liquid soap to the water will help to avoid varnish and shagreen smudges. After matting, the surface is washed with plenty of running water and wiped dry with a lint-free cloth.
Attention! The use of wet manual matting technology is contraindicated when working with polyester putty, which absorbs moisture and leads to corrosion.
Matting with a plane
When manually matting smooth surfaces, it is more convenient to secure the abrasive on a plane. This is a wooden block that is convenient to hold during the matting process. When working, you should securely fasten the sandpaper and regularly change the direction of the plane for uniform polishing.
Important! Keep in mind that when working with a plane, finer abrasives are used than when machine sanding in the same places.
Matting a car using a sander
The universal choice of sanding machine for matting a car body is an eccentric, also known as an orbital sander. The grinder will significantly speed up matting work in the following cases:
- complete removal of old paintwork;
- processing of transition zones of individual sections of the body before painting;
- leveling putty areas;
- removing the shipping primer.
Use the sander effectively on all flat surfaces. For high coating hardness, surface grinders or special attachments with mineral abrasives are used. When machining, it is important to ensure that the pump and dust removal hose are in good working order. To prevent clogging of the abrasive, it is recommended to periodically tap the sole of the machine. When working, it is unacceptable to put pressure on the machine and allow the surface to overheat. Also, bent, curved or thin parts should not be machine matted.
Matting of the car body and parts is necessary at all stages of applying protective and paint coatings. To work, you will need a set of abrasives of different grain sizes. Different elements of the body are processed with different tools - smooth surfaces can be sanded with a grinder, thin metal must be processed with a plane, and hard-to-reach places can only be polished by hand.
What sandpaper should I use to clean my car before painting? Read and remember
What sandpaper should I use to clean my car before painting?
Before answering this question, figure out what exactly you are going to do with the car, as well as how much corrosion has eaten into the body. In some cases, sandpaper is not enough, then you will have to use a sander for the job. In practice, the entire range of sandpaper can be used when painting. Below we will look at the main types and methods of using sandpaper.
Before starting work on updating the appearance of the car, it makes sense to conduct an experiment. Wet a cloth with solvent and place it on the body. After waiting 20 minutes, look at the result. If the paint has not changed its appearance, then you don’t have to rip it off completely. Clean only areas damaged by corrosion. If the paint is warped, you will have to clean the entire body of it. Otherwise there will be problems with swelling of the fresh coating.
Often, beginners do not know how to properly clean the body of rust and paint. Large volumes are usually processed with a grinder. This will help you save energy and time. If you do not have such a tool, you will have to use sandpaper. For large volumes, take a block and wrap it with suitable sandpaper. After that, use a circular motion to clean the body of paint. In areas damaged by corrosion, it is recommended to clean by hand.
Grouting of the primer is done only by hand. With this method you can carefully sand down all the slightest irregularities. This way you can create the best quality base for applying paint. The grouting process itself is carried out using uniform circular movements.
The putty is sanded only after complete drying. Before starting work, check the degree of drying of the substance. To do this, you need to rub the sandpaper over the putty. If stuck fibers appear in the grains, it is better to wait a little longer. Sand the putty stain in a circular motion from the edge to the center. This work takes place in 2 stages. First, a rough leveling is carried out, after which it is brought to normal condition with a finer grade of abrasive.
It is extremely important to thoroughly sand the body before priming. Often, beginners pay insufficient attention to sanding before priming. Don't expect the primer to hide all your imperfections. This is not true, all the little things will be visible even more. Sand the body thoroughly with medium sandpaper. To speed up the process, use a block. It is better not to use a grinder.
In the process of restoring the body, a beginner may wonder what kind of sandpaper to sand the car before painting. In fact, almost the entire line available for sale is used. For each operation, paper with the appropriate grain is used. This allows for a perfect paint finish.
Do-it-yourself car painting. Photo report and description attached
Hello again, forum members