Welcome! Bulbs in the headlight - they burn out over time and become unusable, therefore, as such, light bulbs are one of the consumables that are changed frequently and require mandatory replacement in case of burnout, since if there is no light, then driving normally at night Not sure it's going to happen. By the way, you have already noticed the title of the article, that is: “Replacing all the lamps in the headlight,” and not everyone knows what kind of light bulbs are included in the headlight, as when buying a car, as a rule, people do not bother about repairing it and thus little what they understand about it, so we explain! The front headlight includes, firstly, a turn signal lamp, secondly, a low beam and headlight lamp, and thirdly, a high beam lamp, and the front headlight is also necessarily equipped with a side light lamp; we described in detail how to replace all these lamps in this article.
Note! To replace the lamps, you will need to stock up on: If possible, only a clean rag to wipe the back side of the headlight, or you can not wipe anything, but simply use gloves to replace!
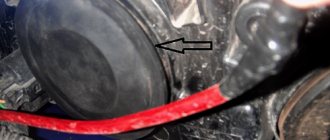
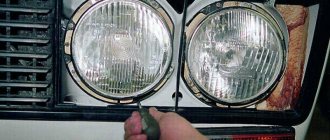
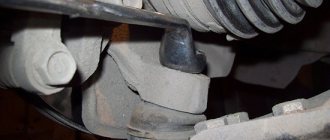
Which bulb is located where in the headlight? To understand this issue, you first need to look at the photo below, this photo shows the left headlight removed and disassembled from a VAZ 2110 car, as you can see, the arrows indicate where exactly which lamp goes, namely the red arrow is the low beam lamp, and The blue arrow is the high beam light bulb.
Note! This is not a whole headlight block (a headlight block is when the headlight comes in its entirety, together with the turn signal, that is, in a word, just a standard healthy block that includes the main light headlight, which is shown in the photo above, as well as the headlight in which the turn signal itself is located)
When do you need to change a particular lamp in a headlight? In fact, this is all done at your discretion, but there is just one thing! When the headlight is not on, driving in the dark is very dangerous, since the road on the side where the headlight is not on is not illuminated, thereby you are putting yourself and other people at risk, which can even cost your life.
And also, recently, as many already know, the prices for fines have increased, and therefore driving with a headlight not on is quite expensive, since constantly paying for the same violation will not make anyone happy, but will only disappoint.
What headlights are installed on the VAZ-2110
At various times, the 10 was equipped with headlights from various manufacturers, or rather, two - Russian headlights from the town of Kirzhach and German Bosch headlights. They are slightly different in design:
Still, many find advantages in Russian headlights, one of which is a lensed lampshade for a low-beam lamp. Whatever headlights may be installed, the quality of light is greatly influenced by the lamps.
Types of headlight bulbs
Marking of lamps according to GOST and EEC.
Since the front optics of the car are designed for a four-headlight lighting scheme, single-filament halogen lamps with an H1 type socket are used for near and far beams. This is an outdated scheme, but if you choose the right lamps, you can achieve good results. The following lamps are installed in the front optics from the factory:
- Distant light - lamp AKG12-55-2 with a power of 55 W with an H1 base.
- The same lamp is installed on the low beam.
- The direction indicator has a 21 W lamp, type PY21W. The A12-21-4 lamp with a power of 21 W is installed from the factory.
- W5W - 5 W lamp installed in side lights. The Russian lamp A12-5-2.Ъ comes from the factory
Types of lamps installed in the VAZ-2110 headlight.
Replacing the low beam lamp on a VAZ 2114: features
If you find that one of the low beam lamps has stopped working, then you should not start replacing it right on the highway, creating an emergency situation. It is better to drive to the nearest gas station or parking lot, where you can fix the problem in a calm environment.
For an experienced car enthusiast, the entire procedure will take 3-7 minutes. However, those who are faced with such a replacement for the first time should not rush
It is important to complete all the steps listed below correctly. Replacing a failed lamp is done as follows:
- Unscrew the bolts on the protective cover (2 pcs.).
- Remove the cover (under it you can see the lamp holder mechanism (spring) and the 3-pin headlight power connection block).
- Disconnect the 3-pin block.
- Gently compress the spring of the fastener (holder) and remove the non-working light bulb.
- We insert a new lamp into the holder.
- We install the protective cover in place, and then secure it with bolts.
If you notice that the low beam lamps on your car burn out very often, it is advisable to check whether there is moisture in the reflector unit (the presence of condensation adversely affects the overall working life of the lamps). If moisture is detected, you need to eliminate it by cleaning the drainage channel (located near the turn signal lamp mount). This measure is preventative, but can significantly increase the life of the light bulb.
Choosing which lamps to put in the headlights on a VAZ-2110
The VAZ-2110 car was designed back in the 80s of the last century, so there are no particularly technological solutions in its design. This also applies to optics. The car comes from the factory with four-lamp headlight units, which require the use of only type 1 lamps.
Which lamps are better?
The editorial car has ordinary headlights with lamps from a Russian manufacturer.
Naturally, the factory light in combination with the block headlight from Kirzhach shines for itself. Therefore, many immediately consider other lamp options, among which there are confident winners:
- For those who like to save money, the Chinese Nord YADA “Clear” lamp is suitable for 100 rubles apiece; nothing more good can be said about it;
- Bosch P190. It costs exactly 10 times more, is durable and has a traditional color, and can be installed for both near and far light.
- Osram H1 Cool Blue Hyper 5000K is an ideal option for not the most advanced optics, 10s per piece;
- Osram H1 Night Breaker 90% is a good option, the light is a little dimmer than the previous ones, but in rainy weather they have no equal;
- Sho-me H1 B4 Xenon White 120%. A lamp for everyone, with a slight yellow color;
- Philips X-treme Vision. Many people like the effect of these lamps, quite long-lasting and colorful;
- Koito "Whitebeam" H1. With a power of 55 W, it produces a luminous flux corresponding to a 100-watt lamp per piece.
What lamps are installed and how many of them?
The VAZ instrument panel is illuminated and the status of the vehicle’s components is indicated using 12 V 1.2 W incandescent lamps, which are installed in a 2W2 socket. The lamp is easily pulled out of the socket - you just need to pull it with your fingers; it can be purchased either separately or with a socket. In total, 20 lamps are used for lighting and indication in the instrument panel for the VAZ 2110, and they are inexpensive - 5-10 rubles. (at the time of writing) depending on brand (without cartridge).
VAZ car lamp installed in a socket and without it
Expert opinion
Alexey Bartosh
Specialist in repair and maintenance of electrical equipment and industrial electronics.
Usually lamps are bought with a small margin (2-3 more), but I would recommend changing everything at once if they are incandescent, since it is unknown how long the old ones will last - they can burn out tomorrow and the day after tomorrow. And again disassemble your VAZ because of one light bulb?
If desired, instead of incandescent lamps, you can install LED ones in the VAZ instrument panel - they are produced for the same voltage with the same standard size and can be either with or without a socket. By the way, in the latest modifications of dozens of VAZs, LED light sources have already been installed.
LED bulbs without socket and with socket for VAZ 2110
Why are LEDs better?
First of all, they have a longer service life (up to 20-30,000 hours instead of 1,000 for incandescent lamps). They are not afraid of vibrations and are 8 times more economical. But you have to pay for all this in the literal sense of the word: LED light bulbs are many times more expensive than their conventional incandescent counterparts. If you consider that there are 20 of them in the VAZ panel, the amount will be considerable.
Be careful with the generator warning lamp; based on feedback from our readers, it is better to replace it only with the same one.
Instrument panel VAZ 2110 - description of lamps and indicators
Designations of indicator lamps on the device panel of the VAZ 2110 - 15.
Many car owners are faced with this seemingly common question. What do the indicator lights on the device panel mean?
Well, how do we know, all of them together light up only when the ignition is turned on, and when one of them lights up while driving, it becomes a little restless.
I didn’t know this myself when I switched to the “two” after the “seven”; on the 2107, in general, half of them didn’t light up, so I didn’t know what it was and why. And a friend of mine, after buying a car in Novorossiysk, even bought a whole book on VAZ, due to ignorance of these light bulbs.
The designations on the device panels on all VAZs are virtually identical, just placed differently.
Let's start in order.
1 — Cooling water temperature, in degrees Celsius.
2 - Tachometer, engine speed.
5 — Speedometer, vehicle speed in km/h.
6 — Fuel level in the tank. With a remainder of 5-7 liters. A yellow light comes on - a warning or an icon with a picture of a gas station.
7 - In fact, this is an image of a gas station, signaling the need to refuel.
8 - Indicator lamp for turning on the dimensions.
9 — The brake water level is low, it may be leaking here and there.
10 - Turn on the high beams.
11 - Clock adjustment knob (hours/minutes - switches when pressed), from time to time this knob does the function of switching the total mileage/day mileage (on panels with a narrow screen).
12 — The screen displaying the total mileage/daily mileage can be narrow on some models.
13 - Hazard warning lamp - “hazard light”.
14 - Check Engine, often indicated by this icon - this means there is a malfunction in the engine, it is recommended to stop the engine.
15 — Screen with a clock (can show the outside air temperature if there is a temperature sensor).
16 — Malfunction in the battery charging system: loose or broken generator belt, generator malfunction, open circuit and other problems.
17 - Parking brake indicator.
18 - Insufficient oil pressure in the engine, it is recommended to turn off the engine and find the cause.
19 — Air damper light (on carburetor engines)
I’ll also add about the lamps on the additional panel in the dashboard of the VAZ 2110 - 12.
— The light marked with an arrow indicates a malfunction of the dimensions or brake lights. — Below is a brake pad wear indicator, if it lights up, check the brake pads, maybe it’s time to change them. — Seat belt warning light — this is clear from the picture.
On the other side from above:
— Low engine oil level — Low washer water level — High cooling water temperature
This is what the review came out with. If some kind of lamp lights up and the signal beeps, do not panic. As a rule, these are little things.
Save this note for yourself on your own social network by clicking on one of the buttons below.
Additional designations
When connecting a generator or tampering with the wiring and ignition system of a VAZ, you should know the location of the fuse box in the car. There are 17 of them in total, of which 2 are reserve.
- reverse gear rear lamps;
- electric motors for headlight and glass washer pumps;
- heated rear window;
- direction indicators, hazard warning lights;
- fog lights;
- tachometer, voltmeter, warning lights on the dashboard;
- cigarette lighter and clock;
- sound signal;
- interior lighting, brake lamps;
- high beam headlights;
- high beam warning lamp;
- engine compartment lighting and license plate lighting;
- glove compartment lighting;
- low beam on the right;
- low beam on the left.
Author of the material: Dumchenkov Mikhail
PROMOTION: SALE OF NEW CAR 2021 PRODUCTION
Dial indicators on the VAZ 2110 panel
The number 6 indicates the fuel level indicator in the gas tank. The device’s readings are not particularly accurate, but it is logically clear that at mark 0 the tank is actually empty, with a few spare liters remaining. Fuel, at the ½ mark the tank is half full or empty, as you like, and at the 1 mark the gas tank is full. Light indication of the fuel level is entrusted to control lamp 7, which begins to flash when the vehicle's range on the remaining fuel is about 100 km, which is approximately 9-9.6 liters. To ensure that the fuel pump does not fail, it is not allowed to completely empty the tank.
Tidy indicator lamps 2110
Lamps 3 and 4 indicate that the direction indicators are turned on outside the car and they light up and flash immediately after the right or left indicators are turned on. At the end of the maneuver, the power button returns to its initial position and the pointer should turn off automatically. If this does not happen, the reason should be found in the returnable mechanism of the indicator button.
The lamp that deserves special attention is located in the center of the tidy and is indicated by the number 14 in our diagram. This is a control lamp that indicates defects and improper operation of the electrical engine control system, otherwise it is called the Check Engine lamp, by analogy with imported cars. When this warning lamp is activated, computer diagnostics of the engine should be carried out and error codes identified. Some errors are removed by software, while others require intervention in the engine control systems: the power supply system, ignition and other systems that could lead to errors.
READ VAZ 2110 Won't Start Injector 16 Valves
Number 12 in the diagram shows the digital odometer screen and the daily mileage indicator, which is reset by a button located directly on the device panel. The top line indicates the total mileage of the car, and the bottom line, which can be reset, indicates the mileage for a certain period.
The VAZ 2110 device panel is a description of the lamps and indicators of which we will complete with ordinary and conventional warning lamps for any car:
- Position 8 points to the external light switch;
- Lamp number 9 indicates that the brake water level in the reservoir has been reduced to a minimum;
- High beam - lamp 10;
- The triangle under the number 13 is the hazard warning lamp;
- Position 18 usually remains in reserve, and in cars equipped with airbags, there is a sensor activation lamp in this place.
Other warning lamps: handbrake, emergency oil pressure in the lubrication system and critical battery discharge are located in the bottom row in order. Let the emergency lamps glow less often on your dashboard, good and unsullied roads!
Fuses are important components
Turning on the headlights must be accompanied by illumination of all four filaments of the exterior lighting lamps. When one or more of the lamps do not light, you need to check the integrity of the fuses located in the fuse box. This can be done from inside the car. Each of the fuses performs a protective function, having its own purpose:
- One is responsible for the low beam of the left headlight;
- The other is for the high beam of the left headlight;
- The third is for the low beam in the right headlight;
- The fourth is for the high beam of the right lamp and warning lamp;
Features of the dashboard of the VAZ 2110 car
Dashboard VAZ 2110
The composition on the dashboard of a VAZ 2110 car dashboard includes:
- 1 – indicates the temperature of the cooling water. If the arrow of this indicator moves into the reddish zone of the scale, this indicates overheating of the motor. You need to pay attention to the operation of the electric fan and thermostat of the cooling system.
Tip: Do not operate the motor in overheating mode. Water temperature is more than 110 °C.
- 2 – tachometer. Indicates the approximate frequency at which the engine crankshaft rotates. To get the real value of the unit’s rotation speed, you need to multiply the device’s arrow reading by 100. The arrow reading in the reddish zone means that the engine is operating at an increased frequency, which is unsafe for the vehicle to continue moving.
- 3 – speedometer. The position of the arrow indicates the approximate speed of the car in km/h.
- 4 – indicates the fuel level.
- 5 – reset button on the daily mileage counter.
- 6 – screen for the trip odometer and odometer.
- 7 – screen for indicating the time.
The photo shows the installation of light bulbs on the panel:
- Positions 1 – used to illuminate device hands and scales.
- Positions 2 – the smallest in size are used in yellowish indicators and burgundy signal indicators. Such light bulbs are installed without rubber caps. Light filters of suitable colors are already integrated into the device.
- Position 3 – has a medium size, used to indicate a low gasoline level, just when the needle is at zero. It burns out very rarely.
Installing light bulbs on the panel
The entire arrangement of devices is fixed with 2 screws in the corresponding slot on the dashboard. Its connections are made using printed circuit board mounting using foil getinax. The board is perfectly attached to the back of the case. The speedometer is equipped with 2 counters showing the distance traveled: one is total, the other is “daily”. Using the corresponding button, the readings of the latter are simply reset.
Tip: Readings can only be reset when the car is stationary.
The latest VAZ 2110 models are equipped with an electric dashboard. It contains all components and control indicators, icons and lamps.
How to replace light bulbs in buttons
- To replace the backlight bulb of the hazard warning light button, the panel with deflectors is removed, after which the hazard warning light button is pulled out of it.
- The deflectors are directed very high.
- On the left and right below them there are mounting ears. Using a slotted screwdriver, they are pulled down, and the panel is pulled towards itself.
- The hazard warning button is pulled out.
- On the side there is a socket with a lamp. Use tweezers to turn it counterclockwise and remove it.
- The contacts on the light bulbs are wrapped around the edges of the socket. The size of the light bulbs is the same as a matchbox.
- In order to replace the lamps in the VAZ 2110 fog lamp device panel, you need to carefully pry the panel with the button with a screwdriver and pull it towards you.
- Other operations are carried out similarly to the same actions as replacing the light bulbs of the VAZ 2110 emergency system device panel.
The light bulb for the electric headlight adjustment wheel changes in the same way:
- Pry it up with a screwdriver and pull out the wheel.
- Using a small screwdriver, the socket is rotated together with the lamp and pulled out.
- The light bulb changes.
The VAZ 2110 device panel is shown in detail in the video.
Product delivery options
Note! Below are the shipping methods available specifically for this product. Payment options may vary depending on the delivery method.
Detailed information can be found on the “Delivery and Payment” page.
Parcel by Russian Post
Available payment methods:
- Cash on delivery (payment upon receipt)
- Using cards Sberbank, VTB, Post Bank, Tinkoff
- Yandex money
- QIWI
- ROBOKASSA
Shipping throughout Russia. Delivery time is from 5 to 12 days.
Parcel by Russian Post 1st class
Available payment methods:
- Cash on delivery (payment upon receipt)
- Using cards Sberbank, VTB, Post Bank, Tinkoff
- Yandex money
- QIWI
- ROBOKASSA
Shipping throughout Russia. Delivery time is from 2 to 5 days. More expensive than regular delivery by Russian Post, approximately 50%. Parcel weight up to 2.5 kg
Express Parcel EMS
Available payment methods:
- Cash on delivery (payment upon receipt)
- Using cards Sberbank, VTB, Post Bank, Tinkoff
- Yandex money
- QIWI
- ROBOKASSA
Shipping throughout Russia. Delivery time is from 3 to 7 days. More expensive than regular delivery by Russian Post, approximately 100%.
Transport companies
Available payment methods:
- Using cards Sberbank, VTB, Post Bank, Tinkoff
- Yandex money
- QIWI
- ROBOKASSA
Delivery is possible to any locality where there is a representative office of the transport company. Delivery time is from 2 to 10 days. Sending large parcels is approximately 50% more profitable than by Russian Post.
Courier delivery in Togliatti
Available payment methods:
- Cash upon receipt
- Using cards Sberbank, VTB, Post Bank, Tinkoff
- Yandex money
- QIWI
- ROBOKASSA
Delivery time from 1 to 12 hours.
Pickup from our warehouse
Available payment methods:
- Cash upon receipt
- Credit, installments
- Using cards Sberbank, VTB, Post Bank, Tinkoff
- Yandex money
- QIWI
- ROBOKASSA
Pickup times must coincide with store opening hours.
I think many of us have encountered the problem when the car door is closed, but the light in the cabin does not go out, or vice versa - the door is open, but the light in the cabin does not light up. Such problems indicate one thing: the limit switch on the door where this is happening has failed. Perhaps it just needs to be cleaned, or maybe replaced. VAZ 2110 owners encounter such problems approximately once every 1-2 years.
So, in order for this problem to occur less often, the contacts of the limit switch should sometimes be cleaned with sandpaper. It would be a good idea to put a rubber cap (boot) on the end switch. This will protect its contacts from oxidation and dirt getting on it.
What I don’t like about the door switches on the VAZ 2110 is that they don’t work when the door is not completely closed. In foreign cars, sensors show that the door is not locked. The thing is that the limit switches on foreign cars are located in a different place. This is where the idea came to me to do such a modification with the ten. By the way, don’t immediately start looking for another place for the trailer. You can simply reduce the size of its button. There is no specific length for this button, since it needs to be adjusted for each door separately. Therefore, be patient and experiment, gradually reducing the length of the limit switch button.
If you don’t want to waste time adjusting standard limit switches, you can buy them from General Motors, they are usually in Lanos, Sensa, Lacetti, Nexia and so on. What are they good for? Yes, because they are already equipped with anther. Their price category is of course much higher than the VAZ standard ones, but agree to pay 65 * 4 = 260 rubles once and forget about the problem with limit switches - it’s worth it.
When changing the door limit switches of a VAZ 2110, you can immediately change the limit switch on the trunk.
Watch the video on how to clean limit switches when they refuse to work:
https://youtube.com/watch?v=V75izLC7oJ0
Instrument panel VAZ 2110 - description of indicator lamp buttons
The device panel of the VAZ 2110, as in any car, both imported and Russian, should determine the general condition of the car, and should show all the information about: the amount of fuel, engine temperature and the presence (quantity) of lubricating parts of the engine.
In addition to the above data, the VAZ device panel on the screen displays all the errors (current malfunctions) of the car.
Later in the article I will give you a complete description of the VAZ 2110 dashboard and tell you about the description of buttons, lamps, light indicators, and tell you about common errors that may appear on your screen while on the road.
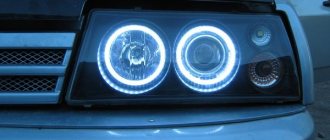
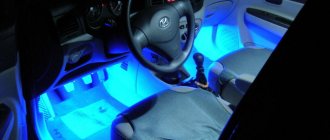
Tuning interior lighting
Install an original lamp in the interior of a VAZ 2110
Many car manufacturers, each in their own way, are trying to find new methods of improving the interior lighting of their creations, as well as car enthusiasts themselves who experiment with their cars on their own. In fact, lighting on your own looks good, it’s beautiful, convenient and practical. You can make the illumination of the thresholds yourself, which will be triggered when the doors are opened, or the illumination of the necessary panels. Of course, the illumination can be installed in any place where everyone wishes, but now we will turn our attention specifically to the lighting of the VAZ interior
Lamp in the interior of a VAZ 2110 and its replacement
For example, if neon underbody lighting is installed, there is a risk of not passing inspection. Yes, external lighting looks beautiful, but first you need to create convenience for the driver and passengers.
Repair of instrument panel VAZ 2110
On cars of the VAZ 2110-2112 family, the dashboard contains control lights and on-board instruments, with the help of which the driver can easily monitor the condition of the car. The following indicator lights are displayed on the device panel: cooling water temperature, turn signals, tachometer, fuel level, speedometer, an image in the form of a gas station, indicating that you need to refuel, lights for turning on the dimensions and high beams, low brake water level, a screen reflecting the vehicle’s mileage, emergency alarm system, Check Engine, which indicates engine defects, a screen with a clock, an indication of a generator malfunction or battery recharging, an indication that the handbrake is turned on, a low oil pressure light in the engine and, on carburetor engines, a choke light).
How to replace the center console light bulbs
When operating the vehicle, the lamps located on the center console of the VAZ 2110 may fail. In this case, replacing the lamps on the device panel of the VAZ 2110 is not difficult to do with your own hands. The cost of the work is low. For this you will need:
- The screwdriver is flat.
- Phillips screwdriver.
- Brand new light bulb.
Abstract of the work:
- The negative terminals are disconnected from the battery and from the speedometer cable drive to the gearbox.
- The external lighting switch is pulled out. To do this, the element must be pryed off with a flat screwdriver. The connector is disconnected from the switch and pushed into the dashboard trim.
- Replacing the VAZ 2110 dashboard light bulb to illuminate it is done by squeezing the socket antenna with a screwdriver, which is then removed from the switch. The lamp is pulled out of the socket and changed to the newest one.
- Use a flat screwdriver to pry up the hazard warning switch, which is then pulled out. The connector is disconnected from the switch and pushed inside the panel trim.
- Unscrew the two screws with a Phillips screwdriver that secure the dashboard console trim and remove the trim. The heating element and ashtray are pulled out of the socket.
- The car radio is pulled out of the socket. The spring brackets securing the panel to the cover are pressed out with a screwdriver, and the shield is pulled towards itself. Use a screwdriver to release two plastic antennae from the lower fixation of the shield to the dashboard. The shield is raised and the 3rd spring bracket securing it is pressed out.
Removing the panel on the center console
- The connectors for connecting the cigarette lighter (see VAZ 2110: replacing the cigarette lighter on your own), the backlight for it, and the lamp for the emergency light switch are disconnected. The instrument panel panel is removed.
- Replacing the light on the VAZ 2110 device panel to illuminate the hazard warning switch on the inside of the dashboard is done after removing it with the socket. To do this, they are rotated in the holder.
- The antennae of the cartridge holder are compressed and the element is removed from the cigarette lighter. The cigarette lighter petals are compressed, the part is pulled out, the light bulb is removed from the dashboard trim and changed as needed.
- Use a Phillips screwdriver to unscrew the two screws that secure the device compositions to the panel. The composition of the devices is set aside. The union nut of the speedometer cable is unscrewed from the speed sensor. The cable is disconnected from the speedometer, then removed and routed through the hole in the front panel.
- The connectors are disconnected and the arrangement of devices is removed. To change the light bulbs on the VAZ 2110 device panel, the cartridge must be turned counterclockwise and the device combination removed from the device. New lamps are being installed. Assembling and installing the composition is done in reverse order.
- The battery is connected.
- The operation of the light bulbs on the device panel is checked.
READ How to Convert an Injector to a VAZ 2109 Carburetor
Easy lamp replacement
If the check shows that the fuses are intact and their contacts are not oxidized, you need to get out of the car and check the integrity of the lamps:
- open the hood;
- remove the rear casing;
- disconnect the wire block;
- remove the spring (which secures the light bulb);
- remove the light bulb holder by turning it;
- replace the light bulb with a new one.
Checking and adjusting relays
If the lamps are intact, you should check the two relays, which are marked accordingly on the equipment diagram. The cause of their malfunction may be oxidation of the contacts or their burnout, which can be eliminated by regular cleaning. If, however, the relay is completely out of order, then it is necessary to replace it.
Replacement and adjustment of other elements responsible for low beam
After checking and making sure that all of the listed devices are in working order, you will need to check the reliability of the connection in the blocks included in the electrical circuit of the head lighting. In addition, you should check the fastening of the headlight wires. One such fastener is located on the left side, next to the battery on the same mount as the air intake. The second one is on the right, in the same place where the adsorber is located.
Note. If the above measures do not help, you should first remove the switch that regulates the headlights. After this, remove the switch responsible for the external lighting. Then check the status of their contacts.
In addition to those malfunctions that may be associated with the headlight electrical circuit, the headlight lens may fog up. This may be a consequence of water getting under the headlight during washing or after rain, which is a consequence of insufficient tightness of the lens glass. Knowing what reasons affect the performance of the low beam lamp, you can easily fix it.
Replacing the low beam lamp by removing the headlight unit
If the cause of the malfunction of the lamp lighting is determined and there is a need for replacement, then to remove it you need to dismantle the headlight unit. The main difficulty will be the decorative trim (eyelash). To be able to get to it, you need to remove the headlight mounting nut. In particular, for the VAZ 2110 you need to loosen the front bumper and remove the headlight.
Note. The work should be done indoors, otherwise the plastic becomes brittle in the cold.
Further actions should be carried out in the following order:
- Disconnect the negative cable from the battery;
- Disconnect the two electrical connectors of the headlight unit;
- If there is a fender liner, you need to unscrew it from the bumper side (usually it is fixed with 2-3 self-tapping screws);
- Using a 10 mm wrench, you need to unscrew the two bolts that hold the headlight on top;
- Next, you should unscrew the bolts that hold the decorative radiator grille (usually two bolts);
- Then, lifting the grille, release two latches on the right side;
- Remove the grille.
After removing the grille, you can continue the process of removing the headlight:
- Unscrew the lower headlight mounting block;
- Unscrew or slightly loosen the bolts of the upper headlight mounting;
- Carefully, use a screwdriver or your fingers to pull the edge of the decorative trim (eyelash) away from the headlight;
- In the resulting gap you can see a plastic latch (with its help, the edge of the eyelash is attached to the edge of the wing). You should very carefully remove the tongue from the place where it engages with the wing. This can be easily done with your fingers.
- Then, slide the cover towards the center and remove it.
Note. It is recommended to lubricate the eyelash with silicone lubricant before removing it. Lubricate along the entire arc of the attachment to the bumper.
- Next, you need to use a screwdriver to unscrew the nut that attaches the headlight to the bracket;
- Then take out the headlight unit;
- Next, use a screwdriver to pry the hydraulic corrector cylinder retainer, then turn it and remove it from the housing.
Note. If there is a need to replace the headlight glass, then you need to unfasten the six fastening latches and remove the glass, after first removing the sealant layer.
To continue the process, you should do the following:
- Turn the turn signal bulb socket counterclockwise and pull it out together with the bulb;
- Carefully press the lamp inward and turn it counterclockwise, gradually removing it from the socket;
- Turn the headlight cover counterclockwise, then remove it;
- Disconnect the electrical wire from the low beam lamp;
- Lightly squeeze the spring clamp and remove its antennae from the grooves;
- Pull the spring clip upward and then remove the low beam lamp.
Note. When working with halogen lamps, under no circumstances should you leave any greasy marks. It follows from this that it is better to work with gloves, but if contact still occurs with your fingers, then the lamp must be degreased with alcohol.
After this, you need to screw a new working lamp into place.
Replacing high beam lamps and parking lights
If there is a need to replace the main beam lamps of the headlights and dimensions, then to remove them you need to unscrew the second headlight cover. Then do the following:
- Disconnect the electrical wire from the high beam lamp;
- Remove the spring clamp antennae from the grooves;
- Remove the high beam headlight bulb;
- Disconnect the electrical wire from the side light lamp and remove the socket with the lamp;
- Remove the faulty lamp from the socket and replace it with a new one.
Assembling and installing the headlight unit must be done opposite to the dismantling process.
Note. The direction of the headlight beam can be adjusted by turning the screws. These screws rotate the optical element in the horizontal and vertical planes.
Adjusting the headlights
After the low beam lamp has been replaced and the headlight unit has been installed in place, it is recommended to adjust the headlights. This procedure is important for vehicle safety.
Note. During operation, there are usually no significant changes in the headlight adjustment, but if the car is burdened, the adjustment should be adjusted.
To adjust the headlights, you need to do the following:
- Find a horizontal, flat area and place the car so that the screen (the wall of a building or garage) is about 5 meters away from it;
- You need to place an assistant in the front seat or put some kind of load weighing about 75 kg;
- On the screen, draw a mark in the form of a horizontal line at 600 mm and another one, 75 mm below the first one. This is the distance that should be from the center of the headlights to ground level;
- You need to draw three more lines on the screen. One of them is axial. The distance from it to the centers of the right and left headlights was the same. The second and third lines should correspond to the centers of the headlights and be at a distance of 554mm from the center line;
- Next, you need to set the headlight hydraulic adjustment handle to a position characteristic of the minimum load;
- Cover one of the headlights (with cardboard or plywood);
- Turn on low beam headlights;
- Adjust the direction of the beams of light from the open headlight;
Note. The direction of the light beams is adjusted using screws with plastic heads, which are located on the rear wall of the headlamp. The bottom line on the screen must coincide with the upper boundary of the light spot, and the point where the horizontal and vertical sections of the light beam intersect must coincide with the vertical line of the center of the headlamp.
Next, in the same sequence, open the low beam lamp of the second headlight. The process of replacing the low beam lamp and adjusting it can be considered complete. It is recommended to watch this video before the replacement process.
Description of the VAZ 2110 dashboard buttons
Well, let’s immediately move on to the description of the buttons on the dashboard of the VAZ 2110.
Device panel of the VAZ 2110 car - the arrows indicate the buttons located on it
As you can see from the screenshot, there are only 4 buttons on the device panel of the VAZ 2110 - let's move on to their description.
- Button to turn on/off the front fog lights.
- Turn on/off outdoor lighting.
- Heated rear window
- Button for turning on/off the rear fog lights.
In addition to the buttons located on the dashboard, there are others that are located under the stove, next to the radio in the cabin. Let's find out their functions:
VAZ 2110 device panel - description of the buttons next to the stove
Many VAZ 2110 owners wonder why these 4 buttons, which are located on the dashboard under the stove, are needed. The answer will seem quite obvious to you:
These buttons essentially do not play any function; I think the engineers working on the 10 wanted to add electric windows to the car, but for some reason they forgot to do this.
Okay, it was a joke! Essentially, these buttons are responsible for the following:
- Turning recirculation on/off
- Button for installing additional equipment (for example, window regulators)
- Turning the hazard warning lights on/off
- Button for installing additional equipment (for example, window regulators)
Xenon PTF
Difficult to install and expensive lighting devices.
Standard PTFs converted to xenon fog lights.
The old xenon PTFs worked on lamps D1 and D2, the new ones received lamps D3 and D4 without the introduction of mercury vapor. At a theoretical level, the efficiency of such fog lights and the luminous intensity are higher than those of halogens. But we should not forget about the specificity of PTF - not to cause reflection of the beam from the water suspension. And all cheap xenon headlights require a very clear beam option and are not able to provide a low horizontal stripe to combat fog.
In addition, the highest color temperature for the effectiveness of fog lights is 3000-4500 K. Otherwise, they will be of no use and blinding light will be provided for oncoming drivers. The prices of such fog lights are not lower than 5-7 thousand (Hella Micro DE. For example). Anything cheaper is useless and even unsafe.
Installation and connection of PTF in VAZ 2110
Recently, I finally got around to installing and connecting the PTF.
Fog lamp VAZ-2110 (for H1 lamp) Kirzhach (Avtosvet) 2110-3743010-03 — 800 rub; 2. Wiring VAZ-2110-12 fog lights SB set AENK - 350 rubles 3. Frame fog lights VAZ-2110-2112 right left 2111-28031922803193 - 100 rubles; 4. Lamps MAYAK H1 12V 55W ULTRA Super Light90%; 5. Bolts M6×45 - 4 pcs; 6. Lambs M6 - 4 pcs.
Installation of PTF
The headlights were covered with armor with yellowish film ORACAL 8300 No. 21;
Installed lamps Autolamp MAYAK H1 12V 55W ULTRA Super Light90%; 3. Covered with silicone sealant all possible places where water could penetrate inside the headlight;
I removed the plugs for the foglights on the bumper; to get to them, I had to work hard, because their fastening is located on the inside of the bumper; the plug is secured with two screws. I crawled up to them through the hood, the right one caused the most trouble, it was very difficult to get to it;
I took the PTF, placed the frames on them and screwed the bolts into the mounting holes (the bolts go tight, cutting threads in the plastic). I used a head to screw them in, because it’s impossible to turn them by hand (be careful, the bolts get very hot!).
After installing the fog lights using the wings for fastening, in the future you can install (dismantle) them very comfortably and quickly!
In the future, I will change the PTF connection pads to the VAZ-2108-2110 crankshaft sensor pads, because they have an elastic band and a sealed connection to protect against water getting into the contacts!
The headlights are in place. And it was necessary to paint the bolt heads dark
PTF connection:
To install the PTF wiring, I used the PTF connection kit, the only negative in this kit is the lack of a PTF on indicator, and searching for it later became a problem for me, so take the full set;
First, I laid the wires in the corrugation, the wires turned out to be a bit long (I shortened them);
I laid them through the hole where the hydraulic corrector tubes were laid (but this method is not easy, because you have to remove the frill and the wiper drive motor), I saw that many people lay them through the hole in the clutch cable. (I think this is not safe, the wire may wear out over time, and it’s not far from the short circuit) or they drill a new one (drilling is also not my option).
I removed the frill and wiper motor
Afterwards we work with the mounting block (I used the annotation included in the PTF connection kit; everything is carefully and clearly described in it.
The only difficult thing was that I had to remove the terminals from the blocks, and because the wires were thick and there was no crimping, I soldered the wires together and to the terminals, then crimped them with pliers, covered them with heat shrink and installed them back into the block (but now everything is firmly held).
We check the headlights, everything works!
We adjust the position of the headlights using the adjusting screw.
What do we want from fog lights?
First, a few words about what we need from fog lights and why a different light installed in a different place on the car will only harm both the driver himself and interfere with oncoming traffic. Even with the brightest lamps installed in the headlights, and with the best optics, their task does not change - to illuminate a very likely area of the space ahead and to capture as much of the roadside as possible.
In general terms, this applies to both near and far light, it’s all about the settings. In conditions of limited visibility associated with high humidity (fog, snow or rain), headlights are not enough.
In most cases, they only interfere, especially distant light lamps - reflecting from water particles, the most powerful light literally creates a wall impenetrable to the eye.
An affordable PTF can produce such light: it will be scary to blind, and glowing under fog is out of the question.
Now everyone can choose the right fog light for their own 10, naturally, after consulting their wallet and common sense. Smooth and well-lit roads for everyone!
Lighting replacement technique
If you have already decided which lamps you plan to install on the headlights of your VAZ, you need to replace them. If you are going to do it yourself, the easiest way to install new lighting in the headlights will be relevant for you.
To do this, follow several steps:
- Dismantle the rear casing (box), which is located on the headlight unit of the car.
- Disconnect the wires from the terminal block under the housing cover.
- Remove the spring that secures the bulb to the headlight unit.
- Rotate the holder of the lighting product and pull it out of the headlamp.
After this, you can make a replacement in the lighting system, following the reverse algorithm.
In some situations, it is not necessary to replace the lamp on a car - the contacts in the lighting system may oxidize. Some car enthusiasts do not know that in certain cases, when the light is not on, the wiring connections in the blocks come loose. And sometimes the reason for the deterioration of surface illumination can be a banal fogging of the light diffuser due to a violation of the tightness. Replacement of equipment is not necessary - it is enough to repair or wipe the components of the light system.
In the case where the low beam provides insufficient illumination, the low beam lamps of the VAZ 2110 need to be replaced as soon as possible. It goes without saying that driving a car with non-working lighting, especially in the dark, is unsafe, and the legislation provides for this. Replacing low beam lamps on a VAZ 2110 can be easily done independently. In addition, you can leave the solution to this issue to specialists. This question is individual, and the decision must be made depending on the availability of skills. Although there is nothing complicated about this replacement.
Other manufacturers and types of lamps
Naturally, many try to install other types of light sources and other types of lamps. All headlights discussed above have a halogen lamp. In other words, it is practically the same incandescent lamp, but its filament operates in a gas environment (bromine or iodine halogens).
There are other fog lights as well.
Connecting PTF VAZ 2112 (European panel)
Under the hood there should be factory wiring for the PTF, we find these chips in the area of the fog lamp plugs under the main lights
The wires under the hood go into this chip to the control unit
Next, I bought a ready-made PTF connection kit for the Europanel with a button, relay and wires, the dark wire from the relay was screwed to ground under the panel
We need to connect 5 wires, 2 blue wires with one side are put on the finished wiring chip near the block, the other ends are inserted into block Ш1 into cells 1 (yellow-black wire) and 6 (yellowish wire (I have them shown with arrows with numbers 5 and 4 Next, the orange wire is in block Ш1 in cell 8 (for me it is arrow 2), there are 2 burgundy wires left from the relay, so we insert the reddish wire from (relay 87) into block Ш1 in cell 5 (for me it is arrow 3), and We insert the second reddish wire from relay 30 into block Ш3 in cell 6 (I have an arrow with the number 1 and that’s it, the work is finished
READ VAZ 2110 cooling fan switch sensor
Wiring diagram for fog lights VAZ 2110 in VAZ 2112
I decided to add a photo annotation on connecting the fogs, maybe someone will need it.
Contents (not everyone’s kit includes a PTF power indicator, see the note on the package)
Connecting PTF to VAZ 2110, 2112, 2111 with an old panel
PTF button. 7 - weight, 9 and 10 on Ш1-5, 58R
Now I've figured out how to connect the PTF. (Yesterday they started working, but later went out). The point was this: there are a lot of diagrams on the Internet with PTF relays. I did with him. Now I realized that a relay is not needed in general. It heats up and turns off. It is necessary for a short start-up. It works on the principle of a magnet (current is conducted, the plate is magnetized, the contacts are closed, and the "" is applied). In short, it is necessary for small starts (for example, a starter). And here we need flaming PTFs all the time. Therefore, we remove it from the diagram. (The fog lights go through fuses 4 and 14, so don’t be afraid that all the wiring will short out). Now I have made a wiring diagram for fog lights, I hope it will help someone. The colors are conditional to make it easier to see, so look at the facts. I present to your attention a diagram for connecting fog lights. Well, my little engine :3
Regular and similar PTFs
Rectangular fog lights with a standard mount fit into the VAZ-2110 bumper in a standard place without additional modifications. They are produced by a lot of manufacturers, but, again, all these headlights are different both in the quality of the optics and in the light source.
Fog lamp Kirzhach.
PTF from Ryazan Bosch.
Which fog lights are better for the VAZ-2110
From the outside, you may not see much difference between high-quality flashlights and “analogs” of unknown origin.
It is very difficult to make the right choice in this case, since an unlimited number of headlights have appeared on sale, varying in shape, light source and color range.
The design of the case, as well as the material of its production, is also of great importance.
It is also important what material the diffuser is made of - glass or polycarbonate. Since PTFs are installed a little low, the puny plastic cases do not last long. And if we take into account that in the rain we will often have to wipe the diffuser with means at hand. Then the bad material will rub off and all the work of the lamps will go down the drain.
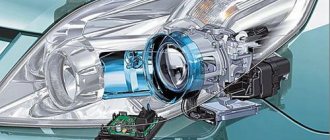
Comparison of halogen, xenon and LED lamps
Based on purely consumer parameters, the primacy of auto lamps looks like this:
- LEDs are the most modern auto lighting products. They are superior to their competitors in all characteristics - durability (can work with a decrease in the brightness of the light flux by a maximum of 10% for more than 25 thousand hours), energy efficiency (consume a minimum of energy, most of which is converted into light radiation), price (at first they were expensive, but already are currently significantly cheaper than competitive designs).
- Xenon - they are also called gas-discharge. On the outside they are similar to halogen ones, but they differ sharply in their operating mechanism and internal design. In xenon lamps, the inside of the cylinder is filled with the generous gas xenon (hence the name), and the light appears not due to the intensity of the iron arc, but as a result of the glow of the gas in the cylinder. The difference in the operation of xenon lamps is the release of a significant amount of heat and light radiation from that part of the range, which leads to burnout of the reflective coatings of the reflectors. The service life of these lamps is about 4-5 thousand hours; their installation requires a headlight of a special design with a lens, position corrector and washer. The price is significantly higher than halogen ones. It is true that the brightness of the light flux, and therefore the range of the illuminated section of the road, is higher.
- Halogen - this type of lamp was initially provided by the manufacturer of the VAZ 2110. Both manufactured headlight designs were designed specifically for halogen lamps. The service life is quite moderate - about 500-1000 hours. The brightness and range of illumination are also very inferior to rivals. The advantages are proven design and affordability.
Fundamentally! In the late 1990s and early 2000s, it became popular for many car owners to install xenon lamps that were not provided for in their headlights. It was enough to purchase an installation kit and use the simplest tools. The brightness of the headlights increased significantly, but due to the lack of provision for such an upgrade, the risk of blinding oncoming drivers and oneself during snowfall increased, and visibility also decreased (to a level below standard halogen ones) during rain and fog. At the moment, such a substitution is expressly prohibited by law and can lead to severe consequences for the motorist.
Replacing incandescent low beam lamps filled with xenon gas
During vehicle operation, drivers make frequent mistakes when replacing conventional incandescent lamps with xenon ones. Having installed such lamps, the reflector and ground clearance divider cannot cope with the strong flow of light rays, which leads to blinding drivers of oncoming vehicles and creates an emergency situation. To avoid this, you need to install splitting lenses to adjust the light on the section of road you are viewing. Replacing the low beam bulb of a VAZ 2114 (xenon) is carried out in the same sequence as incandescent lamps.
We recommend: Choosing a headlight for the VAZ 2114 (BOSCH or Kirzhach)
Lamp manufacturers - the choice of users and experts
As of the beginning of 2021, the following brands of lamps for VAZ 2110 headlights are available on the Russian market (in descending order of their properties and prices):
| Philips X-treme Vision 130% - the luminous flux, according to the manufacturer, is increased by 30%, there is a so-called xenon imitation. |
| OSRAM Nightbreaker UNLIMITED 110% - this lamp features a 10% increased luminous flux. |
| OSRAM ULTRA LIFE - lamps are characterized by durability and a price from 500 to 650 rubles. |
| Beacon H1 12V 55W Super Light 50% - the manufacturer positions its products as an affordable product for a wide range of car owners. The luminous flux is sufficient. |
Types of lamps
For the VAZ 2110, the manufacturer provides for the installation of only 1 type of lamps - halogen. Structurally, they are a glass container filled with gaseous iodine or bromine (these chemical elements belong to the group of halogens, hence the name of the lamps). The gas in the cylinder is under pressure, this guarantees against air getting inside and premature failure of the lamp. The light is emitted from a tungsten iron spiral. Currently, this type of lamp is considered obsolete.
You can carefully familiarize yourself with the types of lamps used and their features in the table below.
What kind of lamps are in the headlights of the VAZ 2110
The VAZ 2110, also known as the LADA 110, has gained popularity among a huge number of car owners both in our country and abroad. These cars were produced in Tolyatti from the mid-1990s until 2007. They were produced abroad, under license, until 2015.
The VAZ 2110 was designed in the 2nd half of the 1980s, back in the Russian Union. Its release was planned for 1990, but due to financial cataclysms in the post-Soviet space, it took place 5 years later. For its time, this car was a good representative of its class and price category. And despite a number of complaints about build quality in the 1990s, the VAZ 2110 has earned a reputation as a reliable and cheap car with a modern design.
How to replace lamps on a VAZ 2110 (LADA 110)
Changing the lamps in the headlights of a VAZ 2110 is quite simple without the help of others.
To do this you need to follow an easy method:
- Open the hood and find the headlight housings.
- Carefully open the dust covers by pressing the latches (they can be either plastic or rubber).
- In the opened cavity of the headlight, loosen the latch on the large terminal.
Fundamentally! Under no circumstances should you remove the lamp by its wires!
Still have questions about the replacement? Then watch a video on replacing all the light bulbs in a VAZ 2110 car:
Currently, on the VAZ 2110 the law allows the installation of only halogen lamps - with a power of 55 W, a voltage of 12 V and an H1 base. Xenon ones are directly prohibited, and LED ones are not prescribed by law in any way. The latter does not guarantee the absence of claims from regulatory authorities. Despite the fact that halogen lamps are already obsolete, they are distinguished by ease of installation, low price and proven design.
Sources:
https://carwin-motors.ru/raznoe/kakie-lampochki-v-paneli-priborov-vaz-2110.html https://moreremonta.Info/strojka/kakie-lampy-stojat-v-protivotumankah-vaz-2110 / https://vaz-2110.ru/elektrika-i-provodka/kakie-lampy-stoyat-v-farah-vaz-2110.html
Replacing a light bulb in a VAZ 2110 clock
The standard clock, which is located on the dashboard of VAZ 2110 - 2112 cars, is a fairly simple design, but still, this part often fails and has to be replaced. Many owners in a hurry break the case out of the panel, breaking the watch itself, and in some cases manage to break parts of the panel. In this case, you must act especially carefully.
In order to remove the clock, or rather remove it from the dashboard, we need two thin flat-blade screwdrivers, although everything can be done even with one:
You need to insert screwdrivers on the sides of the case and pry the watch off, or on top, as shown in the photo:
After this, without any extra effort, pull them out a little from the recess to gain access to the power wires and the light bulb.
If you need to replace the watch, then disconnect the plug and simply insert a new one in its place. If you only need to change the light bulb because it is burning out, then carefully turn the cover:
And then you can remove the light bulb by also turning it counterclockwise by the base:
We installed a new light bulb and now the backlight should work without problems. We put the clock back in reverse order. The price of new VAZ 2110-2112 is about 450 rubles.