04 September 2015 Lada.Online 44 124 1
What is the first thing a person thinks about after buying a car? About its safety! The most popular way to protect your car from theft or accidental collision in a parking lot is to install an alarm system. In addition, the security system can combine other useful functions, for example, automatic engine start or remote trunk opening through an additional channel.
Preparing the car before connecting
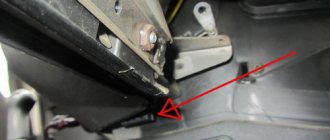
What controls the central locking? A special block to which the lock actuator wires fit. There are also two wires connected to it, connected to the driver's door microphone. More precisely, this wire is used alone in “Grant”, it has a brown sheath, and the second contact from the “micrik” is connected to ground.
The “micric” itself is located inside the actuator. So, the first piece of advice: after removing the left front door trim, you need to find the cable going from the actuator to the 7-pin connector.
Depending on the configuration, under the trim you will see the following:
- There are 6 wires suitable for the connector (from 2 microphones and a drive);
- The cords from the electric drive (pins “2/7”) are not connected, but there is still a brown wire connected to pin “1”;
- Only those wires that, according to the diagram, should be connected to contacts “4/6” are missing.
Connecting the signaling means that the wires from contacts “2/7” are still connected to the central locking control unit. The cords coming from the three actuators are always connected to the standard unit. You need to connect a fourth one, if this is not done by the factory. You may have to lay a two-wire cable from the door to the central lock control unit:
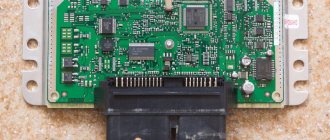
The central locking control unit is located under the fuse block, it is designated BUBD-2190.
Here's how one of the car owners coped with the task:
The cords that come out of the door are connected to the wires of the standard terminal block. The following connector pins are used: “3” and “4”. The main thing is not to confuse them. Take another look at the diagram to see what exactly we are talking about.
Front and rear wiring diagram
The wiring diagram for the front of the Lada Granta is quite simple, the main thing is not to confuse it with the wiring of the ignition system.
The following devices are available here.
Car front wiring diagram
- Right block headlight.
- Room lighting bulb.
- Left block headlight.
- Electric washer motor.
- Accumulator battery.
- Mounting block with power fuses.
- DC generator.
- Klaxon.
- The plug connecting the front wiring harness to plug 1 of the instrument panel.
- Plug connecting the front harness and plug 2 of the instrument panel.
- Plug connecting the front harness to plug 2 of the instrument panel.
- Reverse indicator switch.
- Radiator fan.
The electrical circuit for the rear of the car is more complex, it has more elements and connects to 6 wire harnesses.
Wiring diagram of the rear part of Granta
- Socket to connector 3 of the tidy.
- Socket to connector 4 of the tidy.
- Right side turn signal.
- Left side turn signal.
- Handbrake position sensor.
- Rear window heating element.
- Interior lighting lamp.
- The switch is in the driver's seat belt.
- Luggage compartment lighting.
- Fuel pump module.
- Right rear light.
- Trunk lock drive.
- Interior lighting switch.
- Stop signal.
- Left rear headlight.
- Clamp to the left rear door harness block.
- Clamp to the right rear door harness block.
- Clamp to the harness block of the right front door.
- Clamp to the left front door harness block.
- Airbag control unit.
- Clamp to the license plate light bulb harness block.
2012 Audi A6 Keyless Entry Demonstration Rightclick Keyless Entry System KE669W Alarm StarLine A91 with automatic winding on Grant
Connecting the signaling to the central locking system
Now we get to the most interesting part. The contacts of the signaling relay must be connected to the gap in the brown wire (see diagram in Chapter 1). Moreover, this will be required regardless of the configuration. Oddly enough, we won’t need power cables at all. And the task now looks like this: you need a two-wire signal cable connected to the break in the brown cord.
- If you were able to remove the central lock control unit, connect the cable to the break in the wire connected to pin “7” of the control unit;
- If you have removed the door trim, then pull the cable out of it (from the point where the brown cord breaks).
It is clear that the second side of the cable must reach the relay connector of your alarm.
Option for the “Lux” package
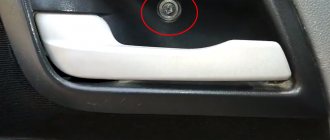
So, this means that there is a button on the armrest in the cabin that allows you to lock the locks. From one of the contacts of the button, to which a “plus” is applied when pressed, you need to stretch the cord to the signaling unit. Nothing else is required, and you can connect the alarm according to the following scheme:
According to reviews, this option is suitable if we are talking specifically about the “luxury” configuration. By the way, the resistor can be connected to the gap in the wire designated “blue” (the common contacts are then connected with a jumper).
It must be remembered that when working with any electrical equipment, you must first remove the negative terminal from the battery.
Each cord that is re-laid must not touch metal surfaces. Otherwise, in places of contact, the wire is protected with a tube that can withstand temperatures of 250 degrees. This is how you can protect yourself from unforeseen consequences.
Option for the “Norma” configuration
Let's say there is no button in the cabin that allows you to perform emergency closing. Then you need to connect the signaling to the central locking system according to the following scheme:
As you can see, unlike the first option, there are no resistors here, and positive voltage is not used at all. But in the luxury configuration the effect that is characteristic of this scheme will not be observed:
- We perform closing from the key fob - all locks are locked;
- We try to open the locks with the key fob - only the driver's lock unlocks.
If you are satisfied with this property, try to implement the scheme in practice. And other options, more advanced, look much more complicated.
Read what is said about installation safety in the previous chapter. Do not neglect the advice about disconnecting the negative terminal. We work only with signal circuits, so nothing will fail even if connected incorrectly. However, be careful not to confuse the locking and unlocking relays, which are located in the alarm unit. This unit is usually equipped with a 6-pin connector (for details, see the signaling manufacturer's instructions).
Programming the duration of control pulses
Even if the alarm is connected correctly, it is not a fact that the owner will be able to control the locks from the key fob. The point is that it is necessary to correctly select the duration of the control pulse (for locking and for opening). There is no need to make it too large so as not to overheat the actuators.
Screenshot of Starline signaling instructions
See what exactly the manufacturer Starline offers. We can set the pulse duration to 0.7 s, which should be enough. The value “3.6” will be redundant at the same time.
The “Lux” package has the following property: after 15 minutes of inactivity, the electronics “fall asleep”. It may take an extra boost to wake her up. So, try to use the option that provides for a double pulse. The main thing is not to activate the “comfort” option, which uses a 30-second duration. To connect the signaling with “comfort”, you need to install an additional unit in Grants (AvtoVAZ does not produce it). We wish you success.
Alarm system StarLine A91 with automatic winding on Grant
Lada Granta Podvenechnaya › Logbook › 108. Replacing the central locking control unit. Is the Kama Sutra included?
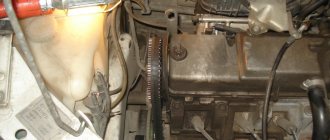
We have another Granta in our family, and about a month ago she became a little sick. It all started when, purely by chance, while driving it as a passenger, I discovered that the car’s power windows were not working. I wonder, I thought, is it a fuse? Whole. Relay? Visually intact, but shorting it directly corrected the situation. The news from the fields was:
Then we move the block towards the street, along the way, do not forget to swear about the terribly short wires. We look inside and curse again. The nuts for fastening the central locking block are screwed in from the inside of the panel; on the outside there are only metal caps of the mountings, and in them you can see a recess for a Phillips screwdriver, but it feels like it’s a shear bolt, that is, the hole is plugged and broken off. In short, there is no way to unscrew it from the outside, plus they are welded from the inside out, only a 10 nut on the inside.
Take a comfortable position, take a breath and turn the nut 10 by touch from the inside of the panel. The ratchet saved me at this point.
If you managed to unscrew it, well done. Then we somehow push it out, not forgetting to swear again about the short wires and get ready to swear again. Connector on Lyra connectors, I fucking hate Lyra. It always holds it in such a way that you won’t be able to pull out the connector.
I literally had to rip out the connector; there is no room for my hands at all.
basic information
Quite often, buyers decide to purchase cars from a domestic manufacturer. Naturally, this has its advantages, but there are also disadvantages. As a rule, domestic cars have a low cost and this is their main advantage. The presented fact even covers the fact that such a car will have less efficiency. So, the car that we will discuss today is precisely one of these budget cars. The most popular configuration of the Lada Granta car is the norm configuration. When choosing such a vehicle, the buyer naturally hopes that it is equipped with a standard alarm system, since, for example, the Lada Kalina is equipped with such an alarm system. But the Lada Granta is not equipped with an anti-theft system; the only thing the buyer can count on is an immobilizer. At a car dealership, the buyer will simply be given the keys to the car and wished a safe journey.
The luxury package is the only package of the Lada Grant that is equipped with a standard anti-theft alarm, but many car dealership workers claim that it is inferior.
In this configuration, the alarm is triggered when the doors are opened, thus preventing unauthorized entry into the vehicle interior. When purchasing a luxury Lada Grant from a car dealership on credit, insurers will not require the installation of alarm systems. To activate the standard alarm, the vehicle owner will only need to drive up to the dealer. The standard alarm is considered part of the electronic system and is equipped with a remote control that is built into the ignition key.
But it is quite possible to install a more effective alarm system with auto start and two-way communication on a Lada Granta car. The engine auto-start function, which appears after the alarm installation has been completed, is especially convenient when used in the cold season, since in the cold the oil and engine need to be warmed up. The owners of such a system claim that it functions without any failures at a temperature of -35⁰C.
Installation of alarm system on Lada Granta
Two-way communication is also quite a useful thing, since there is absolutely no need to install a loud alarm, as well as an external signal, which can be easily turned off. If there is an attempt to break into the vehicle, the key fob on the ignition key will emit a fairly loud signal that will be heard throughout the apartment.
In addition to the electronic anti-theft system, it is also possible to install a mechanical alarm. Especially for the Lada Grant, a Garant lock was invented, installed on the steering shaft. The Garant lock is quite resistant to hacking, thanks to improved keys produced by Abloy.
How is the anti-theft system installed?
To install an anti-theft system we will need:
- Siren (for example, Alfa 12V);
- Alarm system (for example, StarLine B62);
- Connectors and limit switches for 3 doors;
- Universal electronic drive;
- The wire is of medium diameter and about 10 meters long.
Connecting an alarm system to Granta
Alarm establishment algorithm:
- Remove the instrument panel;
- Disconnect the battery;
- Place the main unit behind the instrument panel;
- Hook the main unit onto the air duct with plastic clamps;
- Connect the alarm to the door switches (red and green);
- Connect the signal outputs to the turn signals (blue and black);
- Remove the door trim;
- Install an additional activator on the driver's door;
- Connect the connectors, and then put on the elastic band, leaving a loop of wire;
- Install limit switches at the bottom of the front pillars and rear fenders;
- Connect to the trailer for the trunk (to black and white);
- Replace the incandescent lamp for the luggage compartment illumination with an LED one;
- Connect the alarm power wire to the ignition switch;
- Pass the limit switch and siren wiring through the rubber of the engine shield;
- Attach the shock sensor with a clamp near the fuse box on a horizontal shelf. Attach a relay nearby to open the luggage compartment using the remote control. The relay must be connected in parallel to the standard trunk opening button;
- Remove the front glass pillar trim;
- Attach the antenna to the glass;
- Place the secret key in a random location.
Installation of an alarm system with auto start
How to replace the central locking unit
Required
: remove the mounting block (put it aside without disconnecting the connectors with wires), a new central locking control unit (article 21900651201000, price about 1100 rubles).
- Remove the two screws securing the block.
- Disconnect the block with wires (pull it towards you).
The most difficult thing: unscrew the screw securing the mounting block, unscrew the bolts securing the central locking unit, remove the connector from the central locking unit and install it in its place. If it is not possible to tighten the bolts of the central locking unit in the reverse order, use plastic ties.
The process of removing and installing the central locking control unit on the Lada Granta is also shown in the video:
By the way, do you know that LADA cars can be equipped with sensors? This update will change the way you think about lock management.
The central locks (CL) installed on Grants allow their owners to lock and open the doors of their car from a distance using the remote control, or to perform this manipulation by turning the key in the lock of one of the doors (driver's).
Granta - Norma 033 configuration. We launch the standard security system.
Grant's car. Equipment according to dealer specifications - Norm 033. Column - Central locking with remote control. A dash, that is, missing. Such cars came several times to install alarms. The main requirement of clients is that I want a lazy person who can open and close doors. There was still no opportunity or time to study the car well. Finally, there was time, and a car of this configuration turned up.
What confused us, why the question arose regarding the study of car electrics. The most important thing that catches your eye is the driver's door module for controlling the power windows. It is not power, which means the car has a body electronics unit installed. Then why are there no control panels?
Let’s start to figure it out, because if the unit is the same as on luxury cars, then what’s stopping us from adding a standard control panel there? We open the module and check whether it contains a radio channel circuit. Yes, I have. And it’s unlikely that the manufacturer will bother making several versions of electronics units. We purchase a remote control and carry out the training procedure. The procedure went smoothly, although there was no sound signal when programming was completed. But the remote control works, the doors open and close.
We check security capabilities. We open the car, which is locked with a remote control, using the door lock cylinder and observe the blinking of the turn signals, but again without an audible alarm. We check the body electronics block and see that the wire for the alarm signal comes out of it. But there is no signal itself. Strange savings from the manufacturer, or rather a strange approach to configuration configurations. I don’t think that by excluding the control panel, sound signal and 4 limit switches, the manufacturer released a much cheaper package to the market, especially since the bundle of wires remained complete. But for the user, this configuration resulted in worries about fine-tuning his car. And in general, why such configurations are needed is completely unclear.
Wiring for the limit switches is also present, although we don’t see the limit switches themselves, which is not surprising. The wire to the hood switch is also in the instrument panel bundle, but it does not go under the hood. You'll have to stretch it yourself.
Let's dig further. The option to open the trunk from the remote control works. The last thing left to check is the fine-tuning of the glass when arming. Press and hold the arming button. The windows closed. We press the disarm button and hold it - the windows open.
We install the door and hood limit switches, set the sound signal, connect an additional shock sensor and you're done. The car received a standard security system with the option of monitoring impacts on the body.
I called several installation centers I know and asked a question: Have you tried to equip cars of this configuration with a standard security system, since the electronics unit is installed. I received the expected answer: Why try? You won't earn much from this...