Why do you need a diagnostic connector?
Every time the vehicle undergoes a technical inspection, the data is updated.
If any breakdown occurs, it is likely that it will be much easier to fix it by receiving data about the condition of the car during maintenance by connecting to the diagnostic connector. Diagnostics of this type is not a panacea for a breakdown: with its help, the average car owner is unlikely to determine the exact cause of the malfunction. The fact is that information can be displayed with serious deviations. Therefore, only a professional is able to determine the cause of the malfunction, based only on the data received from the diagnostic connector. However, sometimes, if the problem is obvious, this information can help any car owner - too large a deviation of the parameters from the norm excludes the possibility that the problem is an error.
Thus, the data will help determine the cause of the breakdown.
Location of the diagnostic connector in my Grant (photo)
Photo from under the glove compartment
Photo of the connector from the driver's door
Photo of the connector from a medium distance
Photo of the connector close up
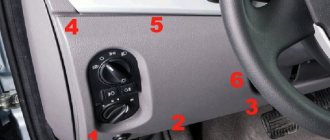
In my Lada Granta, the diagnostic connector is located to the left of the glove compartment under the instrument panel. The reference point for the search is the passenger foot air nozzle. If you draw a parallel from the top point into the panel, you will see a diagnostic connector.
In my opinion, not a very good location. Let me explain why. If you want to use this connector to permanently connect the ELM327 (diagnostic adapter), then, depending on the model, it will stick out a little, so moisture from the passenger’s feet may get inside it. Also, strong passengers may accidentally try to tear it off or press it with their feet, which can cause damage.
A passenger may accidentally trip the diagnostic connector with their foot.
But, it seems to me, the designers of AvtoVAZ decided to save on wires and not lead the diagnostic connector block to a more convenient place. And they didn’t have a goal to make this connector for permanent connection. Although it is to this connector that on-board computers, such as Multitronics VC731, are connected.
Generalization
Granta is easy to diagnose - the connector is not covered by anything and is accessible from the passenger compartment. For VAZ 2110, 2111, 2112 you can make a simple adapter or buy a ready-made one from China.
We use the connector itself to connect a scanner and work with errors, or to connect an on-board computer.
Instructions for working with the ELM327 scanner and the course of action if the “check” lights up are here.
A complete table of error codes on Grant is available at this link.
When I posted about TO1, I wrote that the electrician could not find the diagnostic block in the car and from Fr. I wanted to take a couple of photos, maybe it will help someone, or maybe a “specialist” from the salon will look here to increase their knowledge about the car.
So. Where is the ECU diagnostic connector located on the grant?
The diagnostic connector is located on the front passenger side in the center console area, under the glove compartment. If you put your head between your feet and look up, you will see this picture
I would like to touch on a topic that is interesting to me. I think the topic is interesting not only to me. AUTO DIAGNOSTICS via diagnostic connector. A little background. When I just bought my previous car in 2009 (Nissan Wingroud 2003 QG18 4WD), I immediately bought a new product for that time - a Multitronics RI-500 trip computer. The thing turned out to be very useful and cool for me. After some time, I decided to update the firmware on it. This required a special adapter - K-Line. I successfully bought it via the Internet, updated the Multitronics firmware, and then the fun began. As it turned out, using this adapter it was possible not only to update the Multitronics firmware. Quite the contrary. The main purpose of this K-Line adapter was to diagnose the car. I spent days reading the Internet, spending tens and hundreds of megabytes downloading all sorts of programs - all for nothing. The diagnosis did not work. Without getting into the weeds, I will say that the problem turned out to be that MOST Japanese cars for the domestic market use THEIR SPECIAL protocol for diagnostics, and any programs that support the OBDII standard were absolutely unable to connect to these cars. I accidentally came across a thread on the drome with the ONLY program at that time running under DOS. I don’t even remember its name right now. Then, again, there was one single program for Nissans for Windows - OBD SCAN TECH. The process has begun. The TECU project (then JOBD) began to develop, then programs for smartphones began. At the moment everything is fine with the programs. Diagnostic experience is also present. For those interested, you can read the basics and download the programs on the pages www.wingroad.ru/threads/D...ez-obdi-obdii.213/page-61 (first post) and also vdiag.net/. So why am I all this?
How to independently and correctly diagnose Granta’s on-board network?
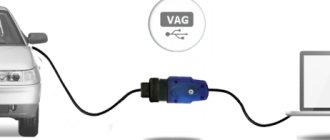
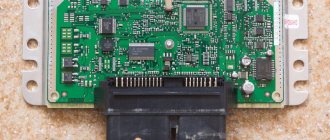
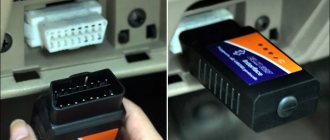
In order for the diagnostics to be complete, the use of a “K-Line” format adapter will not be a sufficient measure, since the ECU is endowed with a different design that differs from other representatives of the VAZ model family. In this case, the use of a different adapter is required. The role of such a tool can be the ELM-327 diagnostic device, paired with which you need to use paid or free specialized software (for example, Scan Master or Torque).
The image of “ELM-327” can be easily found on the Internet or in a directory. Masters of official representative offices use the so-called “dealer scanner” “DST-14” as a diagnostic tool.
Using this method, diagnosing yourself is not easy, since the procedure is associated with certain difficulties associated with the presence of not only the software, but also the “hardware” part. And this is no longer an ordinary connection, like via K-Line. This situation presupposes that the person performing the diagnosis has certain experience and relevant knowledge. Here the main role is given to the ability to compare the device data and the real situation.
Self-diagnosis allows you not only to find errors present in the unit’s memory, but also to save the owner financial resources. To implement the process, you can use a regular laptop, the memory of which already contains a pre-purchased scanning program. Within 1-2 minutes, this software will check the car system and provide results for all parameters of the engine and other components, and indicate where the fault is located.
The engine of a Lada Granta car is initially endowed with specific characteristics, the values of which allow minor deviations. In the table displayed on the display showing the diagnostic results, the presence of errors (designated as “DTC”) is first checked. If line information is displayed in the form of symbols: “error 505”, then you will need to find an interpretation of the decryption on the corresponding website or forum. If your search is unsuccessful, we recommend contacting a professional.
Many software options are equipped with transcripts of a sufficient list of possible errors. Sometimes the ECU simply does not generate errors, which does not at all indicate their absence. The acceptable standard deviation for a specific parameter is a difference within 20% of the regulated value. If this deviation exceeds the permitted limit, then troubleshooting should be done.
The most important parameters are:
- “UACC” (voltage at battery terminals);
- “THR” (throttle valve position);
- the frequency at which the crankshaft rotates;
- mass fraction of the consumed portion of air;
- temperature parameter in the cooling circuit of the Lada Granta engine.
What are standard parameters
Each engine has its own standard parameters. These are technical characteristics that determine the normal operation of the motor. These parameters are compared with the values obtained during diagnostics. All measurements are carried out with the engine running at idle speed.
The presence of errors that are stored in the car's memory is the so-called DTC parameter. What these errors are can be determined by deciphering their codes, which can be easily found on any resource on the Internet. There are entire tables with interpretations of error codes.
But the engine may have malfunctions and malfunctions and not generate errors. For example, if the idle speed is too high, the control unit believes that the driver pressed the gas pedal, does not perceive the situation as an error and, naturally, does not display it during diagnostics.
If, during engine diagnostics, all measured parameters differ from typical values by no more than 20%, then the engine is operating normally. Components and parts whose performance exceeds the specified value can be considered faulty.
Using the connector
The main options for using OBD-2 in the Lada Granta include:
- connecting a scanner to check the machine and deal with errors;
- installation/connection of an on-board computer, for example, Multitronics or State.
Connecting an on-board computer to a Lada Granta car will have a useful effect, because in this way it will be possible to:
- monitor the engine temperature;
- receive error codes as soon as they occur;
- forcefully start the cooling fan.
Where is the diagnostic connector located in the Lada Granta?
To find the diagnostic connector in Grant, you should look under the front passenger seat.
In the place where the passenger's feet should be, there is a small space above which the glove compartment is located. On the left wall of this recess you will find a ventilation grille through which air is blown when the stove is on. Directly above this grille is the diagnostic connector. To get to it and establish a connection, you will have to unscrew several bolts from the plug. The connector is quite large and has a distinctive appearance, so you are unlikely to miss it.
It is recommended to be careful when connecting the adapter to the diagnostic connector of the Lada Granta. The fact is that the location of the connector is not very convenient. Because of this, when the adapter is turned on, there is always a risk that a passenger will touch it with his foot. In principle, the adapter itself is held in the connector quite firmly. However, if a passenger hits it hard (and this most often happens completely by accident), he will easily break both the connector and the adapter. The simplest solution would be to either warn the passenger not to move their legs too actively (which does not always help), or not to ride with the adapter installed in the connector. Some car owners solve this problem radically - car service centers ask them to move the connector to another, safer and more convenient place. However, this will cost a decent amount.
A device with the functions of the ELM 327 adapter.
This adapter is characterized by its rather small size and ability to easily connect to the connector and, due to its miniature size, to be quite inaccessible to accidental movements of the passenger (mentioned above). This adapter, insignificant in size, but not in its functions, connected to the connector, transfers all the necessary information from the car’s memory via the Bluetooth interface to a program on the vehicle owner’s smartphone (the owner can especially be recommended to use the Torque program, which meets all modern requirements with its functionality). If, as a result of the diagnostics carried out, the owner of the car receives the corresponding error codes for some parameters of the functioning of his vehicle, he can contact the specialists of any car service center with them. Moreover, in the documentation supplied by the manufacturer to the manufactured car, all the interpretations and designations of error codes are clearly presented.
General questions about OBD2 on Grant
Let's look at questions about OBD2 on Grant - a diagram of what it is needed for.
How to use the connector
The main options for using OBD2 in Grant:
- Connecting a scanner to check the car and work with errors;
- Installation and connection of an on-board computer of the State or Multitronics type.
Working with the diagnostic scanner is described in detail and step by step at the link.
It will be useful to connect the on-board computer - this is how you can:
- monitor engine temperature >;
- receive error codes immediately when they occur;
- force the cooling fan to turn on.
Diagnostic block diagram
The contact diagram of the block is shown in the picture:
The pinout of the block can be useful in the manufacture of adapters for OBD2.
Diagnostics 2110
The tenth generation VAZ received a 12-pin diagnostic block. These began to be installed on cars as Euro-3 and higher standards were introduced.
Why is OBD2 not suitable for 10?
Frets of the tenth family received their own connection option for diagnostics. You cannot connect a standard international to it
The reason is that tens have a 12-pin connector. OBD2 has 16 pins.
Adapter for ELM327 and OBD2
News - you can assemble an adapter for tens . Need to:
- Connection diagram;
- 4 wires;
- New OBD2 format plug (if you don’t want to connect the wires directly to the scanner every time).
You cannot connect an OBD2 scanner directly to connector 2110 - you need either an adapter or a direct connection of several contacts according to the diagram below.
The adapter circuit for tens requires working with four contacts. No need to go into all 12.
Electric power steering
When the EPS diagnostic light comes on or the electric power steering switches on/off after a certain period of time, you first need to check the EPS using the diagnostic connector. Open Diag (application) together with an OBD-2 adapter or scanners will help here:
- Scanmatic;
- Motor Master;
- ScanDoc.
The diagnostic process is designed to indicate where errors are located and decipher them for further repair based on the type of malfunction. In addition, it is quite possible to perform the check without a scanner:
- There is an 8-pin connector (black) under the ignition switch under the steering wheel. It is necessary to dismantle the casing at the steering column (unscrew the fastening screws from below).
- Insert the paper clip, closing the two contacts.
- Turn on the ignition and observe the warning lamp.
- The first signal will be the continuous burning of the lamp (“1”).
- It is necessary to count subsequent short signals, that is, if there are 3 short ones, then “3”.
- In our case, the code “13” should be formed.
Search for OBD-2 on Lada Granta
- Sitting on the front right seat, you need to find the glove compartment lid.
- Place your hand underneath the lid and move it to the left towards the center console.
- Your hand should now rest on the diagnostic connector.
As a visual reference, look at the vent cover located at the front passenger footwell. Above it is the plug we are interested in. By the way, it is not necessary to look at the port itself, since it will not be difficult to detect from the driver’s seat. The main thing is to know the place where you will be looking.
Features of the Scanmatic-2 scanning kit
The designated set can be easily found in the retail chain. It fits such a thing as the diagnostic connector on a Lada Granta car, but will require the use of a laptop. The Scanmatik-2 package initially includes a scanning program. The cost of such a device (set), according to the official website, is 13,700 rubles. In terms of applicability to domestic cars, this is the best option for scanning, as evidenced by many reviews from diagnosticians.
To diagnose it yourself, first of all we boot up the laptop and activate the required program. Using a “USB” format cable, we connect the computer with the vehicle’s diagnostic socket. In the dispatch menu of Windows devices, we find the appearance of a “fresh” “COM” port, which we “register” in the settings. We insert a cord with an “OBD-2” connector into the diagnostic connector, which is connected with a “USB” cable using the adapter included in the delivery kit. We control the glow of the green lamp, which is equipped with the OBD diagnostic connector, which indicates the correct connection. After launching the special program, activate the “Engine” tab and click on the “Auto-detection” symbol. This allows the program to identify the on-board car computer on the Lada Granta.
If identification is not carried out automatically, then it is possible to manually select the name of the modification (in our version, “VAZ”) from the versions present in the software registry. A menu will appear on the display allowing you to select the ECU. There are cases when the program fails to determine the brand of the on-board controller, for example, when the software was previously “reflashed”.
After communication has been established between the ECU and the diagnostic tool, a list containing diagnostic modes is displayed on the screen. We enter the working window and get the opportunity to view the list of parameters, as well as adjust their settings. This point helps not only to find the fault, but also to improve the configuration of any system. To implement this action, you will need to enter the section called “Settings”. The “View” menu allows you to adjust the settings of the “Blutooth” function in case of using a wireless switching method.
The user of a Lada Granta car can create a set of parameters, which can subsequently be extracted from a list of values pre-present in the program. For example, using this method you can create a specific set that allows you to check the idle speed of the engine, and then save the data and use it an unlimited number of times in the future.
Upon completion of the diagnostic process, we return to the program menu for selecting the ECU and deactivate the ignition.
How to use the diagnostic block
1
.
Directly to destination. To diagnose a car using an adapter that is connected to a computer or phone, or to a special diagnostic device. 2
.
For the purpose of having fun. Connect the adapter and install the Torque program on your phone, connect to it using a Bluetooth connection, and you can view the data online. And if you have a phone with GPS, then you can measure acceleration to 100 km/h, time to cover a section, etc. 3
. View engine temperature. Since the first versions of the car did not have an engine temperature indication on the instrument panel, many owners used a diagnostic connector to connect on-board computers, which show many parameters, including engine temperature. And since most Grant owners complain about the low operating temperature of the engine, on-board computers are a very popular solution to this problem. Self-diagnosis allows you not only to find errors present in the unit’s memory, but also to save the owner financial resources. To implement the process, you can use a regular laptop, the memory of which already contains a pre-purchased scanning program. Within 1-2 minutes, this software will check the car system and provide results for all parameters of the engine and other components, and indicate where the fault is located.
Sources
- https://ladaautos.ru/lada-granta/gde-naxoditsya-diagnosticheskij-razem-v-avtomobile-lada-granta.html
- https://carfrance.ru/gde-naxoditsya-diagnosticheskij-razyom-na-lada-granta/
- https://Vaz-Lada-Granta.com/elektrika-tormoza/razem-dlya-diagnostiki.html
- https://elm327-obd2.ru/diagnosticheskiy-razem/lada-granta.html
- https://ladaprofi.ru/lada-granta/gde-nahoditsya-diagnosticheskij-razem-na-lade-granta.html
- https://car-fact.ru/marki-i-modeli/otechestvennye/lada-granta/obd2-granta.html
- https://24techno-guide.ru/lada-granta-diagnosticheskii-razem-gde-nahoditsya.php
Advantages of an auto scanner
What is the OBD diagnostic connector
“Scanmatik-2” was appreciated even by professional diagnosticians. Having tried this kit once, car enthusiasts were pleasantly surprised that for a relatively low price it allows you to work with a full fleet of domestic cars and an impressive part of foreign ones. When working with the diagnostic kit of this model, you can also use a wireless interface to connect the system to a computer (Bluetooth).
https://youtube.com/watch?v=Q5esXF84-Lk
The OBD-2 connector on Grant regularly supplies power to the diagnostic adapter. In extreme cases, the Scanmatik-2 adapter can be powered from the cigarette lighter. In general, the device is very convenient for performing diagnostic procedures yourself. It even has surge protection. If, for example, you apply current from the cigarette lighter when the system does not need it, nothing bad will happen.
Every device has pros and cons. Many car thieves know how to use the diagnostic connector for their own selfish purposes. As a rule, the diagnostic block is used by criminals to disable the standard immobilizer. A common solution to this problem is to replace the standard block with a “re-pinned” one, with a different arrangement of contacts.
The adapter consists of a “male” (fake connector) and a “female” (standard connector), which is previously removed. It will not be possible to connect standard diagnostic equipment to the new connector without such an adapter, but the chances of saving the car from theft are increased. That's all. Good luck!
Add to favorites
Seal
For me, the most difficult thing about a car is its “brains”. So I can fix everything myself, but I never get into this computer.
Well, at least the “brains” are not the same as, for example, in Toyota. Nothing can be done there at all without the permission of the BC.
It’s better not to get involved in this system yourself. It's easier to contact a specialist.
Oleg, essentially it’s like that in everything. If you don’t know something, then it’s better to run to a specialist.
BC STATE-1 stopped working. The diagnostician could be blocked or disabled. block? Anyone in the know, please tell me. Thank you.
Any system has “foolproofing”; since the 90s I have always repaired cars and computers (as far as understanding was enough) and have never broken anything, but I have found errors left by “professionals”
Please tell me where is the diagnostic connector for Lada Granta 2013?
Car driver test: what kind of driver are you? Car test for girls - you and the car Who is more important, you or your car?
