The installation of this function in my car continued for several months. Slowly, little by little, and finally finished)).
I would like to note right away: This function is used at street temperatures down to -10, -15 degrees. In cold weather this function is not needed. It is needed in slushy weather. That's why the glass won't burst)))
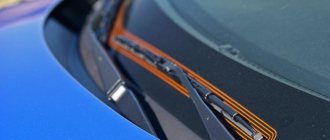
Heating elements (HE) were purchased to heat the wiper area. At the first opportunity they were installed on glass. It stuck perfectly, but not as I would have liked. It turned out that they were visible from the street. The length of each NE is 55cm, when ordering I somehow didn’t think that it was worth taking one NE 55cm and the second 35cm, then I think everything would have stuck perfectly. In principle, they are not even noticeable and if you don’t look closely, they are not noticeable, so I don’t worry about it.
Then the connection issue arose. There were several options: 1. Connect together with the heated rear window. 2. Connect separately from everything else and display a separate button. 3. The most interesting. Connect it separately from everything else, make a small electronic control unit and use the same button as turning on the heated rear window. And to turn it on, for example: a short press turns on the heating of the vehicle, a long press turns on the heating of the vehicle, turn it off in the same way. Plus, make sure that after a certain time the heating turns off automatically.
In the end, I settled between the second and third options, since I myself am not good at programming and besides Stepan Palych
I have already designed a similar device. So all that remained was to assemble it.
The result is this device:
To turn on the heating, I bought a used PWR HEAT button, it is intended for an additional interior heater that is found on diesel cars. It is clear that I do not need it for these purposes, but this is the best option since there is a picture of heating and there is free space in my car for the housing of this button. I found the chip I needed to connect the button in my car in the area of the stove, since this chip was not used, I happily removed it))
This button has undergone a slight modernization to suit my wishes. The board was redesigned and the button fixation was removed.
Circuit board in the button.
And this is how the indicator lights up
When the engine was running, the current consumption was 4A (two heating elements), the fuse was set to 5A. I touched the heating of the glass with my hand, after about 1-1.5 minutes the heating was 40-45 degrees, but since I’m not a thermometer, I can’t say for sure))). In general, it doesn’t heat much, but at -10 degrees outside, I think it will stay about 5 degrees, and this should be enough to thaw the brushes. Accurate tests can only be carried out after 3 months.
Almost every car owner, especially those living in the northern latitudes of Russia and without a warm garage, has more than once encountered the freezing of wiper blades in their parking area and the windshield becoming icy. As a result, “driving on the highway” was delayed until the functionality of the windshield wipers was restored and the driver’s view was cleared.
Heating the parking area for wipers using improvised means
Judging by the numerous videos from the famous YouTube portal, there are a great many folk remedies for dealing with frozen windshield wipers. However, the most effective and simplest methods among them, which are used by most car enthusiasts, are only two. This is heating the windshield wiper parking area and the entire area of the windshield (or only the driver’s side) with a warm air flow from a hair dryer or an “anti-freeze” heated to room temperature.
- Advantages: accessibility, low cost, speed.
- Disadvantages: the mandatory presence of a power source for a hair dryer or heating the liquid, freezing of wipers and icing of the windshield while driving or when parked for a short time at sub-zero temperatures, some labor intensity and discomfort.
Heating the wiper parking area using a car heater
It is possible to eliminate freezing of windshield wipers and ice on the windshield using a standard heater only if there are two car options. These are: blowing warm air onto the windshield and the function of moving the wipers 5-7 cm up from the permanent parking zone. Then, as practice shows, even in severe frosts, the glass thaws and cleans itself while the engine warms up.
- Advantages: high-quality visibility even in severe frosts; wipers do not freeze to the glass when driving or in short-term stops at sub-zero air temperatures.
- Disadvantages: the mandatory presence of the two above-mentioned options and ensuring that the wipers are always 5-7 cm higher than the standard position.
Classification of warm wipers
Modern models of warm wipers should be classified as follows.
- Frame brushes, where plastic parts are installed instead of metal parts, since frost is not so bad for this material. Special rubber with water-repellent properties is also installed. Consequently, the brush does not freeze to the glass surface and remains softer at low temperatures. Such wipers do not need to be replaced with regular ones with the arrival of spring.
- An analogue of a frame brush with a special structure, thanks to which the metal insides remain protected, as well as the rubber in the key links. Among the disadvantages, it is worth highlighting the loss of efficiency at high speeds, as well as problems with eliminating moisture, since it condenses from the air on metal elements during sudden temperature changes.
- Brushes with heating element. Visually, they are similar to frameless models, but are much more effective than the latter. The elasticity is maintained for a long time, and the structure is reliably protected from freezing.
This is interesting: Instructions from a traffic controller with explanations
Heating the wiper parking area using an electric heated strip
The use of electric heating tape to prevent wipers from freezing to the glass is recognized as the most effective among the available, low-cost and uncomplicated methods. It works most effectively in cars with the option of warm windshield blowing at almost any sub-zero temperatures outside and regardless of the state of rest or movement of the car. For cars where there are no windshield heating systems, no better method has been invented either. True, you have to put up with increased wear on the windshield wiper blades when they move over the frosty windshield for some time before it disappears.
- Advantages: with proper installation, it not only prevents the wipers from freezing to the glass, but also provides an automatic mode for turning on and off the heating of the windshield wiper parking area.
- Disadvantages: there are none, except for some physical and financial costs, but they are more than worth it.
Operating principle of heated wipers
Structurally, heated wiper blades are not equipped with a frame, therefore, they are more flexible. This quality allows you to increase the efficiency of cleaning the windshield. The design also involves the presence of a special heating cloth, which protects the cleaning surfaces from freezing, prevents the appearance of unpleasant sounds and preserves their geometry. The entire length of the cleaning surface is equipped with a special flexible heating tape, which is supplied with electricity by the car's power supply.
Methods for defrosting windshield wipers
Traditionally, the lower part of the glass is heated by blowing hot air supplied by the cabin heater fan. The problem is that defrosting takes too long: first you have to warm up the engine and coolant to get warm air, then it takes another 15-20 minutes to melt the ice.
There are several alternative solutions to the issue:
- organize heating of the resting zone of the brushes using an overhead heating element;
- purchase ready-made windshield wipers with a built-in heating system and connect them to the car’s on-board network;
- make your own heating element and install it on standard wipers with connection to the electrical network through the cigarette lighter or a separate button.
The first method will give excellent results when installing a heater on the rear window of a car . The fact is that at the factory it undergoes heat treatment and is not afraid of temperature changes in different zones. The same cannot be said about the windshield, whose heating in frosts of minus 15 °C and below will cause cracks to appear. This is a consequence of a sharp increase in temperature in one area, which the three-layer “triplex” structure is not designed for.
Warming up the lower zone of the glass is quite simple: buy a film thermoelement and glue it to the surface (the product has an adhesive layer on one side). Then connect the wires connected to the cigarette lighter or a separate button to the contacts.
Note! When using a heater on the front window, do not turn it on in frosty temperatures of –15 °C or below. First, warm up the car in the traditional way.
What kind of service is this?
In cold weather, when ice forms on the windshield, special care is required. Heated wipers, which allow for the highest quality cleaning in winter, can be purchased at our service center at a competitive price. It is also necessary to diagnose and possibly replace the windshield wiper motor. Preventing the windshield from freezing can be done in two ways:
- Heating of the wipers themselves;
- Warming up the windshield wiper zones.
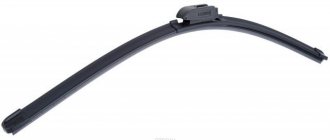
Heated wipers
Universal mount that allows the use of heated wipers , suitable for most vehicles. Their peculiarity lies in the following characteristics:
- The wires contain fluoroplastic, which is not capable of reacting with the external environment. This ensures a long service life of the cleaning system.
- Powerful heating element;
- The service life of the brushes can be extended by easily replacing the cleaning cloth.
Heating of wipers works by increasing the temperature of their metal base. This, in turn, transfers heat to the elastic band. Only a stove can melt a large frozen area of the windshield. Heated wipers are a great help when cold and snowy weather sets in.
Heating of wiper zones
In order to melt ice formations and snow accumulations on the wipers, it is necessary to warm up the areas where they stop. For these purposes the following are used:
- standard car heater;
- heated tape.
In the first case, the brushes need to be raised slightly so that the flow of warm air can reach them. On some vehicles, you can move the brushes slightly by operating a lever.
When a heating element is used to warm up the wipers, the stopping points of the brushes are already heated, which prevents snow from sticking to the rubber band, as well as its icing. Much of the work involved in installing the tape involves running the electrical wiring. Then it is simply stuck on the glass.
Cost of installing heated wipers
Our professionals can install heated wipers anywhere (wherever the car is), you should order this service by calling the service center. The price starts from 2 thousand rubles.
Installation of heated wipers
Frameless blades equipped with factory thermocouples are equipped with adapter modules for attaching to windshield wipers of cars of different brands (quantity - from 5 to 9 pcs.). There are several brands on sale whose products have been tested by drivers in practice: BREMAX, Burner and CHAMPION.
To heat the windshield using ready-made wipers, read the product’s operating instructions and install them in this order:
- Remove the standard brushes from the brackets, and remove the plastic covers of the adaptive modules from the new parts.
- Select a suitable mount from the kit and fix it on the adapter, carefully leading the wiring through a special hole.
- Install the wiper blades by running the wires inside the brackets. To prevent them from dangling, secure the current-carrying wires with thin plastic clamps.
- Using any technological hole in the partition, route the wiring to the button or cigarette lighter socket.
Attention! Where the windshield wipers are attached to the drive shafts, the wires must not be pulled, otherwise the wires will quickly break.
To protect the vehicle's electrical network, connect an additional 5 A fuse to the heater power supply circuit. If you need to activate the button, it is recommended to assemble a circuit with a relay that allows you to protect the button from high currents.
Assembling homemade heating
To make heated wipers, you need to understand how factory-made products are designed. The design is as follows: a film heating element is glued to the metal strip that serves as the base of the brush, whose contacts are brought out approximately in the middle (where the mount with a lock is located). The heater is covered on top with a rubber windshield wiper. Hence the conclusion: it is necessary to make the same flat elements and integrate them into standard brushes.
For work you will need the following materials:
- MGTF brand wire - 0.03 mm 2 in an amount of about 10 m for the heater;
- the same, brand MGShV or PV-3 (0.12 mm 2) for connection;
- heat shrink tube for sealing soldering;
- aluminum foil.
Note. The resistance of the heating wire for one wiper must be at least 5 ohms. This will give a thermal power of about 35 W at a circuit current of 2.5 A.
To make a heating element with your own hands, the first thing you need to do is remove and disassemble the wipers. The goal is to accurately measure the length and width of the future film heater, guided by the dimensions of the metal base. Then proceed like this:
- Drive 2 nails into the board at a distance equal to the length of the brush base.
- Cut a piece of resistance wire (indicated above) and wind it between the nails so that the ends are centered.
- Secure the resulting train with tape, remove it from the nails and wrap it in foil.
- Solder the ends of the MGTF heating wire to the PV-3 connecting cable. Place an insulating heat-shrink tube over the joint and heat it with a lighter.
When finished, place the homemade heater inside the brush, pressing it with an elastic band and a plastic retainer. Further assembly and connection to the vehicle on-board network is carried out according to the algorithm described in the previous section.
Advice. During operation, use homemade heating for a short time so as not to discharge the battery. Turn it on for 3-5 minutes, enough to defrost the glass.
Connecting warm brushes
You can install heated brushes either in a car repair shop or yourself. If the second option is more preferable for you, focus on the following sequence of work.
- Thoroughly clean the surface of the windshield from dust and dirt.
- Remove the protective film from the purchased brushes.
- Decide where to install the wipers on the glass. Mark the area where the brush will stop, and glue the ESCHS to this place on the inside of the glass. At this stage, it is important to consider that the wiper stop zone should be in the center of the heating material.
- Connect one cable to the vehicle ground, and the second to the wire labeled +12 volts through the switch.
- At this point, you can start the wipers.
Installation of the power button
While driving, you need quick and convenient access to the power button, therefore, it should be located based on this requirement. You must have basic electrical knowledge and follow these guidelines.
- Connect the relay to the power button. The best place for the relay is under the hood of the car. Watch the length of the wires.
- To make it convenient to pull wires into hard-to-reach places, use wire.
- Ensure that all wires are properly insulated, otherwise you will have to do everything all over again due to a short circuit.
- Start connecting the relay with a minus and end with a plus.
- Install a fuse between the positive wire.
This is interesting: Do-it-yourself engine diagnostics
As a result, turning on the machine and pressing the button should activate the start of the devices and the heating. This function should be disabled when the button is pressed again.
Refinement of silicone brushes
Many car owners install silicone windshield wipers from the Horse brand instead of regular wipers with rubber pads. The products have 3 features:
- Increased elasticity that does not lose over time.
- There is a longitudinal hole inside the cover.
- Silicone can withstand heat up to 250 °C.
In this case, the heating of the brushes is done using a nichrome thread with a resistance of at least 8 ohms. If it is twisted into a spiral, then straighten the wire by heating it with a small gas burner. Then thread the thread through the hole and bring the ends out in the middle, making an inclined channel with an awl. To solder a copper wire to nichrome, treat it with a brush dipped in hydrochloric acid. Then work according to the previous scheme - assemble the windshield wipers and connect them to the power supply.
If, for various reasons, you cannot make a heating element yourself, then take the advice of experienced drivers: before leaving the car in the parking lot, lift the wipers so that they do not ice up and freeze to the glass.