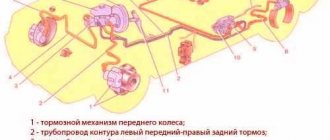
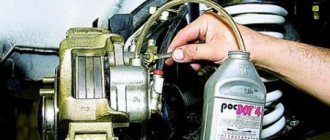
Removing air from pipelines and cylinders is a mandatory operation, which is accompanied by changing brake fluid, replacing hoses or working cylinders. Bleeding brakes with ABS differs from a similar procedure on cars without ABS. This is due to the presence of valves and a hydraulic accumulator, from which air cannot be removed in the standard way.
Anti-lock brake system (ABS) device
When braking, ABS regulates fluid pressure in the working cylinders, preventing the wheels from completely locking. Thanks to this, the braking distance is reduced and the driver continues to control the vehicle’s trajectory even during intense braking on snow, sand or wet asphalt.
The principle of operation of the abs system. Video:
The anti-lock braking system includes the following parts:
- Control block. Electronics that change pressure by opening and closing bypass valves. It analyzes information about wheel rotation. When the wheel stops, the valve partially relieves pressure and the pad presses less.
- Sensors that control rotation speed. The devices are mounted on wheel hubs and operate due to the Hall effect. They transmit information to the ECU.
- Hydraulic block. It consists of hydraulic accumulators, solenoid valves for inlet and outlet, an electrically driven pump and damping chambers.
In their normal position, the exhaust valves are closed and prevent fluid from leaving the cylinder. Accordingly, the intakes are open and do not prevent pressure from increasing when the pedal is pressed. When the car brakes, fluid enters the cylinder, increasing the pressure in it. If the wheel starts to slow down too sharply, the ECU closes the intake valve, preventing blocking. If necessary, a signal is sent to open the release valve, which reduces the pressure to a value at which the wheel is unlocked.
Types and types of ABS anti-lock systems
Based on the number of control circuits, there are three types of anti-lock braking systems:
- single-channel - when one wheel is blocked, all four are released;
- two-channel - triggering occurs based on data from the best (high-threshold) or worst (low-threshold) wheel;
- four-channel - each wheel is adjusted separately, which ensures maximum braking efficiency.
Important! Modern cars are equipped with four-channel systems.
Depending on the location of components and maintenance features, there are three types of ABS:
- with components (hydraulic module, valves, accumulator and pump) located in a single unit;
- with components spaced in the form of different units;
- with optional SBC and ESP systems.
Despite the complicated design, it is quite possible to replace ABS brake fluid yourself.
How to properly and quickly bleed ABS brakes with your own hands
The procedure for bleeding the brakes is influenced by the design of the system, the location of components and the presence of additional electronic modules. The correct sequence is important. You need to start by relieving the pressure in the hydraulic accumulator. To do this, you need to turn off the ignition (it is not necessary to start the engine) and pump the pedal.
A simple secret to quickly pumping brakes. Video:
Read how to bleed ABS brakes and stock up on the following materials, parts, accessories and tools:
- spanner;
- a rubber (possibly plastic) hose with a diameter corresponding to the thickness of the fitting tip;
- brake fluid;
- container (necessarily transparent). This is where you will drain the old brake fluid.
You cannot do without an assistant who must press the pedal on command. You will perform manipulations with the fittings that ensure the removal of liquid.
Bleeding ABS brakes, where the components are located in one unit, differs little from the standard procedure. The only thing you need to do is turn off the system by pulling the fuse. This method works on domestic Ladas.
You can take advantage of the built-in pump. Then you will have to pump with the ignition on or even with the engine running. The sequence and order of bleeding the brakes starts with the right front cylinder and looks like this:
- disconnect the terminal of the level control sensor fixed on the expansion tank cover;
- remove the cover;
- open the brake reservoir;
- fill the reservoir to the brim with brake fluid;
- put the hose on the tip of the fitting;
- lower the end of the hose into a container to collect liquid;
- open the fitting by turning it a quarter or half a turn;
- to activate electronic systems, turn on the ignition;
- release the brake;
- wait until the pump expels the airy mixture;
- release the brake pedal;
- Tighten the fitting with a wrench.
The brake bleeding scheme is no different on any car, be it Patriot, Lacetti, Ford, Passat, Gazelle. First, air is removed from the “far” circuit (for “left-hand drive” cars it is on the right), then from the “near” circuit.
Important: When bleeding, keep an eye on the brake fluid level. If it falls below the minimum, the system will fill with air. Then the work has to be done again.
To bleed a system with components located in different places, a diagnostic tester is needed. It connects to the car and allows you to control electronic components using a smartphone or computer. In this case, you will also have to unscrew the fittings and drain the airy liquid. However, no manipulation of the pedal is required. Instead, the valves and electric pump must be activated using the appropriate menu items. This way you can bleed the systems on the VW Passat B6 and other modern cars.
Bleeding the brakes using the Priora as an example
Before you bleed the ABS brakes, you will have to drive the car into a pit. This will help you gain convenient access to the fittings on the rear cylinders and will allow you to avoid removing the discs during operation. On the Priora, the procedure for pumping brakes with ABS does not differ from that adopted on simpler models. The only difference is that the work must be performed by first turning on the ignition. In this case, the solenoid valves will be in the open position.
How to properly bleed the brakes on a Priora with abs with your own hands, video:
The work starts from the right rear and is done like this:
- disconnect the wires from the tank lid;
- unscrew the lid;
- Fill the reservoir with brake fluid to the brim;
- remove the protective cap;
- loosen the fitting using a spanner wrench;
- connect a tube to the tip of the fitting;
- lower the tube into the container;
- pump the brake pedal;
- press and hold it in this state (you need an assistant for this);
- open the fitting by turning it with a key;
- wait until the fluid flows out (the brake pedal goes down);
- tighten the fitting;
- pump up the pedal and release the “brake” until liquid that does not contain air bubbles comes out of the tube;
- tightly tighten the drain fitting;
- remove the tube with the spanner;
- put on the cap.
After this, it is necessary to repeat the work on the remaining three cylinders. To access the fittings on the front cylinders, you will have to jack up the car and remove the wheel rim.
Pumping the brakes using the example of “Grants” and “Kalina”
The technology for pumping brakes with ABS on the Kalina and Granta models is no different from that described in the section for Priora. Therefore, you can safely use it1, it is suitable for the entire model range of the VAZ brand.
Advice: after bleeding the brakes, do not rush to leave the garage immediately. It is necessary to check their system functionality. Make sure there are no pedal dips or leaks.
Bleeding the hydraulic brake system of Hyundai Accent MC
Tools:
- Open-end wrench 10 mm
- Wheel key
- Wheel chocks "shoes"
- Screw jack
- Support posts
Parts and consumables:
- Brake fluid (DOT-4 type)
- Brake fluid container
- Hose
- Rags
Note:
For example, bleeding the brakes is shown on the front left wheel. We pump the brakes to remove air from the hydraulic drive after it has depressurized when replacing the master brake cylinder, wheel brake wheel cylinders, hoses, tubes, as well as in case of replacing the working fluid or when the brake pedal becomes “soft”.
We bleed the brakes with an assistant.
When the engine is not running, we remove air from the system, first from one circuit and then from the other in the following sequence:
– brake mechanism of the right rear wheel;
– brake mechanism of the left front wheel;
– brake mechanism of the left rear wheel;
– brake mechanism of the right front wheel.
1. Brake the vehicle with the parking brake and place wheel chocks (“chocks”) under the rear wheels.
2. Loosen the wheel nuts, raise the front of the car with a jack, place the car on secure supports, and remove the wheel.
Note:
To make bleeding the brake system easier, do it in a pit so as not to remove the wheels.
3. Bring the brake fluid level to the MAX as described in this article.
WARNING:
If brake fluid comes into contact with wires, plastic or painted body parts, they may be damaged. Therefore, always use clean rags when pouring. If liquid gets on these parts, wipe them immediately with a clean cloth.
4. We put a hose on the fitting, and immerse its free end in a container partially filled with working fluid.
Note:
An assistant should vigorously press the brake pedal all the way 4-5 times and hold it down.
5. Using a 10mm wrench, unscrew the bleeder fitting 1/2–3/4 turn. In this case, liquid with air bubbles will flow out of the hose, and the brake pedal should be pressed all the way.
Note:
As soon as the liquid stops flowing out of the hose, tighten the fitting and only after that can the assistant release the pedal.
6. We remove the hose, wipe the bleeder fitting dry and put a protective cap on it.
7. Bleed the remaining wheel cylinders as described above.
WARNING:
When pumping, you need to monitor the fluid level in the tank and, if necessary, add fluid, as described here. Otherwise, if air gets in, you will have to start all over again.
USEFUL TIPS:
If, when you press the brake pedal, you feel its “softness” and increased travel, then there is air left in the system. In this case, we repeat pumping until the pedal becomes “hard” (the pedal stroke should be no more than half the distance to the floor).
If air gets into one of the circuits, it is enough to bleed only this circuit, and not the entire hydraulic drive. Before pumping, check the level of working fluid in the reservoir of the brake and clutch hydraulic drives. If necessary, add liquid.
The article is missing:
- Photo of the instrument
- Photos of parts and consumables
Source:
Special device for bleeding brakes
There is a brake bleeding device on sale that allows you to independently replace the fluid on cars with ABS and easily get rid of air in the system. You don't even need an assistant for this.
Device for bleeding brakes. Video:
The device is a transparent sealed tank with two tubes. One is connected to the vacuum pump, the second to the fitting. The procedure for pumping the device looks like this:
- connect the device hose to the fitting;
- use a vacuum pump to pump out the brake fluid into the reservoir;
- tighten the fitting.
Thanks to the transparent body of the tank, the presence of air in the liquid can be easily determined visually.
ABS bleeding sequence
- First, we look for and remove the fuse in the fuse block that is responsible for the operation of the anti-lock braking system.
- Next, we jack up and remove one front wheel, and look for the brake wheel cylinder (BWC) fitting.
- After this, we put a hose on the fitting (from the hydraulic level, for example).
- Open the fitting one turn.
- One presses the brakes all the way and holds it in that position.
- Now turn the ignition key to turn on the hydraulic pump (the ABS indicator lights up on the instrument panel).
- The second person watches how air is removed through the hose and, after removing the air, tightens the fitting.
- We release the pedal only after tightening the fitting.
- Now, how do you know that all the air has escaped from the ABS? This shows the ABS icon on the dashboard, if it goes out after removing the air and tightening the fitting, then all the air has escaped.
The correct sequence for bleeding the ABS system
There is a specific order for properly bleeding an ABS system: right front wheel, then rear, then rear right, and then rear left wheel. If during such work the fuel fluid leaks out of the system, it is necessary to fill the system with new fluid. And to do this, you need to know what fluids can be mixed and how much brake fluid is needed for replacement.
Sequence of operation for the front wheels:
- Turn off the ignition (key position “0”).
- Remove the terminals from the brake fluid reservoir.
- Take a bottle with a small amount of brake fluid and a hose. We lower one end of the hose into the liquid, put the second on the fitting and open the fitting with an open-end wrench. It is advisable to use a transparent hose from the hydraulic level so that you can see whether air bubbles are coming out or not.
- Press the brake pedal and hold it in this position.
- The second person (at the wheel) looks to see if the air is coming out, and after the air bubbles have stopped coming out, he closes the fitting with a key.
How to bleed rear wheels with ABS:
The procedure differs for pumping the rear wheels. After the front wheels, the rear right wheel should be pumped in the following sequence:
- We also put the hose into the bottle of liquid and into the caliper fitting.
- Depress the brake pedal all the way.
- Turn the ignition key to position “2”.
- Hold the brake pedal until the hydraulic pump completely expels the air bubbles.
- Close the fitting and release the brake.
For effective bleeding, when working with the brake system of the rear left wheel, the procedure must be adjusted. Namely:
- As in other cases, put on the hose and unscrew the caliper fitting 1 turn. When pumping with the rear left wheel, the brake does not need to be applied immediately.
- Turn the ignition key to start the hydraulic pump.
- After the air comes out, press the brake pedal halfway and close the fitting.
- Next, release the brake and wait for the hydraulic pump to turn off.
- Turn off the ignition.
- We connect the disconnected connector of the TJ tank.
This video shows how to bleed anti-lock brakes on Audi A4, Audi A6, Volkswagen Passat B5 and others.
