Despite the fact that the Lada Priora has a completely modern appearance by today's standards, not all owners of this car are satisfied with its factory design. And in order to improve the appearance and add originality, many carry out external tuning (aka facelift). Only some elements of the car body are subject to changes, including optical instruments. Tuning headlights on a Priora is a fairly popular operation for changing the appearance of a domestic car. Let's consider the topic in more detail.
Eyelashes for headlights
“Ciliations” are the fastest and most inexpensive option to change the appearance of your car’s optical devices. “Eyelashes” are special linings that are glued to the top of the headlight glass. They can be of various shapes and widths, and can also be painted to match the body or simply black.
These headlight covers, since they are located at the top, do not affect the quality of illumination of the road surface. At the same time, they make the appearance of the car stylish and daring. You can make such extensions with your own hands or buy ready-made “eyelashes”.
Homemade tuning of headlights on a Priora is the most profitable option, since you can create linings of literally any shape with your own hands.
Installation of LEDs and overlays
A fairly simple way to transform your Priora is to buy ready-made “eyelashes” in specialized tuning stores. However, it will be much cheaper to make them yourself. To do this, just take tubes or a piece of plastic (an alternative is vinyl film) and cut them into thin lines with a stationery knife. You can curl future “eyelashes” with your own hands using a hair dryer and soap solution. They are then attached to the car body using double-sided tape, glue or sealant.
The optics are painted glossy black, “angel eyes” are installed on the Priora
For this DIY upgrade you will need:
- disassemble the front or rear headlight, having previously dismantled the element;
- stick masking tape on the outer part of the glass of the optics, which will prevent it from being damaged;
- bend the plastic sides (brackets) of the optics, under which the reflector is located;
- heat the sealed adhesive with which the glass is fixed in the headlight using a household or construction hair dryer and remove the glass;
- remove the reflectors using a Phillips screwdriver. Don’t forget to cover the turn signal lens with tape for protection;
- Apply several layers of black paint to the reflector. This, combined with bright LEDs, will provide a greater tuning effect. Let the paint dry;
- take an LED strip with a cross section of 2.6 mm. Remove the reflector's metallic backing, bend the tape into a circle and attach it using fasteners or glue;
- After the glue has dried (about 2 hours), reassemble the headlight or lantern. Don't forget to re-apply the sealant to the glass.
Headlight tuning, bi-xenon lenses, Laser Lights modules for Lada Priora
Coloring masks
The next type of tuning the appearance of optical devices is painting the Priora headlight masks. These changes are also not expensive and will not hurt the car enthusiast’s pocket. The mask is a specific insert that is placed inside the headlight structure. The factory version of the mask is chrome-plated. After painting the mask (traditionally black), the appearance of the car will change quite seriously. Therefore, this tuning of headlights on Priora is quite common.
However, there is a difficulty in its implementation, which lies in the need to completely disassemble the lighting device. Since the Priora's headlights are not dismountable, the glass is securely glued to the body using sealant. However, with the right approach, disassembly can be done. After this, the mask is removed from the headlight, cleaned (the chrome coating is removed), primed and painted. Then the lighting fixture is put back together and installed in its original place.
Alteration or tuning of headlights – Priora
Well guys, let me start by saying that I bought these headlights at the willow tree, there is one place where they are sold. The guys who deal with plastic on a large scale have bumper grilles, etc. At first, when I took the headlights, I was happy, but 3 days after installation, the glass on one headlight became cloudy, not in the area where the lens shines, but completely. I took it back, but three days of use is no big deal.
And what did I hear there? that I probably put Xen in the headlights and it was all because of him! What?! The same person initially told me that xenon can be installed in them, but now he tells me that the manufacturer does not recommend this. He said that he would try to change them, gave the headlight, waited for two weeks. Allegedly, the manufacturer is located in Moscow, and my headlight was sent there for examination.
And finally, calling myself every two days, I heard that the headlight had arrived. I came to pick it up - these idiots got it mixed up and sent me the second left one. Simply gorgeous. I waited another four or five days, and finally the one I needed arrived. Thank you God! By the way, I originally brought two headlights, but they only replaced one for me. And the attitude was not so hot!
Well, having received a new headlight, I decided to disassemble it anyway, since applying paint over chrome is the peak of stupidity of manufacturers, I was promised that everything would be done efficiently - I didn’t see any quality anywhere near it.
And he began to analyze. First, I removed all the lamps from the headlight, then took out the metal pins - there are only 4 of them in the office. I took a hair dryer and a large cardboard box. I placed a partition between the barrel of the hair dryer and the headlight so that a hot stream of air would not blow on the headlight itself.
I left the headlight to warm up for 15 minutes. After heating, the glass came off the headlights easily. By the way! I forgot to say! in one headlight, which they didn’t change for me, the lens was pressed closely to the glasses, and because of this, the sunlight that fell on it somehow managed to melt the plastic on the glasses.
We will also repair it. and what turned out to be after the analysis? These idiots missed the pin of the electric corrector when assembling the headlight - as a result, the lens rested on the glasses, and as a result, sunlight through the lens melted the plastic. once again, huge respect to the crooked hands - whoever assembles this, with such hands you can only plant potatoes, and even then under supervision)) after removing the glass, a gorgeous view opened up to me in full panorama)) what is called chrome here, in my opinion, is just ordinary paint from a spray can under chromium. By the way, here is the condition of this chrome after a month of use.
I didn’t even think about removing chrome with KROT liquid, since under the influence of a regular degreaser this “chrome” takes on a wonderful roughness for applying primer and paint. By the way, now I only use paint and primer like this.
The only place where, in my opinion, the chrome was in good condition was in the DRL area. I decided to leave it as is. Because at least this place inspired my trust. We seal the area that we need to preserve with masking tape.
Well, in the meantime, we sand and seal with fiberglass putty the place where the plastic has melted on the glasses.
We apply two layers of primer, with breaks between layers of 10-15 minutes, and three layers of paint with breaks between layers of 10-15 minutes. We wait until it dries and remove the masking tape.
And the last jamb is the vertical and horizontal tilt controls. These plastic things failed in the adjustment mechanism.
I refused them because I don’t know that if I bought new ones, they wouldn’t wear out either. cut it off and stuck it in as plugs. I made places at the ends for a flat-head screwdriver.
I cut holes for a screwdriver in the case.
Well, something like this, of course it’s not very convenient to regulate - but it’s quite possible) Something like this))
I haven’t had time to take a photo of how the headlights look on the car now, thank you all for your attention. Good luck to all!)
Installing lenses in headlights
Today, there are a lot of car enthusiasts who install other lenses in their headlights. Such elements in factory lighting devices are mounted in optics for the following purposes:
- As a tuning for Priora headlights and rear instruments. Most people like the look of lighting fixtures with lenses. Most often, they can have “angel eyes” in their design, an LED rim around the lens.
- Lenses are installed together with xenon lamps. If you install xenon at certified service stations, then it is supplied only with lenses.
- Standard installation from the factory. In this situation, lenses are often installed by the manufacturer in expensive models. And the lighting devices in such cars are already a whole computer, they have a lot of functions and even have cornering lights.
Lensed headlights on a Lada Priora are probably the most expensive way to carry out a facelift. It consists in replacing factory optical devices with lensed optics.
Installation of LED DRLs
LEDs for replacing daytime running light bulbs must comply with GOST. They provide excellent light during daylight hours, and if connected correctly, light up when the ignition is turned on.
The connection is made through a five-pin relay; plastic corrugations can be used to insulate the wires. Each LED block will have a black and a red wire coming from it. It is advisable to connect the black one to the windshield wiper fuse F11 (20), and the red one to the left side light fuse F14(5).
The use of LED DRLs instead of factory ones after the first week will change the Priora owner’s view of his own car. Such a small part can cost about 500 rubles for two lights, but its appearance on the road will be noticeable to everyone.
"Angel Eyes"
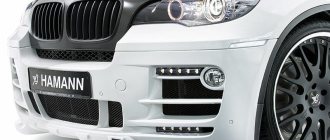
Changing the configuration is not a particularly expensive method of tuning Lada Priora headlights. Such optical devices began to be used for the first time on BMW cars, but this does not prevent them from being mounted on the model under study. Moreover, the shape of the lighting elements fully allows this to be done. “Eyes” refer primarily to side lights. They are special rings that are installed around the perimeter of the reflectors. They glow with a beautiful “cold” bluish light.
Some car enthusiasts manage to make “angel eyes” on the Lada Priora on their own, for which they use silicone tubes or special plexiglass rods, as well as LEDs. You can buy ready-made devices in automobile accessory stores.
Optics tuning options
Most of the methods listed below can be done by yourself. You will need a minimum number of tools and specific upgrade kits. Today Lada Priora owners prefer:
- Install more powerful optics or headlights with a different shade of light.
- Carry out tuning by tinting reflectors. The rear and front lights can also be dimmed.
- Install additional lighting (angel eyes) - LED strips significantly transform the appearance of the car.
- Linings - among motorists they are better known as “eyelashes”.
We decided to pay attention to the overlay of additional elements and angel eyes. They do not violate the rules, and even a novice driver can install LED strips independently
Installing eyelashes
Issue price: 300-600 rubles.
You will find ready-made eyelashes in automotive stores. But if you don’t want to spend money on tuning, you can make LED eyelashes with your own hands. To do this, you need plastic tubes or a solid piece and use a utility knife to cut the material into thin strips; as an alternative, you can use vinyl film.
Eyelash curling is done using a soap solution and an industrial solution. You can attach eyelashes to the car body in different ways: some people choose sealant, others prefer to use glue or double-sided tape. Use your imagination when creating eyelashes, here is a Lada Priora with purchased components in the form of a drop:
Angel eyes
Issue price: 2500-3500 rubles.
This is not only stylish, but also useful Lada tuning, as LED strips improve visibility on our roads. You can attach strips to the rear or front lights. As with the previous option, you can purchase angel eyes or try to make them yourself.
We'll tell you how to do this tuning yourself. To work, you will need the following materials and tools: LEDs, dichloroethane, a drill that matches the diameter of the diodes. The number of diodes is calculated for one “eye”. You can take plexiglass as the main material. For example, from blinds.
The process goes according to the following scheme:
- We know that headlights have different diameters, so angel eyes should also differ in size;
- Pour boiling water into a suitable container and place a plexiglass rod there. He should lie there until he softens. You need to bend the ring quickly before they harden. The easiest way to do this is to use jars. Small circles can be made using a jar lid, and large circles can be made with a coffee can;
- We take a drill and make holes in the ends for the diodes. As a result, you should get something like this:
- Now we make notches on the circles. The distance between them should be 2.5 mm. We put on gloves and take dichloroethane. One drop should be placed into each niche and carefully distributed along the wall of the workpiece;
- Let's move on to the main step - installing LEDs and connecting elements using wires;
- We dismantle the necessary headlights and disassemble them. Apply masking tape to the outer part of the glass, and then bend the holders. You can remove the glass using a hair dryer; it should come off quickly;
- Install LED strips. For example, “eyes” can be installed instead of dimensions, since new components will fulfill their role. Check that there are gaps between the lenses. We assemble the front or rear lights of the Lada Priora. Tuning is complete.
Headlight tinting
Tuning "Priora" rear lighting and front optics using tinting is carried out in several ways - using special paint or a tinting membrane. What color film to choose is decided solely by the car enthusiast. The most common and classic color is black. However, when tinting, a film that matches the color of the car body can be used. It is important to remember that tinting headlights leads to a deterioration in the light output and reduced visibility on the road in the evening and at night.
Headlight polishing
During travel, factory lights are exposed to the negative effects of sand, gravel, dirty water that fly off from nearby passing vehicles, as well as the chemical action of road reagents and salt. Because of this, the surface of the headlights acquires a yellowish tint, becomes matte, and the intensity of the luminous flux decreases. At night, visibility deteriorates.
Modern optical devices are made of polycarbonate, which means that to polish them you will not need to buy expensive diamond paste, which is comparable in cost to the price of new headlights. A budget abrasive will undoubtedly help improve the situation. Tools and materials that will be needed for self-polishing, that is, for tuning the Priora headlights and rear lights:
- scotch;
- sandpaper of different abrasiveness;
- grinding machine;
- car shampoo;
- polish;
- rags.
The polishing process is as follows:
- Clean the headlight well with shampoo and then degrease.
- Dry and tape nearby metal of the car body with tape to protect it.
- Initially, work the surface with a weak abrasive, and then with a coarser one. Each type of abrasive is used for 2-3 minutes.
- Wash the surface of the headlights thoroughly and dry it.
- Using a foam pad and polishing agent, polish to a high shine.
Changing the color of the taillights by painting
First of all, when tuning the rear lights of a Priora, drivers want to achieve an unusual effect, so that the rear lights attract attention and are to some extent provocative. This can be achieved by converting them to the American style - that is, changing the color, repainting the turn signals and all the rear optics in bright red. This is the easiest way to change the appearance of the headlights, and such tuning can be done on any car, not just a Priora.
Making chameleon headlights
Want to make "chameleon lights"? Then use a special tint. You can purchase ready-made versions of the film without any problems at any automotive supply store. Their cost varies depending on the manufacturing company. The most budget-friendly one is from a Chinese manufacturer.
The film material is heated with a hairdryer and applied to a pre-wetted headlight. Smooth it well so that there are no folds or bubbles left. As a result of such tuning of the Priora headlights, the photo of which you see above, the car acquires very stylish optics.
studio
atelierTuning Priora headlights in the style called “angel eyes” requires not only dismantling the headlight, but also disassembling it.
This will allow you to wear out the “eyes” and tint the surface of the reflector (mask, blender) using black paint. List of materials and tools required to complete the work:
- masking tape, which allows you to preserve the glass during dismantling;
- to remove the blender - a screwdriver with a T20 tip;
- technical hair dryer;
- black spray paint;
- plastic tube;
- a set of LEDs with corresponding resistors;
- aluminum tape;
- glue;
- hacksaw for metal;
- automotive sealant.