Step 1
First we need to sketch an oblong rectangle. This will be the main part of the machine.
Step 2
Draw a trapezoid on the right side of the rectangle. Using circles, draw the shape of the wheels.
Step 3
Using half rings, depict the wheel arches. On the left side of the rectangle, outline the hood of the car. Round off the top of the trapezoid slightly. Draw the back of the car.
Step 4
On the front of the car, sketch out the headlights and grille. Then, the windshield and rear windows, as well as the glass on the doors. Outline the side panels between the wheels.
Step 5
Let's continue drawing. Erase the lines of the initial sketch and move on to the next step.
Step 6
Using simple lines draw the doors and the border of the hood. Add cornering lights, side mirrors and taillights as shown.
Step 7
We have reached the last step of our lesson. Draw the door handles and wheels. Please note, there are a large number of different car rims for wheels and you can draw any at your discretion.
We hope you enjoyed the lesson. Let us know if you want more tutorials about drawing cars. Read on and learn how to draw a wide variety of cars from all angles!
How to draw a car with a pencil step by step
Step 1
First draw a rectangle. This will be the main part of our Lamborghini. Don't press too hard on the pencil. The lines should be very light.
Step 2
Using a curved line draw the roof of the Lamborghini. Note that Lamborghini is distinguished by sharp and angular shapes.
Step 3
Sketch out the outlines of the arcs. Using light lines draw the windshield and hood.
Step 4
Start adding basic details. Draw the angular headlights. Draw the lines of the hood and radiator grille. Draw the corner cup and side lines. Draw the shapes of the wheels.
Step 5
Erase the directions. Darken and smooth the lines. Make the lines as clean as possible. Draw details like the example below (such as lines on the door glass, mirrors, and lines on the body of the car).
Step 6
Draw the texture of the lattice using shading. Draw a badge on the hood.
Step 7
Add details inside the headlights. Let's start drawing the rims. First draw circles inside the wheels - these will be the outer edges of the rims. Then draw small circles right in the middle of the wheels.
Step 8
Draw the spokes of the headbands around the small circles. Please note that you can draw any shape of Lamborghini rims.
Step 9
So, Lamborghini is ready! As a finishing touch, you can add shadows using shading.
Your own designer
Numerous online resources offer car enthusiasts software that will allow them to design a future drawing and visually evaluate it on the monitor screen. Using the program “Virtual Car Tuning Airbrush” allows you to select the image you like and contact the studio specialists not with a piece of paper, but with a finished project.
The disk contains a lot of useful information:
- More than 5 dozen ready-made images, when 3D drawings are applied to real cars;
- List of Russian specialists who have established themselves as professionals in this field;
- More than 2 hundred standard drawings;
- Ability to create your own pictures;
- Much more.
To run the program, you only need 512 megabytes of free space in PC memory, any modern OS, video support (GeForce 6600), and a compatible sound card.
If a car owner admires other people’s drawings on cars, he should study this software and try on a new outfit on his “iron horse,” at least virtually.
How to draw a car step by step: mini-lessons
Click on the picture to enlarge it.
Using this lesson, you will be able to draw absolutely any sports car, because the principle will be the same.
Don't forget to share this lesson, subscribe to us on social networks and write your questions in the comments.
Source
A car is one of boys’ favorite objects; many girls are also not very fond of them. In childhood, everyone happily plays and has fun with them, then interest in various creative activities awakens, and the child has a desire to draw a car with his own hands.
To begin with, it’s natural to start drawing simple drawings of cars, gradually your skills and techniques will improve and you can begin more complex, step-by-step drawings.
Video on the topic:
Cool tuning | Tuning 3D airbrush car // ART Airbrush Cool car tuning (HD)
Digital airbrush | 3D drawings on the hood of a car | AirbrushART | HD
Best auto airbrush – Artmobile 2017
Cool airbrushing on a car. Awesome work!
REACTION TO AEROGRAPHY. AIR BRUSHING ON CAR. PART 3 | AUTO/MOTO STUNTS
Interesting on the topic:
How cool, I’ve never seen such airbrushing in person, only standard 2D drawings. To be honest, regular airbrushing on a car is not impressive at all, but I would make such a picture for myself. I wonder how much such pleasure costs? A car with such a design will definitely not go unnoticed on the road, ideal for a girl. I wonder if the drawing will fade over time?
Deep thinking — adds a new dinsoimn to it all.
Volumetric airbrushing is a good thing and there are a lot of ideas for it now, but I definitely wouldn’t do it with my own hands, because if the drawing starts to flow there won’t be any problems. I wouldn’t recommend film airbrushing either, as I’ve seen how it starts to peel off... If you make a drawing, you need to order it from an artist, but this drawing will last the longest and have the best look!
“if the drawing starts to flow there won’t be any problems” What are you talking about? what kind of leak? what problems? It’s immediately obvious when a person is on topic)))) I’m shocked by the comments of such professors) DON’T SCARY PEOPLE, and go get a good night’s sleep) Airbrush (if done on a car with high-quality materials... and not high-quality ones either :), most importantly, not with gouache) NEVER WILL NOT LEAK. It won’t rub off or peel off! airbrushing is covered with auto varnish, and it lasts as long as the paintwork on a car! Good luck to everyone and good mood
Volumetric airbrushing is an amazing thing! A competent master can instantly turn the most ordinary car into a work of art. I would make the same alligator for my Audi as the one in your article, it looks unreal)
How to draw a car for the little ones
For the smallest artists, it is best to start by drawing the base of the car with a simple pencil, and then they can decorate it with colored pencils, felt-tip pens, and paints.
A step-by-step version of drawing a simple car:
In this simple way, the drawing of the car is ready, you can decorate it as desired.
Tips for drawing with pencil
To make it easier and easier to master the technique of drawing with a pencil, you need to adhere to several rules and tips:
- use a graphite pencil of varying hardness;
- the pencil must be sharp and of maximum length;
- It’s better to use whatman paper, it has a greater density than regular printer paper;
- First, you should work on the lines and strokes, and then start drawing complete objects and compositions.
Special equipment is one of the favorite types of cars
A fire truck, a police truck, an ambulance, various combines, and cranes captivate boys, and they are also very interesting to draw, although not very easy and simple. In order to correctly depict such machines, it is worth taking certain steps in artistic skill and adhering to certain rules.
How to draw a police car
To draw such a car, in addition to a pencil and a sheet of paper, you will need a compass and an eraser to erase the pencil.
If desired, the car can be decorated.
Attaching stencils
Disposable stencils are best attached with masking tape, but while painting you will still have to press it with your hand, since the air from the airbrush will go under the stencil. For more convenient work, it is better to take a disposable stencil made of adhesive film. It is most often used when painting motorcycles. Before gluing the stencil, spray the design area with water. Using a napkin, remove the liquid from under it using smoothing movements - from the center to the edges.
Cars from cartoons and movies
It is very exciting and interesting to depict copies of cars from cartoons, movies, and fairy tales. They are quite noticeably different from standard cars. Both children and adults love to draw pictures of such cars. Popular cars from this category: Monster Truck jeep, Lightning McQueen, Mater (from the cartoon “Cars”), Fast and the Furious, cars from the cartoon “Paw Patrol”.
Easy Instructions for Drawing Lightning McQueen
Decorate the resulting car in the colors of the cartoon.
To draw a car on any topic, you can use different materials: a simple pencil, colored markers, markers, pencils, crayons, paints, ballpoint pens. It is worth finding a drawing tool that will be easier and simpler to work with.
Nowadays, skills and the first basics of drawing can be acquired not only in an art school, but also in master classes, with the help of video lessons, by reading specialized literature - the main thing is to show desire, and there are enough opportunities for study.
Source
Volumetric airbrushing on a car as an unusual way to show individuality
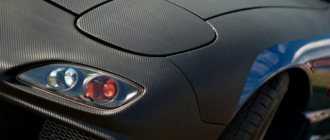
Nowadays, many interesting and varied ways have been invented to distinguish a car from the gray mass. One of the most progressive and modern methods is three-dimensional 3D airbrushing, which is applied to the surface of the paintwork. The proof of this argument will be the photos that have already been posted in countless numbers by users on the Internet.
How to draw Zhiguli 5, 6 and 7 models
Perhaps the most popular car in Russia is the Zhiguli. This car is especially distinguished by its simplicity and in case of any breakdown it can be easily repaired using available materials. Today we will tell you how to draw Zhiguli 5, 6 and 7 models.
Bring your imagination to the body of your car!
- Sunset in the evening forest.
- Dark Warrior.
- Cossacks are hunting a dinosaur.
- Shark.
- Dinosaurs.
- Alien cityscape.
- "Rocket".
- Movie.
- Through time and eras.
- Fantasy style drawings.
- Volga from the future.
The limit of imagination is not set. It is only important that the airbrush expresses the mood and emphasizes the individual style of the owner.
If your character is characterized by activity and determination, you can express this in the form of an image of military equipment or a predatory animal. The stars, moon, and space correspond to a romantic mood. A calm, neutral pattern is preferable for stable people. It is characterized by soft tones and a relaxing scene, for example, the surface of a lake or a sunrise. Bright, catchy colors are for active, active individuals. Halftones, black and white transitions - for fans of the Gothic style. There are dedications to a phenomenon in the life of the owner - to some important event. Football fans can place their idols on the car. Romeo, for example, living in our era, would make a choice in favor of his beloved, Juliet.
When working and withstanding airbrushing techniques, buy yourself a respirator with a 3M multi-level filtration system. It would seem that this is a trifle, but to protect your health it is a necessary thing, and besides, it will help preserve your lungs.
How to draw a seven
Let's start with the most popular model and look at how to draw a Zhiguli 7 series car. In other words, this is a VAZ 2107. For drawing cars, the skills that you have accumulated while depicting people and monsters will not be suitable for us. There will be a large number of straight lines and the laws of perspective play a particularly important role.
We draw the side of the car, on it we will depict the wheel arches, doors, windows and wings. Already at the first stage we are faced with a large number of different lines. Take your time and draw them step by step.
We will work on the wheels, headlights, radiator grille, windshield and roof.
We finalize small details such as a bumper or license plate. Also, you can make tuning for your seven and paint on a spoiler, make cool outlines or come up with something else!
To color the picture, we decided to choose purple. For your seven, you can choose any color, make it multi-colored, sport stripes or airbrush it. In general, there are many options for creativity!
Passenger car
For a child, initially drawing a picture of a car can be quite difficult. Let's try to make drawings of cars strictly following the sequence of all stages. To do this, we will need plain paper and felt-tip pens of different colors or colored pencils:
- At the initial stage, at the bottom of the sheet, located in a horizontal position, we draw two circles at some distance from each other, located in the same plane. These will be ears of corn.
- Somewhat below the centers of the circles, connecting them from edge to edge, draw a horizontal line; this will be the bottom of the car.
- On the other side of each circle we will draw small horizontal straight lines.
- We connect the resulting straight lines with an arc. This will be the cabin.
- Above the drawn arc we build another one of slightly shorter length. This is how the roof will be drawn.
- In front of the middle part of the drawn cabin, using a small arc, draw a headlight, which is located in front.
- We divide the cabin and the roof in half with a vertical segment.
- We draw a horizontal line between the roof and the cabin.
- On the body, using several segments, we depict the side doors of the car.
- Inside the wheels we draw another small circle.
- Below the wheels we draw a horizontal line, which will represent the road in our drawing.
The resulting car can be decorated. Try to use colors that are characteristic of the cars.
How to draw a six
An equally popular model is the six. In this paragraph we will look at how to draw a Zhiguli 6 series step by step. The external difference between the models is only in the headlights, this time they are round.
Let's start with the face of our Shah and draw the front bumper, radiator grille, wheels and a distinctive feature - round headlights.
The car will be at an angle, so according to the laws of perspective, the body in our drawing will be short. This is a very important point that must be observed.
After the sketch is ready for us, we can pick up black colors, namely black markers or pens, and trace all the necessary lines. We erase everything that we don’t need, for example, errors or auxiliary lines with an eraser.
We decided to leave the car white, but tint it so as not to detail the interior. As mentioned in another example, this is just a framework for creative ideas. You can add airbrushing, cool bumpers, a fancy exhaust pipe and much more!
A simple van for little artists
Such a basic drawing can be done by a 3-4 year old child, for this you need:
- Draw a rectangle - this will be the body of the van.
- Add a triangle to the rectangle to visually create a cabin.
- Below draw 2 wheels on the sides.
- At the bottom of the rectangle draw a small exhaust pipe and exhaust gases.
This is one of the easiest options for drawing road transport for young children.
Front view
We have already looked at a sufficient number of paragraphs with a side view, so now it’s time to figure out how to draw a Lada with a front view in pencil. It’s worth noting right away that the drawing process will be much simpler, because we are not faced with the task of depicting a huge number of small details and stripes, as was the case with the side view.
At the first stage we make a sketch, which we will later detail. The main difficulty when depicting a Zhiguli from the front is symmetry. You must constantly ensure that one side does not differ from the other in either shape or size!
We detail the part below the hood and add the second part of the car, which is above the hood.
Now we can put our pencil aside and not worry about the lead breaking. At this stage we will need a black marker. It is with this that we outline all the lines drawn before.
Using a simple eraser, we wipe away all the excess that is left of the pencil and color the drawing.
To make the map more interesting and unusual, you can draw another Zhiguli next to it, as if they were organizing a race!
Advantages of airbrushing
3D airbrushing has a number of advantages that justify its use:
- Unique style;
- Additional body protection;
- Excellent aesthetic appearance;
- High recognition;
- Visibility, which deters car thieves (the pictures are well remembered by passers-by and traffic police officers).
Along with numerous advantages, 3D drawings have their disadvantages:
- Cost of work;
- Expensive restoration of the drawing;
- If the drawing is too large (more than ½ of the body area), the car will need to be re-registered.
The picture is selected from a flat surface, so it is difficult to predict its appearance on a flat car body. Airbrushing takes from 7 to 10 days, it all depends on the complexity of the image and the skill of the artist.
How to draw a five
We have come to an older model and now we will demonstrate an example of how to draw a Zhiguli 5 series car step by step. The fifth model differs from the seventh only in that its radiator grille is black, not glossy, and also has different taillights. However, even after light tuning it is difficult to determine by appearance what series we are facing.
All previous times our Zhiguli was in a static position. This time we will make a drawing in which our car will drift! To do this, at the first stage we will draw a face!
The second stage is devoted to the rest of the body. As you can see, it has undergone tuning and changed a little.
To display the drift of our Zhiguli, we must turn the wheels in one direction.
Now let’s color our drawing!
That's all for us, now you can watch video tutorials that demonstrate the process of drawing these cars!
Source
Airbrushing on a car. Airbrush application methods
Recently, on the streets you can often see a car either with a pattern on the hood, or on the doors, or completely painted. If the design catches your eye and the car clearly stands out from the crowd, then it is most likely airbrushing. Its purpose is not to improve ride quality or cross-country ability, nor is it created to improve the performance of the car, airbrushing is a way of expression, in this case, for the motorist.
A drawing can represent anything: any thoughts, feelings or meanings. As a rule, airbrushing is used by very creative individuals, but not always - it is accessible to absolutely anyone.
Airbrush is painting with an air brush on a surface. It is applied with a small spray (airbrush). The principle of its operation is as follows: paint is sprayed onto the surface under air pressure. Before applying a layer of paint, a stencil with a pattern is applied to this surface. As a result, a unique unique pattern is formed on the car.
As a form of artistic art, airbrushing began to appear in transport in the middle of the last century. At first they painted on bikes, then they started using airbrushing on racing models. At that time, drawings were applied with paint, and they were made by professional artists for a lot of money (not everyone could afford such a pleasure).
Now times have changed and so have the methods of drawing. There will definitely be no problems with choosing an airbrush - everyone can choose a design based on their desires and capabilities.
How to draw a car step by step
Hello friends! In today's lesson we will tell and show you how to draw a car. We will learn to draw using the example of BMW and many other modern popular car brands. By the way, you can find additional tips on drawing cars with a pencil here. So let's start our step by step lesson about drawing cars.
Step 1
First we need to sketch an oblong rectangle. This will be the main part of the machine.
Step 2
Draw a trapezoid on the right side of the rectangle. Using circles, draw the shape of the wheels.
Step 3
Using half rings, depict the wheel arches. On the left side of the rectangle, outline the hood of the car. Round off the top of the trapezoid slightly. Draw the back of the car.
Step 4
On the front of the car, sketch out the headlights and grille. Then, the windshield and rear windows, as well as the glass on the doors. Outline the side panels between the wheels.
Step 5
Let's continue drawing. Erase the lines of the initial sketch and move on to the next step.
Step 6
Using simple lines draw the doors and the border of the hood. Add cornering lights, side mirrors and taillights as shown.
Step 7
We have reached the last step of our lesson. Draw the door handles and wheels. Please note, there are a large number of different car rims for wheels and you can draw any at your discretion.
We hope you enjoyed the lesson. Let us know if you want more tutorials about drawing cars. Read on and learn how to draw a wide variety of cars from all angles!
Passenger car second option
- First, let’s draw, as in the version described above, drawing two circles.
- Inside the circles we draw more circles of smaller diameter. These will be the wheels.
- From the outside of the left wheel we draw a small horizontal segment.
- From the end point of the segment we draw a vertical segment.
- We continue the resulting segment with a small segment to the right, inclined at a small angle to the horizontal plane.
- Let's continue with a segment at a slight angle to the right to the vertical.
- From the outside of the right wheel we draw a small horizontal segment.
- We continue the horizontal segment of a small vertical line.
- From the end point of the segment we draw a small segment to the right inclined at a slight angle to the horizontal plane.
- Let's draw a segment at an angle to the left.
- Let's connect the two segments drawn in steps six and ten with a horizontal segment. This way we get the body.
- In the lower part of the body we will show the bumpers in small arcs.
- Between the wheels we will draw a segment indicating the bottom of the car.
- We divide the resulting body with a vertical line. So we will show the front and rear doors.
- We will draw handles on the doors using short lines.
The resulting car can be painted.
In order to draw a car, first of all you should choose the model that you want to depict. If you want to draw a specific car, it is best to find a picture of the car to sketch and try to divide this car into its component parts.
If the picture is quite complex, it is best to simplify the picture a little when drawing, leaving only the most characteristic features of the model. All lines that were used as auxiliary lines at the final stages of drawing, when the need for them disappears, must be deleted.
If you have difficulty drawing straight lines, it is better to build it using strokes, gradually connecting the strokes.
How to draw BMW
Here we will draw a BMW 7 car step by step!
Step 1
First sketch out the basic lines of the BMW as in the example. Use light pressure on the pencil to create soft lines. Remember, the lines don't have to be exactly the same.
Step 2
On the front of the car, sketch out the long headlights and the famous BMW grille. Afterwards, draw the wheel arches, the wheels themselves, doors and windows. The lines should also be very light.
Recommendations
Paint drying slows down significantly if painting occurs in a cool room with high humidity.
To better fix the design, do not wash the car for a couple of weeks.
When washing, the drawing should only be washed with a special shampoo for cars and wiped with a soft cloth. After each rain, wipe the drawing from moisture! If machine oil or gasoline gets on the drawing, quickly wash off the substance with water and wipe dry.
Before starting work, be sure to draw a layout. If you have artistic skills, you can trust your instincts and sketch directly on the body, but this option is too risky. You must understand that if you take on a very complex drawing, then its implementation may take more than one week, given that you will be working alone.
How to draw a Range Rover
And in this lesson we will show you how to draw a Range Rover.
Step 1
Step 2
Now, using straight lines we sketch out the grille and the front part. Next, we draw the wheels, arches and distant mirrors.
Step 3
At this point we will start using clear lines. Using straight lines we draw the headlights and the radiator grille, which is located between the headlights.
Step 4
Draw the hood with a clear and straight line. After that, we add a bumper, an additional radiator grille and fog lights.
Step 5
We're moving towards the top of our Range Rover. There will also be a lot of straight lines with which we will draw the roof and windows of our SUV. At the same stage we will sketch the mirror.
Step 6
Continuing the lines of the windows on the side we draw the doors. Following the lines of the roof we draw the back of the car. Next, add the taillights and door handles.
Step 7
Let's move on to the wheels. But first, let's draw the wheel arches, and then using smooth lines we sketch the wheels themselves. They should be the same.
Step 8
And the last stage, you just need to finish drawing the disks. In our example, you can see the disks in the form of five beams, but you can use any. You can also add shading.
So, our Range Rover is ready. If you liked our lesson, don't forget to visit our other lessons!
Basic airbrush techniques
- Manual airbrush application technique. The manual technique is a high level technique. It is applied by highly qualified professionals who skillfully master their craft. The cost of such coverage is quite high, but it justifies itself. The process consists of the following stages: first, the working surface is freed from “unnecessary” elements - fasteners, antennas, handles, lighting devices, etc. The required area is completely cleaned, washed off with water, and then, if necessary, painted in the desired specific color, which will serve as the background. A sketch is prepared with a stencil for a specific plot chosen by the customer. The artist applies the drawing using special pencils and brushes. Airbrushing can also be done with a compression gun - a 12 V brush. The tool is equipped with needles with a diameter of about 0.5 mm, which functions on the principle of applying a tattoo. After the drawing has been applied and it has dried, it is coated with varnish and the work is dried completely;
Video of applying airbrushing to a car
How to draw Mercedes-Benz SLC
We love Mercedes-Benz cars and we know you love them just as much.
Here we want to continue drawing cars of this brand. As you may have guessed, here we are drawing a Mercedes-Benz SLC.
Step 1
First, let's draw a sketch of the "body" of the car using light lines. Please note that today we are drawing a car without a roof. So, the first step of this tutorial will be different.
Step 2
Now we add the base lines and body details of our Mercedes-Benz SLC. On the front part we draw the headlights, grille and bumper. Next, draw the wheels, mirrors and seats.
Step 3
Starting from this stage we will use clear and dark lines. Using these lines we complete the grille and headlights. In the center of the radiator grille we depict a large Mercedes-Benz logo.
Step 4
We continue to refine the front part of the Mercedes-Benz SLC. You need to finish drawing the bumper, license plate and hood lines. Now you can erase all unnecessary lines on the front of the car.
Step 5
Now we move to the top of the car. Continuing the line of the hood, draw the windshield. Next, draw the visible parts of the seats and rearview mirrors.
Step 6
And now we need to finish drawing the back of the car. Draw the door and door handle. Don't forget to add an air intake on the side of the case.
Step 7
Now we will have to try, since we will be making wheels and arches. They should be as round and smooth as possible, as in our example.
Step 8
Now we will draw the disks. Please note that we have drawn classic Mercedes-Benz car rims, but you can of course draw any rim design you like.
Step 9
Use intersecting lines to create the texture of the radiator grille. Then add shadows and highlights using dense shading as we did.
If you followed our instructions exactly, then now you know how to draw a Mercedes-Benz SLC. Don't forget to write your opinion about this lesson in the comments or social networks.
Sequence of work
3D drawings are applied with a special device - an airbrush, and the area of transformation can be any - a computer, a cell phone, the body of a car or motorcycle.
It is worth noting that, if desired, a car owner can master this science on his own, but no one will give him guarantees of quality workmanship. Professional airbrush – competent application of the image chosen by the customer in accordance with all the rules, the quality of the work is always guaranteed.
Stages of applying 3D images:
- Development of a design project. This stage can be called the most important, because the final choice of design determines the appearance of the car for many years to come. When developing a design, you first need to outline the theme of the drawing, determine its intended proportions, choose the style and basic color scheme. Airbrushing is a creative area of transforming a car; the design must match the overall style of the body. Sketches can be created individually, but the cost of their application increases;
- Preparing the surface for work. If the car has been in use for some time, its body probably has scratches, chips and dents. Drawings applied to uneven surfaces look pathetic. Therefore, airbrushing is performed only after major body repairs and elimination of existing defects;
- Direct application of the image. 3D drawings can be transferred to the surface of a car only with proven automotive paints (for example, DuPont products). If required, the master prepares a stencil or other devices for better execution of the order;
- Post-processing. When the images are already applied to the car, they need to be protected from premature abrasion. For this, varnish is used, which, in addition to its protective function, perfectly emphasizes the depth of the image.
Many craftsmen consider the application of varnish to be the final touch of their work. But true professionals don’t stop there. The pattern forms a kind of step on the surface of the car body, so polishing is required. A well-polished body with a 3D image turns out to be mirror-like.
At this point the airbrushing is considered complete. The work of an airbrush artist is highly valued in Russia because it allows car owners to stand out from the crowd of similar cars. Such a car becomes recognizable because it acquires its own “face”.
Forget about fines from cameras! An absolutely legal new product - Traffic Police Camera Jammer, hides your license plates from the cameras that are installed in all cities. More details at the link.
- Absolutely legal (Article 12.2);
- Hides from photo and video recording;
- Suitable for all cars;
- Works through the cigarette lighter connector;
- Does not cause interference to radios and cell phones.
How to draw Tesla Model S
Finally, a lesson: how to draw a Tesla Model S. This is probably the most advanced car of our time.
Step 1
At the first stage of car drawing lessons, we always outline the main contours of our future car. Apply very soft and smooth lines at this stage.
Step 2
Step 3
So, it's time to add details. And as always, we'll start doing this from the front of the car. First draw the headlights and hood.
Step 4
Draw an oval radiator grille with the Tesla logo inside. Below we continue to draw additional radiator grilles. But it's worth noting that these are just fake grilles.
Step 5
We rise a little higher and draw the roof using a smooth curved line. Next we draw the windows and side mirrors.
Step 6
Continue the roof line and draw the trunk. Go a little lower and draw the doors of our Tesla Model C and the bottom edge of the car. At the end of this stage, draw unusual door handles.
Step 7
Very carefully draw the wheel arches and the wheels inside the arches. Please note that the lines should be as smooth as possible.
What role does the complexity of the drawing play?
The categories of complexity of drawings are different and require different levels of preparedness for work.
Category I with graphic design:
- patterns;
- lines;
- simple geometric shapes.
Category II – if there is an artistic drawing:
- when depicting up to one artistic object using multi-component paints.
III category – in the presence of a complex artistic design:
- presence of applied background;
- when more than one artistic object is depicted, when using paints with a multi-component composition.
The airbrush technique or skill is manifested in the skillful mixing of paints, in a calm and smooth transition from one color to another. This airbrushing technology turns simple cars into unique masterpieces by reproducing them from sketches.
Airbrush knows no creative boundaries. She is capable of painting of any complexity: both a small drawing and a large-scale painting. It seems that the brunette in this car is smiling at you, and a predator appears from the jungle.
Having a solid knowledge of composition, anatomy and color (in addition to the ability to draw), the artist must have a good knowledge of airbrushing techniques and the characteristics of varnishes and paints in order to follow the rules for applying them to a car. There are several styles of airbrush schools, the most popular of which is the “Free Hand” style - the most realistic and most complex airbrush technique .
Applying varnish
It is important to dilute the varnish correctly. Since there are no exact recipes, you will have to select the “right” consistency by gradually adjusting the pressure and adding solvent. Be sure to try it on a test surface.
The varnish is applied perpendicularly. If the varnish “floods” the surface, most likely it is too liquid. When it appears in spots, it means it is too thick or there is too much pressure on the feed.
Cleaning when color changes
The procedure is quite simple. You need to wash the tank with a wire brush and solvent and wipe with a rag. Then add solvent and spray until the airbrush is thoroughly cleaned. When using dark and light colors, consider two or more airbrushes to prevent cross-contamination of colors.
Errors
Usually they relate to the proportions of paint or varnish and thinner:
“Shagreen” tends to form with other errors:
All of these factors lead to paint particles drying out “in transit” and causing defects. Another cause is unfiltered ink or poorly mixed toner.
Mechanical problems can be easily prevented by choosing a sprayer with a built-in metal mesh filter. Chemical ones are eliminated experimentally - by step-by-step correction of parameters.
Basic mistakes
The biggest mistake beginners make is using too thin paint. You will not be able to work with such material. Any drawing, even a small one, will require a lot of time. If the stencil does not adhere tightly to the surface, then drops of paint will get into the gaps, which will be very noticeable when viewing the work closely.
When working without patterns and stencils, you risk getting uneven lines of different widths. If you understand that you cannot make a beautiful stencil yourself, it is better to order it on the Internet, then you are 100% guaranteed a beautiful drawing.
On a note! You should not rush this work, as if you do everything too quickly and do not allow the paint to harden properly, smudges may appear on the surface.
Airbrushing is a way to decorate your own car, which will never lose its popularity, despite the fairly high price and complexity of the work. This work can be done with your own hands, at home, but this will require patience and a willingness to strictly follow the rules.
Source

