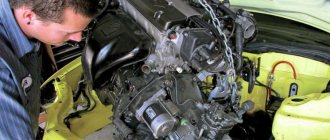
Is it worth doing an engine overhaul?
The engine for 2101-2107 was developed by the Italians in the 50s of the last century.
Since then, the design has not changed, only in 2007 the 2107 model was equipped with an injector. The engine is very simple, and if you have a repair book, as well as a set of tools, you can successfully carry out high-quality engine repairs. The cost of capital, even under ideal repair conditions, is inexpensive. Regarding the service life: according to the manufacturer’s statement, the engine runs for 120,000 km, after which the block is bored to the repair size, and so on 2 more times, after which the block can be thrown away. Subject to high-quality spare parts, proper troubleshooting, the use of high-quality lubricants, and professional assembly, our engine can travel 150-200 thousand, from replacement to oil change and some consumables.
What engine can be installed on a VAZ 2101
Owners of vintage cars may sooner or later face the issue of engine failure. If other parts are in order, but the car is needed for work purposes, and not for show-off, then replacing the engine is the most rational and profitable solution in this case.
When looking for alternative equipment, you need to pay attention to a number of points.
- Dimensions. The space under the hood of the VAZ 2101 must match the dimensions of the new engine system (otherwise cutting of the body may be necessary).
- Power. The power of the device must be identical to the capabilities of the previous engine (otherwise the body will have to be strengthened and half of the components will have to be modernized).
- Drive unit. It is better to use engines from rear-wheel drive vehicles (front-wheel drive vehicles may require modernization of the transmission, brake elements and suspension).
Which engine to choose?
- It is better to opt for native engines: VAZ 21011, 2103, 2106 or even 2113 . This will allow you to spend a minimum of effort on alterations, and in some cases get an almost new engine (which cannot be said about worn-out engines from foreign cars).
- 2108-2170 models , you will need to cut the body and there is no way to do without it. But overall, there won’t be too many problems, and therefore, “the game is worth the candle.”
- You can also pay attention to the 1.7 Niva (you will need to supplement the engine with an oil pump and a sump).
- 21126 engine from Lada Priora is also a good solution. One and a half liters of volume and almost 100 horsepower will “invigorate” the VAZ 2101 and give it a new life.
- When using foreign cars as a donor, you must be prepared that the transplant procedure will take longer. The best engines for the VAZ 2101 will be: Fiat Argenta 2.0i, BMW M10, BMW M20, Renault Logan, Volkswagen 2.0i 2E, Lancia Thema and Mitsubishi Galant.
Prerequisites for engine overhaul
In such conditions, repair of the VAZ 2106 engine is inevitable, the extent of which depends on the scale of the defects caused, which can only be assessed with in-depth diagnostics of the power plant and all interacting system components. Correct diagnostics of the motor complex includes not only establishing the performance parameters of the motor mechanisms, but also tests of all associated systems, such as ignition systems, power supply, and other interacting complexes.
Carrying out major engine repairs, a book about which is available for sale in large auto repair stores, is possible for those car enthusiasts who have certain skills in plumbing, a great desire and the necessary set of tools. Such repair of a VAZ 2106 engine, a video report of which is presented on our Internet resource, is possible not only in a stationary service station, but also in a personal garage, which will undoubtedly reduce financial costs.
After all, the cost of an engine overhaul is quite a large amount, and not every car enthusiast is able to shoulder the burden of paying for such expenses. Global repair includes a complete replacement of all components of the unit with updated parts, which requires dismantling the power plant and disassembling all elements into their component parts.
Engine repair tips
When repairing the engine, you must use the tips given below.
In situations specified in the manual, you must use torque wrenches that limit torque.
The keys must be pressed tightly into the shaft keyways using a hammer or similar. We do not allow any play in the keys in the shaft grooves.
If there are a large number of nuts on an engine element, then they are tightened in the prescribed manner and one after another so that damage to the element does not occur. If the nuts have a circular arrangement, they should be tightened crosswise. If the nuts are rectangular, they should be tightened from the center of the engine element to the edges.
To begin with, the bolts and nuts are tightened by hand. After each of these elements is tightened one full turn, and so on from one element to another, crosswise or diagonally. Then, after tightening each element one full turn, starting from the first element and so on from element to element, tighten it half a turn.
And at the end we tighten the elements a quarter turn until the required tightening torque is achieved. All nuts and bolts of the same connection must be tightened with equal torque. If you allow an engine part to be overtightened, this can lead to deterioration of its strength and failure. If you allow it to be under-tightened, this may lead to self-unscrewing of the connection.
Repairing a VAZ 2101 engine is not possible without fasteners such as bolts and studs, which have the necessary tightening torques, which are specified in the technical requirements; first of all, the tightening torque depends on the material from which they are made and their diameter.
Services
For high-quality repairs, we will need to send the cylinder head and the block itself for grinding. To make the plane even, to ensure a smooth surface and stable operation of the engine, remove 1 mm from the surface of the block, and 2 mm from the surface of the cylinder head. In total, 3 mm will be removed, thereby increasing the compression ratio to 10:1. The engine initially does not have a piston return to TDC of 1.95 mm, and the thickness of the gasket is approximately 1 mm, so you can safely sharpen the block and cylinder head.
The cylinder head must be pressed for pressure testing, checking for the formation of cracks in the channels. If they are not there, then the craftsmen install new valve guides, install valves with seals and grind them in. In total, such work will cost about 50 euros, depending on the region. If desired, you can lighten the flywheel by 1.5 kg by removing the metal around it.
Assembly
You will need: a device for pressing piston pins, a torque wrench, a hammer, a device for installing pistons into cylinders, keys “10”, “13”, “14”, “17”, “19”, “21” ", "22", "36" (or gas), socket heads "12" and "13" (or a special wrench for the cylinder head bolts), screwdriver, mounting spatula.
When assembling a piston with a connecting rod for engines manufactured before 1990, the piston and connecting rod must be aligned so that the “P” mark on the piston (shown by an arrow) is located on the side of the oil outlet holes on the lower head of the connecting rod.
On engines manufactured after 1990, there are no holes in the connecting rod or connecting rod bearings. The piston and connecting rod can be connected in any position.
| USEFUL ADVICE To press in the piston pin, it is better to use a special tool (Fig. 4.8). If it is not available, you can select a suitable mandrel. |
| 1. Place piston pin 2 (see ) onto shaft 1 of the piston pin installation device with spacer ring 5 put on it. Then put on guide sleeve 3 and secure it with screw 4 without tightening the screw. |
| 2. Heat the connecting rod in an oven to a temperature of 240 ° C to expand its head. Remove the connecting rod from the oven and quickly clamp it in a vice. Place the piston onto the connecting rod, making sure that the pin hole lines up with the hole in the upper end of the connecting rod. Using your hand, push your finger using the tool into the holes of the piston and connecting rod until it stops. Remove the device. After the connecting rod has cooled, lubricate the pin with engine oil through the holes in the piston bosses. |
| NOTE Press in the pin as soon as possible, since the connecting rod cools quickly and once cooled, the position of the pin cannot be changed. When installing the pin, being careful (the piston is heated by the connecting rod), press the piston boss against the connecting rod in the direction of pressing the pin. |
| 3. Install the piston rings in the reverse order of removal. |
| WARNING When installing, do not open the rings more than necessary to avoid deforming or breaking them. |
| NOTES Two types of oil scraper rings can be used: 1 – consisting of an expander and two rings; |
| 2 – consisting of an expander and one ring. |
| Removing the second type of ring is discussed above in the “Disassembly” subsection. Installation is carried out in the reverse order of removal. In this case, install the ring so that the joint of the expander is located on the side opposite to the ring lock. |
| Install the lower compression ring with the groove facing down. If the ring is marked “Top” or “TOP”, then install the ring with the mark facing up (towards the piston bottom). |
| 4. Orient the rings. Install the rings on the remaining pistons. |
| NOTE Orient the rings as follows: – the lock of the upper compression ring should be located at an angle of 30–45° to the piston pin axis; – lock of the lower compression ring – at an angle of approximately 180° to the axis of the lock of the upper compression ring; – oil scraper ring lock of the second type (or upper oil scraper ring lock of the first type) – at an angle of 30–45° to the piston pin axis between the compression ring locks; – lower oil scraper ring lock (first type) – at an angle of approximately 180° to the axis of the upper oil scraper ring lock; – expander lock – between the ring locks. |
| 5. Place the upper main bearing shells (with grooves) in the cylinder block bed. |
| NOTE Install the liners so that the installation tab of the liner is aligned with the notch on the bed. Place larger width bearings (without a groove) in the bed and middle bearing cover. |
| 6. Lubricate the bearings with engine oil. |
| 7. Install the crankshaft into the cylinder block. |
| 8. Place the lower (without groove) liners into the main bearing caps. |
| 9. Lubricate the crankshaft journals with engine oil. |
| 10. Lubricate the liners in the crankshaft main bearing caps with engine oil. |
| 11. Install the caps (except for the rear) of the main bearings and lubricate the thrust half-rings with engine oil. |
| NOTE Install the covers in the same block in accordance with the marks, orienting them in the same direction as before disassembly. |
| 12. Install the rear (metal-ceramic, yellow) and front (steel-aluminum) thrust half-rings of the rear crankshaft support. |
| NOTE Install the thrust half-rings with their notches... ...towards the supporting surfaces of the crankshaft. |
| 13. Install the rear main bearing cap and cap bolts, tighten them with a torque wrench to the torque given in Appendix 1. |
| 14. Check the axial clearance of the crankshaft with a flat feeler gauge by moving the crankshaft as far as it will go with a mounting blade. The axial clearance should be 0.06–0.26 mm. The maximum permissible gap is 0.35 mm. If the gap is larger, replace the thrust half-rings with others larger by 0.127 mm. |
| 15. Check for correct assembly by turning the crankshaft several turns by hand. The shaft should rotate freely and smoothly. |
| 16. Insert the connecting rod bolts (if removed) and bearings into the connecting rods, aligning the mounting tab of the bearing with the notch on the connecting rod. |
| 17. Lubricate the cylinder bores, pistons, piston rings and connecting rod bearings with engine oil. |
| 18. Install a device for compressing the rings on the piston and, by screwing in the screw, compress the rings, install the piston in the cylinder in accordance with the cylinder number marking on the connecting rod and press (for example, with the handle of a hammer) on the piston, sliding it from the mandrel into the cylinder. Install the pistons in the remaining cylinders in the same way. |
| NOTE When installing pistons into cylinders, the “P” mark on the piston must face the front of the engine. |
| 19. Install the connecting rod bearings into the connecting rod caps, aligning the mounting tab of the bearing with the recess on the cap. |
| 20. Lubricate the connecting rod bearings in the connecting rod caps and the crankpins of the crankshaft with engine oil. |
| 21. Install the connecting rod cap by connecting the connecting rod to the crankshaft journal and aligning the marks on the connecting rod and the cap. |
| 22. Screw on the connecting rod bolt nuts without fully tightening them. Install the remaining connecting rod covers in the same way. |
| 23. Tighten the nuts of the connecting rod bolts with a torque wrench to the torque given in Appendix 1. |
| 24. Install the crankshaft rear oil seal holder, replacing the gasket. Center the holder relative to the shaft flange using a special mandrel (if there is none, center the holder along the working edge of the oil seal) and tighten the six bolts securing the holder, aligning the plane of the holder with the plane of the block connector without distortions. |
| 25. Install the flywheel (after installing the front cover of the clutch housing) so that the mark (cone-shaped hole) near the rim is opposite the axis of the crankpin of the 4th cylinder, and secure the flywheel by tightening its fastening bolts to the torque given in Appendix 1. |
| 26. Install the parts and components in the sequence corresponding to the following: sprocket on the crankshaft, oil separator, ignition distributor drive gear, oil pump drive shaft, oil pump (replacing the gasket), oil sump (replacing the gasket and not completely tightening its mounting bolts), block head (replacing the gasket). Tighten the head bolts in two steps in a certain sequence ( ): – preliminary torque 33.3–41.16 N·m (3.4–4.2 kgf·m) – bolts 1–10; – finally a torque of 95.94–118.38 Nm (9.79–12.08 kgf m) bolts 1–10 and a torque of 30.67–39.1 Nm (3.13–3.99 kgf m) – bolt 11.
Do not operate the engine at maximum speed.
|
Lada 2101 Tazi Rulet › Logbook › how to properly carry out major repairs of the VAZ 2101 Engine
Overhaul is a major overhaul of the engine, i.e. complete restoration and restoration of the engine, bringing the gaps between parts to like new ones. After a major overhaul, an engine has a new life of 80%-100%. An alternative to overhaul is installing a contract engine or a used one from disassembly, but there are pros and cons. Pros: it is possible to have a low-mileage engine with original parts, it is possible to supply a larger volume, more modern one (from carburetor to injection), from the minuses: there is a risk that the engine does not last the expected life, there may be inconsistencies with the technical passport and data. Overhaul allows you to qualitatively repair the engine, you can immediately tune the engine, increase power, bring details to mind, install a tuning camshaft, crankshaft, increase engine displacement, which is more economically feasible to do precisely at the time of repair, when the engine is disassembled. Let's consider the main stages of overhaul of an internal combustion engine. Engine removal, washing, disassembly and troubleshooting. A major overhaul can only be a major overhaul if the main engine part, the cylinder block, is being repaired. The dimensions and planes of the cylinder block are checked. If necessary, the block is bored to size and honed.
honing machine honing flat top angle of honing grooves The angle of the cavity of the main roughness of the hone is also important, because at a larger angle, the oil falls into the cavity, and at a small angle it protrudes above the surface, thus improving the operating conditions of the piston rings. Ideally, of course, before boring and honing, install a false head and false gearbox on the cylinder block, because According to some data, after installing the cylinder head and gearbox, the geometry of the cylinders changes, which affects the service life in a certain way, but this applies more to sports engines with maximum power and engines with high liter power, such as turbocharged ones with more than 100 hp. with 1 l.
Opening the graphite grains of a cast iron cylinder block
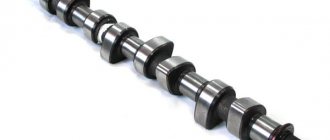
In cast iron cylinders there is the concept of opening the graphite grains, visually the cylinders are matte gray, but if the grains are covered, as if by scales, the color is more shiny, which negatively affects the engine life, reducing it several times! If honing is carried out with diamond stones, then there is a problem such as carving (the introduction of abrasive particles into the surface) when using silicon carbide or aluminum oxide stones with an abundant supply of coolant. After restoration, the cylinders must be washed with either a hot soda solution or soapy water, because gasoline does not wash away abrasive dust after honing. After grinding the crankshaft, it is necessary to clean the oil supply channels; to do this, the plugs are unscrewed or drilled and the channels are cleaned with drills of a suitable diameter, washed, blown with compressed air and the crankshaft is assembled, the plugs are put in place, if necessary, new ones . This is usually done during an engine overhaul.
The cost of restoring a cylinder block (boring, honing) ranges from 350 UAH. For. VAZ, ZAZ and up to 750 UAH. from more expensive contractors on expensive equipment. Grinding the crankshaft (4 connecting rod journals and 5 main journals) – 250-500 UAH, Balancing the crankshaft assembly with flywheel and clutch basket – 600 UAH. Weight distribution of connecting rods, pistons with an accuracy of 1 gr. - 200 UAH Lightening of connecting rods - 300 UAH. Grooving cylinder head channels, combining manifolds - from 500 UAH. Boring of the block and grinding of the crankshaft is carried out by contractors, for example, the Navy company. and etc.
The second large part that requires attention is the cylinder head. A lot of things depend on the condition of the cylinder head.
Cylinder head Checks require the plane of contact with the cylinder block and subsequent grinding, especially if the engine has overheated. The camshaft, camshaft bearings, valve guides, valves, valve seals, camshaft seals, valve seats are checked for wear and replaced or restored if necessary.
The cost of disassembling and reassembling the 400 eight-valve cylinder head is 800 UAH. 16-valve cylinder head, restoration of guide bushing + valve seats 350-800 UAH. Disassembly, washing, troubleshooting and assembly of the engine from 1900 UAH, Removal and installation of the engine or replacement 900 UAH. Valve adjustment 150-450 UAH. Grinding the cylinder head plane - 200 UAH. signs There are times when the client gets the impression that an engine overhaul needs to be done, although in fact the cylinder head gasket has broken, for example, compression has dropped, oil leaks and the reason is in the cylinder head gasket, then a VAZ cylinder head gasket replacement is necessary. It happens that the cause of gasket failure is improper tightening of the cylinder head bolts, an uneven cylinder head contact plane, or stretched cylinder head bolts. There may also be a VAZ cylinder head gasket that does not match the cylinder diameter, for example, the cylinder diameter is 79 mm, but the gasket is 76 mm, or the cylinder is 77.5 mm, and the gasket is 72 mm on the Memz engine.
Because When buying a new part, it happens that you need it anyway. The cost of engine overhaul used to be from $300, today it is less because... We still live in Ukraine. Overhaul of vases is not expensive, and engines are especially susceptible to tuning, the classics are already on their way out, replaced by front-wheel drive vases and 16 valves. When disassembling, the studs of the exhaust manifold, exhaust pipe (pants) are often rolled up, in this case, drilling, straightening the threads, for example, M8x1.25, if the stud is not screwed in tightly, then you need to cut the thread to M10x1.5. The stud is broken. Tighten the yokes (main bearings) of the crankshaft and connecting rod bearings only with a torque wrench, according to the technical documentation.
Malfunctions and repairs of the VAZ 2103 engine
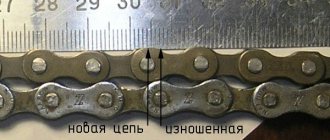
Engine VAZ 2103 1.5 l. carburetor in-line 4-cylinder with an overhead camshaft, the timing belt of the 2103 engine has a chain drive. The VAZ 2103 engine block is tall, more on that below. The service life of the 2103 engine, with careful operation and timely maintenance, exceeds the 125 thousand km established by the factory and reaches 180-200 thousand km. The main differences between the 2103 engine and the increased block height by 8.8 mm from 207.1 mm to 215.9 mm to allow the installation of a crankshaft with an increased piston stroke, due to which the engine volume increased to 1.5 liters. As noted in previous articles, Lada engines have a problem with camshaft wear. Due to the fact that the chain drive does not have a tensioner, the chain needs to be tightened, the engine also needs constant (every 10 thousand km) adjustment of the valve clearances, this will be indicated by a loud knocking sound in the VAZ 2103 engine when the engine is idling, audible from a standstill driver with the hood closed. Many people have a question, why adjust the valves, the answer is simple - power will decrease, fuel consumption will increase, the valve will burn out and many other pleasures of life. Adjustment of the VAZ 2103 engine valves must be done either by a master or with his own hands. Among other problems, Weber and Ozone carburetors constantly require CO adjustment and cleaning. It often happens that the VAZ 2103 engine gets hot, look for the problem in the pump, 99% this is it. Often when the engine in a 2103 misfires, there can be a lot of reasons, most often a burnt-out valve; in any case, you need to measure the compression and show the car to a mechanic. Many VAZ 2103 engine malfunctions repeat the problems of the 2101, due to their close relationship. For a more complete picture and so as not to miss anything, read about the 2101 engine here. Nevertheless, according to popular opinion, the 2103 engine is the most reliable and unpretentious among the classic line of engines, and given the prices for spare parts for the VAZ 2103 engine, you don’t have to wonder why the classics are still driving on our streets.
Do-it-yourself VAZ 2101 engine tuning
Tuning the VAZ 2101 engine with your own hands allows you to maintain the operation of the car at a high operating level, and in some situations significantly improve driving performance. However, it would be stupid to demand high competitive advantages from a car over modern innovations in the automotive industry.
Therefore, improvements should be treated primarily with research and historical interest. Only in this case will the car owner get a lot of pleasure from experimenting with his four-wheeled “friend.”
The following upgrade options are currently available and in demand.
Engine replacement
pros:
Minuses:
- the need to reinstall half of the car components (brake system, clutch, etc.) to more advanced ones;
- costs of time, effort and finances.
Modernization of the current engine
In this method, the cash costs will be significantly less. The lion's share of the work can be done yourself.
For tuning you will need to buy a crankshaft from a more powerful car, as well as a set of accessories:
- spanners;
- jack;
- screwdrivers;
- Bulgarian;
- inspection hole;
- lathe (you can contact the factory or find a service station).
1. The engine must be installed on a lathe in order to bore for the mirror. If it is no longer possible to bore, you can resort to lining to match the dimensions of modern pistons.
Bored VAZ engine
2. When buying a crankshaft, you need to be careful not to buy a low-quality fake. The product must have a matte surface with khaki color. The "QTK" marking, the presence of packaging, lithol treatment are signs of quality products.
3. To get an even greater effect, you need to improve the design of the oil pump.
4. You can also upgrade the flywheel by removing from 3 to 5 mm of material from its internal surface. This will reduce its weight, improve the functionality of the flywheel and overall engine performance.
After completing work on tuning your car, it is recommended not to overload the engine for the first 3000 km. The effect of the work done will be felt at its maximum after the first 10,000 km - transport will become more mobile and powerful.
VAZ 2101 is a beloved, legendary and outstanding car that never ceases to amaze its owners. Various modern methods and innovative technologies of the automotive industry make it possible to maintain the performance of the car at a high level, and the possibility of upgrading the engine system makes its use even more pleasant and interesting.
Repair process
Before installing pistons and connecting rods, they need to be weighed. The difference in weight, in tolerances, should not exceed 3 grams. If the difference is normal, use a piston ring clamp and gently tap with a hammer to press the pistons into the block. After this, we attach the connecting rods to the crankshaft using the journals. During installation of the pistons, the cylinders should be lubricated with oil, as well as the places under the liners. This is required so that in a short period, when the pressure in the system is insufficient, there is no increased friction of parts. We need copper grease to lubricate the connecting rod cap bolts!
Next, we install the oil pump, and pour a little oil into the oil receiver, after which we place the pan on the gasket and sealant.
On this page of the site I will explain how to disassemble the engine and determine the repair method
Since the engine has been removed, without the head, we can say that half the work is already done, all that remains is to disassemble it, at home it is easier to disassemble it on an old tire, first we begin to remove the pan.
Photo. Engine with pan removed.
Pay attention to the photo, the 2nd and 3rd connecting rods are blue and dry, then remove the oil pump and start unscrewing the connecting rods, but be sure to immediately pull it out after unscrewing the connecting rod, put a cushion on it and attach it, the cushions cannot be changed, each connecting rod has its own cushion .
Photo. You can see the torn splines in the oil pump drive gear.
Once the connecting rod and piston are removed, you can immediately determine the wear of the piston engine (the piston with the connecting rod is pushed up the engine), looking at this piston, you can see that gases have broken through the rings, this is indicated by carbon deposits on the piston skirt. Also, when you run your finger along the cylinder, you feel a small step at top dead center, this indicates that there is wear in the cylinder.
Photo. Piston with connecting rod.
I measure the piston, it is 79mm. This means that this engine has never been bored, and there is room for two more borings. I decide to bore the block for the first repair, these are 79.4mm pistons.
Photo. Jammed liner.
I unscrewed the liner from the jammed connecting rod, and here I need to decide whether to replace the connecting rod with a new one or leave this one. Not everything is so simple here, of course, if you have extra money, you can immediately buy a new connecting rod and adjust it to the weight of other connecting rods. But I have been working on engines for a long time and have seen all sorts of breakdowns, the most important thing in the connecting rod is that the liner in the connecting rod bed does not turn and the piston pin sits very tightly, and the fact that it turns blue from heating is not scary. So the owner of this six was lucky, the liner in the connecting rod did not turn, so I leave these connecting rods, which of course affects the price of spare parts.
Photo. Intermediate shaft sprocket.
After removing the connecting rods, unscrew the intermediate shaft sprocket and remove the chain.
Then unscrew the clutch basket and the flywheel itself, to make it easier to unscrew the flywheel, put a piece of wood or a large key in the crankshaft so that the crankshaft does not turn when unscrewing the flywheel.
Next, untwist the crankshaft cushions, but be sure to remember which cushion is in which place; cushions cannot be swapped. Remove the crankshaft and unscrew the engine mounting ears; they will interfere with the block boring. Usually I don’t unscrew the pump; if everything is fine with it, then there is no point in removing it and wasting time.
Photo. Engine block and crankshaft.
Now we need to make a list of spare parts that will need to be purchased to repair the engine, but it is very important that the pistons are purchased before the block is taken for boring, the boring machine bores the engine block for the pistons. And liners for the crankshaft are bought after boring, when it is known what size the boring machine was bored to. Since the crankshaft was standard, I predict that most likely after boring the liners will be 0.25, but the boring machine will tell you for sure.
It is also very important, be sure to ask that the block be bored to fit the mirror, and not in any case to fit the mesh.
When choosing pistons, I usually choose “Kharkov” or “AVTRAMAT”.
VAZ 2106 | Engine disassembly procedure
Engine disassembly procedure
The easiest way to disassemble the engine is on a portable mounting stand. Such a stand can usually be rented inexpensively at a car service workshop or a special rental point. Before installing the engine on the stand, it is necessary to remove the flywheel/drive disk.
If it is not possible to use a stand, you can disassemble the engine after installing it on wooden blocks directly on the floor of the work site. Be extremely careful not to tip the engine onto the floor during this disassembly.
If you decide to purchase and install a remanufactured engine, the first step is to remove all attachments and auxiliary equipment from the old one - they should then be transferred to the new unit - as if you were about to begin a major overhaul of the old engine. This includes:
If you are going to install a reduced block set (see Section Engine Restoration Options ), then the cylinder head(s), oil pan and oil pump must be removed from the old engine.
If a complete overhaul is planned, the engine must be disassembled and all internal components removed. Follow this procedure for removing internal engine components:
Before disassembling the engine and performing its overhaul procedures, make sure that the following components are present (see also the lists of tools given in the Section Procedure for assembling the engine after completing its overhaul ):
What kind of motor can be installed on a “penny” instead of the standard one?
One of the main types of car tuning is improving the car engine. VAZ 2101 engines are an unplowed field in this sense. Some craftsmen install turbines on them in order to increase power and traction characteristics, others change the crankshaft and bore the cylinders, and still others simply change the engine to a more powerful one. But here it is important not to overdo it, because the car body is designed for certain loads, exceeding which can seriously harm the entire car.
Among the popular options for replacement, it is worth considering only power units that are similar in design and performance. For a penny, without any problems, you can install a 1.6 or 2.0 liter gasoline engine from the same Fiat Argenta or Polonaise.
You can try the same engine from Renault Logan or Mitsubishi Galant, if you install them together with a gearbox. But the best option is a power unit from subsequent modifications of VAZs. These could be VAZ 2106, 2107, 2112 and even 2170. The engines from these cars are suitable both in size and in mounting to the gearbox.
Block head
We complete the finished head with a camshaft and a split gear. We set the camshaft to the overlap and tighten the star nuts well so that the camshaft phases do not “walk”. The camshaft bed is also well lubricated with oil. After installing the cylinder head gasket, we seat the head and use a torque wrench to properly tighten the head. After installation, we adjust the initial valve clearance. This procedure should be repeated on a warm engine. Now you can install attachments and place the motor on the beam. Before mounting the manifold to the cylinder head, check the evenness of their plane and place it on the sealant. Lubricate the manifold mounting studs with copper grease.
After installing the engine, we put the ignition kit in its place, and set everything to 1 mark, where the piston of the first cylinder is at TDC. We connect everything necessary and fill in the liquids. It is important that before screwing in the oil filter, it must be filled with oil.
Next, we start the engine, first of all we expel the air from the cooling system, and top it up if necessary. Then, with the engine warm, we check the oil level and adjust the valves.
After 1000 km, it is recommended to change the oil and re-press the head and check the connections. Run-in, as a rule, provided that the rings are of high quality, occurs at the first start. A full break-in will require no more than 1000 km. At this stage, the motor shows maximum power and torque. 85 horsepower can be achieved with high-quality repairs. If there is a need to increase power, then you can install a camshaft with a wider phase, a direct-flow exhaust system and a carburetor with increased capacity. As a result, you are guaranteed an honest 100 “horses” and a good resource. Do not forget that the compression ratio of the engine is increased, so fill only with 95-grade gasoline, which will allow you to use all the engine power and achieve minimal fuel consumption.
Valve lapping tool
You all know why valves are needed in an engine. They serve for proper gas distribution. In other words, fuel must enter the combustion chamber in a timely manner, and the situation is similar with exhaust gases. But if there is no gap between the valve plate and the seat, or it is too large, then the gas distribution will be impaired. To get rid of this trouble, you need to grind in the valves. To do this, you will need two types of lapping paste: for rough and fine work. The tools you need are a drill with a reverse function, as well as an attachment for it. You can make the latter from an old valve; to do this, cut off its stem.
Source
