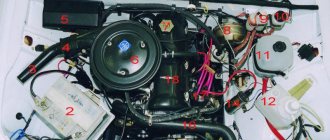
Looking for a starter relay
If any devices on the car fail, then first of all you need to check the relay or fuse in the circuit. Therefore, as soon as after diagnosing them, it will be possible to draw conclusions about the problems as a whole.
As you know, on a VAZ-2112, even when the engine is not running, all devices are powered directly from the battery, and when it is started, the energy comes from the generator. And when the current in the circuit increases or there is a short circuit, the fuse simply blows, and a relay is provided for the most powerful devices.
Photo of the starter relay in the fuse box
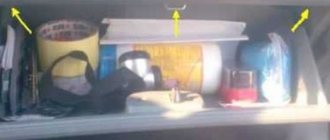
In order to get to the fuse and relay box in which the starter relay is installed, you need to find the cover on the underside of the dashboard. Then, press the locking button and fold it down.
The starter relay is marked with a red arrow
Replacing the old element with a new one must be done in the reverse order of removal.
Please note that in various vehicle configurations, additional relays can be installed on top of the unit, which are intended for certain groups of devices. But the starter relay is always installed second, on the right.
Connecting wires to the starter
Connecting a starter to a VAZ - instructions. Attach the relay in a convenient place (for example, a washer reservoir). Connect the wires to the starter. Then remove the red wire located on the flat terminal of the relay, and you need to make a connection with the connector of the male wire and the wire from the new relay.
Place the wire with a ring terminal for 8 mm on the positive side of the starter and tighten it with a nut. Place the wire of the new “female” type relay onto the contact that was released at the traction relay. This wire will transmit the positive to the coil. Using a clamp, tighten the new wire and the stock one together. Screw a small length of wire from the coil. Now you can turn on the new relay.
Source
Lada 2110 PhiX › Logbook › Additional, starter unloading relay VAZ 2110
Hi all! I’ll tell you about a very useful modification that will be useful for owners of elderly VAZ 2110. Many ten-year-olds have encountered a problem when, in hot weather, a hot engine does not respond to the movement of the key. The starter does not turn and you have to go under the hood with a screwdriver and make a direct connection to the contacts. In the case when the starter is working (in my case it is completely new), the culprit for this trouble may be the contact group of the ignition switch. Over time, the contact group in the ignition switch wears out or the current collector contacts burn out. This problem is successfully solved by installing an additional unloading relay. By the way, such a relay is installed on many cars from the factory.
To install this relay we will need: 4-pin relay with a metal ear (30-40A); 80r Wires 1.5 sq. mm; about three meters -80r relay block - 1 piece; 20r Flat male connector - 1 piece; Flat female connector - 1 piece; Ring tips - 2 pcs. Electrical tape, heat shrink, corrugation.
Let's put this whole thing together according to the following scheme.
The relay needs to be protected from moisture, for this I used thick heat shrink, in which I completely covered the relay block.
After assembly, I check the relay by connecting it to the LBP.
Pay attention to the laboratory power supply, the ammeter shows the current that the relay consumes. The current is only 0.12A and it is this current that will flow through the contact group of the ignition switch. For comparison, the pull-in current according to different sources is from 10 to 30A! Most often we are talking about 20-25A, where 20A is the current of the pull-in winding and 5 amperes of the holding winding.
Obviously, such currents will not be to the liking of the ignition switch contact group. The relay solves this problem perfectly.
I carried out another experiment, turned the voltage towards a decrease, the relay operates down to 7V, at 6V it no longer works, but this is quite enough, because the retractor will not work even at 8 volts.
We connect the wiring to the starter.
We pull off the red wire from the flat terminal of the traction relay and tightly insert the “folder” with the wire from the new relay into the connector of this wire. This wire now powers the coil of the new relay. We connect wires with ring lugs to the battery terminals.
We put the wire from contact 30 of the new relay with the “mother” onto the freed contact of the traction relay. Through this wire, the plus goes to the traction relay coil.
How can I close the starter directly?
You can close the starter directly by connecting to the battery or through contacts. Both options work if the device’s anchor is not damaged.
Closing the terminals with a screwdriver, pry bar or wrench
If the traction relay is faulty, the direct closure method is used with any metal rod of the required length. This could be a screwdriver, wrench or pry bar. Problems with the retractor are indicated by a characteristic clicking sound when turning the key in the ignition switch. The starter at this moment is unable to crank the crankshaft, since the Bendix teeth do not cling to the flywheel crown. By closing the starter's power terminals, it will be possible to send current directly to the electrical windings. A wrench or screwdriver will take over the functions of the traction relay.
Before doing this, be sure to put the car on the handbrake and in neutral to avoid accidents. The tool itself should have an insulated handle and a fairly thick shaft. Therefore, it is recommended to use one of the items described above. The pry bar or key can be wrapped with electrical tape at the gripping point.
Closing contacts B and S, M and B is strictly prohibited! Explanation: B – Bold or thick wire – constant voltage contact. On many starters it is closed with a protective rubber cap and marked “+12”. M – Motor or electric motor. S – Start, the contact is made in the form of a threaded outlet, petal or plug, often closed with a plastic tip, so it must be removed before forced closure. 8 – negative contact, connected to the body.
On some car models (VAZ 2109, 2110, 2114), in order to bridge the starter with a screwdriver, you need to dismantle the air filter and disconnect the chip placed on the contact group. After starting the engine, everything comes back together.
Starter fuse (relay) VAZ 2110
Very often I get a question via email! Which fuse is responsible for the start function on a VAZ 2110 car and where is it located.
I would like to answer it right away - the fuse responsible for the starter on the VAZ dozen does not exist. But there is a starter relay and it is this that very often burns out and fails
Starter VAZ 2101 – identify breakdowns and fix them + Video
In cases where your “penny” does not want to start, there is a high probability that its starter has failed.
Until 1986, a starter labeled ST-221 was installed on the VAZ 2101. It had a remote control and an overrunning roller clutch. It was then replaced by model 35.3708, which was designed with an end-mounted collector and a pull-in relay with two windings.
ST-221 is a motor with four poles and grids, operating on a mixed type of excitation.
Its device is quite simple. The main components of ST-221 include: an anchor with a drive; electromagnetic relay; two covers; excitation windings in a steel casing.
The body and covers are connected together using pins. Inside this structure there are four poles, which are attached to the body with screws. Winding coils are mounted on these poles.
Such a single device forms the stator of the element of interest to us.
In it, two of the four coils are located in parallel with the armature winding, and the other two are connected to it in series. Due to this, the process of exciting the “penny” starter is called mixed. The design of model 35.3708 is not much different from that described above.
It features a plastic end commutator, which reduces the overall weight of the starter and also ensures longer and more stable operation of the brush contact. In addition, in model 35.3708 the winding has one shunt and three series coils (the connection circuit with the armature is serial).
In what cases is it necessary to disassemble and repair the VAZ 2101 starter?
If the starter does not turn on and does not turn, this may be due to the following reasons:
Kopek starter disassembly diagram
Disassembly of the mechanism described in the article is required in many cases, otherwise it is simply impossible to determine why it does not turn.
The diagram for removing the starter is given below: the air filter is removed from the VAZ 2101 carburetor; unscrew (using a wrench) the nuts that connect the engine block to the starter.
After this, you can remove the wires from the starter, moving it forward a little (don’t forget how the wires were connected, otherwise you will absolutely have problems when assembling the unit).
As a result of such fairly simple actions, the starter can be easily removed and checked for the presence of certain malfunctions (does not turn, sticks, does not turn off, and so on). It is clear that to carry out this check you will need to disassemble the starter. The disassembly diagram is as follows:
Then the rubber plug is removed, the drive is disengaged from the clutch and dismantled, which makes it possible to remove the drive lever, retaining ring and washer. Next, the disassembly scheme is simple: the drive coupling is removed from the anchor shaft; Another bushing is pressed out of the starter cover.
How to replace the central locking fuse on a VAZ 2110 with your own hands
Great, now let's move on to the step-by-step instructions for replacing the starter relay on a VAZ 2110 with your own hands:
- Press the fuse box cover switch and lower it down.
- We take a Phillips screwdriver and unscrew the screw securing the latch and pull it out.
- Now remove the fuse box from the cover and turn it over
- Now we disconnect all the plugs with wires and take out the fuse box.
- Using pins, we remove the failed fuse responsible for the cigarette lighter, recall its designation in the R7 diagram and replace it with a new one.
- We put everything back together in reverse order.
How to close the starter
To implement the knowledge of how to close the starter, in reality you will need a wrench, a screwdriver or a pry bar. Using this method is an attempt to deal with the starter directly. There is no need for brute physical force here, as in the previous methods. However, the use of both a screwdriver and a wrench is most appropriate in the event of a malfunction of the solenoid relay. It is present when, when you turn the key in the ignition, characteristic clicks are heard from under the hood. They indicate that the Bendix main gear refuses to crank the engine, although the retractor relay is turned on. In this case, all that remains is to bridge the starter itself and provide voltage to its windings.
Now let's move on to how to close the starter. You will need either a fairly long screwdriver or a wrench with a corresponding “jaw” that will allow you to close the power terminals. Therefore, it is necessary to adjust the dimensions of the “pharynx” to the distance between these same terminals of the solenoid relay. First of all, you need to set the gear lever to the neutral position, and then tighten the brake itself to capacity. Then you need to bring the key in the lock to the appropriate position. Thus, the selected tool performs the function of a solenoid relay. Now the question regarding how to close the starter has actually been resolved.
I would like to draw your attention to the fact that certain safety rules must be followed. For example, it is necessary to ensure that the coil does not stop working during manipulations with the contact ignition system. This is relevant if such a system is classical. If it is contactless, then such a system is already equipped with a special switch, which monitors the stable supply of voltage to the coil itself. Manipulating the contact system will be much easier if you have an assistant who will set the key to the ignition position while you close the contact itself.
To start the car manually without tools, you need to carefully reach the necessary wires. To do this, you will have to remove the protective panel, usually located under the steering wheel. Behind it you will see wires of different colors going to the ignition switch. After this, you need to separate them from it, being careful. It is very important to understand the purpose of each wire. For example, the ground wire is most often represented in black or green. Less commonly, these wires are painted yellow with a green stripe along its entire length, as in ordinary household appliances.
To check whether the selected wire is grounded or not, you need a multimeter.
With its help, you need to connect one of the probes to this wire, and the second to the body of the machine. A zero reading will confirm that this is a ground wire. After this, it should be insulated using adhesive tape or simple electrical tape, since otherwise it can cause a short circuit and failure of the entire on-board system.
As for the power wires, they are often red or yellow. Their color depends on the voltage. However, it is better to double-check the wires with a measuring device. After this, they must be grouped and separated from the ground wire, since contact with it will result in a short circuit.
The wire that supplies power to the starter is fairly easy to identify. It is enough to move the brake to the neutral position and connect the previously defined power wires with the still undefined ones. An indeterminate wire, whose contact with the power wire will result in the activation of the corresponding mechanism, is the one that is responsible for its power.
Those wires that remain are responsible for powering the machine. They should be very securely fastened to the wire responsible for the voltage. After this, we “strike” the wire responsible for the operation of the starter and the engine should start. However, the power wires should not be kept short with the starter wire for a long time, as otherwise the battery will discharge very quickly.
You can install the starter relay on the VAZ 2110 yourself
Those people who have a VAZ 2110 have certainly encountered a situation where the starter did not turn after the key was turned, and some clicks are heard, which indicate that the retractor relay is working. In such a situation, the question immediately arises: where is the VAZ 2110 starter relay located and how to find it faster. This question is also relevant when tuning a VAZ 2111.
But we have interesting news for you: the VAZ 2110 simply does not have a starter relay. There is a solenoid relay, to which the positive contact is supplied from the ignition switch. The relay is installed on the starter, its size is 2 times smaller than that of the starter, and it is round in shape.
Next, we will highlight some popular malfunctions that usually arise in the VAZ 2110, related to the VAZ 2110 starter relay and the starter; by the way, a lot of things are used in the VAZ 2115, so by tuning this car, many problems can be avoided.
Improvement of the starter blocking relay and contact protection in VAZ 2110, 2111, 2112
Based on the operating experience of VAZ (first the classic 21011, then 2111), it has long been noticed that very often the ignition switch contacts (ISC) that control the starter solenoid relay burn out and become unusable. The current through these contacts reaches 20A. We have to replace the entire contact group. So I decided to fix this problem immediately on a new machine, without waiting for it to appear. A common option is to install an additional relay in the power circuit and control it with 3Z contacts. Everything is simple, but as it turned out, this is not at all necessary, because... you can use an existing starter interlock relay, retaining its original functions completely. As analysis of the circuit showed, the starter lock relay is powered from +12V from the main relay of the ECU, and the minus is supplied from pin 50 of the ECU (January 7.2), and is controlled by an “open collector” key in the ECU. When the ignition is turned on, the ECU sets the “low level” (shorts to ground) on contact 86 of the locking relay. The relay is activated, completing the circuit between the ignition switch and the starter solenoid relay. When you turn the key ZZ from pin “50”, 12V is supplied to the starter solenoid relay. As soon as the engine starts, the ECU removes the signal from pin 86 of the relay, it is de-energized, breaking the circuit, and thereby blocking the starter. The blocking works! Fig. 1 shows a fragment of the circuit in the basic version, and Fig. 2 - after modification. As you can see, the changes are minimal: 1. The pink-black wire is disconnected from the pin. "85" and isolated; 2. The power wire from the ignition switch is connected to pin. “85” relay 3. Added a power wire (30 cm) from the connector from which the CB is powered (2-pin connector to the front harness) - with a cross-section of at least 4 mm2, connected to the pin. 87 relays. Now the power circuit is controlled through a relay, and the current through the 3Z contacts does not exceed 0.2A. The modification was completed in 2009. Pros: minimal alterations, no need for another relay, saving space in the control unit Cons: not found in 6 years.
This is interesting: How to adjust the carburetor on a trimmer
Below is a fragment of the diagram.
Well, the final option. Starter relay and additional relay for “unloading” the ignition switch contacts
The final diagram with unloading of the lock contacts along the ignition circuit
But that's not all! The next weak point: the power contacts of the starter solenoid relay. Due to high currents, they receive an even greater electrical load, and as a result, erosion. You can protect them from sparking, especially when opening, by connecting one powerful diode in parallel with the starter and the control winding of the solenoid relay. The essence of the modification is to suppress the “self-induced emf” - the main cause of contact burnout. I used fairly common diodes, KD2998 - high pulsed and direct current, and they had sufficient quantities on hand. You can use rectifier diodes from computer power supplies rated for a forward current of at least 30A. The diodes are placed in 2 layers of heat shrink and connected directly to the starter on short wires. The connection diagram is shown.
Elimination of voltage drop in VAZ 2110, 2111, 2112
Much has been written about the rather unsuccessful and dim rear lights of the VAZ-2111. This problem becomes especially relevant
Basic starter malfunctions
The traction relay does not operate after the ignition key has been turned, and the armature does not rotate.
In this situation, it may be due to the following possible problems:
- the battery is broken or discharged, the solution to this problem is to buy a new battery or charge it;
- the positive contacts have oxidized - you just need to clean them;
- it happens that an interturn short circuit occurs on the winding of the traction relay - to correct this situation, you need to install a new relay;
- the circuit that powers the traction relay has broken - you need to check the wires for integrity, and whether they have become disconnected from the circuit?
- contacts “30” and “50” do not close - you just need to change the contact part of the ignition switch;
- The traction relay armature does not work well - you need to remove it and disassemble it, there may be a lubrication problem.
After turning the key, the starter does not start, the armature rotates slowly, and a click is heard in the traction relay.
This situation may arise due to previously similar situations:
- the battery is discharged or disconnected - you need to check and correct the situation;
- the winding of the traction relay is shorted or broken - you also just need to change the relay;
- the ends of the wires have seriously succumbed to oxidation - they need to be checked and cleaned, starting with the battery.
After turning the key, the starter armature spins, but the flywheel does not spin..
This situation arose due to the fact that:
- the freewheel is slipping - you need to diagnose the starter at the stand and replace the clutch if it is faulty;
- The gears on the gearbox are worn out - you just need to replace them.
Which terminals should be connected to the starter?
Not all drivers understand how to close the starter with a screwdriver.
Sometimes this is simply necessary, because the engine does not start by turning the key in the lock. This happens because the contacts are covered with a so-called oxide film, which prevents current from moving normally. Thus, starting the vehicle without secondary assistance will be quite difficult. How to close the starter with a screwdriver? In fact, every driver should know this, because no one knows what situation they will find themselves in. This is a real opportunity to avoid problems with starting the internal combustion engine. However, before you find out how this is done, you should understand that the method will not be effective in absolutely all cases. First, it is worth determining what caused the malfunction.
To close the starter, you cannot do without a flat-head screwdriver. You will also need a key or other metal tool. This article will describe exactly the situation using a screwdriver.
Problems with the retractor can manifest themselves in completely different ways. Most often, a clicking sound is heard from under the hood. Having heard it, the driver should know that the relay has turned on, but at this moment the clutch is not able to move the crankshaft. There is only one way out of this situation - to close the starter in order to direct voltage to the winding.
The first step is to prepare the necessary tool. The screwdriver should be long so that it fits optimally between the terminals that are to be connected.
Now the gear shift knob should be moved to the neutral position. Raise the handbrake to the maximum. The key is inserted into the lock and turned.
Replacing the VAZ 2110 starter relay on your own
All drivers know that without a starter, the car not only won’t move, it won’t even start. It drives the crankshaft. In this case, the shaft is accelerated to a certain frequency. As soon as the desired frequency is reached, the engine will start. One of the starter components is a two-winding traction relay. Replacing the VAZ 2110 starter relay is a mandatory procedure, because without the correct operation of this mechanism, the vehicle will not move. On a VAZ 2110, replacing the starter relay can be done on your own.
Tips for operating and replacing the starter
When starting the engine, the starter operation should not exceed 5-7 seconds, restarting should be done after 20-30 seconds. If after three approaches the engine does not start, then you should look for the reason in the power supply system or the engine ignition system.
READ How to connect a Lenovo tablet to a TV via hdmi
Before removing the starter, make sure that the breakdown is not caused by other reasons, such as: battery discharge, oxidation of wires, terminals, poor contact of electrical circuits, etc.
It will be more convenient to unscrew the lower starter mounting bolt if you have a lift, pit or jack with stops at your disposal.
To replace the starter you will need the following tools:
The price of the VAZ 21214370801001 starter is 4,700 rubles. Its analogue from UNIPOINT with article number STRL021 is 4400 rubles.
The price is relevant for Moscow and the region for the summer of 2017.
We move the rubber cover of the battery terminal.
Using a 10mm wrench, loosen the tightening of the coupling bolt nut.
Remove the negative cable from the battery.
Using a 13mm wrench, unscrew the two upper starter mounting bolts.
From below, using the same key, unscrew the lower starter mounting bolt.
We move the starter forward to provide access to the wire tips on the starter traction relay.
Remove the connector from the starter traction relay terminal. Then unscrew the nut and remove the wire from the upper contact bolt of the traction relay.
The removed ST-221 starter and a new type starter for replacement.
Install the new starter and the removed parts onto the vehicle in the reverse order of removal.
What is a relay for?
Replacing the starter relay on a VAZ 2110
The traction relay ensures that the drive gear starts. Starting occurs in clutch with the gear mechanism of the crankshaft flywheel. It also provides power to the starter motor. When the starter is turned on, energy begins to be transferred from the battery. The energy path passes through the ignition switch.
VAZ 2110 additional starter relay
In this way, power is supplied to each winding of the traction relay. Windings have two types:
As soon as the process of closing the relay contacts takes place, the retractor winding is turned off. A working relay has a voltage limit that should not exceed 8 V. The temperature during this process should not exceed 25 degrees Celsius. If the voltage when starting the relay exceeds this indicator, then you should pay attention to the drive and the traction relay itself. They may become damaged or stop working. The traction relay can be visually examined. Perhaps the breakdown can be seen with the naked eye, but the starter will have to be dismantled and disassembled.
VAZ 2110 starter lock relay
Additional VR starter
On modern cars, an additional VR starter is a priori provided. On older cars, the relay is installed and connected independently.
The advantages of installing an additional VR are obvious:
You can check whether the additional VR is installed on the car like this:
Connection of additional VR
Here's how to connect:
Additional relays can be purchased in stores. They are sold as a kit, where everything is provided for proper self-installation.
Forget about fines from cameras! An absolutely legal new product - Traffic Police Camera Jammer, hides your license plates from the cameras that are installed in all cities. More details at the link.
The first step is to study how the starter works, because this is where any car begins its work. In addition, if you know how the starter works, you can start the engine and find out the reason for the poor start.
To repair a car starter yourself, you just need to know a few things.
Most drivers believe that the starter is a retractor relay. This relay changes the position in which the freewheel is located, which advances the gear to start the engine. When the engine starts, the relay is released from the current and the clutch returns to its previous position, thus moving the gear back. Due to this, the operating time of the gear is preserved, and the machine starter does not deteriorate.
The starter relay is connected to the power circuit, thereby closing and opening the circuit, depending on how fast the crankshaft rotates.
On all cars, the design of the starters is the same, the differences are only minor, which may be in the design, but not in the principle of operation.
If you understand how the starter works in one car, you can easily figure it out in another. Any starter has 40-60 main parts, these include:
It is better for the driver to know what circuit the starter has and what functions its parts perform. The main unit is the electric motor. When it turns on, the shaft rotates the engine crankshaft.
Auxiliary devices are bendix and retractor relay. The knot is called a bendix because it was invented by the American inventor Vincent Bendix. The purpose of this device is to ensure rotation of the crankshaft.
What functions does the relay perform:
The main elements included in the starter circuit work as follows. When the engine starts, voltage from the generator goes to the relay coil. Then the gears of the drive system begin to work, due to which a magnetic field is created. The flywheel of the propulsion system is working. The gear begins its work thanks to the holding winding, while the bolts are closed. When the key is returned to the ignition switch, the winding is de-energized, thus disconnecting the gear and flywheel. This scheme applies to modern cars, including VAZ models.
Let's look at several reasons why you will have to change the starter or repair it.
Connecting the starter to the VAZ-2110 should proceed as follows. Prepare:
Attach the relay to a convenient location (this could be the washer reservoir). Connect the wires to the starter. Then remove the red wire located on the flat terminal of the relay, and you need to make a connection with the connector of the male wire and the wire from the new relay. Place the wire with a ring terminal for 8 mm on the positive side of the starter and tighten it with a nut. Place the wire of the new “female” type relay onto the contact that was released at the traction relay. This wire will transmit the positive to the coil. Using a clamp, tighten the new wire and the stock one together. Screw a small length of wire from the coil. Now you can turn on the new relay.
Be careful, this instruction is intended only for VAZ-2110 cars, since where there is no relay of this type, it means that it should not be there. It is likely that there are problems with the electrical system.
VAZ 2101 starter: breakdowns and their elimination
This is what the VAZ 2101 starter looks like
. You will learn in today’s article how to remove and repair the VAZ 2101 starter. Agree, troubles with this unit happen quite often.
And if suddenly it stops spinning, you have to dodge and try to start the engine from the pusher. But this obviously won't bring anyone any pleasure.
What if the engine suddenly stalls in a traffic jam? What to do then? And you don’t even know what components the starter consists of? And what could have happened to him?
Is the starter spinning poorly?
Let's start with the fact that it may simply not have enough current. This may be due to insufficient battery charge. But more often, of course, the problem lies in the wiring. Pay attention to the thick wire that goes from the negative terminal of the battery to the engine block.
There is also a cable that connects the internal combustion engine to the gearbox. If a lot of dirt and oil has accumulated on them, then there is clearly a large current leakage. Basic electronics, nothing fancy, look at the starter wiring diagram to make sure it's dead simple.
So what can you do to reduce current leakage?
And here are the contacts of the retractor relay shown
The sequence of actions is as follows:
But if the starter still turns “forcefully”, slowly, and doesn’t even try to accelerate, then change all the ground wires. Only this can really help. The problem is that the ground wires are made of thin wire, which is woven into a large bundle. Dirt and dust accumulate between the wiring, hence, again, large current leaks. And restoring the wires turns out to be very problematic.
What if it doesn’t spin at all?
Another case is that the starter does not turn at all and does not react in any way to the fact that you diligently turn the ignition key.
What to do? A novice driver immediately grabs his head, saying, oh, the car is broken, that’s it, I bought junk that, let alone drive, doesn’t even know how to start! But experienced drivers, of course, will not do this.
First, listen, does the solenoid relay click? Oops, the newbie will say, what is this? Take a closer look at the starter itself; in VAZ 2101 cars, by the way, it is located on the right side (if you sit in the driver’s seat and look forward, of course). Did you see such a cylinder at the top?
Kopek starter disassembled
There are two wires coming from it - one to the battery, and the second inside the starter. This can be clearly seen in the photo given just above in the article. It shows a VAZ 2101 retractor and its conclusions (on the starter).
This small device could have broken. Its function is to turn on the starter and simultaneously connect its rotor to the engine flywheel through a special ring gear.
Carefully close the two retractor terminals with a screwdriver.
Has the starter started spinning? If yes, then simply change the retractor, but if not, then you will have to disassemble the entire starter. Most likely, the reason lies there, namely in the windings. Let's immediately attribute the brushes to the windings, since with their help power is transmitted. All? Has the diagnosis been carried out? Let's start removing the starter from your pretty penny.
It's not an easy task, but it can be done
You are lucky if the previous owners of your car were lazy people. And you're doubly lucky if you're on the thin side. Of course, the ground clearance of our cars, in particular the VAZ 2101, is so high that the average citizen from the great states can easily get under the car.
But still, jokes aside, repairs need to be carried out. Why was all this said? The lower nut... Yes, the lower nut for securing the starter on the classic is just a godsend, a true achievement of domestic engineering.
What's wrong with it? But the fact is that it is almost impossible to unscrew it with spanners or open-end wrenches!
Unscrew the nut using a 13mm socket, cardan and extension.
A question for all car owners immediately appears. Do they all have a cardan and an extension? From personal experience I can say that unscrewing this unfortunate nut on the starter took quite a lot of time.
READ How to connect a radio in a VAZ 2121 car
Well, there was (and still is not) either a cardan or an extension cord. What can I say, I still change the clutch with a hammer, chisel, open-end wrenches, as well as various materials and organs.
The toad is a very strong freshwater animal, it can literally strangle.
But back to the penny starter and my personal experience. What can I say and advise? You can remove the nut with a spanner or open-end wrench. The scheme of action is simple, you can turn it 5-10 degrees.
But you can't remove the starter that easily. He also used a cunning method - he placed the open-end wrench at a right angle relative to the nut. With a suitable object he scrolled through it. Yes, it helped, I removed and installed the starter. But after a couple of removals, I simply hammered it on this nut, and did the right thing. Apparently, the Zhiguli engineers simply had an extra nut left, they just didn’t know where to shove it. We found a place. Well done. All?
The lengthy tale of misadventures is over, the top nuts are much easier to unscrew. Just remember to disconnect the battery before starting work - just remove the negative terminal. And also disconnect the wires from the retractor so that they do not interfere with removal.
So what should we do next?
Starter connection diagram
Throw away the penny starter? Yes Easy! It still doesn't turn. Of course, this is the most optimal option, but it is suitable only for those who can afford to buy a new one, or who already have one in storage. But what should the rest of us do? The budget for repairs is meager, but it’s still difficult without a car. No matter what, but it serves faithfully. Yes, it all comes down to the minimum program:
Are you ready? On the count of three! so that the starter is disassembled! Don't be afraid, you won't break anything in it, since it's already faulty. The sequence for disassembling the starter on a penny and other classic models:
Fastening the brushes on the rear cover of the starter
That's all, the starter crumbled into small pieces in your hands. Don’t worry, your VAZ 2101 car will soon be on wheels and drive and rush. What we do next:
What else can you add? Never mind, assemble a VAZ 2101 starter, the price of a new one, by the way, is about 2,500 rubles, and a used one will cost about a thousand less.
After repair, the starter will work like a clock. The photo in the article shows a general view of the starter, its main components, and a wiring diagram in a VAZ 2101 car.
All questions are in x, we will quickly solve all the problems and lift the car onto its wheels.
How to remove the starter VAZ 2101-2107
In this article we will try to help you find the answer to the question: “how to remove the VAZ 2101 starter?”
Before dismantling starter 2106, rule out possible reasons why the car engine did not start. Check the condition of the battery by looking at the warning lights.
If they burn brightly and do not dim, then the problem is not in the charge. If you notice that the signal lights go out and become dim, then most likely you are faced with a low battery.
However, not every driver will face such a response, and most likely it will end in repairs.
The reasons for starter failure are legion. Starting from a banal jamming of the retractor relay armature and a short circuit in the winding, ending with a starter misalignment or wear of the bushings. To resolve these issues, the driver needs to remove the part.
