Setting up the Starline A93 shock sensor directly depends on what function the car owner plans to use. The device is designed to prevent external penetration into the car and allows you to detect such attempts at the initial stage. Sensors calculate how dangerous a particular impact is.
The manufacturer allows the installation of an additional sensor, thanks to which the protection becomes more reliable. The sensors of such a device are installed on the other side in relation to the sensors of the main sensor. Their functionality is equivalent.
Car alarm shock sensor Starline A91
Starline A91 is one of the most common car alarms in the Russian Federation due to its budget. Of course, there are newer modifications, like StarLine A93, but in terms of price-functionality ratio, the 91 series is one of the best. The alarm system has a two-level shock sensor. When there is an external impact on the car, it is triggered, and the alarm notifies the owner using vibration and a sound system about the impact. The alarm firmware eliminates possible sensor activation due to interference. After installing the car alarm, you need to adjust it.
The alarm operates from 2 key fobs, the range of which is 600 meters. Weather conditions do not affect the operation, the alarm works both in frost at 45 degrees and in heat up to 85 degrees.
How to connect?
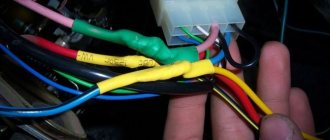
Do-it-yourself installation of the Starline A91 alarm system on a VAZ 2110 or other car is carried out according to the connection diagram. The connection diagram itself may vary depending on the vehicle, but on average it is something like this. The best option would be to entrust this matter to a specialist electrician.
Connection diagram for the Starline A91 system
How to setup?
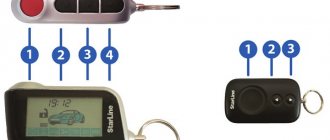
The Starline A91 alarm system itself contains two key fobs, one of them is equipped with a liquid crystal display, the second is not. For more convenient control, icons on devices are in Russian. According to many consumers, these key fobs are very convenient to use; their range of action is 600 meters. The Starline A91 alarm system also includes a case for the key fob.
How to adjust the alarm
For the alarm to work correctly, the main thing is to connect it correctly:
- A Valet button must be installed in the fuse box, or under the steering wheel or glove compartment;
- In order to activate the system, you must turn on the ignition (do not start the engine) and press the Valet button 7 times;
- After this, turn off the ignition and wait for 7 beeps in response;
- Turn on the key fob by simultaneously pressing buttons 2 and 3;
- Perform similar actions with the second key fob.
3. How to set up the tilt sensor
The Starline A93 tilt sensor has the same sensitivity limits: minimum - 01, maximum - 14. According to factory parameters, it is set to level 10.
Setting up the Starline A93 tilt sensor follows the same principle. The only difference is in some of the buttons, and also in the fact that there are no two levels. Setup instructions:
- With the ignition off and security mode, press button 4 successively.
- By pressing keys 2 and 3, set the desired sensitivity value.
- Exit the mode by successively pressing key 4 again. Or simply do nothing for 15 seconds, and the exit will occur on its own.
3.1. Tilt sensor adjustment video
Enabling the shock sensor
The shock sensor allows you to notify the driver of danger using sound alerts and vibration. It is located in the car interior or in the engine compartment. In rare cases, on some foreign cars, a shock sensor is installed in the gasoline compartment. It is not recommended to connect airbags to the impact sensor, because if it breaks down, the safety system may not work at the most critical moment.
To activate the shock sensor, the owner needs to start the security mode on the key fob using the corresponding button, turn it off and then turn it on again.
Sensitivity Setting
The sensitivity of the StarLine A91 shock sensor is adjusted using the shock sensor controls. You can adjust the sensor using a screwdriver, turning it clockwise to increase sensitivity, counterclockwise to decrease it. The green signal is responsible for minor contacts with the car, which notify the driver of possible damage. The red signal turns on a sound alert and vibration on the key fob, notifying the owner of strong impacts.
The adjustment occurs sensitively when the security mode is disabled. To do this, you need to open the door and, turning the knobs in parallel, check the operation of the alarm.
After the sensors have been reconfigured, you need to turn on the security mode. After this, you need to wait a few minutes and re-check the functionality of the car alarm. For the alarm to work correctly, you need to set the correct settings and not go beyond the warning zone.
In order to reduce the sensitivity of the Starline A91 shock sensor, you need to turn on the ignition of the car and make 5 clicks on the settings menu. After that, turn the ignition off and on again, and press the triangle-shaped button on the key fob and search for additional channels. After this, you need to select the section that relates to the operation of the motor and select the third function.
After this, using the security button, you select the level required for the warning system. The alarm is turned on periodically and after settings the functionality of this level is checked.
In order to save the settings, you need to press the settings menu button 5 times and turn off the ignition. After this, the alarm will play a sound alert three times, and the car will blink its headlights. The alarm key fob screen will show the set value, after which the mode will switch to clock display.
How to set up a shock sensor for a Starline A91 alarm using a key fob
Starline A91 has piezoelectric elements with regulators that are adjusted using a screwdriver, which is used to rotate them clockwise. In order to correctly adjust the parameters, follow the explanations drawn on the body of the gadget - they indicate the direction of movement to decrease or increase sensitivity. Additionally, green and red LEDs help in determining the moment of operation.
Sensitivity can also be adjusted using key fobs that serve as control panels. Each of them has a display with a two-way communication unit. During autorun programming, additional settings are made. In particular, it is set to ignore a running motor or starter at the moment of rotation.
Full adjustment of the sensitivity of the Starline A91 system sensors looks like this:
- The first step is to turn off the car's ignition and security mode.
- Next, click on the button adjacent to the one on which the round icon is drawn.
- The success of the actions taken will be indicated by two activations of the alarm siren and triple flashing of the headlights.
- In turn, the key fob emits a melodic signal and its indicator displays an indication of what level of the sensor warning zone is already programmed: by default it is 10.
- Now the car owner can independently specify the desired parameter in the range from 0 to 14. To do this, he uses buttons with triangular icons on the remote control.
- To adjust the level of anxiety in the car, hold down the same key as in the second point until a sound signal appears. After which they press it a second time, but for a short time.
- If the action is successful, the already set sensitivity value appears on the display, the default value being five. It is adjusted in the same way as the warning zone.
- Saving the settings occurs by holding down the signal and pressing the same key again as above.
The success of the manipulation will be indicated by three activations of the siren and three headlight signals. The preset melody will also sound on the remote control.
How to turn on the shock sensor
The shock sensors of the Starline A91 and A93 alarms are turned on after their installation. When all sensors are connected, the car owner needs to put the car into security mode, disarm it and turn security mode back on.
When the security mode is turned on, without disabling it, you can activate the device from the key fob. To do this, you need to hold down the corresponding button until the signal sounds. It is also possible to use a smartphone application for this purpose.
How to increase sensitivity
The sensitivity of the anti-theft system is adjusted using the above-mentioned regulators, which are turned with a screwdriver all the way counterclockwise. As for adjusting the warning level, for this the corrector is turned by a third.
You can adjust the sensitivity only when the security mode is turned off. The car door must be open. After each turn, the force on the body at which the sensor is triggered is checked. To do this, light blows are applied to the body cover or its central pillar.
The correct operation of the reconfigured sensors is checked when the security mode is turned on. After activating it, wait up to a minute for the sensor to work with the new settings.
As for the increase in the alarm level, this follows the same procedure. It is important to remember that the alarm level value cannot be less than the warning zone. Otherwise, the sensors will not work correctly.
How to reduce sensitivity
The sensitivity of the sensors can be reduced. This is done using the key fob with the ignition off. First of all, press the entry button to the settings menu five times. After this, turn the key in the lock and reactivate the ignition. Next, find buttons with triangular icons and use them to select the section for adjusting additional channels. It is lettered as "SF". In the latter, select the item responsible for the operation of the engine and hold down the key located next to the one marked with a round icon until a sound signal appears. After this, the button is released and pressed again for a short time. As a result, you should be able to select functions - use the key marked with a triangular icon to select the third one. The sensitivity mode value is set with the security activation button. The car owner can either completely turn off the sensors by setting the value to zero, or temporarily reduce it only while the power plant is operating. Test runs and warm-ups of the latter are used to determine whether the adjusted level is suitable.
Saving memory parameters is carried out through the same button presses as when entering the settings menu for additional channels. After this, turn off the ignition. The success of the manipulation is indicated by three flashes of headlights and a triple sound of a siren. At this time, the programmed value appears on the remote control, after which it goes into the standard time display mode.
How to disable the Starline A91 shock sensor
The need for shutdown arises from the increased frequency of false alarms due to external factors.
The most common such factor is remote engine start - vibrations from it are perceived by the installation as an attempt to penetrate the vehicle interior. Therefore, it is most important to temporarily disable the sensor at such moments.
The Starline A91 shock sensor is turned off by double pressing the button on the key fob, indicated by the closed lock icon. In response, the external light alarm of the machine will flash twice, and the remote control will emit a melodic sound. The DAT1 parameter will be displayed on the display of the latter, indicating that the warning sensitivity level has been temporarily turned off.
To turn off the alarm level, you must press the same key twice again. The headlights and siren will respond with a triple signal, indicating the success of the manipulations. The DATE2 parameter appears on the display.
The mechanical method of turning off the sensor involves turning the sensitivity regulator with a screwdriver to the minimum level. You can also set the level to zero in the setup menu. In this case, it is strictly not recommended to disconnect the sensor by disconnecting the wires.
Disabling the sensor
How to set up a shock sensor on a Starline A91 alarm and adjust it - the process is not complicated. But sometimes you need to turn off the alarm completely. This is often required due to autostart, since the alarm is triggered and displays that the upper threshold shock sensor is turned on. The alarm system can also issue sound alerts due to dampness or snow. Thus it is necessary to reduce the shock sensor to the lower threshold. In this case, according to the upper threshold, everything should work properly.
In order to independently disable the StarLine A91 shock sensor, you need to press the key with the lock closed 2 times. After this, the headlights will blink 3 times, and the alarm will give an audible warning about turning off the sound mode.
If the shock sensor worked, but the owner turned it off, then you can use other methods:
- Using 5 clicks on the settings menu, the selection of additional channels must be set to 0;
- Use a screwdriver on the regulator to set the minimum value.
Do not try to turn off the alarm by disconnecting it from the wires - this may lead to incorrect operation!
How to disable
Disabling the shock sensor is used to reduce the number of false alarms caused by external factors. At the moment of remote or automatic start of the power unit, the security complex turns off the sensor, since vibration from a running engine is perceived by the sensor as an attempt to penetrate the vehicle interior. When setting the operating parameters of additional channels, it is possible to set a parameter that temporarily disables the shock sensitivity sensor.
To disable the shock sensor on Starline A91 or A93, you will need to press the remote control button, indicated by the closed lock icon, twice. The car will respond with a double signal from the external light alarm, the key fob will give a melodic signal, and the text DAT1 will be displayed on the display, indicating a temporary disabling of the warning sensitivity level. When you press the button twice again, triple signals are sent by lamps and a buzzer, and then the alarm level is turned off. A text like DATE2 appears on the display.
The car owner can turn off the sensor by turning the sensitivity control to the minimum position. On the A93 complex, you need to set the zero value through the setup menu. It is not recommended to disconnect the shock sensor on the Starline A91 by disconnecting the cable harness from the processor unit.
What to do if the sensor constantly triggers
The shock sensor can be adjusted many times, but it will still trigger for no reason. Such problems may not arise immediately, but after a certain amount of time. Of course, the first step is to reconfigure, but if it doesn’t help, then there are several other options:
- Condensation may form and due to moisture ingress, the alarm system may not work correctly. To do this, you need to dry the shock sensor and try to insulate it so that it is protected from moisture;
- Also, the sensor design often wears out or is subject to mechanical damage. In this case, it is necessary to replace worn or damaged parts;
- If the sensor is triggered even when it is turned off, then the problem may be in its mounting. The standard mount is installed on a plastic base, which can become deformed over time. It is recommended to replace the plastic with a metal structure and tightly secure the Starline A91 shock sensor.
How to set up a Starline alarm if it goes off on its own
Most often, random activation of the StarLine alarm is associated with incorrect settings of the shock sensor. The fact is that the name “shock sensor” itself is incorrect - it is a vibration sensor, so it also responds to strong noise, road vibrations from passing trucks, and so on.
- Warning level: as soon as the vibration recorded by the sensor exceeds a preset level, a short-term siren signal is activated, and the corresponding information is supplied to the key fob.
- The alarm level is set higher than the warning level. In this case, the siren turns on constantly, all interlock circuits are activated, and instead of a single signal and short-term vibration, the key fob transmits signals periodically.
A properly configured and installed (this is no less important) shock sensor does not cause serious problems, and occasionally it has to be reconfigured (for example, if construction begins next to the parking lot).
Why do you need to reduce
Could the alarm be too sensitive?
The question is not at all rhetorical. Its relevance has been felt by many owners of car alarms. It’s not at all difficult to understand when an alarm goes off properly and in a timely manner, and when, in addition to the hassle of idle ringing, it ruins the life of its owner. Still, it’s not a joke: 100 dB of a car’s security siren regularly howls in the middle of the night against the permitted 30 dB. If we also mention the loud keychain, which forces its owner to jump out into the street for no reason in order to save his car property, then it will become clear how harmless this very notorious sensitivity of the Starlien car alarm is. Although the reasons for the need to reduce it are quite simple and can be easily eliminated even on our own:
- The adjustment of the shock sensor, when installing it, is made taking into account the maximum sensitivity of the alarm system, incl. and Starline;
- reducing the “sensitivity” of car alarms, incl. and Starline, is associated with a violation of the sensor’s attachment to the car body;
- both reasons simultaneously influence the decrease in the “sensitivity” of the alarm;
- warranty or emergency case of poor car alarm operation.
Important: the main difficulty when setting it up for any alarm will be finding a shock sensor. Its approximate location is known - under the trim next to the clutch pedal. But you still have to look.
Errors when installing the shock sensor
On older generations of StarLine alarms, an external shock sensor was used, which had to be placed in strictly defined places in the car. If it was not installed correctly, it either could not be adjusted adequately, or it would work on its own.
A common mistake is gluing the sensor to the plastic panel from the inside. Even with high-quality preparation, using a branded primer and 3M adhesive tape, it comes unstuck and either falls onto the bottom panel or dangles from its wire.
There is also an equally stupid solution - attaching the sensor with plastic ties to a thick wiring harness (if the alarm is hidden in the area of the mounting block). The sensor is adjusted in a warm box, when the harness is softer and transmits vibration less well, and in winter the wires “dumb”, and the alarm goes off on its own with significantly less vibration than before.
When the shock sensor is rigidly installed on metal brackets rigidly connected to the engine shield, random activations sometimes occur due to the cooling exhaust manifold - short-term vibrations (“clicks”) are transmitted through the cushions to the engine shield, and from it to the bracket.
Video: Setting up the Shock Sensor Alarm.*Avtoservis Nikitin*
The shock sensor itself has different sensitivity depending on the direction of its piezoelectric plate: better it detects vibrations that are directed perpendicular to its plane, worse - parallel to the plane. Therefore, if the sensor is directed to the side and is adjusted by tapping on the windshield, then it has increased sensitivity to vibrations from passing cars - hence the risk of Starline triggering for no reason.
We reduce the sensitivity of the sensor during autostart
A running motor creates increased vibrations, which are registered by the shock sensor as an alarm, and the alarm may go off during autostart. Therefore, by default, when the alarm is started, the shock sensor is turned off, but this reduces the security of the car - if the glass is broken while the car is warming up in the morning behind the house, the alarm will not go off.
Therefore, it makes sense to activate the shock sensor during autostart, but slightly reduce its sensitivity. To configure the sensitivity of the StarLine A91 or A93 alarm to turn on the sensor during autostart, you need to:
- enter the SF settings menu (we already wrote about how to do this earlier);
- go to function 03, which sets the algorithm for the operation of the shock and tilt sensors when the motor is running;
- set it to the value 03-2 or 03-4: in this case, at the beginning of the autostart cycle, the sensors will turn off, but after the engine has been successfully started, they will turn on again;
- check whether the sensors are triggered when the motor is running, and if necessary, reduce the sensitivity in the settings.
8. How triggered sensors are displayed on the key fob
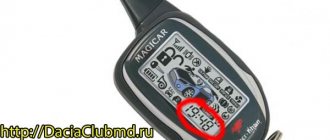
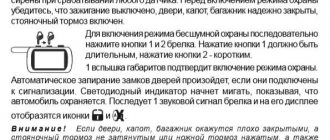
When the vehicle experiences an impact that causes the shock or tilt sensor to be activated, the corresponding icons are displayed on the key fob display:
- dy – 1 and 3 short sound signals, 6 size flashes. The shock sensor warning level has activated.
- dy – 1 and 30 with sound signals and size flashes. The alarm level of the shock sensor has triggered.
- Indication in the form of three arrows, 30 s of sound and light signals. Indicates that the tilt sensor is activated.
Displaying triggered shock and tilt sensors on Starline A93
In general, sensors are configured individually. Your task is to try to set a specific value and test it in practice. To do this, having set this or that sensitivity, activate the security mode, wait 1-2 minutes. and check. If you are not satisfied, we reduce or increase the value. As a result, you will be able to configure the Starline A93 shock sensor so that the sensitivity indicator is suitable for your car.
How to reduce sensitivity
Setting up an external shock sensor
The external shock sensor of the StarLine Twage and Dialog alarm families has two separate controls - compact trimming resistors with heads for a thin flat-head screwdriver.
There is a control LED next to each resistor - if the shock sensor is easy to see during installation, this makes setup easier. The upper trimmer is used to set a warning, the lower one sets the alarm level. If you need to configure it, it’s easier to do this:
1. Turn both trimmers counterclockwise until they stop, setting the sensitivity to minimum. 2. Set the warning sensitivity to a third, close the doors and arm the car. 3. After waiting at least 15 seconds for the alarm to activate the shock sensor, tap the windshield with your knuckles. The blows are sharp, but not strong. 4. If the warning level is sufficient, it will work. Otherwise, disarm the car, add a little sensitivity, arm the car and repeat step 3. 5. Having configured the warning level, set the alarm level to a little less than that specified by the warning setting. 6. Having armed the car and waited 15 seconds, we deliver a sharp blow to the edge of the windshield with our fist. If only a warning is triggered, add alarm sensitivity.
Video: False alarms. Reasons for triggering.
Setting up the built-in shock sensor
In modern StarLine alarms, shock and tilt sensors do not have any controls. Setup is carried out using a key fob or from a mobile application, which is much more convenient for the user. To configure sensors from the key fob:
- disarm the car;
- on the main key fob, press button 3 until a beep sounds, then press it again briefly;
- a hammer icon and a number from 1 to 10 will appear on the screen, indicating the current warning level setting level;
- use buttons 2 and 3 to decrease or increase sensitivity;
- press button 3 again long and short;
- the screen will display the alarm level setting, which can be changed using buttons 2 and 3. In this case, the number on the screen should be less than that set for the warning level;
- Long and short press button 3 again to save the settings.
It's even easier to configure the shock sensor via a mobile application. Go to the Settings screen for the selected device and select Shock and Tilt Sensors. On the screen that opens, set the desired levels using the sliders and click the “Save” button.
Source
Alarm functionality
Alarm Starline A 91 is a modern alarm system widely used by car owners to protect their cars in Russia. The system is equipped with a two-level shock sensor, which is triggered by external impact on the vehicle by emitting a sound signal and transmitting an alarm signal to the owner. To protect against random electromagnetic interference, special protection has been installed to protect against false alarms. The Starline security system is built on two-level zone protection of an object and provides for mandatory adjustment after installation on the vehicle.
Features of the Starline A 91 car alarm:
- high sensitivity of the “friend or foe” response system;
- low sensitivity to radio interference;
- control of the vehicle autostart system using various modes;
- special key fob protection;
- equipping the key fob with a battery that ensures long-term operation;
- stable operation of the system in climatic conditions from -45* to +85*C.
The Starline system is controlled using two key fobs with a range of 600 meters.
Functionality of the Starline A91 shock sensor
Starline A91 is one of the most popular car alarms in Russia. The great demand for it is supported by the combination of a large number of technical advantages with a reasonable price. One of these advantages is the Starline A91 two-level shock sensor, which is triggered if the car body encounters an external impact on it.
The sensor is protected from false alarms by special protection, which protects it, among other things, from the effects of electromagnetic interference. Correctly adjusting the sensitivity of StarLine A91, which is done immediately after installing the alarm on the car, helps reduce the number of erroneous reactions.
The Starline anti-theft system is distinguished by the presence of wide functionality:
- special protection of the control panel;
- reduced sensitivity to radio wave interference;
- automatic engine start in different modes at a distance;
- effective sensitivity of the “friend or foe” system;
- capacious battery that does not require frequent replacement.
In addition to the above, the system operates reliably in a wide temperature range from -45 to 85 degrees, which is extremely important for the domestic climate.
Control is carried out using the 2 key fobs included in the kit, each of which is capable of influencing the device from a distance of 600 meters.
The efficient and correct operation of the entire StarLine system largely depends on the correct connection of two key fobs to the alarm system. To do this you will need to follow a number of steps:
- Find the Valet service mode switch in the car, which allows you to enter the settings - it looks like a regular button and is often located under the glove compartment, steering wheel, or in the fuse box.
- To activate the system, press the service mode switch seven times with the engine off.
- Immediately after this, turn off the ignition and wait for seven beeps from the siren, indicating that the actions were performed correctly.
- Turn on the key fob by simultaneously pressing keys number two and three - another signal will indicate its connection.
The system may not work correctly for various reasons, but the main ones are:
- incorrect setting of the shock sensor itself;
- unsuitable location for installing the device;
- sensors and signal unit incorrectly attached to the body of the car.
The control unit is used to adjust the sensitivity of the sensors.
Starline A91 is one of the most popular car alarms in Russia. The great demand for it is supported by the combination of a large number of technical advantages with a reasonable price. One of these advantages is the Starline A91 two-level shock sensor, which is triggered if the car body collides with an external influence on it. The sensor is protected from false alarms by special protection that protects it, among other things, from the effects of electromagnetic interference.
Correctly adjusting the sensitivity of StarLine A91 helps reduce the number of erroneous reactions, which is done immediately after installing the alarm on the car. The StarLine anti-theft system is distinguished by the presence of wide functionality: special protection of the control panel; reduced sensitivity to radio wave interference; automatic engine start in different modes at a distance; effective sensitivity
Connecting the key fob
For the Starline A 91 alarm to work correctly, it is necessary to connect the key fob to the vehicle’s electronic security system.
Connection is made in the following sequence:
- To carry out the registration process, you need to find the “Valet” button (in the fuse box, under the steering wheel or glove compartment) and press it 7 times to activate the system with the engine off.
- Turn on the ignition. The siren should sound 7 times if all operations are completed correctly.
- To do this, we activate the key fob at the same time, press buttons 2 and 3, as a result of which one siren signal should sound, signaling that the key fob is connected.
- We connect the second key fob in the same sequence.
Basic alarm faults
Most often, motorists have to deal with malfunctions that arise during the operation of the Starline A 91 car alarm:
- When you press the key fob control buttons, the alarm does not go off (you need to replace the battery, replace the key fob).
- A false alarm occurs (the settings of the alarm sensitivity unit need to be calibrated).
- When you turn on the car door locking mode, a malfunction occurs (the reason may be a malfunction in the alarm system or the locking mechanism).
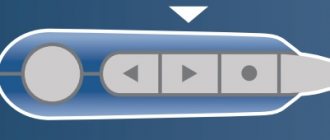
6. Purpose of the button on the antenna
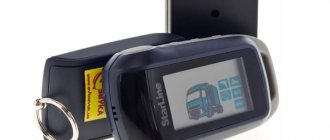
The Starline A93 antenna module, like other alarm systems of this brand, is equipped with one button that serves as a service button. With its help you can:
- enter your personal code;
- perform a hidden activation of the anti-robbery mode;
- write key fobs into the alarm memory;
- activate security mode without a key fob;
- enable automatic engine start based on voltage.
We also advise you to study in more detail the Starline A93 service mode, which is necessary when contacting service centers for repairs and maintenance.
Antenna Starline A93
Signal sensors
To accurately trigger the Starline A 91 alarm, it is necessary to fine-tune the trigger modes of the shock sensor in the event of an unauthorized attempt to gain access to the car by unauthorized persons.
Modern alarm systems are equipped with 3 types of sensors installed on cars:
- a shock sensor, which is triggered by vibration of the car body when a set threshold value is exceeded;
- movement sensor, gives a signal when there is an attempt to steal or evacuate a car;
- volume sensor, is triggered when an attempt is made to enter the vehicle interior.
Correct configuration of sensors ensures reliable vehicle security and eliminates false alarms.
Setting sensor sensitivity parameters
When adjusting the sensitivity of the shock sensor, it is necessary to determine exactly what is causing the false alarm.
The main factors may be:
- the alarm level is set to high;
- The alarm unit and sensor are installed in the wrong place or are poorly secured to the car body.
It is necessary that the shock sensor be attached directly to the car body, have a strong connection and be mounted in strictly recommended places.
To check and configure the functionality of the Starline A 91 system, you must perform the following operations:
- disconnect the car battery terminals or remove the fuse responsible for the interior lighting (this operation is necessary to prevent the battery from discharging);
- we find the installation location of the shock sensor (usually under the front panel, in the area of the pedals or steering column);
- To configure the sensor, disable the security mode, switch to programming mode and make the necessary changes. In previously produced Starline models, adjustment was made using a special screw, and in new models using buttons;
- The system sensitivity level corresponds to the setting scale and contains 10 sections, 0 – min level, 10 – max sensitivity value. The standard factory setting level is 4-5. It must be taken into account that most models have settings for 10 attempts, and for the further process it is necessary to repeat the arming operation;
- when setting up, it is also necessary to take into account the weight of the vehicle unloaded and fully loaded;
- When adjusting the sensitivity level, it is necessary to achieve a level where there are no false alarms.
It is also necessary after setting a new sensitivity level for 2-3 minutes.
wait and then check. This period of time allows you to stabilize the level of sensitivity of the Starline system. When checking the operation, it is necessary to strike all parts of the car (windows, hood, doors, trunk, wheels). After configuration, it is necessary to turn the security system on and off 4-5 times to confirm the stability of operation. When striking various parts of the car, the amplitude of the impacts is recorded by the microprocessor and these values are subsequently used as the threshold level for the system to operate.
How to set up an alarm?
Setting up the alarm comes down to setting the correct level of its sensitivity and perception of the sensors. It is recommended to stick to average settings, as choosing too high values leads to reactions for no reason.
Before you begin to eliminate the causes of spontaneous alarm activation, you should de-energize the battery to avoid a short circuit.
In budget-class security systems, in order to set up an alarm, you need:
- Set the sensor location. Very often it is mounted between the front seats, immediately behind the handbrake.
- Reduce sensitivity by rotating the special regulator on the sensor in its upper part. To set the correct values, you can hit the body several times with different forces to determine the level of its perception.
- If no changes occur, it is enough to reboot the sensor by turning it off and then on again. After such actions, it should resume correct operation.
More expensive alarms are configured through software on the central unit, into which the sensor is built. To set the sensitivity level, the instructions and the key fob are enough.
In most cases, you need to do the following:
- Disarm the alarm from the “Security” mode.
- Select the “Programming” mode on the key fob.
- Simultaneously press the “C” and “N” buttons on the key fob (the letters on the keys may be different depending on the model).
- Set the sensitivity halfway between complete deactivation and the maximum value.
Semi-automatic alarm settings allow you to select the optimal sensitivity level. The sensor is activated in learning mode, after which you need to hit the car with different strength and frequency. This information will be remembered by the computer and will be used in the future to recognize impacts.
To avoid incorrect operation of the alarm, you must adhere to the following recommendations:
How to increase the sensitivity of the starline alarm
- Correctly set the alarm sensitivity.
- Properly install the anti-theft system. To do this, the wiring is hidden in a corrugation, the contacts are covered with electrical tape, and the unit is installed in a dry and clean place. The optimal location is under the dashboard, closer to the passenger seat.
- It is good to fix the control unit.
- Select the appropriate type of security system software for a specific car model.
- Carefully monitor the condition of the vehicle's electrical wiring.
This video demonstrates how to adjust the sensitivity of the sensors with your own hands (the author of the video is logan34rus).