What I learned from replacing stabilizer bushings from Roman
What kind of stabilizer bushings are there for Lada VAZ in nature, how to replace them?
Greetings to all car enthusiasts, dear readers of the auto blog RtiIvaz.ru! Today we will look at stabilizer bushings for Lada VAZ cars and find out how the replacement takes place on a classic.
In the video photo I have prepared for viewing all the stabilizer bushings for VAZ cars that exist in nature and are known to us today. And Roman Romanov showed on video and gave useful tips on replacing the stabilizer bushings of the VAZ 2101-2107 “classic”.
The first replacement bushings that we are considering go to the family of front-wheel drive cars of the VAZ -2108, 09,099, 13, 14 and 15 VAZ models. On all of the listed models, a repair kit for replacement is installed on the stabilizer. The bushings of the VAZ 2108 and VAZ 2110 are no different in appearance except for the internal hole, which is associated with the diameter of the stabilizer. In the VAZ 2108, smaller means smaller hole diameter.
Front stabilizer bar cushions VAZ 2108, design number: 2108-2906040
Front stabilizer bar cushions VAZ 2110, design number: 2110-2906040
On classic VAZ 2101-07 models, a stabilizer repair kit consisting of four bushings is installed when replacing.
Front stabilizer rod cushions VAZ 2101, design number: 2101-2906040
For the Niva VAZ 2121 car, a replacement stabilizer kit also comes in the amount of four pieces. Two of the four are somewhat more powerful than on the classic VAZ 2101-07 models.
Front stabilizer rod cushions VAZ 2121, design numbers: 2121-2906040 (large); 2121-2906046 (small)
For replacement, the Chevrolet Niva VAZ 2123 also comes with its own stabilizer kit, only six pieces.
Front stabilizer rod cushions VAZ 2123, design numbers: 2123-2906046 (large); 2123-2906040 (small)
A separate replacement stabilizer kit is available for the Kalina VAZ 1118. They are also visually similar to the bushings on the VAZ 2110, but have an even larger internal diameter. In addition, unlike other front-wheel drive models, the VAZ-1118 already has four bushings installed, two of which are on the rear stabilizer of the car.
Front and rear stabilizer bar cushions for VAZ 1118, design numbers: 1118-2906040 (front); 1118-2916040 (rear)
Next, please see the photo plus video of front and rear stabilizer bushings for UAZ vehicles with carburetor and injection engines.
Carburetor UAZ: rear 3160-2906040 internal hole diameter 3.1 cm, front 3160-2906041 internal hole diameter 2.7 cm
Injection UAZ: rear 3160-2906040-10 internal hole diameter 3.1 cm, front 3160-2906041-10 internal hole diameter 3.1 cm
Next, please see the photo of the front stabilizer bushings in the amount of two pieces for the Gazelle and Sobol cars.
Gazelle (Sable): front 2217-2906040 internal hole diameter 2.0 cm
Typically, the stabilizer repair kit requires replacement when creaking or knocking noises appear, which will indicate their wear.
As a result, we have made a brief review of rubber elastic stabilizer supports for VAZ cars, which are found in nature.
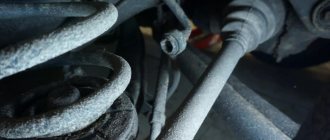
Structurally, the “Classics” stabilizer has four support attachment points. These are two mounting points on the lower suspension arms and two mounting points on the body side members. Most often, the outer support rubber bands located on the lower suspension arms, as they are the most loaded, fail.
The condition of the rubber is checked visually based on their integrity, and plus, worn “oak” tires produce an unpleasant squeak when driving, and a knocking sound may also occur when driving over obstacles.
In addition, this knocking often remains “unsolved” and the owners begin to change either ball joints or steering rods, but as a result the knocking remains. You can make sure that the knocking comes from the rubber supports, as Roman showed in the video. The master grabs the stabilizer with both hands and moves it in the bushing with all his might. With good serviceable tires, the stabilizer should remain motionless. The knock can come from both the outer bushings and the inner ones, so it’s better to check everything together.
Before performing work on replacing bushings, all fastening points must be generously “filled” with an anti-rust compound, such as, for example, VD-40.
Particular attention must be paid to the areas where the brackets are attached to the lower arms, since here problems can often arise when unscrewing the fastening nuts, even to the point of breaking the studs. This occurs because the studs are constantly exposed to moisture and dirt flying from the road surface.
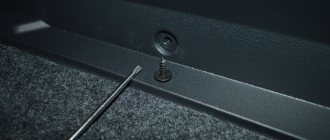
In this case, the video shows two fastening nuts on one stud. However, this is not a torn thread, but a kind of protection of the stud from flying dirt.
Having moistened all fastening points with the anti-rust compound, we give them time to “acidify” so that the composition begins to act - removing rust. If you do not pre-treat the connection, then, as mentioned above, the studs may break off. In such cases, you have to drill out the remaining studs and insert a bolt from the inside of the lever. Although this restores the connection, it weakens it, since the bolt will have some mobility. Therefore, connections always need to be pre-treated with some kind of anti-rust compound.
When replacing the outer mounting bushings, the stabilizer is not removed, and they are replaced in place.
So, friends, let's move on. After waiting for the connection to get wet, we begin to unscrew the nuts securing the bracket. If any of the nuts does not move evenly, but as if begins to “bite”, you should not use all the force, but it is better to moisten it again with WD 40. You need to unscrew such nuts back and forth (two steps back and one forward), gradually twisting it from a stiletto heel. Such nuts are always discarded and new nuts are installed.
It’s worth making a small digression right away. The left and right brackets are not interchangeable, as they have different configurations. After removal, the brackets must be marked with something so as not to be confused when reinstalling the stabilizer. It is convenient to do this using a core, making light blows, say two points on the right and three on the left, also marking the top of the bracket.
When working, it is better not to use sockets with a ratchet, since you need to see the movement of the nut itself along the stud. Engraving washers are installed under the nuts and sometimes they are pressed against the body of the bracket; in this case, you need to use a screwdriver.
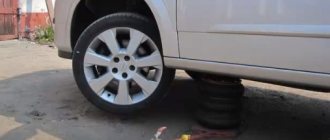
Auto advice. When replacing the outer rubber bands, both sides of the car must be in the same plane. If one side is jacked up and the other is not, then when removing one of the brackets the stabilizer may “shoot” and cause injury.
Having released both nuts securing the bracket and removing the engraver using a screwdriver, we pry it up and remove it. Next, using a mounting tool, inserting it between the lever and the stabilizer, we move it away from the lever, then remove the old bushing. Before installing a new bushing, you need to carefully inspect its seat itself. If the stabilizer is old or the bushings have not been changed for a long time, then there will be metal wear in this place. It is best to replace a worn stabilizer, since it will no longer work effectively, and plus the new rubber bushings will quickly wear out after replacement.
avtoexperts.ru
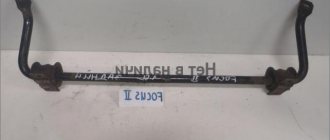
Before dealing with the topic of what a stabilizer bushing is, it wouldn’t hurt to refresh your memory about the stabilizers themselves, what are they for? The main task of this part is to keep the car as parallel to the road as possible. Despite various risks, for example, turns, braking, which cause both lateral and longitudinal rolls. The stabilizer must cope with them.
Structurally, the stabilizer is a conventional rod, the task of which is to connect the subframe with the wheel mount. When it comes to the front suspension, it makes more sense to say that the attachment occurs with the suspension arm, since MacPherson struts are often installed at the front.
At the slightest roll, the ends of the stabilizers begin to move, thereby reducing the roll. The movement occurs along the bushings, which will be discussed. The purpose of the latter is to allow the stabilizer to twist in different directions. That is why they secure it with bushings. Over time, the bushings wear out, causing play to occur, which will lead to improper operation of the entire mechanism. The so-called “freedom of the part” increases, then, by and large, the presence of a stabilizer plays no role. Because, similarly to its absence, roll increases due to large strokes and rotation, controllability is lost and this is felt mostly in turns.
There are several types of bushings:
• Polyurethane. Similar to the previous ones, except for the production material.
Recently, motorists have given preference to polyurethane bushings due to their high performance characteristics. As a rule, they “walk” longer. But this is also individual, depending on how you drive.
Also, you should not lose sight of the nuance that almost every model has its own size and configuration of bushings, which is why special attention needs to be paid to the selection and selection for a specific model. This issue is most acute for foreign cars.
What resource?
This question is quite individual; as such, no manufacturer can give exact “mileages”. It all depends on the specific operating conditions; keep in mind that bad roads, driving style, all of this affects the “life” of the bushing, and the stabilizer mechanism as a whole.
By the way, bushings are considered the most problematic area in the suspension on the Lada Vesta. A creaking noise begins almost immediately from the factory, and a knocking sound is often added to it while driving over bumps. The problem is that they use low-quality material for manufacturing, which is why the resource of the original bushings on Vesta is very small. It’s all very simple to treat; you need to select analogues from other models. For example, it is known that bushings from Toyota Corollas, Avensis and KIA Rio fit perfectly and do not cause problems for West owners.
Judging by the reviews of drivers, bushings from German brands, which are often installed on “Germans” from the factory, performed well. For example, original parts can often last more than 150,000 km. At the same time, when it comes to analogues from China, the resource is reduced several times.
In general, it is generally accepted among motorists that the average “mileage” for a rubber bushing is 70,000 km; more advanced polyurethane bushings “run” 100,000 km. Some manufacturers even recommend carrying out a scheduled replacement after 30,000 km in order to avoid “surprises”. But, as already mentioned, everything is individual, you need to take into account all the operating features.
It is also worth clarifying this nuance; the life of the bushings is greatly influenced by the state of the thrust (stab) itself . For example, if there is a hole in the place where the bushing is attached, then the part will definitely not last the stated period and will not fully cope with the task. As a rule, after replacing the original bushings, owners observe a small amount of metal wear, somewhere around 1.5 mm. With each replacement of the bushings, the output will only increase, so in case of severe wear, it is wiser to replace the entire part so that, in general, the operation of this mechanism will be useful.
Signs of trouble
The following signs may indicate that something is wrong with the suspension. And one of the places that is worth checking is the stabilizer. So:
• There is a slight play when turning the steering wheel.
• The car began to “yaw” when moving.
• When turning, distinct clicks are heard from the wheels.
• The car drives in one direction.
How to replace?
The issue of replacement for some cars is purely individual, because depending on the model, the fastenings may differ. For example, to replace the bushings on the Mazda 6 and 5 at the front, you will also have to remove the steering rods to get to the brackets securing the rod itself. But, in general, you can draw up a small work plan. So:
Replacing anti-roll bar bushings
If the transverse stabilizer bushings in the suspension fail, this can hardly be called a critical failure requiring immediate repair. Because of this breakdown, the car will not lose control and its wheels will not fall off. But in order to drive a car with broken bushings, the driver will need very strong nerves. Because knocking and grinding noise caused by worn bushings will be heard in any cabin. In this article, we will tell the reader how to replace roll bar bushings in passenger cars, both domestic and foreign, with your own hands.
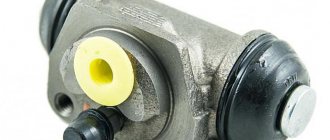
The following types of bushings exist:
1. Spherical (or “iron”) bushing. The design resembles a ball joint;
2. Rubber bushing.
Today, polyurethane type stabilizer bushings are becoming increasingly popular. They are quite easy to replace, which is an important advantage, and they also have good operating characteristics. Experienced drivers can safely say that these are the parts that are most convenient.
If a malfunction occurs in the stabilizer bushing area, it must be replaced without fail. Otherwise, this can have a very bad effect on the performance and handling of the vehicle. When the bushing is deformed or cracks appear on it, some noise may appear in the area of the car suspension (mainly when the car hits an obstacle or increases speed). In principle, problems in the suspension area are identified precisely by such noise.
In order to make sure that it is necessary to replace the bushings, periodically it is necessary to carry out diagnostics of the suspension, after which the malfunction will be identified or prevented.
In the event that it is determined that it is necessary to replace the stabilizer bushing, this can be done independently. Moreover, there is nothing complicated about it and the procedure is very simple. First, the bolts with which the clamp is attached are unscrewed. Then the stabilizer is moved to the side and the old parts are removed. Well, for the final action, the new part is installed very carefully.
It is according to this scheme that both the front stabilizer and the rear stabilizer are replaced. After replacing spare parts, driving a car will be much more pleasant and comfortable, and various kinds of road obstacles will be overcome without any difficulties. Among other things, the new elements will maximize the performance of the racks.
Source
Functions of anti-roll bar bushings
In most modern cars, an anti-roll bar is a mandatory element of the suspension. When a car turns, its roll increases and it can tip over due to centrifugal force. When the car comes out of a turn, its body begins to sway, which makes it difficult to align its trajectory. As a result, anti-roll bars appeared in car suspensions to prevent unwanted swaying. The stabilizer is attached to the suspension with steel brackets, under which there are elastic bushings made of polyurethane (or especially dense rubber). Their purpose is to dampen suspension vibration and guide the stabilizer bar when entering a turn and when driving on uneven roads .
Stabilizer design features
In the field of mechanical engineering, the stabilizer appeared along with the first cars whose maximum speed exceeded 20 km/h. Due to the large rolls that occur when turning, there was a need to install this component. The main purpose of the stabilizer is to protect the vehicle from rollover, since during a turn the load on the outer wheels increases, and on the inside, on the contrary, decreases. This causes the car to rock. The stabilizer makes it more stable on the road, preventing it from turning over.
On a note! All car suspensions are equipped with a stabilizer, not only in the front, but also in the rear. A stabilizer is not needed only if a torsion beam is installed at the rear of the car: the functions of the stabilizer will be assigned to the suspension itself. The design of the stabilizer of many cars is a U-shaped metal rod made of spring steel. To secure the device to the body, special clamps and bushings are used to allow the stabilizer to rotate. To make the car more stable and increase the elasticity of the stabilizer, bushings are used - all impacts from various suspension elements fall on them.
Causes of failure
- Physical deterioration. Most cars (especially domestic ones) are initially equipped with rubber transverse bushings, the service life of which is short. After only 2–3 years, they completely exhaust their service life, become covered with cracks and fall apart (this is why prudent car owners immediately after purchase change rubber bushings to polyurethane ones).
- Chemical exposure. Since the bushings are located close to the wheels, they are regularly exposed to deicing chemicals, which significantly reduces the life of the rubber bushings.
- Mechanical impact. If the car is constantly used on roads whose quality leaves much to be desired, even reliable polyurethane bushings will not last long (since in such conditions they are subject to increased frictional force and are constantly exposed to strong impacts).
Replacement sequence for VAZ 2107
- The car is installed on the inspection hole, after which the crankcase protection (if installed) is removed using open-end wrenches. Then wheel chocks are placed under the rear wheels of the car, and the front wheels are jacked up.
- Now, using a 12-mm open-end wrench, unscrew the nuts on the brackets, where they are attached to the lower suspension arm. This is done on both sides of the stabilizer bar. Under the nuts there are engraving washers. They are removed manually.
Nuts are shown by arrows - Now you can remove the staples. After removing them, you can remove the bushings. To remove them, the stabilizer bar is bent using a crowbar. The rod is held with a crowbar, the bushing is removed manually. The sleeve on the other side is removed in the same way.
A crowbar is used for this - In addition to the two outer bushings, the VAZ 2107 has a pair of central stabilizer bushings. If you need to replace them, you will have to completely remove the stabilizer bar, which is mounted on two brackets. The nuts on the brackets are unscrewed with a 14mm open-end wrench.
- After removing the rod, the bracket is clamped in a vice, and the rod is carefully removed from the bushing, then the central bushing itself is removed.
The bushing is located inside the bracket, clamped in a vice - Worn bushings are replaced with new ones, after which the stabilizer bar and crankcase protection are installed in their original places.
Videos on works
Important points
- When unscrewing the nuts on the brackets, you should be careful: the studs on which the brackets are attached become brittle over time and are easily broken with an open-end wrench.
- It should be remembered: the brackets holding the outer bushings are different, although it is not always possible to see this with the naked eye. The distance between the holes for the studs in the left and right brackets differs by 3 mm. Therefore, before removing it, it makes sense to mark the staples with a marker or chalk so as not to confuse them when reassembling them.
- Removing the stabilizer bar from the bracket can be difficult, especially if it is heavily rusted. To make the task easier, the rod and bracket should be generously lubricated with WD-40. If liquid is not available, liquid dishwashing detergent or plain soapy water will do.
Replacement of rear transverse stabilizer bushings for different types of suspensions
VAZs traditionally have an independent design, which is based on cylindrical coil springs. The beam is “suspended” on springs and attached to the body by 4 longitudinal arms. The reaction bar “absorbs” roll, improving the car’s handling. Its disadvantage is that it does not have a smooth ride.
The semi-dependent option is found on all-wheel drive vehicles. It weighs less and does not require special maintenance. Unfortunately, this cannot be used on rear-wheel drive cars.
Sequence of replacing bushings on Mitsubishi Pajero 4
- Using a 12-mm open-end wrench, unscrew the 4 bolts that hold the car’s crankcase protection.
To do this, unscrew 4 bolts - This allows access to the bolts on the stabilizer bar mounting brackets.
There are bushings underneath - These brackets are easily unscrewed with a ratchet socket.
Removed with a socket head - After the brackets are removed, the stabilizer bar is moved down and the bushings are accessible.
Removable to provide access to bushings - Worn bushings are removed and replaced with new ones, after which they are reassembled.
Installed in place of a worn one
If you compare the design of anti-roll bars on domestic cars and foreign cars, you will notice that on our cars it is a little more difficult to get to the stabilizer bushings. If on a Mitsubishi Pajero 4 to replace the bushings it is enough to unscrew a few bolts, and this can be done in any garage, then in the case of the “seven” you will need a crowbar and an inspection hole. However, with due patience, the breakdown can be repaired on your own.
Replacing stabilizer rubber bands
- Replacing stabilizer rubber bands
- 1. Where are the rubber bands or stabilizer bushings located?
- 2. What is needed to replace worn car stabilizer bushings?
- 3. How to change stabilizer rubber bands with your own hands?
For the connection and normal operation of various automotive mechanisms, a large number of different bushings and rubber gaskets are installed on them. However, these elements have a very short service life, since under conditions of intensive use they wear out very quickly and backlashes form in them. As a result, the operation of the car becomes unsafe; after wear of the bushings, very serious damage can occur. All this applies to the rubber bushings that are installed on the stabilizer. Therefore, if during operation of the car you hear an elastic knock in the front part of it, you should know that you are in danger of replacing the stabilizer rubber bands. How to do this - read our article.
- 1. Where are the rubber bands or stabilizer bushings located?
- 2. What is needed to replace worn car stabilizer bushings?
- 3. How to change stabilizer rubber bands with your own hands?
Where are the rubber bands or stabilizer bushings located?
If the stabilizer rubber bands are worn out and play has formed in them, you will be notified of this by a clearly defined sound that appears during operation of the car engine (or, more precisely, with each revolution of the starter).
It is especially noticeable when the car drives one wheel onto a small hill or accidentally falls into a hole. Then the driver can hear a very strong sound from the contact of metal parts, between which there is no rubber gasket. A typical car stabilizer has four rubber bushings. Finding them on this mechanism is not difficult. Two of them can be found and removed very easily: they are located under the mounting brackets, which form something like a cover or “house” for them. Two more are worth looking for in metal holders.
As a result of wear of the rubber bushings, the stabilizer parts are able to move almost freely. If the body bends a little while driving and there is a lateral displacement, the stabilizer begins to knock. In this case, you will most likely have to replace the easily removable bushings, which are located under the cover of the mounting brackets. These rubber bands most often wear out, which is why there is a need to replace them.
What is needed to replace worn car stabilizer bushings?
You will need very few tools to carry out such work, but you need to prepare them in advance so that they are all at hand during the work. So, you will need:
1. Socket wrench (10 and 13).
2. Socket heads (useful for 13 and 14, but it is best if the 13 head is elongated).
5. Vernier calipers (you can use a regular ruler instead).
But it’s worth noting right away that not in all cases it is possible to get by with only such a simple set of tools. The fact is that in the process of replacing the rubber bushings you will definitely have to unscrew the fixing nuts of the stabilizer struts. Here you may encounter one very unpleasant discovery: the nuts are stuck to the body of the part and cannot be removed with a regular wrench. In such a situation, it may come to the point that you have to use a grinder or a hacksaw. After this, along with replacing the stabilizer rubber bands, you will also need new struts for this part.
And more about why you need a jack. With its help, you will need to lift the car to remove the wheels from it and gain free access to the stabilizer and its bushings. It may also be needed if, during work, the stabilizer bar suddenly moves to the side, and you are unable to return it to the desired position using a crowbar. In such a situation, using a jack, you will only need to lift the rear of the car, after which the bar should fall into place.
Stabilizer bushings - step-by-step replacement instructions
You can determine whether it is necessary to replace the stabilizer bushings by the knocking or creaking noises that appear in the suspension when braking and driving over potholes.
And given that there are sometimes more potholes on our roads than asphalt pavement, the replacement process must be carried out regularly. The bushings themselves are not very expensive, their timely replacement will save the stabilizer struts from rapid wear, and the car owner from unnecessary expenses associated with their replacement. The replacement process is quite simple and you can easily do it yourself using the instructions provided.
Need for replacement
Stabilizer bushings are among the parts that are subject to the greatest dynamic loads. They require regular replacement, depending on the maintenance regulations adopted by various car manufacturers and models. The maximum mileage before replacing the rear and front bushings is usually from 15,000 to 30,000 km. Considering the state of our roads, it is recommended to replace them based on wear and tear.
Untimely replacement can lead to the formation of a roll in the car's stabilizer, and this, in turn, increases the risk of the car tipping over at speed. The complete set must be replaced, regardless of the difference in external signs of wear. The cost of such a repair service at a service station is often overpriced, given the ease of replacement for most car models, so it is advisable to replace the front and rear bushings yourself.
Diagnostics
Knocking of the stabilizers is a guaranteed sign of the need to immediately replace the bushings. In addition, squeaks may appear, especially when it gets colder, when the rubber loses its elasticity.
To determine the need for replacement, it may be necessary to remove the crankcase protection. To check the source of vibration, place your hands on the stabilizer link and directly on the mounting bracket. The partner must press firmly on the hood of the car several times. If vibrations are felt on the brackets, which are transmitted to the rack, it is necessary to install a new set, even if no play was noticed when inspecting the seats on the stabilizer.
If the hole inside the bushing has taken the shape of an ellipse, cracks are visible on the surface, and the material has hardened, immediate replacement is necessary. Continued operation of the vehicle will significantly reduce the service life of the stabilizer struts.
Replacing bushings and anti-roll bar on VAZ 2101-VAZ 2107
Welcome! Anti-roll bar - designed to dampen vibrations; it is installed in many cars, such as the VAZ 2110, Priors, etc. this is no exception, its operating principle is as follows: when a car enters a turn, the stabilizer works to twist and thanks to this, it tries to return the car to its original position as quickly as possible, thanks to this the car does not tip over on its side and thereby stands more stable on the road, than without a stabilizer, there are two of them in the car, one stabilizer is in the front suspension (Which we are disassembling), and the second is in the rear (Transverse rod). If you want to know how to replace the rear stabilizer on a classic car, then in this case go to article: “Replacing jet rods on cars,” in which everything is described in detail, in paragraph 3.
Note! To replace the stabilizer in the front part, you will need to remove the wheels, hang out the entire front part (Because if you lift only one side and start to unscrew the stabilizer, it will be twisted and can shoot, thereby damaging you, so make sure that the front part the car was as level as possible when replacing the stabilizer) well, unscrew the nuts that secure the stabilizer, by the way, you will still have to remove the protection at the bottom, take this into account too and immediately think about how you will need the tools to carry out the replacement!
Stabilizer bushings. Signs of malfunction. Consequences.
For the best damping of vibration and force impacts on the car body, the vast majority of suspension elements are connected by means of elastic elements. The same applies to the stabilizer. To secure it, special bushings (rubber bands, cushions) made of durable rubber or polyurethane are used. Over time, as the vehicle is used, these bushings may begin to deteriorate and noticeably lose their elasticity. The result of this is unsatisfactory operation of the stabilizer =. More serious defects may begin to appear, which will only grow faster over time.
Diagram of the stabilizer device and its fastening elements
The first symptom indicating replacement of the bushings will be a slight knocking sound from the suspension. A similar knock can be observed with “tired” shock absorbers. Only in the case of bushings it will be heard not only on potholes and potholes, but also when entering relatively sharp turns. At the same time, the car often feels excessively rolly and sluggish. The knocking sound that appears will be a consequence of play that has arisen in the connecting nodes of the stabilizer arms due to worn bushings.
If measures are not taken in time, the knocking will only intensify in the future and will begin to accompany the operation of the suspension everywhere due to increasing deformation and destruction of the bushings. Body roll and excessive play in the steering wheel may occur. The car may “yaw” not only when turning, but also when braking or changing lanes. Most car manufacturers recommend changing stabilizer bushings every 30–40 thousand mileage. However, in our conditions it is better to focus on bushing wear. Therefore, a sudden knocking sound and slight rattling in corners will be clear signs of an impending component replacement.
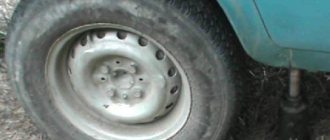
As a popular method of checking the bushings for serviceability, it is proposed to drive the speed bump diagonally in 2nd gear. A dull knock appeared in the area of the pedals - most likely due to the hub bushings. You can also just crawl under the car and inspect everything yourself. A worn bushing will be pleased with the presence of cracks and abrasions characteristic of worn and cracked rubber. Auto mechanics sometimes also call these cracks “daisies.”
Stabilizer bushing and bracket for its fastening
Also, the rubber of the bushings can simply harden and lose the necessary elasticity. If you can’t get a good look at the stabilizer bushings, just swing your hand strongly up and down and to the sides on the stabilizer itself. If you feel play, creaks and knocks in the lower part of the suspension, it means that the bushings have become unusable.
But for the best results, it is, of course, better to drive onto an overpass, an inspection hole, or use a lift. The only tools you will need are a crowbar or a mounting spade, which you simply need to rest against the bottom of the car and slightly “shake” the stabilizer where it connects to the body. If you feel noticeable play or loss of elasticity, then it’s time to think about replacing the bushings.