How to choose a multimeter?
There is a wide range of multimeters on the market today, from simple chopper meters and tachometers to multifunction devices with ten different scales or digital displays. The picture shows: A Sparktune: shutter speed meter, voltmeter, ammeter. B Autoranger: shutter speed meter, voltmeter, ohmmeter, ammeter, tachometer. B Testune: shutter speed meter, voltmeter, ohmmeter, ammeter, tachometer. D Hawk: shutter speed meter, tachometer. E Avometer 2003: voltmeter, ammeter, ohmmeter. F CAB-100: battery tester.
One way to check the condition of electrical circuits is to connect a simple test lamp in the area between the current-carrying wires and ground. However, this method allows you to establish only the fact that current is supplied to a certain point in the area.
For a more accurate test, meters are used to determine the voltage supplied to an electrical system component and the resistance of that component or the circuit as a whole.
Multimeters
In stores that sell automotive accessories, you can purchase measuring instruments designed specifically for cars. The most useful devices are multimeters, which, as their name suggests, measure various characteristics of the electrical system.
Cars use direct current, and using a multimeter you can measure its strength, as well as the voltage and resistance at a specified point. Some multimeters also take readings of motor speed and contact dwell time.
Before each measurement, it is necessary to reset the previous readings, especially if you plan to work with small quantities (for example, resistance).
Do not use measuring instruments with moving needles to check electrical system components. Otherwise, you may over-stress and damage them. Use digital meters.
Types of Multimeters
Before choosing a digital multimeter for your home, let's look at the possible types. The modern market offers two types of testers: analog and electronic. Analog instruments display measurement values on a graphic scale with divisions and an arrow that moves along the same divisions. The scale contains graduations that determine one or another measurement indicator.
The main disadvantage of analog testers is their insufficiently accurate measurements. As a rule, even the highest quality devices of this type provide distorted indicators. The device is useful only if the master needs only indicators of general value. Globally, analog devices are used extremely rarely, and exclusively for home use.
If you are puzzled about which multimeter you need, trust the experience of professionals; experts recommend sticking with electronic devices. Such devices are equipped with a digital display, the measured indicators are quite accurate and well perceived by the user, moreover, most electronic devices are distinguished by wide functionality, and some even have IP 67 protection.
How to use a multimeter
Check the resistance of the high voltage wire by setting the multimeter to ohmmeter mode and taking readings at both ends of the wire.
A multimeter can be used to measure voltage, current, and resistance. Some similar devices also measure contact delay and motor speed. To obtain reliable results, the sensors must be connected correctly.
To measure the voltage on the battery, connect a sensor between the pins. To measure the resistance of a high voltage wire, connect sensors to both ends of the wire.
Switch the multimeter to ammeter mode and connect it to the shunt to measure the amount of current produced by the generator.
To measure voltage, you need to switch the multimeter to voltmeter mode and connect one sensor to the circuit and ground the second.
To measure the current produced by a generator or dynamo, connect a multimeter across a shunt. Measure the voltage of a coil or other circuit element by connecting one probe to it and the other to ground.
Instructions for use
Now I’ll tell you in a little more detail about how to use a digital multimeter with your own hands to make different measurements of parameters.
In our material we will consider the measurement:
To make everything more clear, I will tell you about each procedure separately. If you have anything to add to this instruction, be sure to write in the comments.
Voltage
Measuring the voltage yourself is not difficult. But detailed instructions for such a case will definitely not hurt.
The sequence of your actions will be like this:
- Move the switch to the appropriate position;
- In a network where there is alternating voltage, the arrow should be located in the ACV zone;
- The MTM probes go into the COM and VΩmA sockets;
- Now set the appropriate approximate range;
- When in doubt, convert to the maximum value;
- When a number appears on the display, you can adjust the position;
- If it is a constant voltage network, MTM applies in the same way;
- But in the second case, it is better to set the switch to the 20 V position;
- The probes should be connected to the circuits strictly in parallel.
Reading the readings
To measure voltage, you need to switch the multimeter to voltmeter mode and connect one sensor to the circuit and ground the second.
When using a multimeter, you must correctly connect its contacts to the system components. The connection method depends on the polarity of the vehicle. In a car with negative grounding, it is necessary to connect the contact marked (-) to the body, and in a car with positive grounding, the contact marked (+) must be connected to the body. Refer to the instruction manual to check polarity.
Make sure that the contacts are securely fastened, and if necessary, clean them of rust and paint so that the readings are accurate. Sandpaper works well for cleaning.
Working in the engine compartment, attach the sensor to the ground clamp on the battery
Which multimeter is better for an ordinary car enthusiast to choose for a car?
p, blockquote 36,0,0,0,0 —>
In principle, when choosing a multimeter for automotive use, it does not matter whether the car or a regular model of the device will be located in the trunk. If a multimeter is purchased for garage storage and use, then you can choose a car model.
p, blockquote 37,0,0,0,0 —>
The main thing is that you should always have a multimeter in your car!
It doesn't matter which one. In emergency situations of electrical equipment failure on the road or in a parking lot, it is usually necessary and sufficient for the multimeter to produce:
p, blockquote 39,0,0,0,0 —>
- measuring the voltage of the on-board network and battery;
- monitoring the battery charge from the generator;
- made a “test” of fuses, light bulbs and electrical wiring;
- leakage current measurement;
- monitoring sensor parameters, primarily resistance and voltage on the sensors.
The following additional consumer characteristics are desirable: backlighting of the digital indicator, shock-resistant housing. A simple multimeter costing up to 1000 rubles, for example MAS830L, can satisfy these parameters.
p, blockquote 40,0,0,0,0 —>
The designations of modes on most devices are standardized, therefore, having learned to work on one multimeter, you can confidently switch to using another. The “lifetime” of a multimeter in the practice of an auto electrician is a maximum of six months, in a car enthusiast – a couple of years.
p, blockquote 41,0,0,0,0 —>
The first thing to fail is the probes. This usually happens in winter: poor-quality insulation cracks in cold weather, wires break, and probes have to be replaced. Then, usually due to inattention, the 10 Ampere current measurement mode fails. After this, the dialing mode, resistance measurements and ... then it’s better to buy a new one. Therefore, it makes no sense to buy an expensive multimeter.
p, blockquote 42,0,0,0,0 —>
Battery check
Before checking other components, it is recommended to check the battery itself to ensure its functionality.
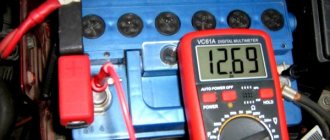
Set the multimeter to the appropriate settings and connect it to the battery terminals. The measurement result should be approximately 11-12V (at low and high charge levels, respectively).
If, according to the multimeter, the voltage is 10V or less, it can be assumed that there is damage in one of the battery cells. Connect the ground contact to the car body and take readings again. They should not differ from the results of the previous measurement. If this is not the case, check the tightness of the contacts.
Connect one multimeter probe to ground and the other to the starter solenoid. Take readings again. If readings are low, check the connection between the battery terminal and the starter solenoid.
If during measurement the readings on the contacts are too low, they must be secured before checking other components of the circuit. Clean problem areas from dirt and rust and re-measure. When the results of all measurements are approximately equal, they can be used for comparison when inspecting other components of the circuit.
Checking devices
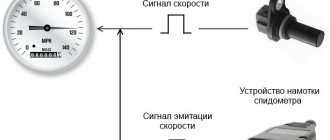
Checking the tachometer
To test a new tachometer, you need to connect the multimeter to the terminal on the back of the device and ground. When current is applied to the device, the multimeter will record readings. This technique can be used for any device.
Many devices operate on current that passes through a voltage stabilizer. If several instruments display incorrect readings at once, the stabilizer may be faulty. To check, you need to connect a multimeter to the output connector and turn on the ignition.
Stabilizer check
In modern cars, some devices are powered by a voltage stabilizer. If the stabilizer breaks, the instrument readings are distorted. Before checking each device, you need to check the stabilizer itself by connecting a multimeter to its output connector and ground.
The multimeter should show approximately 10V, small deviations are due to the action of the rheostat. A strong deviation indicates that the multimeter needs to be replaced.
Some tips
Below we will tell you a few nuances that will make your life much easier when working with the device:
- Most Chinese testers have very flimsy and fragile probes. They can be strengthened by putting a cambric on the place where the cable comes out of the holder tube.
- Always remember to measure from high to low. If you nevertheless forgot about this rule and the device fails, do not rush to get upset. It has a fuse - perhaps it managed to save the board and blew itself. Replace it with a new one. Do not use homemade fuses or wires - they will not save the unit next time.
- Do not forget that the device is battery-powered and needs to be changed periodically. If the word Bat appears on the screen, it will go away soon.
- The switch can be rotated in any direction, but only if the probes are not connected to a voltage source. You cannot plug them into an outlet and turn the handle in both directions.
- When measuring voltage, you do not need to catch phase and zero - you can connect probes to any contacts. If the polarity is incorrect, the device will simply display the value with a minus sign.
To make it easier for you to master the device, watch the video on how to use a multimeter for dummies. This review will be understandable even for beginners.
Checking the fuel level sensor
Disconnect the wiring from the sensor terminal and connect a multimeter between the non-working terminal and the ground point. Indications may vary depending on the position of the float. If readings cannot be taken, the sensor must be repaired or replaced.
The fuel tank sensor has a variable resistance resistor, the serviceability of which can be checked using a multimeter.
Disconnect the wiring from the sensor and connect a multimeter between the non-working terminal and the ground point. If the sensor is working properly, the multimeter should show a certain value. To carry out a full check, it is necessary to take readings with a full, half-empty and empty tank.
The readings should be in a logical sequence with approximately equal intervals. If the values are equal, most likely the sensor has shorted and is giving incorrect readings.
How to test a car battery with a multimeter
Testing a car battery with a multimeter involves connecting two probes at once. Also turn off the engine before taking measurements.
Place the red probe against the “positive” terminal, the black one against the “negative” terminal. If you mix it up, it’s okay, the device will show the current numbers, just with a minus sign.
Look at the device screen. The normal battery charge ranges from 12.6 to 12.9 volts.
The operation of the battery can also be checked with the engine running. When checking the car battery with a multimeter, you will also find out how the battery works in conjunction with the generator, as well as whether the voltage regulator is working properly.
Normal numbers with the engine running are 13-14 volts. If the multimeter shows less, the battery needs to be charged, or there is a current leak.
Remember: a multimeter will show the battery charge, but will not tell you everything about its operation. There are other devices for this. For example, a load fork.
How to check car sensors with a multimeter
The reason for the “death” of the battery, voltage surges, and unnecessary values on the instrument panel can be various sensors in the car. According to the experience of motorists, 5 types of sensors most often cause problems:
You can understand where they are located from the instructions for the car, on car enthusiast websites, and various forums.
To check your car's sensors with a multimeter, you will also need information about the normal voltage readings specifically for your car. It can also be found in the instructions or on the Internet.
Ignition check
When testing a low voltage circuit, it is necessary to close it by closing the breaker contacts.
If an additional resistor is used in the coil, its action will cause the voltage at the input terminal to be lower (about 6-8V). To check the ignition voltage, connect a multimeter to the coil and ground. Turn the starter on and off briefly to bypass the additional resistor. The multimeter should show about 12V. Disconnect the multimeter from the coil.
If the value does not change, the fault lies in the low voltage circuit itself or the solenoid terminals.
Test these components by measuring the voltage drop across them. Connect the sensor between the terminals on the coil and to ground.
Close the contacts and switch the multimeter to low voltage mode. It should show 0-0.5V. If the reading is greater than 0.5V, the terminals on the coil are not working properly.
Switch the multimeter to high voltage mode and open the contacts. The readings at the input and output must match.
Zero voltage may indicate a distributor failure. In order to verify this, you need to turn off the distributor. If the voltage does not appear after turning off the distributor, most likely the fault lies in the coil itself.
How to use a multimeter in a car in different modes
p, blockquote 43,0,0,0,0 —>
Let's look at the MAS830L as an example.
p, blockquote 44,0,0,0,0 —>
p, blockquote 45,0,0,0,0 —>
How to check voltage
To control the voltage on the battery, you need to connect the red (positive) probe to socket 6, the black (negative) probe to socket 5. Next, the mode switch is set to zone 1 for measuring direct voltages to a limit of 20 Volts (20V). The voltage of a normally charged battery is from 12.4 to 12.8 volts. With the engine running, the voltage at the battery terminals should increase to 13.5 - 14.5 Volts. This indicates that the car's generator is working.
p, blockquote 46,0,0,0,0 —>
How to measure current
Most often, this mode is used to measure leakage currents in the battery circuit.
p, blockquote 47,0,0,0,0 —>
Current measurement is carried out in an open circuit.
p, blockquote 48,0,0,0,0 —>
To measure the leakage current, you need to disconnect the positive terminal of the battery, then switch the mode to the 10A position (on mode 8). Connect the positive probe to socket 4, the negative probe to socket 5. Connect the red (positive) probe to the “+” terminal of the battery, the black (negative) probe to the disconnected positive terminal.
p, blockquote 49,0,0,0,0 —>
Be careful - the positive terminal should not touch metal elements of the body and engine.
The multimeter display will indicate the leakage current. A leakage current of up to 0.2 Amperes is considered normal. For more accurate measurements, you can switch to a lower measurement limit. In this case, switch the red probe to slot 6.
p, blockquote 51,0,0,1,0 —> adsp-pro-3 —>
Video - how to measure battery current leakage with a multimeter:
p, blockquote 52,0,0,0,0 —>
p, blockquote 53,0,0,0,0 —>
Resistance measurement
To check the serviceability of the light bulb, set the mode switch in resistance measurement zone 2 to a limit of 200 Ohms. Connect the probes to the light bulb. The indicator shows the lamp resistance value.
p, blockquote 54,0,0,0,0 —>
If the indicator displays 1 in uppercase, it means the light bulb is faulty or has a resistance greater than 200 Ohms.
p, blockquote 55,0,0,0,0 —>
p, blockquote 56,0,0,0,0 —>
The resistance of the sensors is measured in a similar way.
p, blockquote 57,0,0,0,0 —>
"Continuity" of fuses and circuits
The mode switch is set to position 7. The probes are connected to the fuse terminals. If it is working properly, a buzzer will sound. The wires are connected in the same way. The probes should be connected to the stripped areas at the beginning and end of the wire.
p, blockquote 58,0,0,0,0 —>
Diode check
Required when checking the generator diode bridge. The switch is set to position 3, the probes are directed to the diode being tested. In one connection of the probes, the resistance should be infinite (as in the previous figure - the indicator will display 1), in the other (direct) - from 500 to 700 Ohms.
p, blockquote 59,0,0,0,0 —>
This multimeter also has a mode for measuring the gain of bipolar transistors, but it is not used in car enthusiast practice.
p, blockquote 60,0,0,0,0 —>
Checking high voltage wires
To check high voltage wires, you need to switch the multimeter to ohmmeter mode. If the car operates with intermittent ignition, it can be assumed that one of these wires is faulty.
Determine the type of wires. Carbon alloy wires have a resistance of 10,000-25,000 ohms. Copper-plated wires have low resistance, but are equipped with radio suppression plugs with a resistance of 10,000 Ohms.
Disconnect the spark plug wires, remove the distributor caps, and measure the core resistance at both ends. Make sure the readings are correct.
To check the insulation, measure the resistance of the core and the surrounding plastic. If the wire is in good condition, the readings should be the same.
Checking the charging system
Start the engine, wait until it reaches normal temperature, and then turn it off.
Switch the multimeter to the desired mode (0-20V) and connect it to the battery terminals. Start the engine and take readings, then gradually increase the speed to 2000 rpm, paying attention to the multimeter display.
If the system is working correctly, the voltage will initially rise as the motor speed increases and then stop.
The maximum reading is 13.5-14.5V (depending on the car model). If the voltage does not increase, there may be a problem with the charging system.
autovazremont › Blog › Car multimeter DT-832. How to use?
Recently, inexpensive compact digital multimeters have replaced the warning light to help motorists.
So, what is a multimeter? A multimeter is a multifunctional (from the word “multi”), universal device that combines the functions of a voltmeter, ammeter and ohmmeter. That is, it allows you to measure the voltage and strength of alternating and direct current in networks, as well as the resistance of conductors. Along with these basic functions, the multimeter also has many additional ones, depending on the model and price of the device. For example, functions such as a temperature probe, a circuit testing mode, a mode for checking diodes and transistors, capacitors, a memory function and others. For a car enthusiast, usually the functions used are limited to the ringing mode and voltmeter.
For example, let's consider the most common and affordable multimeter, and the one I use, DT-832 under the TEK brand.
This device allows us to measure the strength of only direct current up to 10 Amperes, direct voltage up to 1000 Volts, alternating voltage up to 750 Volts, resistance up to 2000 kiloOhms, as well as the health of diodes and transistors, there is a signal generator function of 5V 50Hz (radio electronics engineers will understand, but we not really necessary).
So, what do we see on the instrument panel?
Firstly, there is an LCD display displaying the measurement results; under it there is a multi-position switch for modes and limits, three sockets for probes, as well as a socket for testing transistors. A black “negative” probe is inserted into the lowest socket under the designation “COM”, the top two are intended for the red “positive” one. “VΩmA” - middle socket, used to measure voltage, resistance and current up to 500mA, that is, up to the 200mA limit on the switch scale. This line is protected by a fuse. “10A” is the lower socket, used only for measuring current in the range from 200mA to 10A. It is not protected by a fuse, which means that if the threshold of 10A is exceeded, the device may fail - simply burn out.
Now let's move on to measurements. But first, one important rule: if you do not know the approximate value of the current parameter being measured, then set the switch to the highest limit
(does not apply to resistance measurements).
1. AC voltage measurement In this mode we can, for example, measure the mains voltage in a regular household outlet. Since we know that the voltage in the network should be about 220V, we set the switch to the limit of 750V, otherwise the fuse will blow. It should be connected in parallel to the terminals, as shown in the diagram (Fig. 6), with or without a consumer. In our case, we simply insert the probes into the socket hole. Do not touch the metal parts of the probe under any circumstances, and also make sure that their insulation is not damaged!
2. Measuring direct voltage As we know, constant voltage is present in batteries, regular batteries, chargers and power supplies. We can measure all this in the same way as when measuring alternating current. However, polarity must be observed here, otherwise the display will show “negative” values. This function of the multimeter also allows us to find wires with “+” or “-“. In the case of a car, we can safely set the switch to the 20V limit and measure the voltage in the car’s on-board network, at the battery terminals, generator outputs, or its drop under load.
3. Measuring DC current The current is measured only when the consumer is connected, i.e. under load. The multimeter probes are connected in series to the open circuit BEFORE the consumer. Under no circumstances should you connect directly to an outlet or battery - the multimeter will immediately break down! Measuring the current consumption allows us, for example, to calculate the required wire cross-section for additional equipment in a car.
4. Ringing of circuits and diodes. In this mode, we can check sections of the circuit for open circuits, as well as the health of the diodes. Measurements, as in the case of resistance testing, are carried out with the power source turned off. To search for a break, we connect one probe to one end or point of the circuit, and the second to the other, and if the circuit is working properly, we will hear a characteristic sound signal and the display will show near-zero voltage drop values. If there is a break somewhere, the sound signal will not sound, and the display will show the number “1” in the left corner - this means “the resistance tends to infinity,” i.e. the circuit is open. When checking diodes using this mode, we can find out whether the diode is broken, as well as the magnitude of the voltage drop in it - a key parameter of serviceability.
In conclusion, I would like to give some tips on choosing a car multimeter: 1. Choose a model with a built-in sound indication, it helps a lot. 2. With a fuse that can be replaced, otherwise the device can be considered disposable, errors will still occur. 3. With a rubberized body. 4. Preferably with a retractable stand. But for the first acquaintance, the simplest one will do, so you don’t mind.
Battery charging and discharging counter
There are special multimeters that take readings from the battery under high load (for example, during startup). This multimeter is a voltmeter with two teeth connected by a powerful resistor.
When the teeth touch the battery terminals, the multimeter takes readings. If the battery is good, the multimeter will show approximately 9V.
For such a check, you can use a regular multimeter. Disable the ignition system by de-energizing the coil. Connect a multimeter to the battery terminals, ask an assistant to turn on the starter for a few seconds and take readings during this time. As in the previous case, the reference value is 9V.
Getting to know your device
To begin with, I propose to talk about multimeters themselves as electronic devices. Next, detailed instructions will be presented for beginners or, as they say, for dummies.
Let's look at the front panel of the device for measuring indicators in the car and at home. Typically, several values are indicated on the front. Namely:
- OFF. Everything is clear here. The device is turned off;
- ACV. This designation indicates alternating voltage;
- The Ω symbol here means resistance;
- DCA is DC;
- Completes all DCV or DC voltage;
- 3 connectors with corresponding indicators;
- Directly the dial itself or the electronic display.
As for the 3 connectors. The probes are connected through them. The set with pliers is included with the MTM, so everything should be clear here.
There is one note regarding how and when to connect certain probes to the tester. There is a black wire that invariably always goes into the socket that is marked with the symbols COM.
But with red the situation is more complicated. It all depends on what kind of measurements you are going to take with your digital multimeter. When making measurements of mains voltage, resistance or current up to 200 mA, then you only need the VmA output. If the value exceeds 200 mA, then connect the red probe to 10 ADC.
I think we've sorted this out. If you do the opposite, you will not be able to use the tester for a long time. The reason for this will be a blown fuse. As in the case of the cigarette lighter fuse in a car, fusible elements are also used here.
Analog MTM
Most motorists and electricians prefer digital multimeters. These are modern devices with wide functionality.
But there are also outdated devices on the market. They are called analog or pointer. Whichever is more convenient for you. But their characteristics and efficiency are significantly inferior to digital solutions. Using a pointer tester is not the best option, since the scale has a larger error.
And in general, using such devices is not particularly convenient. It is better to immediately switch to good quality digital devices.
I would include the following models as such:
- DT830;
- DT832;
- DT838;
- Resanta DT 181;
- Resanta DT 182;
- DT9205a;
- Ermak;
- Mastech, etc.
Although I will not hide the fact that some continue to use digital testers. Probably, they have had them in their toolbox for a long time, or the motorist simply does not want to spend money on a digital device, since he is completely satisfied with his dial multimeter.
Current measurement
Measuring the current produced by a generator or dynamo often causes certain difficulties, because... this value is too large for most measuring instruments.
For this, an additional element called a shunt is used. A shunt is a resistor with a certain resistance. The multimeter is connected to the electrical system through a shunt, determines pressure drops and calculates the current strength. In some cases, the shunt is supplied with a multimeter. If this is not the case, read your vehicle's owner's manual to find the correct shunt.

