How to disassemble a headlight
In our profession we often have to disassemble car headlights.
There may be several reasons for disassembling the headlights: - To eliminate fogging of the headlights. — To clean the headlights from the inside. — Polish the inside of the headlight glass. — For cleaning standard lenses. — To replace standard lenses with new ones, for example, with Optima Bi-Led Professional 3.0 LED modules or with non-original lenses. — For installing xenon or LED lenses in a reflector headlight. — And finally, for headlight repair or tuning. Important! Before disassembling the headlight, you need to determine the type of glass fastening: - Thermally dismountable headlights (headlights whose glass can be separated by heating the sealant). — Conditionally non-removable headlights on polyurethane (in this case, the headlight glasses “sit” on a polyurethane sealant. Simply heating the headlights will not help here, but we will write about disassembling such headlights a little lower.) — On latches .
On some cars, the headlight lenses are held in place with latches without the use of sealant. Taking these headlights apart is the easiest task.
Methods for removing headlight glass
#1 Mad_dog
- Users
- 1,480 messages
- Registration 17-March 07
- Users
- 121 messages
- Registration 13-April 09
- Moderators
- 5,565 messages
- Registration 27-Jan 08
- Users
- 1,480 messages
- Registration 17-March 07
- Users
- 1,480 messages
- Registration 17-March 07
#2 Niko
Message modified: Niko, February 16, 2010 - 15:33. Clarification
#3 WAZ
Mad_dog, I did this in BMW headlights.
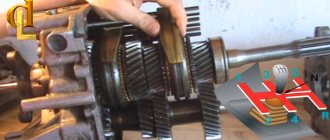
I put them in a regular oven and kept them at 130 degrees for 10 minutes, then the sealant softened and I took out the glass (it didn’t matter to me in principle, I just had to save it until the car market to show it and buy a new one. But at the car market it burst into small particles , as it turned out, overheated it.
Therefore, you either buy new glass (and remove the old one using a remover) or heat it for more than 15 minutes. at a temperature of no more than 100 degrees, and they mess around with digging out the sealant.
#4 Mad_dog
#5 Mad_dog
Introduction to the topic
Few car owners know how to disassemble a headlight, but they are willing to sacrifice personal time and money to install xenon lenses, which will have a better effect on driving safety at night.
The lighting devices of most modern cars are equipped with special parts that contain xenon lamps. The powerful light from gas-discharge components performs well not only at night, but also in conditions of snowfall, fog, and rain.
Xenon is considered a sign of an expensive foreign car with a bunch of options and a set of modern systems. However, many manufacturers have started producing components for independent implementation in almost any headlight.
For installation, you need to disassemble the optics; in addition, you will need a set of lenses, gas-discharge lamps, sealant, screwdrivers, a hair dryer, spatulas and a lot of patience.
Description of automotive optics
Car headlights vary in appearance, size and type. However, the parts meet stringent requirements for certain characteristics. For example, for right-hand traffic, the optics must correctly collect the beam of light, have a clear limitation without flare horizontally and a clearly defined “daw” towards the side of the road. This luminous flux allows you not to dazzle oncoming drivers and illuminate the side of the road on the right.
You can form and direct the light beam:
The reflector is most often used with halogen lamps, but there are exceptions with xenon. The lens is used to form the beam for all types of lamps. It can be halogen, xenon or even LED.
Glass with special guide ribs on the inside can be seen on old foreign cars produced before 1990. The most striking example is considered to be a lantern from an old Zhiguli. For example, on the glass of a VAZ 2107, stripes are clearly visible, which are responsible for collecting the light flux.
Structurally, any headlight consists of:
You can install the lens in any headlight, except for those models that use external glass to form the “daw”. In this case, you will have to buy a transparent part separately or disassemble it and grind the protruding ribs on a special machine.
Which film to choose
Based on their composition, the coating is divided into two types:
- Vinyl.
- Polyurethane.
The choice should be made by studying the characteristics of each material.
Advantages and disadvantages of vinyl
Vinyl films have a wide range of applications. Previously, they were used to protect street advertising posters, so they differ from polyurethane ones in their smaller thickness. Such films prevented fading and damage to paper material from rain. Recently, similar technology has been used in the production of protection for optics.
Negative characteristics:
- Formation of a cloudy yellow coating over time.
- It does not withstand severe frosts; when it gets cold, it cracks and peels off.
- Too hard and it will be difficult to shape, especially for complex headlight shapes.
The vinyl film is applied to the headlights by heating. It is easy to purchase the material. The price is affordable. Suitable for economy class cars.
Advantages and disadvantages of polyurethane
They are a durable coating and are twice as thick as vinyl. The material was originally used in the construction of helicopters. The coating protects the helicopter blades from air containing fine sand, etc.
Of the minuses note:
- Transmits light less well. Lighting, unlike vinyl ones, may be worse. Xenon equipment will shine consistently brightly regardless of the material.
- The cost is higher due to the complex production technology.
It is recommended to cover the optics of the Soviet automobile industry with vinyl, since the cost of polyurethane film will be about 5 times more.
Main manufacturers
Eagle Eyes (Taiwan) is a manufacturer of automotive optics. Produces accessories for a wide range of car brands.
Noble (China) – manufacturer of auto parts. The range includes auto electronics, as well as high quality protective elements.
Sonar (Taiwan) is a manufacturer of automotive optics. A popular manufacturer producing high-quality auto parts.
Auto Parts Industrial Ltd - produces both body parts and small accessories.
What to choose
You only need to pay attention to the financial condition and characteristics of the optics. With a simple form, you can purchase vinyl
If there are large bends, polyurethane has priority.
Polyurethane is preferred for SUVs and off-road enthusiasts.
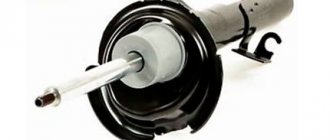
Description of lenses
The lens is the most favorable component for installing a gas discharge lamp. The internal device allows you to accurately collect the light flux and direct it to the right place, providing a clear cut-off line and a clearly defined daw.
Lenses are divided into:
The bi-xenon version comes with a special built-in curtain that covers the light flux in low beams and opens completely in high beams. Thus, one lens is sufficient for installation in a headlight with one module. Classic components are responsible only for high or low beam and are not equipped with a curtain.
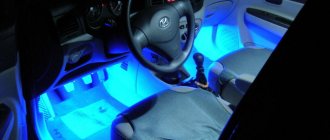
Preventing headlights from fogging
In order to prevent water from getting inside the headlight, it is enough to follow a few simple rules:
- When washing a car, especially the engine compartment, turn off the lights in advance and allow the air inside the headlight to cool.
- Regularly ventilate the headlights by blowing them with a hairdryer or vacuum cleaner.
- Regularly inspect the body of the optics unit for cracks.
- put a small bag of silica gel or other adsorbent (for example, rice) inside and change it regularly.
What is needed for installation work
To install bi-xenon and classic lenses, you will need to complete the following steps:
- Remove the headlights from the car. This may require a special tool.
- Warm up the light fixtures with a hairdryer, disassemble the module and remove the old sealant.
- Remove the halogen lamp from the reflector and unscrew all fasteners.
- Place the lens into the hole that appears and secure it with the retaining ring on the reverse side.
Installation of lenses in the headlight is carried out in accordance with the side position indicators. Otherwise, the “daw” will be turned the other way around and the beam will shine incorrectly. After installation, you will need to install ignition units in the engine compartment and connect the wires.
Dismantling and disassembling optics
It is not possible to disassemble the headlight directly in the car, so the optics will have to be removed. Cars use different mounting systems; many models will require the front bumper to be removed.
Typically, the optics are mounted with 1 or 2 bolts on top and several latches on the bottom, under the bumper. To remove the part you need to do the following:
- Open the hood and remove the negative terminal from the battery.
- Unscrew the screws holding the headlights.
- Disassemble the back cover and remove the chips and wires.
- Remove lighting fixtures.
Some manufacturers use a latch system that does not require the use of bolts. It is quite easy to disassemble and remove such a part.
To install lenses, we must disassemble the optics. To do this you need:
- Unscrew all the screws along the contour of the glass on the back side.
- Disassemble the retaining clips and latches.
- Take out all the light bulbs.
- Place the part in a box of suitable size with a small hole for a hair dryer.
- Close the box and heat the headlight for 5–8 minutes.
- The softened sealant will easily come off if you carefully pry the glass with a flat-head screwdriver.
Often the headlight is assembled using a special rubber glue, which is easily softened in a box with a hairdryer. You should carefully remove any remaining compound that will interfere with the assembly of the headlight.
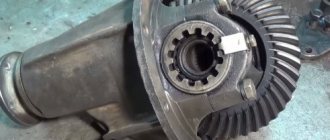
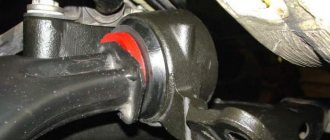
To remove the reflector from the headlight housing, screw in the adjusting screw to the end of the thread and remove the plastic fastener.
Self-recovery methods
To get to the reflector, the headlight removed from the car must be disassembled. The first option involves repeatedly passing the hot air of a hair dryer over the seam. The second option involves leaving the headlight in an oven preheated to 100°C for 20 minutes. After opening, all parts are cleaned of sealant residues, washed without using alcohol-containing liquids and dried.
Using metallic tape
Let's start with how to restore the reflector on a headlight using tape foil. All you need is metallized tape, purchased at a hardware store for about 30 rubles. Its adhesive base copes well with high and low temperatures, and the aluminum film is very wear-resistant.
In order to obtain a smooth surface with a minimum of seams after gluing the tape on the reflector, first, pieces of the most suitable shape are formed from several strips. Then remove the protective film and carefully stick it on. The whole procedure takes about half an hour.
Advantages of the method: durability, low cost, ease of implementation.
Disadvantages: when gluing, irregularities and seams remain, which impair the properties of the reflector.
Using metal foil
Aluminum foil is highly reflective, which allows it to be used in the restoration of headlight reflectors. You will also need some epoxy resin. To maintain a perfectly smooth surface of the foil, the entire pattern is made from plain paper. Then the parts are duplicated from aluminum sheet, a thin layer of resin is applied to the reflector and glued, removing excess resin.
Advantages: withstands any temperature changes.
Disadvantages: being between the metal foil and the plastic base, epoxy glue lacks air and takes a very long time to dry. It is almost impossible to remove dried glue. Therefore, such a reflector is not suitable for repeated restoration. With the advent of tape foil, this method is practically not used.
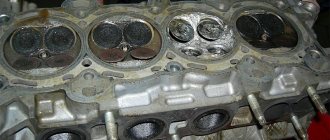
Using chrome paint
Headlight reflector repair using chrome paint is the most popular. No need to cut and glue anything. Paint is sprayed onto the degreased surface of the reflector from a can of white chrome until a uniform, uniform layer is obtained. After painting, the headlight is dried according to the instructions on the can.
Benefits: Provides a smooth surface. You can even spray paint onto metal tape, thus increasing the reflective effect.
Lens installation
It is not difficult to place lenses in headlights with your own hands. The main thing is to follow the signs on the upper and lower sides. The body of the lens is placed in the hole where the lamp stood and screwed into a ring on the reverse side. The ring is included in the package. All work is carried out wearing fabric gloves - also part of the kit.
It will take no more than half an hour to install the lenses in the headlights. The most time-consuming part of the process is running the wiring through the back wall of the headlight housing. You can insert the wires using a drilled hole, which must be filled with rubber glue.
Disassembling the headlight yourself
So, let’s disassemble the headlight with our own hands. As material support for this process, it is necessary to prepare:
- Screwdriver Set.
- Industrial or powerful household hair dryer.
- Set of wrenches (socket and open-end).
- Assembly knife for removing sealant.
- Sealant.
The workplace used to disassemble a car headlight must be free of dirt (dust, debris, moisture) and have sufficiently good lighting.
The process of disassembling the headlights installed in front and behind the car is somewhat different, but there are several general, mandatory rules:
- the sealant is heated with a hairdryer evenly along the entire perimeter of the headlight;
- according to the recommendations of experts, the heating temperature of the sealant should not exceed 3000C, since exceeding this limit can cause thermal damage not only to the glass, but also to the headlight housing;
- Experts consider the optimal distance between the hair dryer nozzle and the headlight to be 20 millimeters;
- The plastic used in most modern car headlights is a rather fragile material, so when working with it it is necessary to avoid using significant force;
- each standard headlight has three mounting points;
- before dismantling the headlight (to prevent a short circuit in the circuit), it is necessary to disconnect the battery terminal;
- during the process of dismantling (installing) headlights, periodically check with the information located in the “Working with the electrical system” section of the operating and repair instructions for your car;
Installing ignition units and adjusting light
Ignition units are installed inside the headlight housing or outside in the engine compartment of the car. If one of the units fails, you will have to disassemble the case again and remove the glass, so it is more convenient to place the electronics behind the bumper or directly under the headlight using double-sided tape.
Xenon devices shine perfectly even in heavy snow and fog, but for correct operation they require professional setup using a special stand. This procedure is offered at each maintenance station and is inexpensive.
disassembling and assembling headlights using thermosealant and rubber glue
Good day, dear motorists! =) Today I will tell you how to independently disassemble the optics of a car to install various devices without damaging it. So, in order to do something, I will make it absolutely clear
1. To dismantle/install the headlight in most cases, you will have to remove the bumper. I won’t tell you how to remove the bumper on each individual car. I can only say that for most cars this operation is standard. You don't have to remove the bumper completely. To do this, you need to unscrew the fasteners from the top in the front (usually under the decorative radiator grille), from the sides (there are fasteners under the lockers that secure the bumper to the wings).
2. Absolutely all headlights have 2 main parts: transparent glass (plastic) and a body (base). All reflectors, fasteners and headlight range control are installed in the housing. The main thing: the glass is placed in a U-shaped horizontal profile, along the entire perimeter. Basically, it is held in place by sealant and latches, but sometimes there are a couple of small screws. After dismantling, carefully inspect the headlight for their presence.
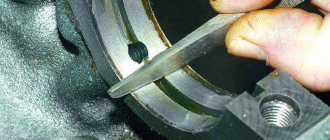
3. All headlights are sealed in two ways: with heat sealant and with rubber glue. It is very simple to find out how the sealing was done; just take a thin flat screwdriver and insert it into the outer joint of the transparent plastic and the headlight housing, and bend it a little. If the headlight is sealed with heat sealant, you will see how this sealant stretches (from dark to light), staining the screwdriver (it can be easily wiped off with solvent). If the screwdriver does not get dirty, and the edge of the socket comes away from the transparent plastic with great force, then it is rubber glue.
Let's get acquainted with the process of disassembling a headlight in a car
- Let's get acquainted with the process of disassembling a headlight in a car
- Disassembling the headlight: preparing the tool
- How to properly disassemble a headlight. general information
- How to disassemble a headlight
- How to disassemble a tail light
- How to disassemble the fog light
Disassembling a headlight and its further repair is not as simple as it seems at first glance. Especially for a driver who has never dealt with such an activity before. But this does not mean at all that at some point you will not need to resort to dismantling or repairing the headlight, because no one is immune from breakdowns. And today we will figure out what is needed to disassemble the headlight, and how best to do it.
- Disassembling the headlight: preparing the tool
- How to properly disassemble a headlight. general information
- How to disassemble a headlight
- How to disassemble a tail light
- How to disassemble the fog light
Disassembling the headlight: preparing the tool
First of all, you need to remember that in order to disassemble a car lamp, you need to have certain skills. But for subsequent disassembly of the headlights, you must first prepare the following tools:
— a set of screwdrivers;
— a powerful hair dryer (to warm up the sealing compound, since after this it is much easier to “unsolder” the headlight);
— wrenches (socket and open-end wrenches);
— mounting knife (it is necessary for cleaning the sealant from the headlight housing);
How to properly disassemble a headlight. general information
No matter what car you need to remove the headlights on, the disassembly rules are as follows:
1. Turn off the power supply. These actions are necessary in order to prevent short circuits.
2. Heat the sealing compound. This is necessary in order to “unstick” the headlight, and a hair dryer is best suited for this.
This should be done evenly and along the entire length of the lighting fixture. But you need to remember that the maximum temperature for heating the sealant is 3000°C. If you exceed the permissible temperature, you can damage the device. 3. Do not use too much force. The plastic from which a car headlight is made is quite fragile, and therefore, if you press more than necessary, you can not only disassemble it, but seriously damage the device.
While following all these rules, you also need to remember about the instructions for the vehicle and be guided by the information provided in it.
How to disassemble a headlight
If you need to dismantle the headlight on a foreign or domestic car, then, first of all, you need to remove the front fender liner along the desired side. Next, disassemble the cover of the bracket hole on which the radiator is attached.
And after this it is necessary to remove the lining and reinforcement of the bumper. After completing all these steps, you can safely dismantle the headlight unit itself. Once you've done this, you can:
— heat the sealant using a hairdryer (it must be heated to a temperature of 250°C);
— separate the glass from the body;
— clean the surface from sealant using a knife.
And now, all the required actions have been successfully completed, which means that you can safely begin replacing the necessary parts. After the repair work has been completed, reassembly is carried out in the reverse order. When assembling the flashlight, you need to carefully ensure that all components are installed correctly.
How to disassemble a tail light
In order to dismantle and disassemble the rear light, you must perform the following steps:
How to choose headlight sealant?
In this article we will analyze the process of disassembling and assembling the headlight, as well as the materials that are used.
The following reasons may lead to the need to disassemble the headlight:
– headlight fogging; – replacing broken or cracked glass; – reflector repair; – tuning of optics (installation of lenses, diodes and other work on retrofitting optics).
The most important mistake is trying to disassemble the headlight mechanically, using improvised means.
At manufacturing plants, headlights are most often assembled using butyl sealants. This allows you to disassemble the headlight without any problems by heating it in an oven to +120°C or heating the seam with a hair dryer to the same temperature.
Next, the disassembled headlight must be thoroughly cleaned of all remnants of the old sealant mechanically (with a screwdriver or knife).
You can also use ABRO® Sealant Remover, but avoid contact of the remover with the transparent surface.
Instructions for disassembling headlights
In addition to the tools and materials listed above, in the process of dismantling and disassembling the headlight, you will need rags and spare structural elements of the headlight, which are supposed to be replaced (lamps, reflectors, light filters, etc.).
The following is a list of dismantling work, which looks like this:
dismantling the front fender liner, radiator bracket hole cover, front bumper trim, upper bumper reinforcement (if necessary); dismantling the headlight unit; heating the sealant using an industrial (household) hair dryer to the consistency of soft plasticine (heating speed is directly proportional to the power of the device); carefully pulling back the latches and separating the glass and the car headlight housing.
The headlight has been disassembled and is ready for repair work and replacement of faulty elements. Assembling the headlight and installing it in place is done in the reverse order.