Torpedo restoration options
We can briefly consider the available methods for restoring a car dashboard. These include the following methods:
- paint with acrylic enamel and varnish;
- matte enamel painting;
- paint with a rubber-containing compound;
- pasting with vinyl film;
- finishing with leather or its substitute.
As mentioned above, the easiest and cheapest way to return a decent appearance to a torpedo with your own hands is painting and applying a layer of varnish. Some people prefer matte enamels, since deep gloss can cause glare from the sun and interfere with driving. It all depends on the shape of the torpedo and the taste of the owner of the car. In most cases, preference is given to a glossy surface.
Preparation for restoration work
Before starting work, it is advisable to acquire all the necessary materials and accessories. After all, the car will be disassembled, and it will be very difficult to quickly go to the store for the missing piece of sandpaper. To paint a car dashboard, you need to prepare the following materials:
- means for degreasing the surface before painting;
- detergent for cleaning the car dashboard from dirt and dust deposits;
- tools for dismantling the panel;
- sandpaper of different grits from P500 to P2000;
- special primer for plastic parts;
- paint of the desired color;
- varnish;
- abrasive polish for working with a layer of varnish.
Additionally, you should take care of the room in which the car dashboard will be painted, where there should be no dust or large drafts. A normal temperature regime is also required, which is indicated on cans of paint and varnish. It would be a good idea to ensure uniform lighting, so as not to be upset later by defects discovered when leaving the garage.
Painting a car dashboard: choosing materials and how to do it yourself
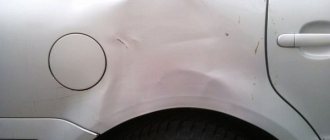
The dashboard is a plastic dashboard located in the front part of the car interior. It is regularly exposed to mechanical stress, due to which its coating wears out and becomes scratched. The dashboard is the “face” of the car; to tidy up the appearance, it is painted.
With the help of painting, the car's dashboard is restored to its original luster; the procedure is easy to do with your own hands.
How to restore a car dashboard
To return the car panel to an attractive appearance, the following methods are used:
- painting with acrylic and subsequent varnishing;
- painting with matte dye;
- painting with liquid rubber;
- vinyl film covering;
- finishing with artificial leather or genuine leather.
The most common and economical way to make the device aesthetically pleasing again is to paint it and then varnish it. Most often, the coating is made glossy, although some motorists prefer a matte panel. The fact is that sunlight falling on a glossy surface creates glare that hits the eyes and makes it difficult to follow the road while driving.
Selection of materials
Before you start painting, you need to prepare the materials so that you don’t fuss and run around hardware stores later.
To paint a torpedo you need to take:
- plastic panel cleaner;
- a degreasing composition that does not act aggressively on plastic (white spirit is suitable);
- sanding cloths;
- putty;
- primer suitable for plastic;
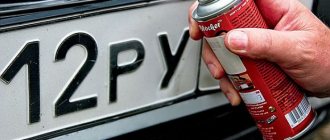
- paint (in a can or spray can);
- varnish for final coating (preferably 2-component polyurethane);
- fine mesh to filter out the paint and primer.
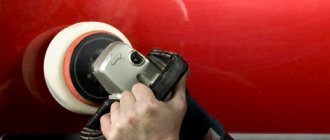
Instead of sanding paper, you can use a machine. But to process a torpedo by machine, the worker must have extensive experience. The plastic panel is textured and quite flexible; unprofessional actions can damage the surface and worsen the condition of the product.
A sander running at high speeds can melt the plastic surface. Therefore, if you lack experience, it is better to use sandpapers.
Preparing tools
The purchased materials and tools must be placed in advance in a room specially equipped for painting the torpedo. Usually a garage is used for painting work.
The room should be dust-free, well lit, without drafts, with optimal temperature values indicated on the paint can. In addition to materials for preparing and painting the torpedo, you need to buy the following tools:
- paint roller or priming brush;
- spray gun - a manual or compressor-type spray gun for applying dye;
- spatula for putty;
- different screwdrivers to remove the dashboard, then attach it back.
A spray gun is necessary if you purchased paint in a can. If you will use dye in a can for painting, then there is no need to buy a spray bottle.
Dismantling and preparing the dashboard
Before painting, the torpedo must be dismantled. If the employee has not performed this work before, he is advised to review the technical manual for the dashboard. It shows where the fasteners are located because they are usually hidden. If a worker does not find at least one hidden part and tries to forcefully rip out the panel, he may irreparably damage it.
After studying the manual, the worker first dismantles the steering wheel and switches, if the design provides for this possibility. Next, remove the instrument unit and disconnect it from the electrical wiring.
Removes plugs under which fasteners are hidden. Then he unscrews the parts themselves and carefully lays them out. At the last stage, he separates the torpedo and pulls it out of the car through the driver's door.
It is important to mark the parts that have been removed and laid out so that they can be reattached correctly later. It would be a good idea for an inexperienced worker to take photographs of the stages of work in order to use the photos as clues.
The dismantled torpedo must be thoroughly washed with detergent and dirt and dust deposits must be removed. Next, remove scratches and other minor defects that have formed during use. Abrasive sandpapers are used for grinding: first coarse-grained, then medium-grained, and finally fine-grained.
Torpedo dismantling
Painting begins with dismantling the torpedo. If this procedure is being done for the first time, then it would be a good idea to first read the instruction manual for the specific model. This is necessary in order to find out the locations of fasteners, which in most cases are carefully masked. There were many cases when, due to one fastening, a torpedo was dismantled by force, resulting in irreparable damage.
When the location of the fasteners has been studied, the steering wheel and all switches on the panel are dismantled, if their design allows it. Next, the instrument panel is removed and disconnected from the wiring. After removing all the plugs hiding the panel fastenings, they are turned out and neatly folded with marks. When everything is ready, the torpedo is removed from the latches and removed from the cabin through the front passenger door.
When dismantling the panel, it is very important to mark the removed fasteners so that there are no unnecessary parts later. Some people practice taking step-by-step photographs of the dismantling process, so that in case of hiccups there are basic clues.
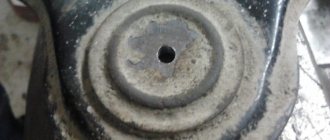
You need to be especially careful with the plugs and branded torpedo mounts, since if they are lost or damaged, they can be very difficult to get.
Repair methods
There are three main approaches to repairing a dashboard after airbag deployment:
- Functional repair of instrument panels includes mechanical restoration. The dashboard and steering wheel are installed in place, and new airbags are mounted under them. After this, the program resets information about airbag deployment;
- A complete interior dashboard repair includes not only mechanical repairs, but also aesthetic ones. The console is dismantled, a complete reupholstery is carried out using selected materials, a new SRS complex is inserted under the steering wheel and covers and reprogramming is carried out. This method makes it possible not only to recreate the transport security system, but also to change its internal appearance;
- A rough repair is suitable for cases where the car has received minimal damage and does not require major restoration procedures. In this case, the holes where the pillows used to be are filled with polyurethane foam, and the covers are installed in their original place. This method is bad because in the event of a new accident, the SRS complex will not work, because there will be nothing to work. By resorting to the third type of repair, you endanger not only your life, but also the lives of your passengers.
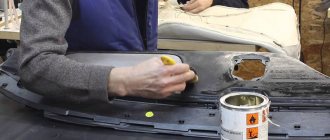
Preparing the surface for painting
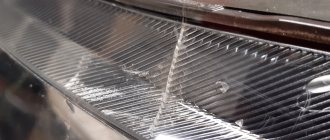
The dismantled panel is thoroughly washed from dirt and dust using a high-quality detergent. Next, the surface of the car panel needs to be freed from minor defects. Often, a torpedo has many scratches that formed during its use, and which will be visible even after painting.
Abrasive paper is used to remove defects. If possible, you can use a grinding machine. However, this should be done extremely carefully, since the plastic can very easily be melted by high tool speeds. Thus, the surface of the torpedo is brought to a perfectly smooth state.
After sanding, you should clean everything from dust and degrease the panel. Do not forget that the work is carried out with plastic, so cleaning products should not react with this material. The easiest way is to use alcohol or even a simple soap solution.
Padding
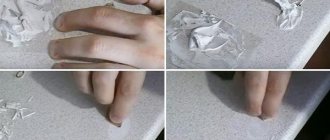
Painting with any composition begins with a primer. This will improve adhesion and even out the surface a little. At this stage, a primer is used, packaged in pressurized cans.
To treat one torpedo in two or three layers, one standard-sized cylinder will be sufficient. The primer is applied in accordance with the manufacturer's instructions on the label or from a distance of 25 centimeters in an even thin layer.
Each layer is dried before applying the next one. In addition, you need to carefully inspect the surface in good lighting for defects. Stains are removed immediately using napkins, and missed areas are re-checked.
Applying paint
To paint the panel you will need appropriate paint in pressure cans. For high-quality coverage, two standard-sized cylinders will be enough. The paint is applied in several passes. First, the first layer is applied - it should be thin and sprayed from a greater distance. After applying it, you will be able to clearly see all the defective areas that were missed during sanding and priming. If there are any, then they are processed again either with an abrasive or a primer.
The second and third layers are applied more thickly from a standard distance. At the same time, you need to keep an eye on it. So that the paint does not leak and lies on the surface of the panel in an even layer. After this, the panel is left for some time to crystallize the applied coating. Existing defects are immediately removed and repainted.
Demand for color
Designers advise painting the dashboard in the same color as the interior, choosing a slightly lighter shade. This reduces the strain on the driver's eyes. To make the interior of the cabin original, you can use one of the current colors: anthracite (charcoal color with a dusty effect) or titanium (golden hue with matte or dazzling glossy effects).
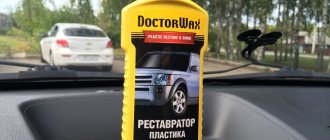
Repairing a car dashboard using “liquid rubber” paint is popular. When dry, this composition forms a smooth, rich matte surface, pleasant to the touch and resistant to negative influences.
- How is a car body restored after an accident? Recommendations from professional locksmiths
If the article was useful to you, you can share the material on social networks: