Replacing the stabilizer bar cushions, removing the bar
We replace the rubber pads that attach the stabilizer bar to the front suspension subframe when there are ruptures and significant wear of the pads, which results in play in the connection of the parts.
The elements for fastening the stabilizer bar to the subframe are located in hard-to-reach places - between the subframe and the body. Therefore, the manufacturer recommends replacing the cushions on a subframe removed from the car. In this case, it is necessary to perform many complex operations to dismantle the subframe (see “Removing the subframe”). In order to reduce the labor intensity of operations, we suggest not dismantling the subframe completely, but lowering it slightly, providing access to the attachment points of the stabilizer bar. To do this, place an adjustable stop under the subframe, unscrew the rear and loosen the front bolts securing the subframe to the body (Removing the subframe). We lower the rear part of the subframe on the stop by 60-70 mm.
Using a spanner wrench or a 13mm socket, unscrew the two bolts securing the stabilizer bar bracket to the subframe (the second bolt is not visible in the photo).
Remove the split rubber cushion. The cut in the cushion should be directed towards the front of the car, and the protrusion should be located to the right in the direction of travel. On the new pillow it is painted yellow. Similarly, we dismantle the bracket and the rubber cushion on the other side of the stabilizer bar. We remove the anti-roll bar bar to replace it if it is deformed or broken. To dismantle the bar, disconnect the anti-roll bar struts from it (see “Removing the anti-roll bar strut”) and remove the brackets securing the bar to the subframe (see above).
Remove the front suspension airbags for the exhaust system.
Use a socket with a 13mm extension to unscrew the four bolts...
...and dismantle the removable floor cross member. The cross member and cushions will interfere with the removal of the stabilizer bar.
Remove the stabilizer bar. We install the anti-roll bar in the reverse order. We install new cushions on the bar and attach the bar to the subframe and to the stabilizer struts. We tighten the bolts for securing the rod brackets and the nuts for securing the fingers of the ball joints of the stabilizer struts to the prescribed torques (see “Appendices”).
Replacing parts of the front suspension stabilizer bar for Ford focus 2 and 2 restyling
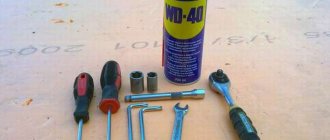
You will need: keys “13”, “15”, hex key “6”, a screwdriver with a flat blade. 1. Raise the front of the car.
2. Apply a penetrating lubricant such as WD-40 or equivalent to the nuts.
3. While holding the hinge pin from turning, unscrew the nut securing the hinge to the front suspension strut bracket...
4. ...and remove the nut.
5. Disconnect the upper stabilizer link from the front suspension strut bracket.
6. Similarly, unscrew the nut securing the lower hinge pin of the strut to the stabilizer bar...
7. ...separate the strut joint and the bar...
8. ...then remove the anti-roll bar link.
9. To replace the anti-roll bar and its cushions, remove the front suspension cross member (see “Removing and installing the front suspension cross member”). 10. Remove two bolts each securing the stabilizer bar brackets to the front suspension cross member...
11. ...and remove the rod assembly with brackets and rubber pads.
12. Use a screwdriver to pry...
13. ...and remove the stabilizer bar mounting bracket.
14. Uncompress the stabilizer bar cushion...
15. ...and take it off.
16. Remove the second pillow in the same way. 17. Install the parts in the reverse order of removal; tighten the bolts and nuts to the torque specified in Appendix 1. 18. Bleed the power steering system (see “Bleeding the power steering system”).
Note After replacing the anti-roll bar parts, check and, if necessary, adjust the wheel alignment angles. Use the services of workshops with special equipment.
How to replace a stabilizer bushing on a Ford Focus 2
Ford Focus 2 has earned considerable popularity in the domestic car market. It owes this to its excellent design and excellent driving performance. But, like any complex machine, sometimes glitches occur. So, some car owners are aware of the problem of knocking in the chassis. It resembles impacts on the bottom of a car. They usually occur during movement. Most owners of Ford Focus 2 note that knocking occurs when driving on uneven roads or dirt roads. This means that diagnostics in a car service or service station will be problematic. An auto mechanic simply will not be able to hear the knocking and identify the source in a car that is at rest. Therefore, car owners often receive a verdict that everything is in order with the vehicle and no problems have been identified. However, the first time you hit an uneven surface, the knocking appears again.
If all the symptoms described coincide with what is heard in your Ford Focus 2, then most likely there is a problem with the stabilizer link. Many car owners find out that the problem is in this particular unit by the method of elimination. That is, when everything has already been sorted out and there is nothing more to suspect. You should check the connection: stabilizer bar – anti-roll bar – mounting clamp (bracket) – stabilizer bushing. As a rule, if the knocking resembles a muffled rumble, then the problem is in the last part.
The process of replacing the stabilizer link in the rear suspension
But as soon as you drive along a road with slight unevenness, this annoying knock appears again. This is how the stabilizer strut reveals itself. Many car enthusiasts themselves come to this conclusion by elimination, when after reassembling the entire chassis there is nothing more to suspect than the stabilizer link. That's when the need to replace it arises. The most common reasons for the failure of this spare part are torn boots or wear of the ball pin inside the joint body, which is accompanied by a characteristic play that can be seen on the removed strut.
On a second generation Ford Focus, replacing the stabilizer link is easy.
Replacing the front stabilizer strut
After successful replacement of parts, it is necessary to assemble the structure. To do this, you need to install the stabilizer at the desired height, placing the bushings opposite the spacer elements.
After which, for convenience, you need to prop it up. When installing the clamps, it is recommended to moisten them with water, then the operation will be easier.
According to Ford Focus 2 car owners, this is apparently the most difficult moment in the entire assembly and disassembly when replacing bushings. It appears when driving over uneven roads.
If it's knocking from behind, then it's most likely the strut. When knocking from the front, the sound can be confused with ball joints. Therefore, before dismantling, carry out diagnostics.
If there are problems with the stabilizer link, there will be no wheel play. You can also try squeezing the stand. This will not work on a working one.
But keep in mind that it is under constant tension, and the absence of play does not guarantee the functionality of the rack. If you still suspect the rack is faulty, you should remove it and evaluate its performance. Replacement is carried out in the following order: We lift the front part and install it using a support. And here we have this artifact.
replacing stabilizer bushings
The strut is screwed with its lower part to the stabilizer using a 15 wrench nut. The upper part of the part is attached to the shock absorber in the same way. If you unscrew the nut with only one wrench, you may notice a certain difficulty - the ball pin inside the hinge body will begin to rotate. Therefore, at the end of the ball pin there is a cell for a hexagonal profile to keep it from turning with the appropriate hexagonal socket wrench.
We begin to unscrew and notice that after loosening the nut, the hinge no longer rotates, and we twist the nut freely, having previously lubricated the threads with a special aerosol agent. The process of replacing the stabilizer link in the rear suspension Here it is necessary to note the practicality of the design ideas of the manufacturer of the Ford Focus 2.
Replacing stabilizer bushings
The solution to the problem is to replace the worn-out unit.
On a Ford Focus 2, such a replacement will not be difficult. Thus, an experienced car enthusiast will not have to pay for a simple operation at a car service center, and the cost item will only include the purchase of new bushings. Before starting the operation, you must prepare everything you need for replacement:
- jack;
- a set of keys;
- extension pipe;
- penetrating lubricant, such as WD 40.
Of course, don't forget about new bushings.
It is recommended to treat it with a penetrating liquid before unscrewing anything. This minor detail can greatly facilitate the task and make the replacement process more enjoyable.
Replacing stabilizer bushings begins with removing the stabilizer. The procedure is carried out according to the following algorithm:
- First, you should take care of safety: put the car on the handbrake and install stoppers under the wheels (chocks).
- Raise the car with a jack, install a stand and hang the wheels.
- Remove the wheels by tightening all the nuts.
- Unscrew the steering linkage nuts.
- Using a special tool, disconnect the tie rod ends from the steering knuckles.
- Tighten the fastener and disconnect the connecting levers.
- Disconnect the ball joints of the lower control arms. When unscrewing the bolts, it is recommended to hold them on the reverse side with a socket wrench - there is a hexagonal profile at the end of the ball pin. When the nut is loosened, the hinge will stop turning.
- Unscrew the central mounting bolt connecting the support pad to the gearbox.
- Unscrew the bolts holding the cross member (6 pcs.).
- Lower the cross member to gain access to the stabilizer.
- Unscrew the bolts securing the stabilizer.
- Remove the clamps holding the part.
- Remove the anti-roll bar.
Installing a new bushing
Now you need to install the prepared new spare parts. Please note that the anti-roll bar bushings must be correctly placed exactly in the place intended for them. They must be secured to the flats of the stabilizer. Do not use lubricant in this case!
After successful replacement of parts, it is necessary to assemble the structure. To do this, you need to install the stabilizer at the desired height, placing the bushings opposite the spacer elements. After which, for convenience, you need to prop it up. When installing the clamps, it is recommended to moisten them with water, then the operation will be easier. According to Ford Focus 2 car owners, this is apparently the most difficult moment in the entire assembly and disassembly when replacing bushings.
In the future, perform assembly in the reverse order from the step-by-step instructions described above.
Replacing bushings without dismantling the stabilizer
In principle, there is a possibility that replacing the bushings can be done without dismantling the entire stabilizer, but only by opening access to the brackets. To do this, after removing the wheel, you need to:
- Unscrew the stabilizer link.
- Remove the tie rod end.
- Unscrew the fastening (2 bolts) of the bracket under which the bushing is located. Note that only one of the bolts can be completely unscrewed; the second one can only be loosened by unscrewing it by about a centimeter.
- Remove the bushing from the bracket.
- Replace the worn bushing.
It seems that this method is much simpler, but this, as car enthusiasts who have experienced it point out, is not entirely true. The fact is that all procedures have to be performed in extremely uncomfortable positions. In addition, such a replacement also takes quite a lot of time - more than 2 hours per bushing. Despite some hassle, with some skill and experience, the time spent on replacing the stabilizer bushing yourself pays off in the money saved on a trip to a car service center.
Ford Focus Sedan Serebryanka! › Logbook › Replacing front stabilizer bushings.
Hi all! When I bought a Focus (3.5 years ago), I immediately went to the service center for diagnostics. In general, I use services extremely rarely, but at that time I didn’t know Focus and decided to immediately identify and change what needed replacing. The front stabilizer bushings were also on the short list for replacement. I bought them right away and took what was available, namely FEBEST. I found out the replacement price from the same service and was stunned! From 3K then the master started spinning, explaining that it was necessary to remove the subframe, and this is generally terrible, “it’s easier to rebuild the engine”!))))) I then decided to change everything myself, and since the service technician was so afraid of removing this subframe, I I certainly won’t take on this, in short, I found in the vastness of Drive instructions on how to do this without disassembling almost anything, everything was unscrewed from the top, using a bunch of extension cords and a lot of swear words. In short, I spent almost the entire day with them, but somehow I changed them! How funny it is to remember this now! If only I had known then that the subframe lowers one time and without any problems!))) It turned out that this FEBEST, then it’s still good! After driving o5 a little, something started knocking, etc. In short, during the next tinkering, I don’t even remember what I did (in my opinion, something was wrong with the steering rack), but the subframe was already lowered, everything was disassembled, I saw these damn febests and... I need to change it urgently! I went shopping, only these same FEBEST bushings were available!))))) Ironically, I installed the same ones, because the garage was not mine and I couldn’t leave the car there for a week until the normal ones arrived. About 1.5 years later, this spring, the familiar knock returned. By the way, someone else encountered the same symptoms, the knocking appeared in warm weather, but in sub-zero temperatures nothing knocks! I stopped tugging at fate's tail and ordered the original! By the way, the price is not high, 800 rubles per piece!
Replacement is extremely simple, but you can’t do it without a pit/lift! — We’re going to the pit; — Jack up/remove both wheels; — Unscrew the top nut of the stabilizer link on both sides and remove the stabilizer link; — Unscrew the 4 bolts of the cross member from the bottom and remove it; — Unscrew 2 bolts on each side on the plates of the large subframe bolt (rear subframe silent block); — Remove the rubber bands that hold the exhaust system between the “corrugation” and the resonator; — Unscrew the bolts of the front silent blocks of the subframe (15 wrench); — We unscrew the bolts of the rear silent blocks of the subframe (the key, in my opinion, is 22 or 21). And we have excellent access to the bushings we need!
How to replace front stub bushings on FF1
Crap. In short, the bushings do not change without unscrewing the subframe. Oh how lucky I am. The ZIMMERMANN wheels burst and began to crack, the stop frog died and not a single stop lights up, when braking the fog light flashes, cough dies.
Lots to do on the weekend
130 thousand almost stalls +1
If you give it 6000, then brake in gear to 2000, remove the gear, continuing to actively brake, it stalls. I will change the IAC myself. plus the valve itself 2000
It's time to change the stub bushings because the stub has moved to the right and hits the body, subframe and drive when the suspension is operating. With this I'll go to Comics. They promised to do it there for 1700. plus the bushings themselves are 400
Previous Lucas discs developed a groove on the inside in the middle of the working surface. The Sparko led before them, the Zimmer led before them, before that there was only the original on this car. Now I want Lucas or ATE again. Zimmers cost 2300 apiece, Lucas bought a pair for 2400. I change them myself.
The frog stops dead nissego without reporting it. I'll change it myself too. another pizztor rubles.
oooo Ford Focus 2001 Body No. (VIN) WF0AXXWPDA1K55561 Engine No. EZDA1K55561 Zetec-E 1.6 EFI (90PS), B5/IB5, EEC 96 Car (EEC 1)
International designation of the manufacturer Ford Motor Co.Ltd, Brentwood, UK Body shape 5-door hatchback Country of origin Almussafes/Spain Assembly (component) plant Valencia/Azambuya Year of manufacture 10/23. 2001 Month of manufacture October Engine number 55561
Explanation of the engine compartment plate C = left-hand drive H = 1.6L ZETEC E 91RON W = ib5 manual transmission 5 B = 4.06 GP gearbox AK = match- midnight black interior trim AYS = body color a=metropolis blue/v=zinc- indian yellow/ s=citrus gold Q =96EEC emission standard DAW =5-door *WF0(Eur.)A(5-door)XXW(Spain)P(Valencia)D(Focus)A1(2001)K(October)55561*
Mileage and date What was replaced Price 39973 km 03/12/03 Front brake pads 1075558 1400 rub. Spark plugs 4 pcs. 1077002 560 rub. Oil filter 1119421 110 rub. Motor oil 5W30 5l. 600 rub. Cabin filter 1139654 420 rub. Fuel filter 3964918 300 rub. Brake disc 2 pcs. 4077455 1500 rub. 5440r 180$ 47945km 08/18/03 Antifreeze 1222116 200 rub. Heater tube connector 1108264 620 rub. 1560r 52$ 50858km 10/10/03 Gasket for fuel pump 1069084 350 RUR. Fuel pump 1237431 13000r. 13530r 450$ 52924km 12/15/03 Fuel pump gasket 1069084 360 RUR. Fuel tank 1071510 11200r. Fuel level sensor 1134621 1900 RUR. Plastic clamp 1652967 30 rub. 13500 rub. $450 52924km 04/15/04 Glass of the 5th door 1090397 7200 rub. Set for gluing 1102105 1800 RUR. Sealant 1102109 300 rub. 12000 rub. $400 60020km 04/26/04 Bulb H7 1013711 400 rub. Air filter 1072246 420 rub. Oil filter 1119421 250 rub. Cabin filter 1139654 900 rub. Front pads 1151049 2188r. Fuel filter 1212739 630 RUR. Candles 1233897 1251r. Engine oil 1254584 815r. Mount 5016703 230 RUR. 8000 rub. $265 79156km 08/27/04 Air filter 1072246 440 rub. Oil filter 1119421 260 rub. Cabin filter 1139654 950 rub. Front pads 1151049 2260 RUR. Fuel filter 1212739 660 RUR. Candles 1233897 1290 rub. Engine oil 1254584 815r. 8750 rub. $290 93201km 12/15/04 Support bearing 1061721 340r. Shock absorber support 1087177 1030r. Wheel bearing 1112547 2200 RUR. 4750 rub. $160 100170km 03/25/05 Oil filter Air filter Cabin filter Fuel filter Motor oil Spark plugs set Timing belt Timing belt rollers Topping up brake fluid Work $220 Salary/hour RUB 9,000 $543 100230km 03/29/05 Replacement of the pump Replacement of the alternator/steering wheel/pump belt guide roller Replacement of the tension mechanism and tensioner roller of the generator/steering wheel/pump belt Checking the oil in the manual transmission Replacement of the rear wheel bearing Replacement of the generator belt RUR 12,270 $445 Yokohama 88H 195/60/15 A520 tires (weight 8.97 kg) purchased and installed on OZ RACING TITAN wheels, rim 7J diameter 15 beads for H2 tire offset ET37 bolt holes 4X100/4X108 landing hub 52 RUB 10,400. $380 101260km 05/10/05 The bottom was treated with Dinitrol RUB 445,680. Front pads purchased Lucas GDB 1358 1390 RUR. Rear drum pads Lucas GS 8636 1700rub. Front brake discs Lucas 3 555 344 2310rub. 6000 rub. $220 101410km 05/18/05 Pads installed Spark plugs ordered 1202935 $45.4 1305 rub. $45 1310 rub. 101510km 05/24/05 Purchased clutch kit Luk 622 2414 09 orig.1 122 236 4200 RUR. $150 101800km 06/02/05 Purchased mass air flow sensor Hella 8ET 009 142-291 orig. 1 051 277 4200 rub. 150 dollars 102040 km 06/11/05 The internal combustion engine was diagnosed, the timing belt was replaced, and the ECU was recalibrated for RUR 1,550. $54 103600km 08/13/05 Purchased 4 winter tires Gislaved NF3 185/65/15 at a price of RUB 2,470/piece. (weight 8 kg) 9900 rub. $350 104500km 09/19/05 Purchased Proma RS 6.5J15 H2 4X10⁸ ET45 d63.4 wheels for RUB 2,050. disk 4 pcs. for 8200 + 200 (delivery) = 8400 rub. and installed on the wheels Kisloved NF3 185/65/15 tires for 730 rubles. installation + balancing. 9130 rub. $323 105000km 10/10/05 Purchased high-voltage wires 1114744 1092379 1114745 2100 rub. 72 dollars Purchased front stabilizer struts MOOG fdls0090 1004018 and rear stabilizer struts al3059 1800rub. $64 3900 rub. 136 dollars 105100 km 10.23.2005 Rear stabilizer struts installed. 2 rear shock absorber bushings from a VAZ classic and 2 generator bolts from a GAZ 406dvig were purchased for the rear stabilizer struts. For 100 rubles. One front stabilizer strut was returned as defective, 2 moogs were purchased as a replacement and installed. Additional payment 1100 rub. Purchased and installed a handle on the Sparko gearshift lever for 1150 rubles. We bought and installed a Weihers front strut strut / upper / steel 3000 RUR. To install the spacers, 6X12 bolts, nuts, mounting plates for gas, UAZ, and VAZ were purchased for a total of 200 rubles. Bought dinitrol, injector flushing with Liqui Molly, Tektil for 800 rubles. 6350 rub. $223 November 30, 2005 105,900 km Purchased a Sparco Sprint chair for RUB 7,200. and parts for its installation - woodworking knife blanks, unheated, 2 pcs. for 650 rubles, plate brackets for a VAZ classic 100 rubles, gearbox cover for a VAZ classic, Plates for a GAZ 50 rubles, drills 50 rubles, bolts 200 rubles. Purchased suspension H&R cup kit sport springs and shock absorbers Purchased front levers assembled with silent blocks and ball moog FDWP0403 and FDWP0404 pf 2228 RUR. pcs. X2 Moog tie rod ends FDES1536 and FDES1535 were purchased for RUR 320. pcs.X2 Purchased front shock absorber supports with bearings SKF VKDA35417 520 RUR. PC. X2 Purchased front wheel bearing installation kit SKF VKBA3531 1050 RUR. Purchased 2 windshield washer nozzles. 1135044 180 rub. Seat installed RUB 25,816. $890 12/14/2005 105984 km Installation of suspension 150 dollars + 500 rubles. Oil Liqui Moly Leichtlauf special 5-30 1100 rub. 5l+ 300 rub. 1l Oil filter MANN РН5803 190rub. Wheel bearing YHR SNR Rl5255 1100rub. Bearing installation and oil change RUB 1,900. Wheel alignment 1450 rub. 10840 rub. $380 12/30/2005 106300 km Purchased and installed Sparco reflex1 pedal covers 1380 RUR. Sparco safari steering wheel 5370 rub. Momo steering wheel adapter 1570 rub. 8320 rub. $292 01/10/2006 106500km Bought aluminum rear strut strut Wiechers 1660rub. Front lower steel strut Wiechers 36.5 euros Gearbox link B&M 240 euros Given 1660 rubles + 1890 rubles + 265 dollars 11235 rub. $395 01/21/2006 106550km Ordered OMP release from the manifold - the entire system - 650 dollars. $650 02/03/2006 107000 km Purchased and installed Hella lensed headlights 1DL008367921 400 dollars + 1400 rubles. $450 02/22/2006 107,100 km Purchased and installed a JVC KD-G807 radio cassette player 5800 RUR + 300 RUR. Sparco mats rubber + aluminum inserts 1800 rub. $280 02/26/2006 107200km Received Piper exhaust system – rear muffler + resonator + fasteners + short pipe. 03/02/2006 107300 km Exhaust installed, catalyst removed and replaced with a pipe. $170 Purchased 3L gearbox oil. Liqui moly Hochleistungs-Getriebeoil SAE 75W-90 (GL 4+) 1410 rub. $220 03/12/2006 107410 km Purchased and installed - Simota cold air intake kit 3800 rub. And Green cotton air filter Twister (65mm) RUR 3,300. Cleaning the Green cotton air filter 520 RUR. Wipers 560 and 480mm 1300 rub. 8920 rub. $320 03/26/2006 107503km The B&M drawstring has arrived. The backstage is installed. 04/01/2006 107600 km Power steering oil was purchased for 500 rubles. We bought hub nuts for 170 rubles. 2 pcs. and a repair book for 550 rubles. Total 1390 rub. $50 04/05/2006 107610 km Installed clutch - disc and basket, release bearing assembled with clutch cylinder 510001110 (2100 rub.), oil changed in manual transmission. A tube was purchased for supplying the bunker to the clutch cylinder combined with the release cylinder 1255407 1500 RUR. and installed Work 3720 rub. 7320 rub. $261 05/04/06 108,000 km License plate lamps with lamps were purchased for RUB 540. PC. bought 2 pcs. 1109489 1080 rub. Windshield wiper panel pistons 8 pcs. 115 rub. 1106903 920 rub. Panel sealant above the cabin filter 5m. 1128983 500 rub. Cabin filter K1054A 500rub. Rear stabilizer struts febi 19830 900rub. 3900 rub. $140 05/05/2006 1120 rub. spark plugs Denso iridium power ITV20 5339 4pcs. 1120 rub. $40 05/11/06 108142km 5400 rub.+300 dollars. Superchips $500 05/15/2006 108,200 km Replacing spark plugs on Denso ITV20 Purchase and replacement of battery on Medalist m56420 64ah for 1960 rubles. $70 05/16/2006 108255km Purchase and installation of lights Hella 2SD 008 694-801 3700 rub. $135 06/22/2006 109000km Purchased Timing Belt 1037660 orig. 1550 rub. and valve cover gasket 1126120 original 750 rub. strip on glass 300 rub. crankcase ventilation filter 800 rub. $125 06/29/2006 109100km Ordered SCHRICK intake shafts: 0252E1640-00 and exhaust: 0252A1560-00 07/06/2006. 109200km Turn signals depo fdfoc98281ttn 250rub. R/shaft seals febi 18170 310 RUR. 560 rub. for everything 21 dollars 07/10/2006 109250km Hood locks SANDTLER 450rub. $17 $17 07/14/2006 109500km Rear right wheel bearing 78/03 HK ipd 1325rub. Rear stabilizer struts Febi 19830 830rub. Bearing replacement 700 rub. Total 2855 rub. $105 08/04/2006 110,000 km Purchased OZ TITAN 7J17H2 ET42 4X10⁸/4X114.3 DIA L-63.3 wheels and Pirelli P zero NERO 205/40/ZR17 84W tires Assembly and balancing of wheels 1100 rub. 08/23/2006 110300 km Shrik camshafts received on August 28, 2006. 110450 km Installation of r/shaft seals, valve gaskets. Covers, camshafts. $56 08/30/2006 110550 km Reflash of the engine control unit $100 and power measurement $100 09/02/2006 110650km Purchased pump P236 HEPU 1230rub. Antifreeze 5l liquid moly kuhlerfrostschutz kfs 2001 concentrate 850 rub. Distilled water 3l 30 rub. Power steering reservoir-pump pipe 1110rub. Total 3220 rubles or 120 dollars. $120 September 20, 2006 110734 km Re-flashing, additional tuning 09.24.2006 110,870 km Re-flashing three times, measurements Replacement of thermostat housing 1,450 rub. YS4Z-8592-BD, replacement of thermostat F8RZ-8575-CA 500 rub. Buying a speed sensor 1087548 1300 rub. Purchase of a gas filter and oil filter Mahle 600 rubles. Replacing the speed sensor 800rub. Total 4650 rub. or 172 dollars. $172 112150km 11/22/2006 Changing the oil, oil filter, fuel filter. 400 rub. Oil Liqui Moly Leichtlauf special 5-30 1100 rub. Oil filter mahle 210 rub.
Replacement stabilizer Ford Focus
We have been working since 2008. More than 50 thousand clients trust us
- home
- Ford model repair
- Ford Focus
- Replacing the stabilizer
Replacing stabilizer bushings for Ford Focus
The anti-roll bar helps prevent body roll when cornering, increasing vehicle stability.
The Focus 2, 3 stabilizer bushings are subject to constant dynamic loads and therefore are consumables and must be periodically replaced if a malfunction is detected. On average, Ford Focus stabilizer bushings last about 50,000 km before replacement.
Signs of the main failure of the bushings are knocking noises when passing uneven roads, as well as symptoms such as:
- knocking and vibration when moving;
- play and beating of the steering wheel;
- rolls when making turns;
- car instability and car drift when driving.
Instructions for replacing front stabilizer struts for Ford Focus 2
These instructions will help you easily select and replace the front stabilizer struts on a Ford Focus 2 without the help of a car service. Stabilizer struts are necessary for a stable position of the car while driving, as well as to reduce possible roll when the car enters a turn. Due to poor-quality road surfaces, stabilizer struts often fail, and some car service technicians call them “consumables”.
Prices for replacing anti-roll bar for Ford Focus 2, 3
Replacing stabilizer struts for Ford Focus
The service life of the stabilizer struts of the Ford Focus 2 and 3 is about 100 thousand km, however, the action of moisture and reagents on our roads reduces the service life of the part to 70-90 thousand km. A knocking noise in the suspension area when driving on a rough road will tell you that the struts are faulty. This symptom is also typical for other problems with the chassis, but if you have carried out a thorough diagnosis of this unit and have not identified any breakdowns, then the problem is most likely in the stabilizer link. You should not delay replacing the struts, because the stability of the car when driving and the performance of the entire suspension depend on this, especially since the procedure at a Ford service center will take no more than an hour. In addition, this is not a very expensive part, so there is no need to put off repairs until later.
