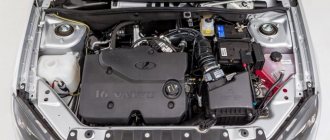
Engine of the old modification 11183
Engine 11183 is installed on the Standard Grant. It migrated here from the Kalina car. The unpretentious and time-tested engine is quite reliable and does not raise any questions. Its power is quite enough for city driving. Such an engine is less suitable for the track, but Grant will have quite good luck. This engine also has advantages - its elasticity. Unlike the Kalina engine 1.4l 16kl. from the very bottom he begins to accelerate the car well.
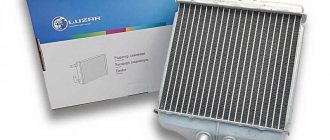
Installation of a new Lada Granta radiator
When buying a new radiator, you need to understand that it must be either original or very close to the original in its characteristics.
Car enthusiasts have to console themselves mainly with a radiator heater for the Lada Granta Luzar. In general, he performed well. Especially with the use of special additives that seal the liquid supply channels. The new generation of radiators has features in the fastenings; they consist of two parts and are assembled together with three self-tapping screws.
The new radiator will fall into place correctly if, after purchase, you carefully cover it with foam rubber around the perimeter, after which a small window of the required format is cut, somewhere at the bottom of the stove body. Thanks to these manipulations, the new radiator should fit perfectly into place. Next, the entire assembly proceeds in reverse order.
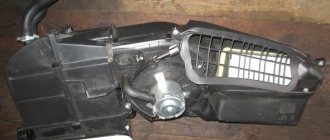
Removing and installing the evaporator unit
We install the car on a lift or inspection ditch.
We unload the refrigerant from the air conditioning system.
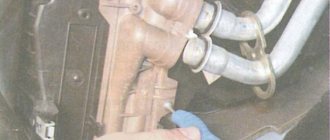
Using a 10 socket, unscrew two bolts 1, Figure 5, with washers 3 and disconnect block 2 of pipelines from block 4 of the evaporator.
We install plugs in the holes of the evaporator block and the piping block.
Removing the instrument panel and heater - article How to remove the instrument panel of a Lada Granta.
Disconnect block 1, Figure 6, of the evaporator temperature sensor from the instrument panel wiring block.
Using a flat-head screwdriver and pliers, unfasten the fastening brackets and disconnect the evaporator unit housing.
By visual inspection we check the elements of the evaporator block for mechanical damage to tubes, plates and threaded connections
Evaporator Unit Installation
We perform the installation in the reverse order, in this case:
– before installation, add compressor oil to the evaporator in the amount of 25 cm3 (compressor oil FD 46XG);
– replace the O-rings with new ones and lubricate them with compressor oil;
– the tightening torque of two bolts 1, Figure 5, securing the pipeline block to the evaporator block is 5 – 6 Nm (0.5 – 0.6 kgf.m).
Evacuate the system and charge the system with refrigerant.
Heater radiator: responsible for heating the interior
It’s hard to imagine a modern car without a standard set of devices and options, thanks to which driving the vehicle becomes as convenient as possible, and staying in the cabin is comfortable and safe. The functions of maintaining a favorable temperature regime in the car are assigned to the heating, air conditioning and ventilation system, which, depending on the situation, can heat, ventilate or cool the air in the cabin. At the same time, one of the key components of the heating system is the stove, which includes a radiator that acts as a heat exchanger. The air entering the car interior is heated by the radiator, and it is heated by the liquid that cools the engine.
"Lada Granta" is equipped with a large number of options, thanks to which driving the vehicle becomes quite convenient
How does the Lada Granta heating system work?
Structurally, the Lada Granta heating system consists of:
- an air duct directing the flow to the left deflector (deflector is a device for enhancing traction);
- heat exchanger covers;
- seal;
- stove radiator;
- air duct to glass;
- stove body;
- central air duct;
- an air duct directing the flow to the right deflector;
- recirculation shutter rods;
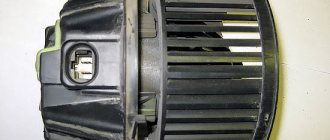
- fan shell;
- directly from the fan;
- a resistor that regulates the operation of the fan;
- main air duct;
- distribution valve rods;
- regulating device;
- a device that directs air to the feet of passengers;
- thermostat shutter rods.
The structure of the Lada Granta heating system allows you to carry out repairs on your own
How does the heating system work?
The heating and ventilation system in Lada Granta is a supply and exhaust system . What does this mean? Air from outside penetrates into the cabin through a special device in the form of an air intake box placed in front of the windshield. The amount of air coming from outside is regulated by a special recirculation damper. The recirculation system provided in the Lada Grant allows for better heating of the air in the cabin in winter and faster cooling in summer (if air conditioning is available). However, you should not abuse the recirculation mode, since this will introduce stale air into the car. It is convenient to use recirculation to protect against foreign odors from the street entering the cabin, but only for a short time. The principle of recirculation is to block the access of air from outside and repeatedly pass internal air flows through the heating or cooling element.
Next, an air filter 7 appears on the path of air flows, which serves as a barrier for dust and dirt particles. Do not forget to change the filter element in accordance with the schedule recommended by the manufacturer. The air, cleared of mechanical particles, is picked up by fan 11, driven by engine 12, and pumped into the car interior.
After this, the air stream passes through the air conditioner evaporator 13 (if provided in the package), under which there is a drainage hole 14 for draining the condensate. Depending on the position of the damper 15, which regulates the temperature, the air moves to the heater radiator or bypasses the heat exchanger. If the damper directs the jet to the radiator, then heated air enters the cabin, the flows of which can be distributed as necessary onto the windshield and side windows or under the feet of passengers.
Heating and ventilation system "Lada Grants" - supply and exhaust
The exhaust occurs through special openings in the rear of the body, which can be found under the trunk lining. For normal operation of the hood, these openings should not be blocked by cargo carried in the trunk. Among other things, a closed hood can cause windows to fog up.
Operation of the Lada Granta stove radiator
There is a heater directly under the windshield; after passing through it, air flows are directed to different parts of the cabin. Judging by the reviews of the owners, the stove installed on the Lada Granta works more efficiently than the heaters of other VAZ models, for example, Lada Kalina .
The radiator leaked, the sealant was filled in - the leak stopped, and the stove also stopped heating. The service center said that I shouldn’t have done this: the stove radiator was clogged. Replacing a stove costs approximately 4–5 thousand rubles. + oven. Refused, no money. A friend advised me to change the expansion tank cap. And so they did. Cool, the oven works great!
Nikolai
https://avto-granta.ru/remont-i-obsluzhivanie-lady-granty/pechka-na-lada-granta
It is necessary to remove the battery, the air filter box by pulling it out from the rubber dampers and remove the intake corrugation. You will need this to access the thermostat.
We drain the antifreeze from the cooling radiator by unscrewing the plug in the lower right part of the radiator. To drain, you will need a container of at least 10 liters.
Attention: It is necessary to drain the coolant when the engine is cold to avoid burns.
Remove the connector from the electronic accelerator pedal and unscrew the pedal from the car body using a 10mm socket wrench. Then remove the pedal from the studs.
We dismantle the radiator of the Lada Granta stove
This radiator eventually leaked into the car interior. And antifreeze vapors are harmful!
Despite the fact that there are usually no complaints about the quality of the stove, breakdowns can still occur. If you focus on the radiator, it may clog or leak. In any case, you need to immediately begin dismantling the stove, after which it will be possible to inspect it in detail and understand the causes of the breakdown.
Most of the work will have to be done on the top of the engine compartment, as well as from inside the car. In fact, in this case we will not need a pit, a jack, or a lift. Just keep in mind that access to the engine compartment will be extremely difficult.
- To begin, unscrew a couple of clamps that secure the heater pipes to the heater radiator. This frees them up so we can remove the pipes completely.
- Now we will have access to draining the coolant from the radiator. Naturally, you will have to take care in advance of the container where this liquid will be drained.
- If possible, we move the pipes to the side. In principle, most of the work in the engine compartment is completed here.
- Next comes work from inside the car. Near the handbrake you can find one self-tapping screw that secures the tunnel, as well as another self-tapping screw for fixing the parking brake housing. Unscrew them completely. In addition, on the driver's side and on the passenger's side there will be two more screws that secure the tunnel on both sides.
One self-tapping screw under the handbrake tunnel
Unscrew the two screws. One is visible in the photo, the second is to the right, closer to the gearshift knob
Three pedal mounting bolts
Gained access to the heater radiator pipes
We saw off the radiator tubes to remove it
Installation of a new Lada Granta radiator
The new radiator must be original or at least compatible with it in size and technical parameters.
We carefully cover its perimeter with foam rubber, after which we begin to work with the window in the stove body.
Carefully cut a small window of a suitable size, closer to the bottom of the stove body.
After this, the new radiator will fit into place very well. All other parts are assembled in reverse order.
Selecting a new heater radiator (verified articles)
A model specifically for the Lada Granta Luzar under the symbol LRh 0190b would be a good fit for the role of a standard heater radiator.
It is completely made of aluminum alloy, and the price of this radiator is about one and a half thousand rubles. In addition to the Lada Grant, it is also suitable for installation in the second version of the Lada Kalina.
In general, so far, alternatives are rarely found on the domestic market. So car enthusiasts have to be content with this radiator. However, it performs quite well, especially if you do not use special additives to “repair” it, which seal the liquid supply channels.
Radiators of the so-called new type are characterized by mounting features. In addition, such radiators are not solid, but consist of two parts. They are assembled together using three self-tapping screws.
As for the “old” radiator model, it has a completely solid structure. However, most of the fastening elements are the same as the new type, so installing any of them should not lead to any difficulties.
As you know, in some cases it is not practical to restore the heater; it is easier to replace it with a new product. Therefore, before removing the heater radiator on a grant, it makes sense to resort to some tricks, we will dwell on them in more detail.
For example, if the car's mileage is more than 40 thousand kilometers, there is a high probability of scale and foreign deposits forming in the system on the walls of the channels. To correct this situation, washing with a special product is ideal. There are many flushing methods, both with and without draining the coolant.
In our opinion, the most acceptable way is to add a special product to a system that already contains antifreeze. With this approach, it is possible to achieve the following results: - dissolve scale; — improve heat dissipation and restore the performance of the interior heater. Moreover, the cleaning agent does not corrode materials, gaskets, or sealants. In general, whether to flush or replace the unit depends on the severity of the malfunction and the individual decision of each car owner.
Some good advice
Changing the oil in the gearbox of a Lada Granta with a cable drive with your own hands
To avoid problems with your heating system, it must be carefully monitored. For example, after purchasing a new car, observe the condition of the cooling system hoses in the engine compartment. Also, check under the car regularly to see if there are any black spots underneath. If you notice traces of antifreeze, quickly seek professional help or fix the problem yourself.
Please note that after completing the repair work, it is advisable to replace the radiator hoses with new ones. In this case, use sealant at the joints. You should be extremely careful, because sealant that gets inside the system can damage the pump, which will lead to the timing belt breaking.
Interior temperature sensor for LADA Granta
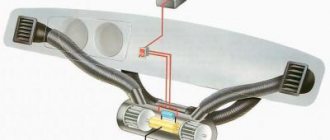
The interior temperature sensor is located in the interior lighting housing. To eliminate incorrect temperature readings due to the influence of heated elements, the sensor is equipped with a forced airflow system. The system ensures uniform flow of air from the front of the vehicle through the sensor housing.
To ensure proper air movement, keep the inlet of the sensor housing free from any solid particles or liquids. This is especially true in cases of dry cleaning of the interior. When cleaning the interior with a vacuum cleaner, it is strictly forbidden to bring the suction tip of the vacuum cleaner pipe to the sensor inlet. If air flow through the sensor housing is obstructed, the normal functioning of the automatic climate control system is disrupted.
Replacing the Lada Granta heater radiator
If it's cold in the cabin when the heater is on, it means it's time to repair or replace the heater. Among the most typical reasons why you have to change the heater radiator on a Grant:
- clogging of channels due to the formation of scale or dirt;
- the occurrence of cracks or holes in the heating system.
In some cases, it is possible to get by with repair and restoration measures. For example, before changing the radiator, you can try flushing the system with a special liquid. There are means to get rid of scale inside the heating system, both by draining the antifreeze and the coolant inside. Such products, as a rule, do not harm sealants, gaskets, hoses, etc.
In some cases, it is possible to repair the heater radiator of a Lada Granta car without having to replace it
What is needed to replace a stove radiator?
When starting to replace the radiator, you need to prepare:
- set of clamps;
- sealant;
- antifreeze;
- Phillips screwdriver;
- key to 10;
- insulation (foam rubber);
- file.
Of course, you should purchase a new radiator in advance, and a “original” one, since the heat exchanger of other models will not work.
Video: recommendations for replacing the Lada Granta heater radiator yourself
Sequence of steps when replacing a radiator
Work on dismantling the old radiator can begin from the engine compartment. Here, to create access to the elements of the heating system, it is necessary to remove the battery, the air duct pipe between the throttle assembly and the air filter, as well as the air filter itself.
Then you need to empty the system of coolant by draining it into a previously prepared container. Obviously, if a car owner intends to fill in new antifreeze at the end of the work, the old one does not need to be saved.
This is interesting: Driving on the sidewalk
Before replacing the heater radiator of a Lada Granta car, you must remove the battery and air filter
The next stage of work is carried out from the interior. To gain access to the heater radiator, you will first have to remove the gas pedal: without this, it is not possible to remove the heat exchanger . Dismantling the pedal, as a rule, does not cause any difficulties: using a 10mm wrench, unscrew the three fastening nuts and disconnect the brake light limit switch and the connector for the electronic gas pedal. In addition, you need to press the brake pedal and lock it in this position.
Next, the plastic cover covering the radiator is removed, after which access to the heat exchanger opens. After this comes the most crucial moment - sawing off the radiator pipes: you should saw off after bending so that the cut part can be removed through the hole into the engine compartment. After both pipes are removed, you can remove the radiator from the niche into the car interior.
To dismantle the old radiator, you need to saw off its pipes
The pipes on the new radiator should also be sawed off so that later hoses can be put on them and secured with clamps. The cut edges of the pipes should be processed with a file, the holes in the engine compartment are filled with foam rubber to provide additional fixation to the structure and to preserve heat in the cabin.
Before disassembling the entire panel on the Grant, you need to file down the aluminum tubes on the stove radiator and connect the new radiator with a piece of hose... Doing this is not a problem, but before doing anything, you need to think about how to do it correctly.
Akhmed Fazilov
https://grantaremont.ru/content/pechka
It is more convenient to carry out the work of replacing the heater radiator together: one supplies the pipes from under the hood, the second receives them in the cabin. Sealant should be applied to the pipes of the new radiator and, after connecting to the flexible hose, securely secured with clamps. After this, you need to assemble all the removed parts: gas pedal, battery, air filter, then fill the system with antifreeze. At the end, you should check how the new radiator works: you need to start the engine and let it run for a few minutes, then visually make sure that the antifreeze level has not dropped, there are no leaks, and the heat exchanger has warmed up.
There are no fundamental differences in the procedure for replacing the heater radiator on a Lada Granta with and without air conditioning (unlike replacing the cooling radiator).
Video: personal experience of the Lada Granta owner in replacing the heater radiator
Stable and uninterrupted operation of all vehicle systems can be achieved by constant monitoring of their condition. The serviceability of the Lada Granta heater radiator becomes especially important in winter, therefore, in the process of preparing the car for the cold season, it would be useful to check its readiness for the season, especially if the vehicle is expected to operate at a high intensity in winter conditions. Practice shows that with proper operation, a stove radiator can serve properly for many years, but if it still fails, it is quite possible to replace the heat exchanger yourself.
Two higher educations. The main activity is freelance copywriting. I write on various topics that interest me, I try to put my own knowledge and experience into the texts. (1 vote, average: 5 out of 5)
Radiator dismantling in Kalina
To remove the designated assembly and related components, you will need to use the following tools:
- wrench "10" (socket type);
- pliers with thinned grips;
- Phillips screwdriver;
- If the Lada Kalina is equipped with an air conditioning system, then we additionally stock up on a set of Torx (star profile).
- Disconnect the power connector from the system fan.
- Let's dismantle this unit. It is held on the radiator with 4 bolts. To unscrew them, you will need to use a “10” key. Extraction is carried out in the upward direction.
- Next, we move on to removing the pipes from the radiator fittings. We loosen the clamps using pliers or a screwdriver. We use the same wrench to unscrew the two nuts that hold the radiator assembly in the seat.
- Now we tilt the product slightly towards the engine and lift it up.
When dismantling the unit on a Lada Kalina equipped with air conditioning, you will need to resort to removing additional components that are directly attached to the radiator. To carry out this activity, you should stock up on a key with an asterisk profile.
You need to unscrew 4 screws. During dismantling, look towards the lower radiator cushions. They can either be removed along with the product or left in the landing niches. Experts recommend removing these support elements to assess their condition. It would also be useful to remove the rubber-metal bushings present on the body of the LADA Kalina radiator unit. It is better to replace them with new analogues.
After dismantling, the radiator is checked. For this purpose, plugs are used that are installed in the bends. Then air is pumped into the unit placed in water (through a small fitting) with a pressure of approximately 1 bar. If there are a lot of fistulas, then the unit must be unconditionally replaced. When the leaks are insignificant, you should try to negotiate with the technicians to repair the unit in the station conditions. The new product is installed in the reverse order. Particular attention should be paid to rubber pipes and clamps. If the condition of these components is in doubt, then it is better to replace them with new analogues.
When all the elements of the system are assembled, we begin to fill the refrigerant. We perform this action until liquid begins to leak from the throttle heating unit pipe.
➤ How to replace the heater radiator on a Lada Grant
The stove heating system on the Lada Granta car functions quite well, the owners have no complaints. The stove radiator is reliable and durable. However, there comes a time when the process of metal corrosion begins and the seams peel off. A faulty heating system can cause a lot of trouble, especially in sub-zero temperatures.
Frosting of windows and cold inside the cabin are the first symptoms of unstable operation of the heating system. Prevention is necessary.
Let's look at the step-by-step process of replacing the heater radiator on a Lada Granta car.
Preparatory stage before replacing the heater radiator on the Lada Grant
Required materials and tools:
- set of automotive tools, sockets, ratchet;
- additional lighting, extension cord;
- screwdriver with a Phillips-shaped, flat tip;
- rags;
- silicone sealant;
- new heater radiator;
- empty container for draining antifreeze waste.
Sequence of actions when replacing the Lada Granta heater radiator
Note to the driver!
There are two ways to dismantle the heater radiator on a Lada Grant: according to the instruction manual and the “folk method”. Let's look at each with a specific example.
- We place the car within the perimeter of the repair area, turn off the engine, and open the hood. We provide priority safety measures.
- After the engine has cooled down, we proceed to dismantling the heating system on the Lada Grant without a condenser.
- We remove the terminals from the battery to avoid a short circuit in the circuit.
Removing the terminal from the battery
- We unscrew the drain plug in the radiator, cylinder block, and grind the antifreeze into a plastic container.
- We unscrew the four screws, remove the heating system filter and casing.
- We release the clamps, remove the two rubber pipes “supply” and “return” from the radiator fittings.
Supply and return pipes
- Inside the car, pry up and remove the cover of the fuse box.
Removing the fuse box cover
- We remove the plastic lining of the tunnel and the steering column frame.
Steering column frame
- Remove the dashboard in the central part.
Central part of the dashboard
- We dismantle the rubber seals on the doorways.
Rubber seals on doorways
- We pry up and remove the side (left) plastic trim of the instrument panel.
Plastic instrument panel trim
- By analogy, remove the trim on the right side.
- We dismantle the upholstery of the front left and right pillars.
Front pillar trim
- We dismantle the lighting beam control knob.
Dimmer knob
- Unscrew the nut and pull the regulator out towards you.
- Using a screwdriver, pry it up and remove the glove box cover from its regular place.
Glove box lid Glove box
- On the left side, under the casing, we find the mass fastening, unscrew the nut (key set to “10”).
- Using a “10” head, unscrew the left and right console mounting bracket.
Console mounting bracket Unscrew the bolts
- We press the side clamps, disconnect the block with wires from the brake light switch.
- By analogy, disconnect the accelerator pedal.
- Disengage the clutch pedal.
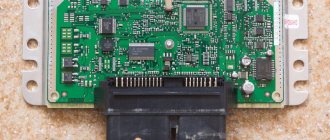
- On the right side, press the latch and disconnect the wire block from the controller.
- Using a “13” socket, unscrew the bolts securing the instrument panel to the body element.
- We remove the instrument panel from the car interior and carefully place it on the surface of the workbench for work.
Replacing the radiator of the Lada Granta stove with your own hands is completed.
Some motorists practice not removing the entire dashboard, but only the plastic lining. The process is similar to the one described above. In fact, the dashboard frame remains in place, and all plastic linings and inserts are removed.
Each owner decides which method to use individually.
Method No. 2: replacing the Lada Granta heater radiator without removing the panel
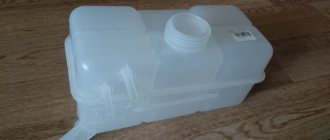
- Unscrew the expansion tank cap and release the pressure in the system.
Expansion tank plug
- We unscrew the plug in the cylinder block and grind the antifreeze into a plastic container.
- We disconnect the block with wires from the pedal unit: brake, accelerator, clutch.
- In the engine compartment, turn off the mass air flow sensor.
Mass air flow sensor - We saw off the upper and lower pipes of the heat exchanger.
- We recess the pedal module and remove the heater from its original place.
- We clean the seat and blow out the cavity.
- We install the new radiator in its original place.
- We install pipes - connectors.
- Fill in 8.0 liters of pure antifreeze. We start the engine and check the system for leaks.
The process of replacing the radiator of a Lada Granta stove with air conditioning is similar to that described above.Is it better to do it yourself or contact a service station?
Considering the simplicity of the process, replace the radiator yourself. If necessary, additionally read the recommendations outlined in the article, watch video tutorials, and get advice from specialists.
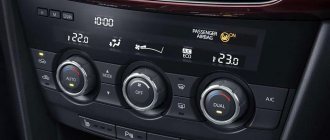
Undocumented capabilities of the Lada Granta heater
Unlike a number of other foreign cars, the Lada Grant has only four heater control switching modes. For example, there are six of them in Audi and Opel.
The air supply lines are connected in such a way that the windshield is heated at any position of the regulator. There is no such option in domestic transport.
In winter, when the air conditioning is activated, most of the air is automatically directed to the feet, in summer to the windshield for blowing. In Grant the flow is of the same type.
In order to warm up the side windows on the Lada Grant as quickly as possible in winter, you need to redirect the deflectors towards the glass. After the glass has thawed, we move the deflectors to their normal position.
The second speed mode of the regulator is not enough - we transfer it to the third to speed up the frequency.
According to the recommendations in the operating instructions, it is necessary to dismantle the heater when the dashboard is disassembled. However, the method is not as effective as the one presented above.
Review of Manufacturer Prices
Heater parameters: weight 0.5 kg, length 155 x width 167 x height 20 mm.
Name/article Price, rub.) Heater radiator 2190-8101060 From 2400 21900-8101060-00 —/— 21900-8101060-10 —/— 27140-5PA0A —/— LUZAR aluminum LRh 0190b From 2100 – 2200 LUZAR LRaC 0190 —/— LUZAR 482768 —/— LUZAR 353287 —/— AvtoVAZ OJSC 429612 From 2300 with air conditioning for automatic transmission LUZAR 367792 From 2400 AvtoVAZ OJSC 348402 —/— LUZAR 466443 —/— *prices are current as of November 21, 2018.
Recommendations for the selection of parts and components
The market offers products from domestic manufacturers, the quality is good, the price is affordable. Foreign analogues are 10–15% more expensive.
To exclude counterfeiting, purchase parts and consumables exclusively from certified stores, dealership centers, and sales offices.
Before purchasing, check the catalog part numbers with the actual data specified in the instruction manual.
Removing and installing the capacitor
We place the car on the lift.
We unload the refrigerant from the air conditioning system.
We raise the car for convenient work.
We remove the front bumper, as stated in the article - How to remove the bumper of a Lada Granta car.
Using a 10mm socket, unscrew the four nuts 1, Figure 1, remove the washers and beam 4 of the front bumper.
We remove the sound signal 2.
Disconnect block 3 of the ignition system wires from the block of the electric fan harness 5 of the capacitor.
Using a 10 socket, unscrew two nuts 1, Figure 2, fastening the high pressure pipeline 5 and the suction compressor pipeline 4 to the condenser 3, remove the washers 2.
We disconnect the pipelines and install technological plugs on the pipelines and in the condenser holes.
Using a 10mm head, unscrew the two bolts 1, Figure 3, securing the condenser to the radiator, remove the washers 3, remove the radiator 4 from the clamps and remove the condenser 2 with the electric fan assembly.
Using a 10mm socket, unscrew the four bolts 1, Figure 4, remove the washers 2 and remove the electric fan 4 from the condenser 3.
Condenser installation
We install the electric fan 4, Figure 4, on the capacitor 3 and tighten the four bolts 1 securing the electric fan with washers 2.
We install the capacitor 2, Figure 3, with the electric fan assembly into the radiator clamps 4 and with a 10-point head we tighten the two fastening bolts 1 with washers 3.
We connect block 3 of the ignition system wiring harness to the block of the electric fan harness 5 of the capacitor.
We remove the plugs from the pipelines and the condenser. We install new o-rings. Apply compressor oil FD 46XG to the sealing rings.
Add 15 cm3 of compressor oil to the condenser.
We attach pipelines 4 and 5, Figure 2, to condenser 3, install washers 2 and secure with nuts 1. The tightening torque of the nuts securing the pipelines to the condenser is 3.7 - 4.6 Nm (0.37 - 0.46 kgf.m).
Install sound signal 2, Figure 1.
Install beam 4 of the front bumper, install washers and screw four nuts 1. The tightening torque of the nuts securing the front bumper beam is 5 – 7 Nm (0.5 – 0.7 kgf.m).
Evacuate the system and load the system with refrigerant, loading rate 500±25 grams.