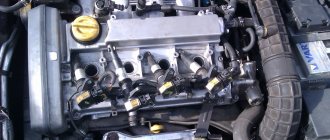
It is no secret that for normal operation, an engine requires fluid, or rather fluids, such as motor oil, coolant (antifreeze, antifreeze or water), as well as fuel, due to which the power stroke occurs. I will not go into detail about the role played by each of the above liquids; I think everyone already knows about this to one degree or another. Instead, I want to talk about mixing these liquids, why this happens, what the dangers are and how to avoid this.
Fault detection
This problem, or rather, a serious breakdown, is quite insidious and does not appear immediately. Liquid lubricant passes through microcracks in small portions, without having a particular effect on the operation of the power unit. Changes become noticeable at the next stage, when the channel connecting the two systems expands and the mixing speed increases.
How to determine whether lubricant has gotten into antifreeze:
- due to the deterioration of the cooling properties of antifreeze, the engine begins to heat up more often, the electric fan operates more often;
- the oil level gradually decreases, and the antifreeze level increases (it’s quite difficult to notice);
- the pump impeller whips up the oil-water mixture, turning it into a thick white emulsion that clogs the filter, causing the engine lubricant pressure to drop;
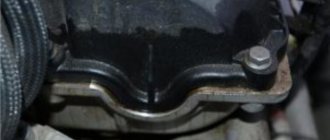
- drips are visible on the outside of the block or heat exchanger body, originating near the gasket (they do not always appear);
- the oil in the expansion tank changes the color and consistency of the coolant.
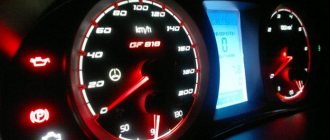
Important! The most obvious sign of mixing, monitored visually, is a white emulsion in the expansion tank with antifreeze. If you find a similar substance in the tank, compare this fact with other symptoms - constant overheating of the engine and signals from the oil level warning lamp.
As a rule, trouble does not come alone. Antifreeze that gets into the oil pan can create serious problems: at best, the emulsion will clog the lubricating channels and filter. In the worst case scenario, the crankshaft will rotate the bearings (sliding bearings) as a result of oil starvation. Expensive repairs are guaranteed.
Often the gasket bursts all the way to the cylinder walls, after which antifreeze gets into the combustion chambers (its channels are closer). The sign of a breakdown is clearly visible - white smoke pours out of the exhaust pipe in large quantities, and the engine power drops sharply.
You can read about which oil is best to pour into the engine on a special resource https://kakoemaslo.ru/lada/maslo-dlya-dvigatelya-lada-priora/, which provides information on this issue in great detail. After all, its performance will depend on how and what kind of oil you fill.
When a similar problem occurs on a machine equipped with a heat exchanger - a motor lubricant cooler, diagnostic difficulties arise. If there are no external signs in the form of drips, then after identifying the emulsion in the expansion tank, it is better to contact a car service center. There, both units will be purged with a special installation and the culprit will be determined by air leakage.
We recommend: Reasons for gasoline getting into oil
Diagnostics
When the cylinder head gasket
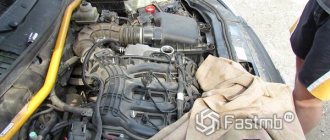
(cylinder head) burns towards the engine compartment, the location of the leak of antifreeze or other liquid from the cooling system can be easily determined by the drip. This is provided that the engine is supervised and washed regularly.
Especially cultured drivers, in order to quickly identify leaks of various fluids circulating in the engine, paint it in heat-resistant silver and regularly wash the engine itself.
On silver, all leaks are detected instantly, which allows you to quickly eliminate the problem. Of course, it is impossible to quickly determine anything on a dirty engine. But freshly squeezing antifreeze out from under the head there is a chance to see it.
The presence of antifreeze in oil is determined by three criteria:
- firstly
, the color and saturation of the exhaust gases change, they become white and swirl with thick steam, in winter it is this steam that confuses drivers - try and determine whether antifreeze has got into the oil or is it from the frost; - secondly
, as an additional check, the color of the oil is checked on the dipstick; if it has recently been changed, but has already turned black, then there is a high probability that antifreeze has got into it; - thirdly
, although slowly, the level of coolant liquid in the distribution tank will decrease every day.
A gradual decrease in the volume of antifreeze is not scary, and may indicate the presence of a breakdown in the gasket
, as well as for leaks in the main line connection bridges or microcracks in the hoses. An exchange of antifreeze and oil can also occur in the heat exchanger due to a leak in the seal.
When the issue concerns only antifreeze, its timely detection of getting into the oil will not cause serious or irreversible processes with the rest of the engine systems.
The situation will be worse when the system contains not antifreeze, but antifreeze diluted with water. In this case, you can expect everything from the engine, including overheating and deformation of the cylinder head.
Why does coolant get into the car oil?
The reasons why antifreeze went into the oil may be the following:
- The cover is burnt out. Between the cylinder head and the cylinders there is a metal lining. High temperatures in the combustion chamber and cooler increase the wear of this spare part. If you operate the car correctly, the lining will last approximately one hundred thousand kilometers. However, if the part is constantly overheated or filled with low-quality coolant, the part becomes deformed and the coolant goes into the lubricant.
- Cracks. While running, the engine heats up and cools down. This causes the metal to crack. Through the cracks, the coolant enters the lubricant complex. The negative impact increases if you start the engine in low temperature conditions.
- The block head was deformed. This problem appears after repairing the motor (if the head was removed). In view of this, major repairs should be entrusted to specialists.
- Defective pad. Even among new spare parts there are low-quality products. Replacing a part with a defective one will definitely not fix the problem.
Buy spare parts only from reliable retail outlets. Do not use the services of car services that employ employees whose qualifications are questionable.
Oil cooler failure
An oil cooling system is necessary for a car to maintain the lubricant at a temperature that is comfortable for the car to operate. If the oil cooler tubes are damaged and this system depressurizes, oil gradually begins to leak into the coolant. The first signal that the problem with your breakdown is in the oil cooler is the appearance of oil with bubbles in the coolant.
In this case, it is necessary to remove the pipes from the oil cooler, wash them and connect them together. The expansion tank of the system also needs to be completely cleaned. After these manipulations, the liquid is refilled. After a short period of time after restarting the car, you need to check whether the problem has disappeared or not. If yes, then the repair will cost you a little less, since you will have to deal exclusively with the cooler.
The coolant reservoir is dirty with grease
We recommend: How to remove rust and bugs from a car body? Means and methods of combating corrosion
After removing the cooling system, you should thoroughly check all the pipes and, if there are cracks, weld them. This part of the work should be left to professionals. Poor quality repairs will end up costing you even more. Most often, copper tubes of the appropriate diameter are simply inserted into the places where cracks form in the oil cooler.
Sometimes oil gets into the antifreeze due to the fault of service station employees. If you discovered such a problem after visiting the station, it is worth checking whether engine oil has been added to the cooling system of your car. To do this, the liquid from the oil cooler is completely drained, and the system itself is thoroughly washed. In the final part of the work, you just need to pour new antifreeze into the engine.
Be sure to note that passenger cars have an oil heat exchanger filter. If a malfunction of the engine circuit in question is diagnosed, the filter must also be replaced.
Elimination method
When a significant amount of lubricant gets into the antifreeze, the latter is unable to work as a coolant. It forms clots and even solid particles that settle on the walls of the channels, clogging the thermostat valve and clogging the radiator. There is also no guarantee that mutual penetration has not occurred and antifreeze has not leaked into the oil pan. Hence the conclusion: both liquids must be drained .
If your car is equipped with an oil cooler, immediately contact a service station to locate the broken gasket. Then decide whether to carry out the repairs yourself or entrust the work to car service personnel.
What to do if oil or emulsion is found in the expansion tank with antifreeze:
- Both systems need to be flushed. Before draining the antifreeze, add a special detergent composition to the expansion tank and let the engine idle for 5 minutes. Empty the lubrication system immediately.
- Unscrew and discard the oil filter.
- Replace the gasket on the cylinder block by removing the cylinder head. During the dismantling process, disassemble the elements of the cooling system (pipes, pump, thermostat) and thoroughly rinse them by hand. Do the same with the heat exchanger if it is the culprit for mixing liquids.
- Unscrew the oil pan and oil pump, disassemble the latter and change all gaskets. Before assembly, wash the parts with gasoline or solvent.
- Assemble the power unit, install a new filter and fill in engine flushing lubricant. Instead of antifreeze, fill the system with distilled water and add detergent.
- Start the engine and let it run for 10–15 minutes without increasing the speed. Keep an eye on the oil warning light and temperature gauge.
- When finished, replace the water with a working fluid - antifreeze, and the flushing oil - with full-fledged engine oil. It is highly advisable to change the filter twice.
Advice. When pre-flushing the cooling system before eliminating the malfunction, monitor the temperature and pressure of the lubricant. If you notice something is wrong, immediately turn off the engine, as the oil still gets into the antifreeze.
No matter how carefully you try to wash the engine parts during disassembly, you will not be able to get to all the channels. Therefore, flushing is performed several times, including after starting the power unit. During further operation, monitor the condition of the process fluids so that the problem does not recur.
How does lubricant get into antifreeze (antifreeze)?
The cooling system of the power unit is a network of channels passing through the block and cylinder head. It is sealed and therefore operates under pressure resulting from the heating and expansion of the liquid. The lubrication system has a similar structure, only the channels are narrower, and the pressure is created by an oil pump.
There are only 3 reasons why two different liquids are mixed:
- The gasket between the head and the cylinder block is the weak point of any engine. When the smallest crack appears in it, liquid with higher pressure penetrates into the “foreign” system. As a rule, oil enters the antifreeze because the oil pump “presses” harder than the pump. Although mutual penetration also happens.
- In cars with powerful and more complex engines, there is an element for cooling the engine lubricant - an oil cooler. In it, too, mixing of antifreeze and oil occurs as a result of a breakdown of the gasket.
- Cracks in the metal of the cylinder head itself.
Now about why the integrity of the gaskets is compromised. The main enemy of any motor and additional elements is overheating. When exposed to high temperatures, the aluminum cylinder head or oil heat exchanger housing is deformed. But since the part is firmly held by bolts, longitudinal expansion of the metal occurs, pulling the gasket along with it. Cracks appear in the latter, where the lubricant penetrates.
The opposite situation also happens: antifreeze flows into the engine and dilutes the oil in the crankcase. The reason is a malfunction of the pressure relief valve installed in the expansion tank plug. Then antifreeze penetrates through the cracks, since its pressure is greater.
We recommend: Automotive low beam lamps H7 - a ray of light in the dark kingdom of the road
What to do
The method for eliminating an antifreeze leak depends on the cause of its occurrence. The simplest situation is a burnout or rupture of the gasket. It cannot be repaired, so the gasket should be replaced.
If a deformation of the cylinder head occurs, most often you cannot do without the help of a specialist, since performing this action incorrectly will lead to failure of the part. A deformed cylinder head will require grinding on a special machine. But if the defects are serious, it is necessary to remove more than the permissible layer. In this case, the part will have to be replaced.
We recommend: Lean mixture on the injector and error P0171: causes
The discovery of a large crack in the cylinder block requires its immediate replacement. Small cracks in cast iron or silumin blocks can be repaired by welding - electric or “cold”.
Replacing the BC gasket with your own hands
Replacing the cylinder block gasket is a simple manipulation, and any car owner can easily cope with this task on his own. The main condition for obtaining the desired result without additional breakdowns is to follow the car manufacturer’s recommendations regarding the strength and procedure for tightening the cylinder head with a torque wrench. The sequence of actions when replacing the gasket is as follows.
- The car is de-energized by removing the negative terminals of the battery. If necessary, drain the antifreeze and reduce the pressure in the supply.
- First, the attachments are disconnected from the cylinder block. If you have no experience working with parts, it is advisable to sketch or otherwise record the sequence of dismantling the elements. Craftsmen advise arming yourself with a marker and applying the appropriate marks to each dismantled part.
- The screws securing the cylinder head begin to unscrew from the center, making half a turn each time.
- Disconnect the cylinder head and remove the old gasket.
- Clean the cylinder head and wash it with gasoline.
- Install a new gasket. To ensure precise installation, there are special bushings on the center of the block. The hole for the oil passage should be between the 3rd and 4th cylinders.
- Screw all parts in reverse order.
- Return hanging elements to their place
IMPORTANT! The fastening bolts must be cleaned before unscrewing. This will prevent the key from falling off and protect the bolt splines from damage.
Repairing a cylinder crack
The most common way to seal a BC crack is welding. The work requires certain skills and abilities, since a violation of the technology will lead to divergence of the seam, and the problem will return. The welding sequence and technology is as follows:
- The ends of the crack on the block are drilled at an angle of 90 degrees. This procedure is necessary to prevent further expansion of the crack.
- The cylinder block is heated to 650 degrees. Then a cast-iron-copper filler wire is applied to the crack and a continuous weld is made using flux.
- The part is gradually cooled in a heating cabinet. Sudden cooling of the cylinder block after welding is unacceptable: this will lead to rupture of the seam and complete failure of the part.
The seam on the part can be made without heating, using electric welding and copper electrodes in a tin wrapper. In this case, the resulting seam requires additional reinforcement with epoxy resin. The surface is degreased with acetone or a special compound, then a layer of epoxy paste is applied to the seam with a spatula. After this, the BC is dried for 24 hours at room temperature. After drying, the seam is sanded.
We recommend: What is the difference between an injector and a carburetor in a car?
Minor cracks can be repaired without welding by applying fiberglass and epoxy resin. The surface of the crack is degreased, then several layers of fiberglass are applied one by one, each coated with epoxy paste.
What actions should I take?
First of all, find out why antifreeze began to leak into the car oil (how to find out the reason was written above). In most cases, you need to change the lining by checking the engine parts. If the block head is in good condition and has no noticeable cracks or holes, then repairs will not be expensive. If there is severe deformation, the worn part will need to be replaced. Remember that there is no point in repairing a broken block head. It's easier to replace it with another one.
Once you have eliminated the root cause, flush the cooling and lubrication system completely. You will need to disassemble the pipes and clean the oil channels. It's quite difficult. The mixture of coolant and lubricant is not easy to remove from parts. Use cleaning products that clean the engine from various contaminants.
Curdled oil in antifreeze negatively affects engine performance. Bearings become coked, lubricant is deposited on spare parts, and the corrosive effect increases. If you ignore the problem, the power unit will jam and major repairs will be required.
When purchasing a vehicle, be prepared for the fact that you will need to carry out maintenance yourself. All recommendations are written in the operating manual. Once you understand how a car works, you are unlikely to pour antifreeze into the lubricant complex.
Such knowledge comes with experience. The more experienced the driver, the more procedures he can perform independently. This makes it possible to save your own money, since you do not need to pay car service employees for work.
To ensure that your vehicle serves you for as long as possible, follow the recommendations prescribed by the car manufacturer in the owner's manual. Fill the engine with only those consumables that are optimal for your power unit. If you find it difficult to choose the optimal cooler/oil, contact an experienced driver or a service center employee. Proper car maintenance is a guarantee of long-term operation of the car.
A dry motor is the first sign of its serviceability
If oily stains are found, you should immediately contact a specialist. An oil leak must be repaired immediately, since such a malfunction can be a big problem for the car owner.
Of course, there are few reasons why antifreeze gets into the oil and vice versa, but the consequences are serious. A good car owner should monitor the oil and antifreeze levels daily. It will take no more than 5 minutes, but the effect speaks for itself. You need to know that if the vehicle mechanism is normal, then the oil and antifreeze move mutually and autonomously, without intersecting anywhere. At the same time, everyone performs their functions!