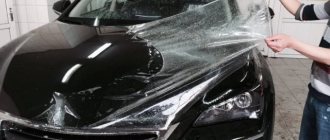
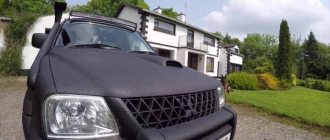
Any car sooner or later needs painting: rust appears, the coating swells, or even worse, an accident. Until recently, there were two ways to restore the appearance of a four-wheeled friend - painting and using vinyl film. Now, thanks to the American manufacturer Plasti Dip International, an alternative has appeared - rubber-based paint, similar to vinyl. Essentially, it is liquid rubber (polymer-bitumen emulsion).
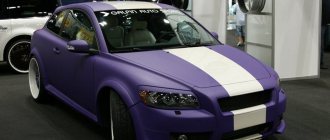
In the photo - a car with rubber paint
What is liquid rubber
The easiest way to paint wheels yourself is with plastidip. This type is easy to apply to all types of metals. It doesn’t matter whether it’s stainless steel or cast iron, carbon steel or aluminum. The composition holds equally firmly and looks beautiful.
Composition – bitumen-polymer emulsion made of two components. It can be applied to any surface and has seamless waterproofing properties. Hardens quickly, special conditions for application are not required.
However, it should not be confused with bitumen mastic. Although the properties are partially the same, rubber has differences. I'll start with the usual properties of any rubber:
- Elasticity;
- Easily withstands blows;
- No chips left;
- It is not washed off with water and does not allow moisture to reach the metal;
- Resistant to elevated temperatures;
- Good resistance to slipping;
- Durable in use;
- You can find any color you want.
In addition, there are properties inherent only to liquid rubber:
w[n] = w[n] || []; w[n].push(function() { Ya.Context.AdvManager.render({ blockId: “RA-676344-20”, renderTo: “yandex_rtb_R-A-676344-20”, async: true }); }) ; t = d.getElementsByTagName("script")[0]; s = d.createElement("script"); s.type = "text/javascript"; s.src = "//an.yandex.ru/system/context.js"; s.async = true; t.parentNode.insertBefore(s, t); })(this, this.document, "yandexContextAsyncCallbacks");
- Ready to use immediately (no need to wait, warm up, etc.);
- Easy to apply.
These qualities have made it popular in the market. Liquid rubber is produced both in sprays (aerosol cans) and in cans. Applies as easily as paint. It can be removed as easily as film. Able to penetrate difficult to reach places.
This is an excellent alternative to gluing vinyl films. Films are difficult to stick to the complex shaped surface of disks, but rubber does not require even or smooth surfaces.
Can be removed without damaging the coating on which it was applied.
Material advantages
Nowadays, liquid rubber for cars appears as one of the best materials on the market, since it has a whole set of modern parameters:
- this material forms a smooth surface without seams (this is clearly visible in many videos on the Internet), due to the fact that it is applied using cold spraying;
- the high adhesive properties of the composition cause the most reliable adhesion to virtually any part of the car body, no matter what material it is made of;
- the adhesion of liquid rubber does not depend on the temperature of the base surface, its age or stage of hardening;
- The cold spray technique makes it possible to apply coatings to car parts of complex shapes, while avoiding increased consumption of the composition.
For a car, liquid rubber can sometimes be an alternative option that replaces painting, since when processing vertically located parts, the composition does not flow down even in hot weather.
The final coating is characterized by reliability, resistance to damage, chipping or weather conditions.
Types of liquid rubber
The cost of the product varies, it all depends on the manufacturer. There are budget coverage options, and there are very expensive ones. You can cover the rims (and other elements) of the car yourself, or you can contact a service center where they will do everything for you.
The most popular rubber is in a can. They are much cheaper than canned ones and come in a wide variety of colors and textures. Plasti Dip is considered the market leader; it is an American brand. In addition to sprays, manufacturers package liquid rubber in cans or buckets.
Purchasing buckets or cans is more economical, however, for application you need special equipment - a spray gun and a compressor, or an electric sprayer. It is not recommended to apply it with a brush; it will not create a smooth and uniform layer.
The can version is more suitable for covering the entire bottom of the car, or the entire body. That is, for large volumes of coverage. For rims, a spray is sufficient.
The most accessible, well-known and popular types of liquid rubber are:
- Plasti Dip. Produced in America, in the form of 400 ml cans. In addition to the standard color palette, there are special ones, for example, mother of pearl, metallic or chameleon. It is very easy to remove and apply. Suitable for painting and as protection against scratches or chips.
- Air Dip. Analogue of the American product, Chinese release. The scope of application is the same, but Chinese products are limited in colors and variety of textures. It has no glossy shades at all.
- Liquid Rubber Coating. The cheapest coverage option. The structures are only matte, but the color palette is unlimited. Also produced in 400 ml cans.
DIY painting
Preparation
Painting a car with liquid rubber is a fairly simple operation, but requires careful preparation. The main condition for high-quality work is the cleanliness of the surface.
Before starting work, the car should be washed with car shampoo and all grease stains and drops of bitumen should be removed. After the car is thoroughly washed and dried, you can use a hair dryer at home.
The presence of water droplets on the treated surface contributes to the formation of bubbles and loose adhesion of the material.
To prevent paint from getting into the interior or onto untreated surfaces (glass, lights, chrome elements, etc.), they are sealed with film and masking tape.
Before starting work, the windshield wiper blades are removed from the car, and the windshield is covered with film.
If you paint discs with liquid rubber yourself, you should paint them separately from the car or carefully cover the brake discs, calipers and other elements. Work should be carried out wearing a respirator and in a well-ventilated area.
Coloring
The best quality work can only be achieved indoors. Like the car being treated, it must be clean and dry. The optimal temperature is 20 °C, but work can be carried out at temperatures close to this value.
If the paint is in a can, then shake it vigorously for 1-2 minutes in accordance with the manufacturer’s instructions and you can start working. If the material was purchased in the form of a concentrate, it should be thoroughly mixed with a mixer with the solvent specified in the instructions.
Liquid rubber should be applied to surfaces from a distance of 20–25 cm. When applying paint to a surface using a spray gun, the maximum possible supply of coloring material should be set and the output pressure should be 1.2–1.5 bar.
Coating a car with liquid rubber is carried out in several layers and can range from 3 to 8. The number of layers applied depends on the selected color of liquid rubber; the closer the color shades are to each other, the less material is required for processing.
If painting involves a complete change of tone, then more layers may be required, especially when changing from black to white.
During work, the sprayer should be held so that its angle does not change and the optimal distance should be maintained. When the distance from the spray gun to the surface decreases, smudges form; when it increases, a rough surface forms.
It is better to apply the first layer very thinly to create a base and let it dry for half an hour. Unpainted areas found during inspection are not so critical, the main thing is that there are no swellings or peelings of the liquid rubber.
Next, the following layers are applied with intermediate drying of the layer for 10–15 minutes. After painting is completed, the liquid rubber should be allowed to harden for 1.5–2.0 hours and then remove the masking tape and remove excess paint. Complete hardening of liquid rubber occurs after 20–24 hours.
Useful tips
- The resulting smudges can be easily removed with a paper towel;
- To carefully remove excess material, you can use a utility knife or a flat-head screwdriver;
- Before starting work with your own hands, try applying liquid rubber to some surface and evaluate the results;
- To improve the adhesiveness of the applied material, it is better to pre-treat the treated surface with a special primer primer.
The complete process of painting a car with liquid rubber, video:
Why are discs covered?
What does such coverage provide, is there any benefit or is it a collective farm show-off? This type of tuning is considered not a simple decoration:
- Rubber provides additional protection against moisture, scratches and chips on metal. Scratches on the disc occur from pebbles flying from under the wheels;
- This is a design method of giving a car a unique style, not prohibited by law;
- A good way to hide disc defects, scratches, chips, small dents, and give them a new life;
- Applying a spray from a can will cost less than replacing discs or contacting a service center for painting.
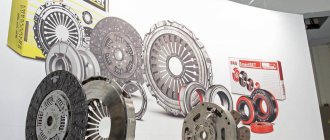
Other protective equipment
Let's consider several alternative means for processing car body parts:
- Anti-gravel. These protective compounds are designed to treat the underbody, sills, wheel arches and other areas of the car body that are vulnerable to chips. Anti-gravel agents are applied both by aerosol method and traditionally, using a brush. A popular anti-gravel compound in a can is ProLine Hi-Gear Anti-gravel.
- Protection against chips and scratches. A well-known representative of this category is AVS Crystal. Like the previous composition, this product protects body parts well from mechanical damage. Experienced drivers often treat their car with it before a long trip.
A wide range of protective compounds for cars is presented in the catalog of the online store TopDetal.ru.
How much should I buy?
If you paint 4 discs with a spray, how many cans will be needed in total? Many authors forget to answer this crucial question. Meanwhile, you need to take into account that the coating is applied in 5-7 layers. The options are:
- 2 cans of spray should be enough for 4 discs if the coating is 5-7 layers;
- If you want a final layer of a special color, then add another can of final coating, the previous layers will serve as a strong base;
- For large and patterned rims, it is recommended to take one can per wheel.
To summarize, I will say that it all depends on your skill and the number of layers applied; for a car - a passenger car, you need a maximum of 4 bottles of spray.
Preparation
Any driver who has already dealt with painting wheels knows that such work is carried out indoors without dust and debris, which easily stick and spoil the appearance. Wheel rims also require preparation before coating:
- It is necessary to clean the discs from dirt, dust, oil flows and debris.
- The treated surface is dried and degreased with a solvent.
After this, you can spray the rubber. If the liquid is sprayed unevenly, it is not recommended to rub it with a rag so that the fibers do not get on the coating. It is better to buy anti-silicone, which is freely sold in any spare parts store.
Preparing the surface for coating
If you have already dealt with painting alloy wheels, then you should know that any manipulations with automotive parts must be carried out in a clean room, where there is no debris, dirt and dust that can easily stick to the elements. Before painting the wheels with liquid rubber, you need to thoroughly clean them of various types of imperfections. First of all, the rims need to be washed from road dust, stones cleaned, and the surface degreased. The last procedure can be difficult, but you only need a special product and a rag with which you will rub the sprayed liquid. Anti-silicone, sold in all auto stores, can be an assistant in this matter.
Removing plastidip from painted wheels
Application methods
For a better coating, rubber is applied at temperatures above +5 in the room; if the room temperature is below +20, you can hold the can for a short time in warm water. Shake first, like any substance in a can. There are several application methods:
- The most popular method has become the dipping method for wheels. With this method, the outer edge of the tire is covered with masking tape. At the same time, the joints between the disc and the rubber are painted. The color of liquid rubber is chosen to match the color of the tires, and the result is a visual merging of the tire with the rim.
- The use of cardboard pieces to cover all unnecessary elements. They are easy to insert and then easy to remove once the rubber is applied.
- You can seal areas that do not require rubber coating using regular tape. Only this process is more labor-intensive and it’s difficult not to get tape on the disc.
- The easiest way. It is recommended to cover only the wheel valve. The costs for pasting are minimal. Unnecessary rubber residues fly off after several washes. It’s easy to remove plastidip from unnecessary places; it comes off with pieces of film.
New wheels do not need painting, but painting after repair or used wheels is necessary. For more details, read my article “do-it-yourself repair and painting of alloy wheels.”
Features of Plasti Dip application technology
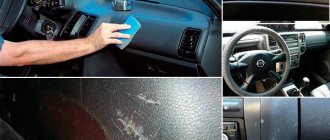
Before starting work, there is practically no need to prepare the car; just wash it using degreasing detergents and then dry it thoroughly.
You must first check the body for the presence of “bugs” (rust) and clean them, putty or weld leaky areas.
Some experts advise removing license plates, door handles, protecting windows, radiator grilles, exterior mirrors, etc. from paint. Others consider such measures unnecessary, since rubber paint is easily removed and there is no need to spend money on masking tape or plastic film.
For work, you need a dry garage or room with a temperature of ± 20 ° C; you can work outside in calm weather. It is recommended to work in a protective suit and use a respirator.
Painting is carried out with a conventional spray gun (paint gun), but to prevent it from clogging, it must be set to a thick jet, or use a tool with a wide nozzle, since the particles of the coloring substance are larger compared to conventional car paint.
Rubber paint is diluted with solvent in a ratio of 1 to 1.5 and stirred with a construction mixer. The mixture is heated in a water bath to a temperature of 50°C.
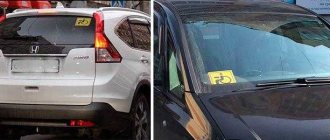
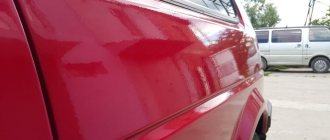
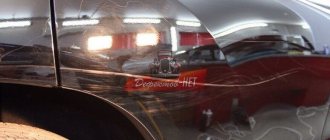
Car treated with rubber paint
Painting is carried out in two layers (the backing is white), and in some cases up to eight layers. But you can apply the next layer only when the previous one has dried. Drying should be natural, that is, without the use of hair dryers or any other devices, heat guns, etc. There is no need to rush, as already noted, the material dries very quickly.
The product in different colors can be purchased ready-made - in cans.
To prevent smudges from forming, the spray gun or spray can must be held at an angle of 90° at a distance of 15-30 cm, then the paint will apply more evenly. To do this, it is important to slightly overlap the edges of the paint strips. Spray speed is average.
This coating is used to apply various designs, advertising texts, identification marks, etc. to the car body.
The car can be used 24 hours after completion of work, and washed no earlier than a month later.
Video: a complete guide to painting a car with rubber paint
Rules
There are simple rules for applying rubber that must be followed:
- A total of 5-7 layers are applied to each disc, with one application;
- It is better to apply the first layer by spraying;
- On the second pass, pay more attention to the corners and spokes;
- Subsequent passes are needed to increase the thickness and strength of the layer;
- Rubber is applied at angles of 60-90 degrees;
- Damaged areas with noticeable defects can be passed separately several more times to smooth them out and hide them under the thickness of the layer;
- Drying of the first layer is about 15 minutes, subsequent layers are 30-40 minutes;
- It is recommended to dry a fully treated wheel for another day.
Unsuccessfully applied rubber can be carefully torn off from the surface, without harm to it, and applied again. I have everything, my friends. Now you can handle the coating of rims with rubber yourself, decorating your car. I recommend reading my article “Do-it-yourself repair and painting of stamped wheels.” Subscribe to updates on the site and share the link with your friends.
Dyeing process
Clean, dry, prepared discs - you can proceed directly to painting yourself. How to do this - step-by-step instructions. The can should be held at a distance of 40–50 cm perpendicular to the surface. The correct angle of inclination will help avoid the appearance of shagreen (pimply surface).
- Applying the first layer - the surface is covered with rubber in a shallow layer, so that the main (factory) color is visible, let it dry for 10-15 minutes.
- Second layer. This time, liquid rubber is applied more specifically - all areas of the disc are painted thoroughly and evenly. Having finished re-painting, the paint is allowed to dry again, leaving it for the same period.
- Applying the third layer is almost a completed procedure. Now, on the rubber-painted and dry surface of the disc, the paint is sprayed so thoroughly that the disc looks finished. Before applying the final, fourth layer, the paint is again allowed to dry thoroughly.
- After 10–15 minutes, it’s time for the finishing touches. The fourth layer is to bring the surface of the disc to an ideal state. Then comes the turn of final drying and the final stage.
Pay attention to: How to choose a spray gun for repainting a car
After waiting for the liquid rubber to dry completely, which is about two hours, you can begin to remove the tape. This is done carefully - the protective layer is removed gradually, without making sudden jerks, so as not to damage the fresh coating. Cards are deleted faster. The average consumption of Plasti Dip for four wheels with a diameter of 17 inches is 2-3 cylinders.
A little advice! During the preparatory work, place the can of paint in a bucket of warm water - heating promotes uniform spraying, without convulsive “spitting”.
Painted disc