Door panels, or panels, give the car's interior an aesthetic appearance by hiding the internal elements underneath. The manufacture of these parts is required when replacing worn out, peeled skin, wanting to update the interior space, or installing speakers under the skin for better music sound. You can make cards yourself, the main thing is to wait for good weather and stock up on the necessary tools.
What is needed to reupholster door cards?
Homemade door card reupholstery is impossible without the following components:
- a knife and spare blades for it;
- dense foam rubber 3-6 mm thick;
- two cans of spray adhesive that can withstand high temperatures;
- external material;
- sanding paper with parameters P100 or wire brush;
- degreaser;
- pen/pencil;
- sharp scissors;
- hot glue gun;
- washers and screws;
- flat screwdriver;
- hairdryer;
- wallpaper roller;
- clips securing the inner panel.
Tools needed
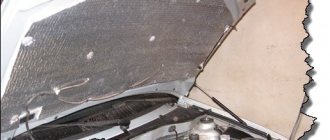
No special equipment is required to dismantle the casing. The tools are limited to a Phillips screwdriver for unscrewing self-tapping screws and a clip remover - an anti-stapler type design designed for carefully removing the clips that hold the door trim.
Moreover, it is better to take a plastic clip cutter: you will have to “pick out” the plastic clips, and a metal one can scratch both them and the surrounding, also plastic, parts. In the absence of this, you can get by with an ordinary flat-head screwdriver for prying and tugging, but again, in this case it may not be possible without damage. So, you need to act extremely carefully!
{banner_content}
Material for reupholstering door cards
To reupholster the door trim and trunk, you can use any dense fabric. Pay attention to the color, tone of the upholstery material, strength, quality.
Craftsmen recommend giving preference to a fabric that has good stretch and wear-resistant properties. The thickness of the fabric is also important - the parts hidden under it should not stand out too much or show through. If you still choose a thin material, grab a soft backing from the store.
Often car owners want to restore the upholstery using thermal leather. It stretches perfectly in any direction, is durable, and looks aesthetically pleasing. Such artificial leather must be installed using a hairdryer.
How to remove the door trim of a Lada Priora yourself
The car brand was released twelve years ago, and since then has been very popular among drivers. And it’s not surprising, because the cost of a high-quality product from the domestic automobile industry is quite low.
Many car enthusiasts can afford to buy it. Repairs and service are cheap, and some parts can be replaced yourself.
For example, from this article, readers will learn how to remove the Priora door trim.
In some cases, vehicle owners want to replace the door trim on the Priora. Achieving this goal is quite simple; you will need a minimum of tools. Lack of experience should not be scary; even people who are not involved in such repairs will be able to remove the old door trim and install a new door trim according to the instructions.
How to remove the trim
The process is divided into three main stages:
- Finding all screws and fixing elements, unscrewing the bolts.
- Removing door trims.
- Dismantling the casing.
The covering of the rear and front panels is removed separately. These steps will be described in detail below in the article; if you do not want to go to a car repair shop, we will provide instructions on how to remove the door trim on a Lada Priora car.
Why is dismantling necessary?
The upholstery of the Lada Priora car is available in several colors. If a car enthusiast wants to change the interior color, then he will have to change not only the seat upholstery, but also the door trim. Components such as noise insulation or insulation cannot be installed without first removing the sheathing.
If the window lifts are damaged, or the door handles are damaged, you will also have to remove the Priora door trim, notice the broken components, and install it back. Also, over time, the cladding loses its appearance, stains appear that cannot be removed.
How to dismantle the casing: instructions
You will need the following tools:
- flat screwdriver;
- Phillips screwdriver;
- clips and pistons to which the covering is attached.
It is not necessary to complete the last point, but it’s better to stock up on clips and pistons in case you break the old ones. In order not to waste time and not run to the store, it is advisable to buy the kit in advance.
When choosing caps or clips for Priora, pay attention to what brand they are intended for. These components for Priora are similar to those for Kalina. The difference is in length - for Kalina the clips are one and a half millimeters longer
Ask consultants for help, they will help you choose the right parts
The difference is in length - for Kalina, the clips are one and a half millimeters longer. Ask consultants for help, they will help you choose the right parts.
Front door
So how do you remove the front door trim? Reading the instructions:
- Unscrew the door lock latch.
- Unscrew the screw securing the handle to the door. Remove the screw and remove the handle.
- Unscrew both bolts that hold the switch block. Remove the unit; to do this, unclip the wires from the connector.
- Find the three fixing screws at the bottom of the door, unscrew them, and set them aside.
- Unclip the trim clips using a flathead screwdriver. Using the flat tip of a screwdriver, pry up the edges of the casing and carry out the process from the bottom up.
Such simple manipulations allow you to remove the front door trim. Install the new or old covering (depending on the purpose) in the reverse order
Backdoor
How do you remove the rear door trim? See instructions:
- Remove the socket from the glass receiver handle.
- Move the fasteners aside.
- Carefully remove the window handle and set it aside.
- You will find three bolts at the bottom of the door, unscrew them.
- There are four latches on top; unscrew them with a Phillips screwdriver.
- On the side, where the handle is located, there is another bolt, unscrew it.
- There are two screws on the other side of the door, unscrew them.
- Take a flat-head screwdriver and pry up the trim from below, gradually separating it from the door. Perform manipulations from the bottom up.
Install the door trim in reverse order. A map of the location of the fasteners can be found on the Internet, so you will be sure that you are unscrewing the bolts that secure the covering.
Conclusion
The dismantling process will not take much time and effort. It is so simple that the decision to go to a workshop and order a replacement of the covering there seems irrational. Following the instructions, everyone will be able to remove the Priora's trim.
Soft backing
It is needed to add volume to thin fabric. The substrate smoothes out all bulges, sharp iron corners, and irregularities that appear through the material. Typically, foam rubber with a thickness of 3-6 mm is used, although you can opt for a thicker version. Foam rubber is often equipped with a knitted layer that keeps the thread from passing through the spongy material when stitching.
The dimensions of the soft substrate should be such that it does not protrude beyond the edges or is 1 mm shorter. This will give the edge more edge. Do not wrap the backing over the other side of the insert - this may cause too much bulk at the edges. For upholstery, it is better to use high-density raw materials with closed cells. Whatever material you choose, remember - the denser it is, the longer it will wear out, maintaining its original aesthetic qualities.
We insulate a GAZelle with our own hands
The light commercial vehicle produced by the domestic GAZ plant was to the taste of both entrepreneurs and drivers - the vehicle turned out to be quite maneuverable, comfortable and profitable to operate. But it also has a number of serious shortcomings. Among these are poor thermal insulation - in the summer it is always hot in a GAZelle, and in the winter you have to constantly treat your back after drafts. However, knowing how to insulate a GAZelle, you can significantly improve the situation and get rid of most troubles.
Useful information about making door cards
If you decide to start making door cards for car audio with your own hands, then it is recommended to study the issue of the quantity and quality of speakers and the necessary tools.
Speaker selection
Car enthusiasts equip their door cards with different numbers of speakers to receive mesmerizing, loud music. Before retightening the part, determine how many speakers you want to install in the door. Also decide what diameter the parts are needed, where and how they will be located on the panel. Think over these points, then make a drawing of the speaker placement - this will make installation easier.
Determining the number of speakers
When selecting speakers, be guided by the rule that they must form a single balance of frequencies, recreating the fullness of their range. To achieve ideal sound, it is recommended to choose speakers with a caliber of 16.5 and 20 cm, as well as horn tweeters.
Place the midrange speakers in the midbass positions on the new panel in the lower segment of the door, and the tweeters in the upper segment. Choose a place for the midbass speaker - it should be where the woofer/midrange speaker would produce sound into the door space.
To get loud, clear music, 4-5 speakers are enough.
Loud front in the car door
When installing 4-5 or more speakers, new trim is required for each car door. It is worth considering that the body and base must support the weight of the speakers and do not resonate while music is playing. Card structures are firmly attached to the door metal - the tighter the fasteners are tightened, the less chance of vibration and resonance occurring during operation of the audio system.
Possible problems after dismantling
It often happens that after assembling the structure and installing it in its rightful place, some problems appear. The most common mistakes need to be considered.
- The locks are too tight. When reinstalling them, it is necessary to provide the necessary clearance to the crossbars. It is needed to prevent problems with the lock if the door sags a little over time.
- Door not closing tightly. This situation can be created by installing a new seal or incorrect placement of the tongue. In the first case, over time the problem will disappear on its own; in the second, you will have to adjust the element.
- The appearance of a squeak. This symptom indicates sagging of the fabric or loose loops. Troubleshooting - tightening hinges, lubricating parts.
- Distortions of the canvas. In this case, new dismantling will be required, since some errors were made during installation.
The main duty of any entrance door is protection from the entry of strangers, from noise and cold. To ensure long-term operation, regular maintenance of the structure and timely repairs are necessary. In this case, there are two ways: inviting a specialist or working independently. In order not to encounter problems, or to be able to successfully eliminate them, you need to carefully study all the elements of the front door and the conditions for their flawless functioning.
To learn and understand how to disassemble the front door yourself, and in what order to do it, it is better to watch this educational video:
Questions and answers about door cards
Inexperienced craftsmen often have questions about how to tighten car doors. The most popular ones are answered comprehensively.
How many speakers can fit on a door card
The number of columns depends on the door area. The doors of the domestic Lada Kalina and other cars can accommodate 10-15 speakers, 5-6 of which are tweeters.
How to open a door if the entire card is occupied by speakers
To open a door filled with speakers, a special drive is designed, controlled by a button. He moves the door opening mechanism. The button is placed in a convenient place.
Is it possible to make door cards yourself?
Yes, it is possible to remodel the door card yourself if you have the appropriate materials and tools.
What should be the power supply for speakers with a loud front?
To fully power the speakers, it is necessary to install several batteries for high currents, for example, 100-120 A. The power system is supplemented with several capacitors and equipped with powerful generators. For fastening, only high-quality wires with sufficient cross-section are used.
Is there a danger that a door with a loud front will sag?
Yes, it exists. To avoid this, do not pile too many speakers on the front doors.
Dismantling procedure
To ensure that removing the Duster door trim takes no more than half an hour, it is important to adhere to the order of work. We list the cases in which it will be necessary to dismantle the cladding:
We list the cases in which it will be necessary to dismantle the cladding:
- when replacing a standard card with a tuning version;
- to eliminate leaks from the rear door opening into the passenger compartment;
- when improving sound insulation.
The factory assembly of Duster has its weaknesses, both in the first generation and in the restyling version. An SUV has minimal sound insulation in the interior, so during repairs it is recommended to make noise in the doors, wheel arches, and trunk lid. Let's look at how to remove the Duster door trim step by step:
- Disconnect the negative terminal from the battery.
- Use a screwdriver to pry up the speaker mesh, pull it out, unscrew the four 25mm screws with a T25 key, and pull out the speaker.
- Using a screwdriver or a plastic wedge, pry off the decorative panel trim on the armrest. Find the screw under the plug and unscrew it.
- Pry up the edge of the upper panel of the armrest, secure the pad with clips, overcome their resistance by placing a plastic wedge.
- Unscrew the fastening screws located under the trim and the screw of the front door handle.
- Pry off the door opening handle, disconnect the rod connector from the lever, and remove it from its seat.
- Disconnect the power supply to the window regulator.
- At the end of the door, unscrew the screw by 30. After all the screws are removed from the door panel, the trim is held in place by 7 pistons around the perimeter, two clips in the center and a layer of automotive mastic.
- Insert a flat-head screwdriver or a wooden wedge under the casing from below, pull it towards you and carefully snap off the pistons around the perimeter, while tearing off the sealant. Craftsmen recommend prying off the cladding in the right corner and inserting a construction knife 1–2 cm under the door card. Run the cutter around the perimeter, cut off the mastic, then begin to snap off the pistons.
- After dismantling the trim, use a knife to remove the automotive factory sealant from the inside of the door card and door metal.
Restoration of door cards
To restore car door trim, select the appropriate material, prepare the tools, then proceed to reupholstery.
- Remove the door and remove the old covering.
- Disassemble the door.
- Remove the old material from the plastic and lightly sand it.
- Cut the required piece of fabric with a margin.
- Glue the door part with glue, cover it with the prepared fabric, and smooth it over the entire area with your hands.
- Trim excess fabric, cut out places for handles and buttons.
- Assemble the door and install it in its original place.
As you can see, there is nothing complicated in reupholstering door inserts if you follow the entire sequence of actions, have the necessary tools and have the time.
How to remove the rear door trim on a Lada Granta
The procedure is slightly different from removing the front passenger door trim, but the removal process is even easier.
The work must be performed in the following sequence:
- The door lock button is unscrewed.
- The handle of a mechanical window lifter is removed in the manner described above - first the hook is removed, and then the handle (for electric windows, the steps are also described above).
- Use a flat tool to pry up and remove the handle cover.
- Unscrew the two screws located under the removed cover.
- The rear door trim does not have the two lower bolts that were previously seen, as these doors do not have pockets. Therefore, all that remains is to remove the trim from the clips.
On the rear doors you will not have to deal with the power window control unit, since this element is not provided at the rear. The wires may be present if there are speakers connected. There are also no rearview mirrors, eliminating one plug. When reassembling the doors, you should make sure that there are no gaps, which over time can cause breakdowns due to the presence of condensation, moisture and dust. These include mechanical and electronic problems, including corrosion.
We recommend: Rating of the best manufacturers of cabin filters according to experts and customer reviews