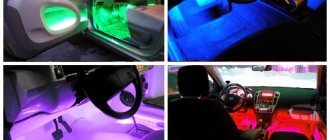
Installation and fastening of the podium in the car
The traditional method to securely secure a homemade podium is to screw it with self-tapping screws from the inside of the casing.
This, on the one hand, will ensure the quality of fastening, and on the other hand, will not spoil the appearance of the entire structure. To carry out this procedure, you will need only two tools: a screwdriver and soundproofing materials.
Main stages of the procedure
The process of installing and fixing any podium in any part of the car is as follows:
- Take a ready-made podium with a speaker built into it.
- The podium is screwed on the inside of the casing with self-tapping screws.
- However, to achieve truly clear sound, you will need to experiment with the installation - some screws will be tightened all the way, and some will not. That is, you need to give the podium such a position so that the speaker can reveal its sound to the maximum.
- It is recommended to soundproof the doors and ceiling (in this case you can achieve even clearer sound).
- After completing all the work, reassemble the ceiling, racks or doors (depending on where exactly the podium was mounted).
What it is
In fact, every car is standardly equipped with an audio system. Some of them are extremely simple, others are advanced and powerful.
As a fan of high-quality and fairly loud music, standard speakers often cannot satisfy my needs. Therefore, the decision is made to purchase more solid speakers. And here another problem appears. The large dimensions of the equipment can be a nuisance if they are not installed correctly on the rear parcel shelf or in the doors of your vehicle. That is, you need to place everything so that the speakers do not disturb the driver and passengers, but at the same time create the highest quality and much cleaner sound than before. And podiums come to the rescue. They improve the sound and take even standard acoustics to a new high level.
The podium is the base or basis for the speakers, due to which the speaker is fixed in the required position. That is, in fact, this is a mount that can be used standardly and practically in doors, in the cabin on the rear parcel shelf or directly in pillars.
By installing a podium, the sound becomes deeper and richer, high and, accordingly, low sound frequencies are clearly distinguished.
The podiums have several quite useful features and functions:
- appearance improves the visual perception of the speaker system in a car;
- the quality of the speakers improves;
- increased acoustic comfort in the cabin;
- podiums serve as mounts for speakers of non-standard shape;
- structures support large-sized devices;
- become a decoration of the entire interior;
- change a person's perception of music for the better.
Whether you need a podium or not, decide for yourself. Here you should take into account that buying a ready-made structure in St. Petersburg or any other city, including Almaty, is not a problem. But for some reason, many people strive to do everything efficiently and with their own hands. Numerous homemade products on Drive2 are direct confirmation of this.
Varieties
The podiums are not divided into rear or front, respectively. They are classified by location, and distinguished internal and external, respectively.
External ones include fastenings that are installed directly in the cabin. A striking example is placement on the rear standard parcel shelf of a car. But more often, motorists give preference to internal structures that are inserted into the doors. They hold up well and improve sound.
Both options can be easily installed or purchased for machines such as:
- VAZ 2110;
- Ford Focus;
- Chevrolet Niva;
- Chevrolet Lacetti;
- Daewoo Lanos;
- Lada Priora;
- Nissan Qashqai;
- VAZ 21099;
- Lada Kalina;
- Mitsubishi Lancer, etc.
Cars usually already have standard, factory-installed speakers or at least mounting holes for them. The dimensions and shapes themselves depend directly on the specific brand of vehicle. Domestic cars usually have speakers with a standard diameter of 13 cm, while foreign cars have speakers with 10 cm, 16 cm, 16.5, 20 and even 25 cm. 6x9 podiums are also extremely popular.
For doors, speakers are used that have oval or no less common round shapes. Depending on what kind of car you have, you need to consider the shape when choosing a speaker. Although in reality any form can be used. After all, the main task of the podium is to ensure reliable and strong fixation. This is what gives the sound volume and improves clarity.
We recommend: How to make and install a heated steering wheel
And if you are still thinking about whether to make it yourself or buy it, I advise you to study the range of finished products, look for podiums for the rear or front doors for your car, compare prices and decide.
Homemade designs will be cheaper. But here you will have to work hard, take the production into your own hands and try to achieve the maximum result. Otherwise you will be disappointed.
Why install speakers on podiums
Acoustic podium: photos and possible options for creation.
how to make podiums for speakers with your own hands door podiums speakers for a car with your own hands The first and obvious justification for the need to use podiums is that with their help you can move the dynamic head out of the standard seat if it does not fit there in depth. However, this is not the only reason.
For any speaker to sound, it needs a properly calculated acoustic design and a rigid base designed to dampen parasitic vibrations.
In home and stage systems, heavy, rigid enclosures are used that perform both functions at once. Subwoofers are made in a similar way for automotive systems.
The acoustic design of the mid-frequency speakers and “midbass” is formed by the design elements of the car. In this case, the cavities behind the casing act as the internal space of the sound column.
During operation, car acoustics experience significant vibration loads. If they are not extinguished, they are transferred to the sheathing panels and other structural elements, usually made of rather thin materials. These vibrations distort the sound.
The purpose of podiums is to absorb vibrations and dampen them. Prevent the spread of parasitic vibrations.
Making a podium in a car for acoustics with your own hands
To improve the sound quality of the audio system installed in the car, it is necessary to install additional speakers or replace the original ones with better and more powerful ones; you can also make efforts to improve the speakers. To do this, you will need to independently make a podium for the interior for new or updated speakers. Each design is made according to an individual sketch.
Let's look in detail at how to make a podium with your own hands and install it in your car yourself.
Blog of a Siberian auto mechanic
How to make a boat trailer with your own hands
The car audio kit finally arrived, and there was a problem installing it. We have component acoustics DLS R6A. The speakers are quite large, both in diameter (16 cm) and in height. It won’t be possible to simply install king-shaped ones in the door; the magnet will interfere with the glass, so it was decided to make acoustic podiums for the front doors.
There is a lot of information on the Internet on how to make podiums with your own hands, so after spending a couple of hours everything became extremely clear, let’s check it in practice... First you need to decide on the material! For richer and better sound, it is recommended to use birch plywood. Fortunately, I just had scraps of 2-centimeter birch plywood lying around. Some may think that it is too thick for such work, but in this case I will need to raise the speaker by about 5 cm, so folding it in half (platform layer + ring) will be something like this :) Although, of course, it’s better It would be nice to take a centimeter or even thinner plywood, and put a couple of rings of 2-centimeter plywood on it, then the weight of the podium would be lower, but I didn’t have thin plywood, and the weight of the finished podium is not that big.
Initially, it was planned to make the podium taking into account the direction of sound waves, i.e. the left speaker is aimed at the driver, the right one at the passenger (the car is right-hand drive), so the sound would be more voluminous and detailed. I did it, primed it, tried it on and realized that such a podium would not work... Photo below:
The podium turned out to be very large. When getting out of the car it’s hard not to kick the speaker))) Therefore, it was decided to change the design of the podiums, as a result of which it became simpler.
So let's begin! I sketched out a sketch on plywood, drilled holes to insert a jigsaw blade and cut out a hole. Why did you drill so many holes, you ask? Yes it is... pampering)))
Then I cut out a ring on which the speaker will rest and another ring-edging. The mesh is very high, when I made the first podium, I realized that the mesh would look somehow ridiculous, so I decided to make it a little lower.
Now we coat everything with glue (I used PVA) and screwed it together for strength, so we get this design:
Next we foam our podium. By the way, in order for the foam to better adhere to wood (and indeed to any material), it is necessary to first spray the part with water!
After the foam has dried, we take a sharp blade and begin to shape our podium.
It turned out to be such a nice acoustic podium.
When I made the first podium, I decided to forget about pasting, put putty on top of the foam, as a result, firstly, I spent a lot of time creating streamlined shapes, and secondly, since the putty layer was small and the foam was soft, the putty kept breaking at the polishing stage... Therefore, we need to strengthen our podium. For this, fiberglass is usually used (fiberglass is impregnated with epoxy glue and laid on the surface of the podium), I didn’t have fiberglass, so I used regular fabric (it’s probably better to use gauze). Baksit is very thick, it’s not easy to saturate the fabric with it, so I first coated the podium with baksit, then laid the fabric down, and coated it with baksit on top again.
When I was making the last podium, I decided to try covering it not with fabric, but with newspaper, but it didn’t work out well..:) The newspaper doesn’t stretch, so it doesn’t fit tightly to the foam, so I tore it off. By the way, I advise you to use a stapler, then you can stretch the fabric as needed and it will not go anywhere during the drying process!
The epoxy glue has dried. Remove the staples and cut off the excess fabric. Now we take sandpaper, sand the entire part (matt), degrease it and begin to level the surface of the podium with putty. When the form is ready, do not forget to degrease and begin priming the podium. The primer has dried, if everything is fine, then degrease it, and finally paint it.
For those interested, I took a photo of the back side of the podium.
In the end, I ended up with a podium like this.
I think the meaning is clear, the shape and size of the podium depend only on your imagination, and think in advance how the podium will be attached to the door, since there is no point in screwing it to the trim! It is necessary that the podium is firmly screwed to the door itself.
Communities DIY Blog remove the core from the candle, nozzle for sandblasting
How to make a paper machine with your own hands
Throw the candle into the heat, when it gets red hot, take pliers and pull out the core; from Brisk candles it can be pulled out without heating
Comments 26
excellent manual. bookmarked)
The best option so far is ceramics, but it also works
Let's just say it's the cheapest so far.
Just yesterday at work we were discussing this topic and then bam, instructions for action =)
When I work with a forge, I simply pour a pound of candles, they warm up and the cores are removed from them with pliers, and the cores are removed from all types of candles.
This is how we use metal nozzles... in principle, not bad either)))
How long does the “nozzle” work?
What pressure and abrasive?
Do you work outdoors or indoors? If indoors, how do you deal with dust?
I work outside, I want to make a camera
Shall we chat in private?
I work outside, I want to make a camera
Manufacturing and installation of a podium in a car
First of all, the vehicle owner, having been inspired by the idea of installing a podium in his car, must find a suitable place for it.
Podium shape
After he decides on the location, he will need to think about the shape of the podium, which, as you know, can be different, since a person’s creative imagination is not limited by anything. But the primary task should be not only the aesthetic component of the shape of the future podium, but also the practical one.
After the form is thought out, you need to do the following:
- Take a sheet of cardboard.
- Draw the shape you like, taking into account its practicality.
- Cut with sharp scissors.
Speaker platform
The base for the speaker is no less important than the shape:
- We measure the dimensions of its protective mesh.
- We draw a ring on cardboard, taking into account the fact that the diameter of the inner ring must correspond to the diameter of the speaker seat. As for the outer diameter of the ring, it should be equal to the diameter of the protective mesh.
- You need to add another 5-7 mm to the diameter of the ring for a decorative ring.
- We transfer the cardboard model of the form onto plywood and trace it.
- We cut out two shapes.
- We do the same with rings, also made from plywood. The decorative ring will need to be glued to the base and pinned onto small nails for reliability. This is what should happen.
Podium assembly
So:
The rings will need to be fixed to the base using spacers. They are made from any suitable material. For example, beams or tin legs are suitable. But it is best to make them from a suitable sized slats.
Filling the podium
The podium is almost ready. Now you need to fill it with something. You should know that the stiffer the frame, the better. Polyurethane foam is usually used, but it is also considered not a very durable material, although it is convenient to work with. Professionals recommend using epoxy resin as a good material, but not everyone can work with it. Let's consider filling the podium frame with the help of polyurethane foam, which can be given any shape. As for epoxy resin, we will use it later:
- We insert a suitable bag made of paper or cardboard into the ring so as not to waste excess foam. You can use an empty mayonnaise bucket, etc. instead.
- Apply the foam in even layers, starting from the base of the ring.
After the foam has dried, cut out all excess.
- After this, you need to arm yourself with sandpaper and begin the process of sanding the product.
- Sand until the surface is perfectly smooth.
- We apply putty to the surface, which should be mixed in advance with PVC glue to prevent shedding. You can use another option: fiberglass putty.
- The putty should be applied in thin layers, allowing them to dry thoroughly.
- After the putty has dried, you again need to sand it with sandpaper.
To protect the podium from mechanical influences and to give the greatest rigidity to the product, it is advisable to cover the structure with fiberglass, which is impregnated with epoxy resin.
- Mix the epoxy resin with the hardener following the instructions.
- Apply an even layer to the surface of the homemade product.
- We put fiberglass on top, smooth it out carefully so that there are no folds left and the material completely covers the product.
- Again, impregnate with epoxy resin and leave to dry.
- After this, we cut out the excess fiberglass, and use the same sandpaper to remove smudges from the glue.
Tightening a homemade podium
The ideal material for covering our podium could be artificial leather. Its properties and appearance are similar to door trim. Typically, the tension should extend from the ring to the ends of the product. Each side of the podium must be re-tightened several times. A hair dryer can be a good helper in this matter. At the end, the skin is secured with a stapler, and the excess is cut off.
Finishing touch
The podium is ready. Now it needs to be installed in the car door. It is usually secured with self-tapping screws, which are screwed into the back of the casing:
- We take the finished podium and attach it to the door with self-tapping screws.
- We screw on the handles and all decorative elements.
To achieve ideal sound, you also need to soundproof the doors with special materials that absorb sound. In addition, it is necessary to build the acoustic stage as competently as possible by selecting the position of high frequencies on the pillars near the windshield. That's all, the process is over. The instructions for making and installing a podium with your own hands will be doubly effective if you study it together with photo and video materials. The price for good podiums in the store is always high, so why pay extra if you can do everything yourself?
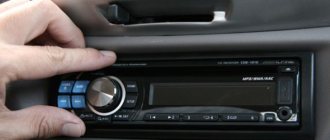
Making podiums for car door speakers.
Greetings to all drivers who are not satisfied with the standard (factory) car audio system; in this article we will look in detail at how to make homemade podiums for speakers that will be mounted on the car door, and which will improve both the sound quality and the volume of music in the car.
But before we begin to describe the process of making podiums, I want to warn you that making and adding additional acoustics to any car is only half the battle. Since in order for the car sound to be loud and at the same time of high quality, in addition to the acoustics itself, you will need to make other changes in the car, namely: install a good head unit, an amplifier, a more powerful generator and battery, and other expensive components, without which normal sound will not be a problem you won't achieve it. I have written several articles about this, which I recommend reading by clicking on the links below.
Car audio 1.
Car audio 2.
Car audio 3.
Car audio 4.
Most craftsmen use polyurethane foam, plasticine, clay, and even plaster to obtain the shape of podiums. And such materials are more suitable for various plastic body kits, bumpers, etc. (especially clay). I myself used clay to create the relief of motorcycle glove compartments, which can be seen in this article, which also describes a little about working with fiberglass.
But such materials are not very suitable for acoustic podiums, since there is a lot of fuss with them, especially polyurethane foam, which is then painfully removed, and some are not removed, thereby reducing the volume behind the speakers, which is undesirable. In the article I will describe a simpler and less labor-intensive method, but despite this, it allows you to get an excellent appearance of the finished product and sufficient strength of the podium.
So, let's begin. Many craftsmen make the base of the podium from a flat sheet of plywood; this option is the simplest, but it is only suitable for flat door panels (door cards) of domestic cars. But we will go the other way (as Uncle Lenin said), since on modern foreign cars the door panel has a certain beautiful relief on which it will not be possible to fasten a flat sheet of plywood without gaps. Therefore, we will make a relief base for the podium from fiberglass, which will exactly repeat the relief of your door panel (card).
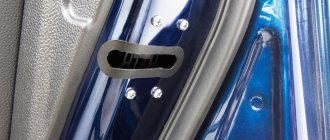
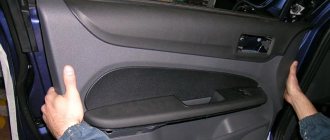
Photo 1. Standard door panel speaker
If there was one modest factory speaker on the top door panel (card) (as in photo 1), then get rid of it, and remove the panel itself from the car door, and lay it on the table. Next, decide how many speakers you want to have on the car doors and, in accordance with this, stick masking tape on the door panel in several rows, and then draw on it the outline of the base of the future podium, but of such a size that the diameters of all the speakers fit nicely on it.
Photo 2. A more complex form of the podium.
This is easy to check: we measure the diameters of the speakers, then cut out circles from cardboard with the same diameters as the speakers and attaching them to the outline drawn on the tape, we check that all the circles fit (if they don’t fit, then draw a wider outline). In general, the shape of the base of the podium can be different (and the podium itself), it all depends on the shape of the door panel, the location of handles and buttons on it, and on your imagination. The form can be more modest, as I will describe in this article, or maybe a little more complex (like the bright green podium in photo 2).
After you have drawn the outline of the base (bottom) of the future podium on the tape (as in photo 3), put transparent tracing paper on it and draw this outline on the tracing paper. This is necessary in order to make an exact copy of the base of the podium for the second door of your car, but in a mirrored (upside down) form. After this, stick regular transparent tape on top of the masking tape in two layers (with the edges of the tape strips overlapping). This will prevent you from getting epoxy on your door panel. Moreover, you need to seal it with regular tape, going beyond the contour, and generally cover the entire door panel with cellophane film, so that during the work you do not accidentally stain the panel with epoxy resin.
Photo 3. We applied tape and outlined the outline of the future podium.
Now we have to do not very clean work with epoxy resin and fiberglass. Prepare a supply of disposable medical gloves, as the gloves will be thrown away when the resin hardens. Prepare the fiberglass by cutting it into strips and squares, and the thicker the fiberglass, the smaller the cut squares, since folds may appear on the folds when gluing a large piece. When you glue fiberglass squares, the first layer can be glued at random, but the fiberglass squares of the next layer should overlap the joints or edges between the squares of the previous layer. It will be stronger this way.
It happens that fiberglass fabric is impregnated with paraffin, and layers of such fabric will not stick together normally. Before sticking, it should be annealed by heating it a little over a fire. Normal (without paraffin) fiberglass is easy to check - after being coated with resin and impregnated, it should become transparent (cut out a piece and check). In general, it is better, of course, to look for fiberglass without paraffin, so as not to waste time on annealing.
Thinner fiberglass fabric is easier to work with, it fits better into the mold without wrinkles, and even if wrinkles appear, they are insignificant. But there is more fuss with it, since more layers will have to be applied. Thick fiberglass fabric allows you to lay fewer layers, but it is harder to work with, since it is more difficult to lay it normally (without folds), and you have to tinker with finer-cut squares at the bends. I think that it is better to work with medium-thick fiberglass fabric, and apply the very last layer from the thinnest fiberglass fabric, it will be more accurate.
How many layers should I apply? Naturally, this depends on the thickness of the fiberglass. But in the end, you need to ensure that the dried fiberglass has a thickness of 3 millimeters. This thickness has sufficient rigidity, especially since the speaker itself will be attached to the door iron, and the plastic will not bear the force load, but more on that later. It is advisable to apply all the layers at once before they dry, otherwise you will have to work with sandpaper. More precisely, if you have applied several layers, but the resin has hardened and the thickness is insufficient (less than 3 mm), then wait for it to completely polymerize (take a break from working) and after 24 hours continue applying the next layers.
I advise you to dilute the epoxy resin and hardener very precisely in the appropriate proportion indicated on the packaging (usually 1 to 10), otherwise there will be problems with polymerization (hardening) and the strength of the fiberglass will decrease. For accurate dilution, it is advisable to use electronic scales, and if they are not available, then use large medical syringes or painter's measuring cups with marks in milliliters.
But in order for the new layers to adhere well to the previous frozen layers, you need to create a scratch on the surface of the frozen fiberglass by sanding it with sandpaper. Then the next layers that you will subsequently apply will adhere well to the frozen ones. And the risk should also be applied in numerous depressions (pits) that can form after the resin hardens.
The required number of layers have been applied, the resin has hardened, and you can remove the plastic shell, which, thanks to the slippery surface of the transparent tape, is quite easy to remove. Even if the resin sticks to the transparent tape, it is still easy to separate the frozen base of the podium from the door panel, since the lowest base is ordinary masking tape, which is easily separated from the door panel.
Photo 4. The frozen base of the podium can be removed from the panel.
Everything is a plastic base (lower part), which exactly repeats the relief of the finished door panel (see photo 4). Where there was a hole in the door panel from the factory speaker, you can cut a hole in the plastic base, slightly larger than the speaker magnet, and then you will increase the total volume of the acoustic space (due to the volume of the door). And as you know, the larger this volume, the more solid the sound.
All that remains is to make the top, on which the speakers will actually lie. The base of the upper part of the podium is the same common plywood (12 mm thick is suitable). Everything is simple here - we place cardboard circles equal to the diameter of the speakers on a plywood sheet and outline them with a marker (to make sure we use tracing paper with a drawn outline for the second door). Next, we cut out the contours with a jigsaw (see photo 5), inside of which we cut out holes with diameters similar to those of the speaker diffusers.
Photo 5. We cut out the frame for the speakers from plywood.
You will also need to cut out a frame, which we glue along the contour to create a beautiful step, and thanks to it, the speakers will be recessed (flush) into the podium. Of course, a step can be made using a milling machine, but then you will have to take a thick board or plywood and mill the step. For those who do not have this opportunity, we do it as I described in the first version (with a frame). When the plywood frame for the speakers is cut, it should be glued using vertical slats to the plastic base that was made earlier (see photo 6).
Photo 6. Glue the plywood frame to the base using glue and slats.
The height of the slats and, accordingly, the height of the future podium depends on how much you want the podium to protrude into the car interior and, most importantly, that it does not interfere with the feet of the driver and passenger. Of course, the higher the podium, the larger the volume of acoustic space and the more solid the car sound. But still, you should not make the podium too high, especially in the interior of a small and cramped car, otherwise it will interfere with your legs and will be constantly rubbed by your feet (have an ugly appearance). Therefore, in this matter you need to be guided by common sense and choose the golden mean.
Having glued the plywood contour to the fiberglass base (on the slats), we will then create the volume of the podium, that is, make the upper shell. To do this, you need to find a fabric that stretches well and is also well impregnated with epoxy resin. Fiberglass fabric does not stretch (or only stretches in one direction) and is not suitable for this purpose. Abroad, in specialized stores, special stretch fabric is sold in rolls. We, at least in small towns, do not have such stores, or if they exist, then no one has ever heard of such fabric.
Photo 7. We stretch the fabric over plywood and plastic.
Therefore, you should search and experiment. You should cut a small piece that should stretch in all directions (knitted or stretch fabric will do) and coat it with epoxy resin. After drying, the resin should be dry on both sides of the piece of fabric - this means that such fabric is well saturated.
Having bought a suitable fabric, we stretch it over the plywood as in photo 7 and wrap the fabric at the base, as in photo 8, and when you wrap it, attach the fabric, for example, using paper clips (a stapler).
Photo 8. And we wrap the stretched fabric over the edge of the base of the podium.
Then cut off the excess and coat (soak well) the cut edge with glue so that it sticks well to the base and at the same time cover the paper clips with glue. The main thing in this matter is that there are no folds on the outer surface. And on the inner surface, the folds will subsequently need to be sanded and trimmed.
Now we dilute the epoxy and coat the stretched fabric on top with it, and then put fiberglass cut into pieces on it (see photo 9). Just like with the base, we add layers until we achieve a total plastic thickness of about 3-4 mm.
Photo 9. Coat the stretched fabric with epoxy and apply layers of fiberglass.
After the resin has hardened, we cut out holes for the speaker diffusers with a jigsaw and sand the surface with sandpaper so that the putty adheres well to this surface, with which we fill in the holes and irregularities and remove the entire surface of the future podium, sanding it to a smooth state (photo 10).
Photo 10. We cut and straighten the holes for the speakers, sand them, cover them with putty and sand them again.
We make a podium for the second door in exactly the same way, only in a mirrored form and try on both podiums on the panels of the car doors (photo 11). In this case, you should put the speakers in their places (except for high-frequency tweeters) and mark with a marker where the holes should be drilled.
Moreover, the holes should be drilled through a draft (both in the upper part - plywood and in the base and in the door panel) using a long drill (an assistant presses the podium to the panel, and you drill). This is necessary in order to attach heavy speakers using long screws to the metal of the door, and not to fragile plastic - this is important. That is, you will be able to attach both the podium and the speakers to the hardware at the same time.
Photo 11. We try on the almost finished podium on the panel, and mark the holes for the speakers.
When you have drilled the through holes, attach both the panel and the podium to the door in place (you can fix the panel to the door with a couple of screws, if they are in the door structure, or with latches), and ask an assistant to hold the podium in place. And you, using an awl or a thin scriber, mark on the metal of the door the places where the screws from the speakers will subsequently be screwed in.
When you have marked the places with a scriber, remove the panel from the door and drill holes there with a diameter of 11 - 12 mm. Then insert and weld M6 nuts into the holes, but so that they are recessed (flush). To make this work easier and to avoid spattering the threads of the nuts with welding, screw long studs into them, and then insert the nuts into the holes of the door, hold them by the stud and weld. Don't forget to disconnect the negative terminal of the battery before welding. That's it - reliable fastening of both podiums and speakers is ensured, all that remains is to buy long screws.
Now you have to make a choice: either paint the finished podiums as in photo 2 at the beginning of the text, or cover them with black fabric, vinyl, leather, or cantara. It all depends on your imagination, as well as on the color and trim of your car’s interior. One thing I can say is that for painting you should sand the plastered surface of the podium much more thoroughly and achieve an ideal surface, without the slightest scratch. Then prime, matte and paint.
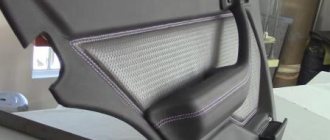
Photo 12. Covering the podium with black fabric.
To cover it with black fabric (can be in the color of the interior), leather, cantara or vinyl, you should coat the surface of the podium with glue, but not with epoxy, but with quick-drying glue for leather (you can use 88), and then quickly covering the surface of the podium, press the material, so that it sticks and takes the shape of the part (photo 12).
We glue the material on the back side, cut off the excess along the contour and glue on a leather (fabric) overlay cut along the contour of the back side of the part.
Photo 13. Trying on a podium covered with black fabric on the door panel.
After the glue has set, you can attach the part to the door panel and check whether it fits tightly and if everything is done correctly, then the podium fits neatly on the panel, without gaps (photo 13).
All that remains is to cut holes for the speakers in the material with which you covered the podium (photo 14).
Photo 14. Cut out holes for the speakers in glued fabric or leather.
Photo 15. We attach the podium and speakers to the panel and to the car door.
And secure the speakers and the entire structure to the panel and door of the car (photo 15).
Using the simple technology I described above, you can make podiums for the rear doors, as in photo 16.
Photo 16. Podium with speakers on the rear door of the car.
Or also make side panels for the trunk and illuminate the speakers with LED strip, as in photo 17.
Photo 17. Homemade panel-podium for speakers in the trunk of a station wagon.
And to complete the picture and complete the beautiful and powerful car audio, it is advisable to make a beautiful rear podium panel in the trunk to mount an amplifier, monitor and subwoofers on it. But I will write about this in detail in the next article (read the article here).
I hope that after reading this article, many novice music lovers will be able to make podiums of any shape for the door speakers of their favorite car, because the manufacturing principle is not very complicated, and the shape depends on your imagination, and this is what makes tuning any vehicle interesting; good luck to everyone!
If this article is useful to you, please share it on social media. networks by clicking the buttons below. Thank you.
RќСЂР°РІРёС‚СЃСЏ
Video “Visual aid for making podiums”
How to build podiums with your own hands at home and what nuances should be taken into account - more clear instructions are presented in the video below (the author of the video is the AVTO CLASS channel).
The acoustic podium is the base for the speaker, thanks to which it is fixed in the desired position. The podium serves as a speaker mount, for example, in a car door or pillar.
Those speakers that are built into the podiums give a completely different sound: richer and deeper, with clearly distinguishable high and low frequencies.
What are speaker shelves used for?
We can say that the podium performs several functions in the car interior:
- the variety of appearance of the podiums helps to hide an unattractive sound system or emphasize the strengths of the interior design;
- expands the acoustic capabilities of the speakers in the cabin;
- podiums can be made from various materials and decorated with leather, wood, velor and other types of finishing fabrics to create a unique interior;
- in complex-shaped podiums it is easy to place non-standard and large-sized speakers, for example, a horn.
What types of podiums are there?
Podiums are divided into only two types: external and internal.
Traditionally, most cars already have standard speakers or holes for them. Usually their sizes depend on the make of the car. Domestic cars typically have speakers with a diameter of 130 mm. Foreign cars can have built-in podiums of larger sizes - 160, 200 and even 250 mm.
Car door speakers are usually round or oval in shape. Depending on the car model, podiums must take this feature into account. In general, the shape of the podium can be absolutely any, since the main purpose of this element is to securely fix the speaker in order to give volume and clarity to the sound.
Round speakers of different sizes can be installed in the doors of any car
Making podiums for speakers
Purpose of podiums
The podium acts as a sound design for in-mount speakers, but differs from the body in that they are not separate closed products, but are fixed to elements of the interior trim.
There are not many standard places for installing mortise speakers in the car interior. Automakers install them in the rear parcel shelf, door panels, and A-pillars. In this case, one of the basic rules for the correct installation of speakers is violated - the directional position of the diffuser, which ensures the necessary direction of sound propagation.
For example, the acoustic heads installed at the bottom of the door panels are located perpendicular to the door, so the sound emanating from them is highly dispersed before reaching the hearing aid of the passengers. In addition, the acoustic head at this installation location is fixed to the inner metal wall of the door, which causes sound distortion.
The situation with good sounding acoustics is complicated by the use of speakers with mediocre characteristics by manufacturers.
To “make” an acoustic system sound spacious and high-quality can be achieved by using speakers with better characteristics, creating sound design and correct placement. The last two conditions are solved by installing speakers in podiums.
Factory products
There is a large selection of ready-made podiums on sale, for example, in the form of overlays attached to door panels and the rear shelf. There are also tuning cards and acoustic shelves with podiums that are simply installed instead of the standard ones.
But such podiums have a number of disadvantages, the main of which are the low quality of production and the use of not entirely suitable materials for manufacturing.
If we look at the podium-overlays attached to the surface of the door card or shelf, then most of them are made of thin plywood and covered with cheap leatherette on top. At the same time, the dimensions of the seats of such products do not always correspond to the dimensions of the speakers, and the car owner who bought them has to modify the podium covers.
The only positive aspect of these pads is that they ensure the directional position of the speakers.
As for tuning cards and shelves, manufacturers often do not maintain the dimensions, so it is not always possible to install such products without problems and the first time. In addition, maps and acoustic shelves are expensive and are not available for all cars.
Factory overlays on the front pillars are quite rare. Although on the front panel next to them there are acoustic elements that play the main role in creating the sound stage - high-frequency tweeters and mid-range speakers.
A common drawback of factory podium covers and tuning cards is the limited number of seats for speakers, which does not allow creating a multi-component speaker system.
Podiums for individual projects
Equipping a car with a serious acoustic system allows you to manufacture podiums for speakers according to an individual project. But making durable and stylish podiums is not easy. But only in this way can you place 2-3 speakers on the door, install tweeters and midrange speakers in a rack, and install large-sized coaxial speakers in the rear shelf.
The general technology for manufacturing a podium comes down to creating a frame, around which a body is then created from composite materials.
The frame includes a base, spacer ring and spacers. The basis can be either interior trim elements - pillar trim, door panel, shelf, or a wooden backing fixed to the specified surfaces (applies to shelves and door panels).
The spacer ring is made of wood in the shape of the speaker. It is used to secure the acoustic head.
Spacers are elements that connect the base and the ring. The use of spacers of different lengths allows the ring to be positioned at an angle relative to the base, thereby ensuring the directional position of the speaker cone.
To create the body of the podium, composite materials such as fiberglass and epoxy resin are used. With their help, a strong “shell” of the desired shape is created.
Depending on the shape and size of the podium, the technology for its manufacture is selected.
Manufacturing technologies
The first method of creating a podium is to give the desired shape to the workpiece using elastic fabric. This technology is often used to create a podium for installing a tweeter and midrange driver on the A-pillar trim.
The work algorithm is as follows:
- We do a fitting and choose the location of the speakers and their angle of inclination on the stand;
- Remove the cover;
- We produce spacer rings;
- We create a frame by securing the rings through spacers on the lining;
- We adjust the position of the rings (angle of inclination);
- We cover the structure with elastic fabric (lycra), which will form the shape of the body;
- We coat the fabric with epoxy resin to create the first layer of the body;
- We cut holes for the acoustic heads;
- We apply layers of fiberglass and epoxy resin (the thickness of the “shell” should reach 4-5 mm);
- We polish the surface of the podium;
- We cover the manufactured podium with decorative materials (leatherette, Alcantara, etc.);
After making the podium on the stands, all that remains is to stretch the wiring, connect and secure the speakers in the rings and install the cover in place.
When creating volumetric podiums for installing several massive speakers, a technique is used in which the future shape of the product is formed by polyurethane foam. This technology is used to make podiums on door panels and rear shelves.
Let's consider the algorithm of work using the example of creating a podium for installing two large-sized coaxial speakers on a standard rear shelf:
- Remove the rear shelf;
- Based on its shape, we make the base for the frames (we cut it out of a sheet of thick plywood);
- We fix the base on the shelf;
- Cut out the spacer rings;
- We assemble the frames by securing the rings to the base using spacers and choosing the correct angle of inclination of the speakers;
- Fill the surface around the frames with polyurethane foam;
- After the foam has hardened, we cut off its excess, giving the future podium the desired shape;
- We create the podium body using composite materials (we glue layers of fiberglass and epoxy resin onto a foam blank);
- After creating a “shell” of the required thickness (4-5 mm), we grind the surface and paste it with decorative materials;
Having finished making the podiums, we put the shelf in place, connect and mount the speakers.
Note that the above describes only general algorithms for the production of podiums without taking into account the nuances, of which there are many in each specific case.
Our craftsmen are ready to make podiums for your car. We will create truly durable and beautiful podiums that will reveal the full capabilities of the speaker system.
What is a speaker podium?
If you decide to equip your car with podiums, then you probably know what they are needed for. Firstly, these elements make it possible to provide a clearer sound to the track, while eliminating overtones. Secondly, thanks to them, sound transparency will improve and low frequencies will be added. Thirdly, if you purchase good acoustics, then the speakers, as a rule, have non-standard connectors; accordingly, podiums for speakers of 16 inches or other sizes will solve this problem. In general, these elements provide more spacious sound, which cannot but please music lovers (the author of the video is the Romanautoreview channel).
Manufacturing and installation of a podium in a car
Acoustic podium under UAZ Patriot
First of all, the vehicle owner, having been inspired by the idea of installing a podium in his car, must find a suitable place for it.
Podium shape
After he decides on the location, he will need to think about the shape of the podium, which, as you know, can be different, since a person’s creative imagination is not limited by anything. But the primary task should be not only the aesthetic component of the shape of the future podium, but also the practical one.
Making podiums for acoustics yourself
After the form is thought out, you need to do the following:
- Take a sheet of cardboard.
- Draw the shape you like, taking into account its practicality.
- Cut with sharp scissors.
Speaker platform
The base for the speaker is no less important than the shape:
- We measure the dimensions of the speaker for the car radio and its protective mesh.
- We draw a ring on cardboard, taking into account the fact that the diameter of the inner ring must correspond to the diameter of the speaker seat. As for the outer diameter of the ring, it should be equal to the diameter of the protective mesh.
- You need to add another 5-7 mm to the diameter of the ring for a decorative ring.
- We transfer the cardboard model of the form onto plywood and trace it.
- We cut out two shapes.
- We do the same with rings, also made from plywood. The decorative ring will need to be glued to the base and pinned onto small nails for reliability. This is what should happen.
Blanks for the podium
Podium assembly
The rings will need to be fixed to the base using spacers. They are made from any suitable material. For example, beams or tin legs are suitable. But it is best to make them from a suitable sized slats.
Filling the podium
The podium is almost ready. Now you need to fill it with something. You should know that the stiffer the frame, the better. Polyurethane foam is usually used, but it is also considered not a very durable material, although it is convenient to work with. Professionals recommend using epoxy resin as a good material, but not everyone can work with it. Let's consider filling the podium frame with the help of polyurethane foam, which can be given any shape. As for epoxy resin, we will use it later:
- We insert a suitable bag made of paper or cardboard into the ring so as not to waste excess foam. You can use an empty mayonnaise bucket, etc. instead.
- Apply the foam in even layers, starting from the base of the ring.
Apply polyurethane foam
After the foam has dried, cut out all excess.
- After this, you need to arm yourself with sandpaper and begin the process of sanding the product.
- Sand until the surface is perfectly smooth.
- We apply putty to the surface, which should be mixed in advance with PVC glue to prevent shedding. You can use another option: fiberglass putty.
- The putty should be applied in thin layers, allowing them to dry thoroughly.
- After the putty has dried, you again need to sand it with sandpaper.
- Mix the epoxy resin with the hardener following the instructions.
- Apply an even layer to the surface of the homemade product.
- We put fiberglass on top, smooth it out carefully so that there are no folds left and the material completely covers the product.
- Again, impregnate with epoxy resin and leave to dry.
- After this, we cut out the excess fiberglass, and use the same sandpaper to remove smudges from the glue.
Tightening a homemade podium
The ideal material for covering our podium could be artificial leather. Its properties and appearance are similar to door trim. Typically, the tension should extend from the ring to the ends of the product. Each side of the podium must be re-tightened several times. A hair dryer can be a good helper in this matter. At the end, the skin is secured with a stapler, and the excess is cut off.
Finishing touch
The podium is ready. Now it needs to be installed in the car door. It is usually secured with self-tapping screws, which are screwed into the back of the casing:
- We take the finished podium and attach it to the door with self-tapping screws.
- We screw on the handles and all decorative elements.
To achieve ideal sound, you also need to soundproof the doors with special materials that absorb sound. In addition, it is necessary to build the acoustic stage as competently as possible by selecting the position of high frequencies on the pillars near the windshield. That's all, the process is over. The instructions for making and installing a podium with your own hands will be doubly effective if you study it together with photo and video materials. The price for good podiums in the store is always high, so why pay extra if you can do everything yourself?
We do it ourselves
If you try, the homemade podium will not be much different from the factory one. But the price will be much less. Plus an additional reason for pride.
To complete the work you will need a set consisting of:
- plywood (take a thickness of about 6-8 mm);
- PVA;
- epoxy;
- cardboard;
- degreaser;
- nylon tights;
- polyurethane foam;
- paints;
- putties;
- leather or fabric (will be tight);
- scissors;
- pencil;
- hacksaw or jigsaw;
- sandpaper;
- spatula;
- stationery knife.
I will say right away that in this case we are considering the option of making a homemade speaker podium, which will later be installed with your own hands in the front or rear doors of the car. Often a speaker with a diameter of 13 cm is used here. But no one bothers to make a design for the rear shelf.
But size is not key. The entire preparation procedure looks like this:
- think over the shape of the podium;
- take measurements of the speaker and its special protective mesh;
- the diameter of the ring here will be exactly equal to the diameter of the corresponding landing socket or place on the future podium;
- the external diameter of the existing ring we need, in turn, corresponds to the diameter of the tread (protective) mesh;
- a sketch is drawn on cardboard;
- the template is cut out;
- applied to plywood;
- outlined and cut out;
- a perfectly even hole is cut for the podium.
Do everything as accurately as possible so that no problems arise later.
If you are done with this, proceed to the next step.
Manufacturing process
You have already made the preparation. But it’s too early to relax. There is still a lot of work ahead.
- A layer of polyurethane foam is applied to the surface of the workpiece;
- The foam hardens, and the required shape is given with a blade or sharp knife;
- Next, apply 1-2 layers of putty;
- When it dries, make the product smooth using sandpaper;
- The product is painted in a suitable color;
- It is better to apply the paint in 3 layers;
- An alternative to painting is upholstery with fabric or leather;
- The banner is secured with glue.
The installation process finishes it all off. The most optimal method of fastening is installation using self-tapping screws on the inside of the existing door trim. This will preserve the sound quality, ensure reliable fixation, and at the same time definitely will not spoil the appearance of the interior and the podium structure in particular.
Do not forget to additionally use soundproofing materials. They are used to make noise on doors. This is not necessary, but it is useful and effective.
I think you have figured out how to make podiums in the doors. They can also be installed in rear shelves and racks.
Thanks everyone for your attention! Don't forget to subscribe, leave comments, ask questions and invite your friends to join us!
Subscribe to updates and receive articles by email!
We guarantee: no spam, only new articles once a week!
The word “Podium” came to us from England and means elevation, convexity. An acoustic podium in a car is a special convex structure for mounting a speaker of any size. Owners of the domestic automobile industry prefer podiums to be able to install musical equipment of any segment and enjoy high-quality sound on the road.
So, the future! At first we tried, then we tried again, then we made mistakes and used up a couple of kilograms of rather expensive plastic, but in the end the soulless machine gave us the product we needed.
We are talking about the very rings (podiums, spacers) on which new speakers are mounted. We immediately appreciated the advantages of the new technology: the 3D printer has only been in the studio for a month, but no one wants to remember about the router, machine, jigsaw and plywood. We return to the old technology only if it is necessary to produce spacers instantly, within 20 minutes - in terms of speed, the printer is still far behind.
Advantages:
— Complete, unconditional, 100% resistance of new products to moisture and any chemicals. This is very cool, you don’t have to be afraid that after 5-7 years the spacers will lose their shape, delaminate and lose their rigidity, and we saw this when we worked with MDF 10 years ago.
— Rigidity . Rigidity and toughness. The most important parameter for the operation of any emitter. The printed podiums have a truss structure (think of what a tower crane looks like). The first products were deliberately compared with complete analogues made of plywood: they bent, beat with a hammer, tried to pull out screws and screws through - the new plastic product stubbornly surpasses or is equal to its older brother.
“It’s easy to make the printer produce parts that are not only beautiful, but also difficult: during the programming process, we provide places for the nuts. Not embedded ones, but regular ones, which is extremely convenient and automatically switches the method of attaching a new speaker from self-tapping screws to bolts and nuts, which in some cases is even better, higher quality and more reliable than from the factory.
- Perfectly beautiful shape. Technical beauty is also very important, even if it is hidden under the skins. And for the last 4 years, all customers have been demanding to send photos of the installation process of a new audio system. Products printed on the printer look completely factory-made, are impressive and speak about the level and overall quality of the work performed.
Flaws:
— The 3D printer is slow. The time to make one spacer podium is from 7 to 15 hours. It is clear that the printer works both night and day and does not get tired, but if the part is needed immediately...
— The cost of products made from plastic is higher than from plywood, even taking into account paint, varnish, wear and tear on the router and working time.
BUT! The listed shortcomings do not concern the customer at all. We do not charge additional money for producing internal podiums using a printer. At least for now, and in any case there is enough time for printing while the wiring is being laid in the car and sound insulation is being done.
The photo shows the installation of mid-bass speakers using podium spacers printed on a 3D printer for RangeRover Sport, RangeRover Velar, Skoda Kodiak, Ford Explorer, Toyota Rav4.
How to make universal podiums for speakers
In most cases, you can do without investing in the purchase of factory podiums and make the element yourself. It's not as difficult as it might seem at first glance.
To successfully make a podium you will need the following materials:
- plywood 6–8 mm thick;
- degreaser;
- cardboard;
- polyurethane foam;
- putty;
- glue;
- epoxy adhesive;
- nylon tights;
- dye;
- fabric or leather for covering.
In order to put your idea into practice without any difficulties, it is best to prepare the necessary tools in advance:
- scissors;
- hacksaw/jigsaw;
- pencil;
- stationery knife/blade;
- sandpaper;
- putty knife.
Almost all the tools and materials for making podiums are available on the farm of an experienced craftsman
Dimensions and shape of the acoustic podium
The technology described below involves the manufacture of podiums for speakers located in the front or rear doors of the car. Most often, there is one speaker with a diameter of 13 centimeters in the door. However, regardless of its size, the podium manufacturing technology will be the same:
- First you need to figure out what kind of podium shape is suitable for the interior of your car.
- It is necessary to measure both the dimensions of the existing speaker and the dimensions of its protective mesh.
- The diameter of the speaker ring will correspond to the diameter of the seat for it in the podium. And the outer diameter of the ring will be equal to the diameter of the protective mesh.
- Once you have approved the form, you need to draw it on a piece of cardboard.
- The resulting template must be carefully cut with scissors.
- Next, we apply the template to a piece of plywood and trace it with a pencil.
- For two doors we will need two plywood blanks that can be cut with a hacksaw or jigsaw.
- It is necessary to cut out the hole in the podium as accurately as possible, since if the proportions are violated, the speaker in the pocket will not be securely fixed.
Photo: correct procedure for making a shelf in a car door
The process of creating podiums for speakers does not end here. The workpiece must go through several more stages of design.
In order to give the plywood podium an attractive appearance, polyurethane foam is usually used. It is applied to the surface of the plywood. Then you need to do the following:
- when the foam has completely hardened, you need to work on the shape using a stationery knife or blade - you can give the workpiece absolutely any shape;
- After initial processing, you will need to apply one or two layers of putty to the product. After it has dried, you will need to give the podium the smoothest and most embossed shape possible by treating it with fine-grained sandpaper;
- the resulting product can be painted in any color, and it is advisable to paint in three layers for deep color saturation;
- As another design option, reupholstery is also allowed - that is, the use of elastic fabrics that can be attached using adhesives to decorate the podiums. You can cover the podium blanks with almost any type of fabric or artificial leather, but you should take into account the practicality of the material and its durability.
Upholstery with artificial leather is one of the most labor-intensive stages in design.
DIY podiums for speakers
Good day everyone! I decided to talk a little about how I made (almost, all that remains is to cover it with leather) the podiums for the midbass. Making notes about each stage is very tedious, and who needs it, everyone wants the result. So soon there will be a result - let's go!
I sawed rings from artificial stone, milling the inner walls at an angle of 60*.
One - smaller to the speaker, the second to the door I set the direction using Chinese sticks and hot glue
The second base is absolutely mirror
Brothers damn I sealed the inside in two layers with masking tape
waiting for continuation The space between the rings on the outside was filled with polyester with fiberglass, waited for drying, trimmed off the excess
Beauty The remaining space was filled with fiberglass putty and sanded. Then I eliminated minor flaws with finishing putty.
Preliminary result The inner wall was also covered with finishing putty, although after removing the adhesive tape it was already almost smooth, but still, I sanded everything down in the same way. After all the “Skin” procedures, I covered the bases of the podiums with three layers of primer on plastic and two of black enamel.
Beauty The next stage is making the outer part of the podium
Using a pre-fabricated metal ring and cutting off standard speaker mounting nuts, marking and drilling holes for mounting bolts
After fitting the mounting holes and cutting threads for them in the bases of the podiums, we secure them, having previously covered them with masking tape to the door.
On the spot T.K. I decided to make overlays on the outer part of the door, then the door card also needs to be prepared, having previously covered it with the same tape. Put it in place.
With a ring - the base of the decorative part cut out using a hand router and glued with hot glue. We apply fiberglass with polyester, first soaking the fiber on the glass until it becomes plastic and pliable, no more than 30-40 seconds, otherwise it then begins to disintegrate into layers, and Some of the fiber remains on the glass. I threw on about 5 layers and left the whole thing to dry for a day.
We wait 24 hours. The next day, we carefully separate the whole thing and give it a preliminary shape with a Dremel.
Something like this: Having tried it on the door, pleased with the result, we cover the blank with lycra and impregnate it with polyester resin
We wait a day. After drying, we apply 3 layers of fiberglass, wait an hour and a half.
In the process After hardening, we cut off all the excess with the same Dremel, apply a thick layer of fiberglass putty, wait for 20 minutes to dry, and then long and hard we bring the whole thing to the shape we need
Almost ready Well, then everything is as always, 3 layers of primer, 2 layers of paint and voila!
Let's dry After drying, naturally you need to see what happened there, and how it looks assembled. I glued it with double-sided tape to admire the preliminary result)
I like it))) So far they’ve just been painted, I’m still waiting for the covering fabric, which exactly matches the texture of the door card, maybe I’ll tweak something a little more, but for now...
Something like this, the next stage is Preparing the doors. It’s also an interesting and time-consuming undertaking, but one thing I can say for sure: Every piece of soul, effort, and time invested in the project certainly leads to a result that you like more and more with every step!