Every person wants to express their individuality. Someone buys clothes, jewelry or collects stamps, and car enthusiasts modernize their cars in every possible way. In this case, tuning is the most common way to transform a car. Few people may notice the new engine, but the updated body catches the eye immediately.
Ordering a bumper or other part in a store is quite expensive, so it makes sense to make a body kit for your car yourself. With a minimum set of knowledge you can get a lot of advantages, including:
- Significant cost savings compared to a custom body kit
- Opportunity to create a unique body kit for your car
- The work is done independently, which means that with due effort it will be done conscientiously
- Gaining Real Useful Skills
We tell you how to do interior tuning in this article. About 3D virtual tuning - here.
Do-it-yourself body kit - how to make a beautiful car tuning?
Many car owners want to make their car more attractive in terms of appearance. One of the options for increasing attractiveness is a body kit, which emphasizes and in some cases even changes the contours of the car, giving it courage and a sporty character. You can mount the body kit yourself, but the main task is to purchase a high-quality body kit directly for your car model. Here it is important not to overdo it and not make your car overly intrusive and funny.
If you want to purchase and install a body kit on a car, first imagine what it will look like, look at photos of other cars that have already been subjected to these processes, and also look for different opportunities for purchasing materials for visual tuning. This will help you get exactly the materials you need to create a beautiful car.
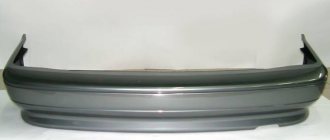
Body kits made of polyurethane
The chemical formula of polyurethane includes a chain of macromolecules with inserts of the type -NH-CO-O-, representing a group of urethanes, which gives the material its name. Currently, two types of polyurethane are produced: rubberized and foamed.
Let us note the advantages of the material on a rubberized basis:
- characterized by a very high quality indicator in almost all important criteria;
- excellent impact resistance;
- the inclusion of rubber fillers in the material makes it elastic and flexible;
- an excellent combination of strength and flexibility allows polyurethane products to withstand fairly serious mechanical stress without collapsing, and in case of serious deformation, return to their original shape;
- It is very difficult to break a product made of this material; the most accessible processing methods are cutting or chopping;
- the high precision of the casting process of body parts (using cast iron dies with unchanged geometry) allows you to achieve impressive accuracy - factory products designed for certain car models are installed perfectly in their standard places, without adjustment;
- polyurethane has good adhesion, that is, the ability to hold paint.
Advantages of polyurethane foam:
- the quality is slightly inferior to the rubberized analogue, but only slightly;
- high impact resistance - it is very difficult to destroy the product as a result of a mechanical shock;
- since the technology is basically the same as in the production of rubberized body parts. There are usually no problems during installation; no preliminary adjustment is required;
- the ability to hold paint and varnish materials is no worse than that of its rubberized counterpart;
- The thickness of the VP is greater than that of other materials, with low weight and high density.
A disadvantage of polyurethane foam is its insufficient fracture resistance, which can be explained by the absence of rubber in the material.
A common disadvantage of the polyurethane family is its high cost. Making a body kit for a car from polyurethane yourself is just as difficult as making it from carbon.
We choose and buy body kits for your car
Many people decide that the prices for these materials are too high, so they can make the aerodynamic body kit themselves. We warn that without good equipment and sufficient skills in this area, you can only spoil the appearance of the car, therefore we urge you to abandon the production of body kits.
Moreover, today you can buy budget body kits for any car, buy equipment of different price segments and types. There is equipment made from different materials, as well as different shapes and appearance. Therefore, it is important to choose bumpers and body kits according to all the appropriate characteristics. The most important points in this matter are the following:
- high strength body kits that will be subject to constant influences and loads;
- unpretentious appearance, normal perception after installation on the car;
- no negative impact on the technical characteristics of the car, lower ground clearance;
- the possibility of simple installation without compromising the integrity of metal body parts;
- made from good materials and without the risk of losing shape over several months of use.
These are the important points you should observe if you need to buy body kits. Today, body kits for your car can be found in plastic, fiberglass and metal. The latter will be more preferable, but the most expensive. Most car enthusiasts prefer plastic options - the cheapest. Fiberglass is the most optimal offer in this area.
Choose the design of bumpers and body kits very carefully. If you do not want to get a problematic appearance of your car as a result of repairs, give preference to calm and discreet designs. Sometimes the front bumper separately from the car looks quite modest, but after installation it turns out to be too pretentious.
Fiberglass
Made from fiberglass by impregnation with resin, it is considered one of the most popular materials in external and internal car tuning. Most body kits are currently made from fiberglass.
Advantages of the material:
- the most affordable;
- if manufactured with precise adherence to technology, the quality is not inferior to either polyurethane or ABS plastic;
- light weight;
- ease of processing;
- good flexibility, the ability to keep its shape after mechanical stress, if this does not lead to destruction of the part.
But there are also disadvantages:
- manufacturing accuracy is inferior to other materials. As a rule, during installation it requires careful adjustment of the body kit;
- Fiberglass, like carbon, is considered a toxic material due to the presence of epoxy resins in its composition. When working with it, safety precautions are required (it is recommended to use a respirator).
Note that, due to the relative ease of manufacture, the market is literally flooded with low-quality products made without adherence to technology. Of course, we are not talking about high quality here, and those who bought such body kits, coveting a low price, find themselves dissatisfied with their strength characteristics and elastic deformation indicator.
At the same time, most body kits are made from it, including both products belonging to the highest price class (Brabus), and body kits of the middle (Zender, Riger) and low (Seidl, Mattig) price segments. There are often cases when, as a result of a car collision, purely metal cars received more damage than those with a fiberglass body.
When it comes to making your own body kit, fiberglass is considered one of the most popular materials. At least in terms of cost and ease of processing.
Installing body kits on a car with your own hands
Securing all the purchased equipment is the most difficult task assigned to you. To do this, you need to acquire the appropriate tool, which will depend on the chosen type of body kit. Metal body side parts may often require welding, which is a difficult process reserved only for professionals.
In the case of plastic parts and fiberglass body kits, you can use simpler mounting options and start the process of assembling the body kit in your own garage. Otherwise, it is better to immediately contact bodywork specialists and get professional help. The sequential steps when installing a plastic body kit are as follows:
- remove the front and rear bumpers of your car to make room for purchased parts;
- remove the fender liners, which will be put on after installing all the body kits;
- attach the front bumper to the same fasteners that held the factory version;
- then you should immediately install the rear bumper using the same factory fasteners;
- with the side parts of the body kit everything is much more complicated - you need to position them as accurately as possible;
- after an even and precise position, use the fasteners that come with the set of body kits;
- Next, all that remains is to install the fender liners in place and evaluate the appearance of the car.
Often the body kit is purchased unpainted, so it is necessary to pre-paint it. This must be done before installing the body kit, otherwise you will have to deal with rather complex painting of an already installed part. You can fully count on an excellent visual result if all the tools and materials were selected with high quality.
If certain inaccuracies occurred at the stage of selecting materials, paints and fastenings, installing the body kit yourself will not go so smoothly. Some Chinese body kits do not have fasteners, which forces the driver to use self-tapping screws, screwing them into the car body. This will cause corrosion of the body in the drilled areas after just a few months of use.
Master class on making a do-it-yourself fiberglass body kit
This material is chosen by 80% of lovers of DIY car crafts. To dispel doubts about the strength of the material, watch the video. The questions will disappear by themselves.
Deciding to make a body kit for a car with your own hands is always difficult for a beginner. At least because the question of materials is open. Write down:
- fiberglass;
- epoxy resin;
- a lot of plasticine;
- gypsum and clay;
- flexible wire;
- wooden bars;
- cream;
- fine mesh.
Step 1
Stock up on a drawing of the future body kit. Constantly checking with it, sculpt a frame on the car. In wide places, supplement it with bars, and in thin places with mesh. Provide recesses for an additional pair of headlights and air intakes. Do not sculpt it tightly - the structure will have to be removed.
Step 2
Prepare liquid plaster, then coat the frame with cream. This will allow the clay to easily move away from the machine. Place the layout on bars or boxes. Next, pour the prepared plaster into the plasticine part. Leave the future kit to think about its behavior. Joke. The hardening process is long and depends on the weather. In hot weather it will take 1–2 days, in cold weather – 3–4.
Step 3
After the part has hardened, remove it from under the plasticine. Drill small holes to bleed air. Coat the mold with cream, then prepare epoxy resin and strips of fiberglass.
Step 4
Place strips on the plaster mold until the thickness reaches two millimeters. Then lay a flexible metal film to strengthen the structure. Again, continue to cover everything with fiberglass. When ready, leave the body kit to dry and return to it in a couple of days. Remove the structure from the plaster mold, cut off the excess and sand it. Ready!
We order the installation of body kits to professionals
The surest way to install body kits on your car and make visual tuning of the car is to contact specialists who will complete the tasks in a few days, and will also help you purchase good equipment for performing external tuning. Specialists who deal specifically with this issue can provide you with the following services:
- independent selection of several options for tuning device kits;
- modeling the exact appearance of your car in the future;
- ordering high-quality equipment to carry out all work during the tuning process;
- painting of parts and excellent processing to give the desired appearance;
- installation of body kits on a car, taking into account all the important features of this process;
- servicing body kits, repairing plastic parts and painting chips and scratches in the future.
How to make a power bumper
power bumper" width="660″ height="440″ />
The part is mainly installed on SUVs. Thanks to it, the vehicle, when driving off-road, will be able to overcome serious obstacles without risking its integrity. The passive safety of the driver and passengers will also significantly increase. The power bumper is made of iron. Homemade elements, in addition to safety, “give” the SUV an aggressive appearance. With a homemade power kit, you can drive. To obtain this permit, changes to the design of the vehicle must be registered with the traffic police.
Before starting work on creating a power element, you need to draw up a plan on how to make a bumper, and only after that, start working. To complete this you will need the following tools and materials:
- Tape measure, tape, marker, scissors.
- Sheet metal (up to 3 mm thick), and cardboard.
- Grinder, cutting and grinding wheels, welding machine.
The work process is slightly different, depending on the method used to create the bumper:
- Constructed from a single piece of metal.
- Construction from several parts.
Despite the differences, the process has some similar operations:
- Creating templates from cardboard.
- Cutting out the necessary elements from metal, or creating the desired shape from a single piece.
- Connecting several parts into one piece using a welding machine, or forming a structure by bending sheet metal (practically impossible at home, since powerful equipment is required).
- Primer and painting.
- Installation on a vehicle.
The power bumper is painted in dark colors or left unpainted (if stainless steel is used as the material).
Let's sum it up
To obtain the necessary goods and services in terms of external car tuning, many people prefer to turn to specialists to save time and money. However, you can complete all the processes yourself. Buying kits of body kits and installing them will not be difficult for you. The main thing is to choose the right kits, as well as paint them well.
Take advantage of the exterior decoration options for your car that you will love. But remember that excessive pretentiousness does not always suit your car. If you have experience in external tuning your car, share your conclusions in the comments.
Preparatory stage
Before starting work, you should model the future body kit at least on paper, carefully calculating its dimensions and geometry. However, there is no point in competing with design bureaus. You can simply find a solution that suits you on the Internet, which can be adjusted if necessary.
Then you need to dismantle the old body kit, if any. Their fastening can be done in different ways. Japanese automakers, for example, practice the use of double-sided tape and stabilizing screws. Here, dismantling is simple: unscrew the screws and remove the tape. You will have to tinker with the pistons longer, but this is not a problem either.
If you come across a used car, then there is a possibility that the previous owner was also a big supporter of external tuning and used sealant to attach the body kit - this material is practically not used in production models. Dismantling such a body kit is unlikely to go smoothly, so traces of sealant and paint chips will have to be treated by grinding and polishing the body parts.
It is advisable to carry out such work in a garage equipped with an inspection pit. If, after removing the old body kit, you find traces of corrosion underneath it on the metal, you need to get rid of them by using a grinder.
But now it’s time to decide what you plan to make the body kit from. And you have quite a wide choice.
Making your own fiberglass body kits
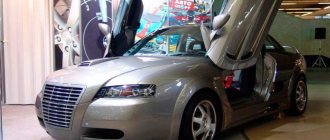
An aerodynamic body kit can greatly improve the appearance of your car. Different shapes and designs of body kits can give vehicles a bold, sporty, stylish, modest and even funny look. In addition, a high-quality part can significantly improve dynamic characteristics: controllability, operational stability and fuel consumption. That is why we can say that the work is carried out according to complex tuning. Moreover, if we consider a specific type, then the front bumper body kit, as it were, lands the car at high speeds, and the rear bumper body kit removes air turbulence that can lift the car. Aerodynamic body kits are presented on the market in a wide variety, but all of them, as a rule, have a considerable price. There is only one way to save significantly on tuning - making the body kit yourself.
Car with body kit
Before you make a body kit with your own hands, you should decide for what purpose you need it? If to change external tuning, then the product must be without extra holes and design changes. When it comes to driving characteristics, changes in the body and deformation of other parts are inevitable.
Please note: at low speeds the benefits of the aerodynamic body kit are not visible, but from 100 km/h everything becomes apparent. At high speeds from 140 km/h, the body kit begins to affect handling. Because of this, aerodynamics should not be discounted.
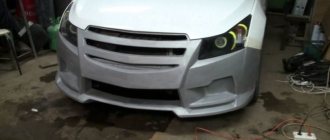
Fiberglass bumper: how to make it yourself, strengthen it and install it
Hi all! I think each of you will agree that a car bumper is one of the most noticeable parts of any car. That's why tuning fans simply cannot ignore this element. And a great solution to change it would be a fiberglass bumper.
Reading the reviews, I realized that many are interested in such tuning with their own hands. Fiberglass has excellent properties and characteristics, giving additional strength and rigidity. That is, in essence, a power body kit is created.
The only question is how to make such a design. After all, manufacturing includes several successive stages. You can use video instructions to help. Many craftsmen clearly show how to make a body kit. Some even offer to make them to order. The price is quite decent, but fans of tuning fully justify it with quality and originality.
Well, I propose to discuss with me the question of how a fiberglass bumper is made and how to strengthen the structure using readily available materials and available tools.
Types of materials
Before you start creating, it’s worth considering the question of what materials are body kits made from?
- ABS plastic (ABS plastic).
- Carbon.
- Polyurethanes (rubberized or foamed).
- Fiberglass.
Aerodynamic body kit made of ABS plastic
This material is an impact-resistant plastic containing a copolymer of acrylonitrile, butadiene and styrene . It is used most of all by domestic body kit manufacturers. It is used both in the creation of automobile parts and in household appliances.
Its advantages:
- moderate cost;
- resistance to mechanical stress;
- flexibility, allows you to restore the previous shape with a slight impact;
- holds the paintwork for a long time.
ABS plastic body kits
Cons of ABS plastic:
- if the technology is violated during the creation process, then in operation the part will begin to easily succumb to low temperatures;
- elements need to be adjusted during fastening.
Carbon body kit
Carbon is a composite material consisting of graphite threads and epoxy resin . Belongs to the category of carbon fiber plastics. Car tuning elements are made from carbon fiber: strut braces, hoods, bodies, bumpers and interior elements. Today, carbon is used not only in the automotive industry, but also in many other areas.
Material advantages:
- excellent quality;
- lightness compared to steel;
- low weight with high impact resistance;
- unique appearance.
Flaws:
- price;
- cannot restore shape;
- If the manufacturing process is not followed, it is susceptible to targeted impacts.
Carbon body kit
Body kit made of polyurethane
Polyurethane is a polymer containing macromolecules of the urethane group -NH-CO-O- in its chain. There are two types:
- Rubberized polyurethane (PP) The best quality material. It is manufactured using cast iron, non-deformable dies under pressure. His resistance to impacts is amazing. The rubber content makes this type the most flexible. Even if a mechanical impact occurs several times in a row in the same place of the part, it will still return to its original state. A polyurethane part may fly out of place, but will remain unchanged in condition. You can create a defect on it only by cutting. The paint coating lasts on rubberized polyurethane for a long time.
- Foamed polyurethane (VP) is slightly inferior in properties to rubberized one. Direct exposure will not affect the condition of the product in any way. The downside is that over time the material will deteriorate due to kinks. The polyurethane itself is lightweight, but the edges of the product are thicker. Abroad, the production of material from polyester resins is popular - this increases resistance to frost. Disadvantage : Both types are expensive.
Making a bumper from foam and polystyrene foam
Fiberglass body kit
Fiberglass is a type of composite material. It consists of fiberglass impregnated with resin. The new generation material allows you to implement any ideas. Fiberglass allows you to make a body kit for a car with your own hands of any complex shape, and represents the best solution in all areas of activity. Due to its qualities, it is widely used in the field of tuning.
pros:
- affordable price;
- if all manufacturing nuances were observed in production, then the quality is not inferior to ABS plastic and polyurethane;
- easy;
- easy to use;
- after an impact it can return to its original position.
Minuses:
- toxic;
- defective material can easily crumble and break in the cold;
- Parts need to be adjusted before installation.
Fiberglass Matrix for Bumper
Body kit made of ABS plastic
This material is a form of impact-resistant plastic made from acrylonitrile with the addition of styrene and/or butadiene. ABS plastic is quite popular and is used in a variety of fields - in the manufacture of furniture, household appliances and, of course, automotive parts. Domestic manufacturers of car body kits use this material, perhaps more often than others.
So, its advantages:
- low cost when compared with polyurethane and especially carbon;
- good impact resistance with good flexibility, which allows you to withstand minor deformations, returning to its original shape;
- passable molding accuracy (which is especially important when making it yourself);
- good adhesion characteristics.
Flaws:
- a slight deviation from the optimal manufacturing technology, as well as violations of the chemical composition, cause a sharp increase in fragility at low temperatures (about minus 10 degrees and below);
- poor resistance to heat (corrugation appears at 90 degrees and above);
- insufficient resistance to aggressive substances, including technical fluids used in cars (gasoline, oils).
Instructions
Let's look at how to make a fiberglass body kit with your own hands. The work can be divided into several stages:
- You need to start by considering the appearance of the product. It is worth calculating the parameters and deciding on the shape. For easy perception, you should make a layout or sketch a sketch based on ready-made selling options. Find interesting types of body kits on the Internet and implement a unique design based on them.
- Next, based on the sketch or image in your head, prepare parts of the body kit from fiberglass. Beginners are advised to first cut out a rectangle and then give it the desired shape. If you cut out the parts with small bricks and then glue them together with resin, then when attaching them to the car they will lie more evenly.
- Let's move on to the most difficult part of the work - preparing the bends in the arch area. This part is tricky because it is along the edge of the wing splitter. It is worth approaching the task responsibly, since the transition of the extender into the fang of the rear bumper may have flaws.
- If the body kit is not designed correctly, dents will appear. When a defect has already occurred, it can be corrected using plastic putty. Fill the cavity of the product with it.
- Remember that gaps should be left between the tuning parts. For example, between the bumper and the fender.
- After the preparation is completed, we proceed to applying the primer and wait for it to dry completely.
- Making car body kits with your own hands also involves painting the structure yourself, so the paint must be selected in advance to match the body.
- If the paint has dried, install the body kit on the vehicle. We take sealant and screws.
- During fastening, parts may need to be adjusted.
Pasting process
To make the product durable, it should be treated with fiberglass. These are glass mats impregnated with polyester resins. To prevent the foam itself from being destroyed by the action of the resin, it should be protected. Here you can simply paste it over with plasticine. Only technical.
If you have a styrofoam-based layout, cover it with several layers of masking tape and then cover it with aluminum foil. This will allow you to easily separate the layout and the workpiece. I will give a few more important recommendations:
- Pasting is carried out with glass mats, resin, and hardener. Additionally, prepare scissors for cutting and brushes for applying the material;
- Create indoor conditions with a temperature within 15-30 degrees Celsius;
- Provide good ventilation;
- The first layer is applied from glass mat No300. The surface is treated with resin with a brush, then glass mat is applied;
- When processing bends and joint areas, use resin with a thicker consistency;
- Do not prepare resin in quantities greater than 300 grams;
- Avoid air bubbles;
- The next layer is applied when the previous one has hardened. This takes 1-4 hours;
- A total of 3-5 layers are applied;
- Place a stiffer mat like No600 in the middle. Although this will lead to weight gain.
If you doubt your abilities, or simply cannot afford to spend so much time on modifying your car, contact a specialist. In cities such as Moscow, St. Petersburg, Volgograd, Krasnodar and many others, there are good tuning studios and manufacturing specialists.
Final revision
Since you have created the blank and it has completely hardened, you can remove it from the model and begin the final stage of creating a fiberglass bumper.
First, carefully process the workpiece itself, removing unnecessary elements and cleaning the edges. Don't forget to go over it with sandpaper.
Also at the last stage, external finishing is performed. To do this, you need to treat the product with putty, sandpaper, then go over it with a primer, pick up paint, apply it in several layers and cover it with a protective varnish. We finish the work by polishing and installing it on the car.
The procedure is not the easiest and takes quite a lot of time. Therefore, think through each stage in advance, make sure you have free time and the necessary conditions. Improve your knowledge by watching useful videos.
Thank you for attention! Don't forget to subscribe, leave comments, ask questions and tell your friends about us!
DIY body kits
Tuning, to one degree or another, changes the factory design of the car, attracting the eyes of passers-by with unusual shapes. It is for this reason that aerodynamic body kits have become a classic type of tuning. The changes can be small, from a bright pattern on the body, or large, up to the replacement of all body panels.
The aerodynamic body kit on the Skoda Octavia is made according to an individual project, in contrast to the serial kit, which is considered traditional for cars styled as sports cars.
The car has wheels of large width and diameter. For them, enlarged arch extensions were made, and the door sills were formed in width. The front part of the car is made in the style of Audi cars.
The round elements of the Hella headlights play off the headlight covers.
The rear of the car has much in common with the front: the molding arc is designed in the same style - in a characteristic horizontal version. The numbers have been moved from the trunk lid to the bumper. Other changes affected the large rear wing: it is mounted on the trunk. Holes specially cut for air outlet are also clearly visible. The rear view mirrors were replaced, the door handles were completely removed, and sports locks appeared on the hood. The wing is imported and has adjustments.
The body kit project was completed for one of the companies. The technical specifications were drawn up with the owner of the car. The search direction for creating the appearance of the car was discussed with him. He wanted to give the design an aggressive character and add dynamics to it.
The terms of reference indicate the working conditions - to create a modern Audi style in the form of a front bumper, but make it more daring by adding massive openings for air access. The arch extensions should be clearly visible on the body. The top of the body with body kit had to be made laconic.
As for its lower part, it needed to be done with detailed work. The sketches were presented within a few days, and one of them went into production.
Together with an assistant - a modeler - a version of the body kit was made from plasticine on the right side of the car body. Subsequently, changes were made to the model regarding proportions and other aspects of the model. According to the plasticine model of one side, this form was symmetrically transferred to the other side. Complex parts were made using the matrix.
So, fiberglass was molded onto a mock-up of the rear bumper. The material used was 5mm thick. Then the frozen matrix is removed from the body along with the plasticine. It is trimmed, cleaned and leveled with sandpaper. Next, the sill and wheel arch matrices are peeled off in the same order, preparing them for molding. Next, the parts themselves are molded using the matrices.
To do this, they are processed along the contour using a saw and adjusted. The arch extensions are made closed. They are made with internal panels that are adjacent to the surfaces of the wings. With such panels, the expanders are attracted to the wings using self-tapping screws. The rear extensions have a complex shape - they consist of two parts, of which the front part is attached to the door.
We make metal brackets for bumpers, or more precisely, for attaching them to the body. Using these devices, in the area of the flanges, we screw the bumpers, securing their lower edges to the bottom of the body.
We mold the front bumper with the radiator grille. The edge of the grille goes under the hood from above and is held on the panel with screws. A flat panel is molded to the bottom of the bumper. It extends far under the body and is mounted on the bottom.
After installing the bumper, air holes were cut on the sides and immediately glued in place. We add new fragments without worrying about strength - fiberglass allows this. The tinsmith made holes right in the metal of the hood, with an undercut that bent inward.
It was secured from the sides with tin wedges. The locations of the handles were covered with metal, just like the trunk lid. When all the parts are in place, you can start adjusting the body kit elements to the body and to each other. We even out the gaps between the parts.
For this work we take glass-filled putty. Now the car is ready to be sent to the paint shop. It took 2.5 months to make the body kit.
We installed the already painted parts, and glued the sills and arch extensions to automotive sealant. Place the rear bumper in the prepared area and secure it with bolts. Next, we cover the air intake holes in the front bumper with a metal mesh. And the bumper sat comfortably in its place.
Advantages and disadvantages of tuned bumpers
Body elements that have undergone tuning have their advantages and disadvantages. The list of advantages includes:
- Individual design.
- More durable construction compared to the standard one.
- Relatively low financial costs for creation.
The list of shortcomings includes:
- Large time and labor costs for tuning the rear and front bumpers.
- The need to register homemade bumper covers as modifications to the design of the car.
Bumper tuning is a great way to give your car a bright and unique design. He also helps to repair an old broken body part. Professional tuning costs a lot of money. It is much more profitable and efficient to independently change the design of a body element, or even create a new part.
DIY aerodynamic body kit
All body kits are considered elements of external car tuning. With their help, the vehicle not only gives a sporty appearance, but also improves dynamic performance. The main reason why body kits are installed is the desire to give the car style, improve speed and other characteristics.
Content:
This method of modifying a vehicle is quite an expensive undertaking, but many car enthusiasts find a way out by making external body kits with their own hands.
Making a bumper out of plastic
You can use plastic for creativity. The principle remains the same: you need a blank. It will need to be primed, because molten plastic deforms the foam very easily. Afterwards, a sheet of plastic of the required size is heated and placed on the blank.
The plastic material takes the shape of the workpiece. In difficult places (bends), additional heating with a hair dryer may be necessary. When the plastic hardens, and this will happen many times faster than in the case of epoxy resin, the bumper can be removed from the blank and further preparation can begin (installing fasteners, trimming excess fragments, grinding).
Now you know how to make a body kit for a car with your own hands. Good luck with your technical solutions!
Aerodynamic properties
Aerodynamic body kit elements give the vehicle a new look and make it more exclusive. Most often, most fans of such tuning change the appearance of bumpers, hoods and trunks.
Fenders and car doors, sometimes even the roof itself, can be altered. There are some difficulties in the work here, and it is almost impossible to do everything on your own. Not many people can afford to use the services of specialists, so everyone tries to make the body kit themselves.
In most cases, the appearance of the car is fundamental. At low speeds, the advantages of the body kit do not appear, but as soon as the speedometer needle exceeds a hundred, it begins to remind itself. And at high speed it can even affect the handling of the car. A well-made body kit improves it, increases stability, and reduces fuel consumption.
Styling of the classic VAZ model
Let's consider the option of transforming the body of a regular Zhiguli. You can easily make a body kit for a VAZ yourself, using available materials for the work. The body of the Zhiguli has few rounded shapes - its design is based on straight lines and angles. An aerodynamic body kit will give the car new features, making it exclusive and recognizable.
Basically, many tuning enthusiasts modify the front and rear bumpers, hood and trunk lid. Less often, alterations affect the wings and doors of a car, and even less often the roof. This is due to the greater complexity of this type of transformation and the inability to complete the work on our own. Not all car owners can afford to resort to the services of masters from a tuning studio, so many car enthusiasts have to make a body kit with their own hands.
In addition to new external characteristics, a professional body kit reduces the coefficient of air resistance, as a result of which the car is able to reach much higher speeds without any other technical changes. The effect of this modification is evident at speeds exceeding 120 km/h.
Installation procedure
If you are driven by design motives, then this idea is simpler, everything can be done directly on the machine. And when you're looking to improve aerodynamics, get ready for a more difficult, but fun process.
When the main goal is to improve your appearance, then large financial expenses can be avoided. In a special store you will purchase all the necessary elements - bumper, spoiler, etc. All this is attached directly to the body part.
The factory base remains unchanged; you don’t even have to drill new holes. Any motorist can install the body kit himself. No special skills are required here; all the work will not take you even three days. But immediately get ready for the fact that decorative elements can fly off at a decent speed, because they are more intended for urban recreational skating; on a serious track at good speed, the decor will show its weakness.
Installation of a body kit is considered an average tuning option in terms of its costs. The elements are made of a special plastic material, are lightweight and have good strength. There are craftsmen who make their own bumpers or spoilers according to their own sketches, but most prefer to purchase ready-made products, although this option is considered more expensive.
First you need to decide what you want to replace. It is best to prepare drawings of new body shapes. After this, you can move on to the technical aspects of implementing everything planned.
Options for solving the problem in bumper manufacturing
To manufacture a power body kit for a Chevrolet Niva, it is necessary to provide for the following points that will most likely arise during the manufacture of the bumper:
- Drawing. The new power bumper on the Chevrolet Niva can be of any shape and type, but the main thing is not to violate the maintenance and traffic rules;
The drawing shows a sketch of a power bumper for a Chevrolet Niva car
- Material. You need to decide what shape and what metal your new, reinforced bumper will be made of. It is recommended to use metal with a thickness of 3-4 mm. For this, we will use a square pipe, a channel, as well as a 40-mm angle and pipes with a thickness of 2 mm or more;
- Weight of the new design. Since the new bumper will be made of stronger metal, it is recommended to approximately calculate its weight so that the front springs and shock absorbers do not have to be changed;
- Optics. It is necessary to provide places for attaching additional lighting, which will never be superfluous;
Additional light can be installed on the power bumper.
- Hi-jack and winch on UAZ and Chevy. A reinforced bumper involves the installation and further use of these two devices, so we recommend that you foresee their installation locations and fasteners in advance.
The power bumper on a Niva car can have any shape; no permits are required for it.
The main thing to remember is that installing a power bumper is not prohibited by law. Lack of installation permission and documents confirming the certification of this device - this will already be considered a violation of the rules and maintenance requirements.
For example, you can take a power bumper, which is called “RIF”, from the company -. It has an integrated winch platform, which makes it more functional. It is also reinforced with stiffening ribs. This makes it possible to use hijack. By the way, special fixation points are provided for it. The “Reef” power bumper is equipped with special towing clamps that can be easily removed and installed.
The RIF power bumper can be additionally equipped with a winch mount.
Some craftsmen make bumpers from aluminum, which also makes them durable and quite lightweight. As a rule, such protection is made of several bent power arcs made of metal.
Bumper replacement
This can be done in two ways:
- modernize the factory;
- install new one.
In the second case, we are talking about a purchased part that needs to be fixed in place of the old one. The downside is that the cost of the bumper is quite high, and sometimes it’s quite difficult to find it in stores.
But in the first version, all factory parts are preserved, the design features of the car do not change. At the same time, it is possible to think about the removal of air that cools the brakes, and to arrange mounts for “foglights”.
Most likely, you will not be able to test a new bumper made by yourself in order to identify any mistakes made in its shape. The quality of the work performed will only be evident on the track. The car will either be pressed to the asphalt, and the control sensitivity will increase significantly, or the car will start to wobble from side to side. This will mean that all efforts were in vain.
Materials and tools
After creating the project, you should decide on the materials and tools for the work. The final result depends on this.
Depending on the selected materials, the set of tools required for work and the nuances of changing the body kit depend.
Also, before you start upgrading the body kit, you will need to use a mock-up or create a matrix; its peculiarity is that it is a “negative” in relation to an existing part. When designing a bumper, the material of the future body part is applied to the matrix, and a “cast” is obtained. It is used when upgrading or repairing an original body element.
To create a matrix, it is recommended to use technical plasticine. The material is not afraid of exposure to high temperatures and is easy to process.
Polyurethane foam
The material is used both to create a bumper from scratch and to modify an existing one. To construct the part, you will need the following materials and tools:
- Polyurethane foam (approximately from 3 to 5 cylinders);
- Foam gun;
- Masking tape;
- Epoxy resin;
- Fiberglass;
- Cooking foil;
- Fiberglass;
- Sharp stationery knife and replaceable blades;
- Sandpaper of different grain sizes;
- Automotive putty.
To create a bumper from polyurethane foam, it is important to have a developed eye, “straight hands”, patience, accuracy and master the skills of manual processing of materials. Only in this case, the quality of the manufactured element will be at its best.
To make a bumper from polyurethane foam yourself, follow the following steps:
- Creating a base from polyurethane foam.
- Use of fiberglass.
- Primer and painting.
You can get a bumper made of polyurethane foam through a step-by-step process:
- Remove the original component. It will serve as a template for creating a new product.
- Cover the internal cavity of the dismantled element with several layers of masking tape.
- Apply foam evenly.
- After drying, separate the frozen workpiece from the bumper.
- Using a knife, cut out the main holes on the new component.
- Carefully sand the resulting part with sandpaper.
- After the foam has dried, putty the workpiece. Afterwards, you should also process the future part with sandpaper, while gradually reducing the grain size.
Before you shape the future bumper, you need to make markings. This way you can achieve a symmetrical, neat part.
The application of fiberglass is carried out as follows:
- Cover the workpiece with foil. It will protect the product from exposure to aggressive materials and make it easier to remove frozen foam.
- Use epoxy resin. Place a layer of pre-cut fiberglass on top of it.
- Smooth the applied material with a rubber or plastic scraper. Do not allow wrinkles or air bubbles to appear on the surface to be treated.
- Repeat the procedure 4-5 times. Wait until the material hardens and dries.
- Remove the foam, make adjustments using putty, treat the surface with sandpaper, prime and paint the body part.
Manufacturing procedure
The most affordable method is epoxy. Plastic and metal are considered more expensive options. Some people use fiberglass in their work.
The base for the future part is made from ordinary foam plastic. Using a sharp knife and using plasticine, the surface of the body kit is exposed for subsequent gluing. Then fiberglass is applied, the thickness of which is determined according to your wishes. The foam is removed, the surface is cleaned, and fasteners are installed. The body kit is ready for installation. Finally, all that remains is to putty it, cover it with a primer and paint it.
If you decide to use plastic, the technology of work remains virtually unchanged. You just need to make a suitable base from balsa, linden or dense foam. To give it strength, the surface is primed with nitro varnishes, to which talc or baby powder is added. The surface of the base of the body kit is leveled with the same mixture.
When using polystyrene foam, it is treated with diluted acetone, varnish or epoxy. After this, the surface must be rubbed with a candle or polish.
Materials used for layouts
Polyurethane foam and polystyrene foam can be considered good options. They are inexpensive, convenient and easy to use and process.
see also
Driving with a trailer in a car according to the new rules
If you take polystyrene foam, the sheets can be joined together using liquid nails to create a rectangular block, the dimensions of which will be slightly larger than the dimensions of a standard bumper. Take a knife, a clearly visible marker, apply markings, cut everything out, etc. That is, a few hours of work will allow you to create a life-size foam model, and use it to create new bumpers. But if you have an old bumper, you don’t have to worry so much.
For an old body kit, polyurethane foam is suitable. Before applying it to plastic, treat the surfaces with penofol or masking tape. This will prevent connection with the bumper structure. Then a layer of foam is applied, leveled (with gloves required) and pressed to increase strength. Cardboard and tape will prevent the foam from draining. After 2 days, the foam will harden and can be removed, processed, etc.
In some cases, it is convenient to use both materials, cutting out small components from foam, and filling ordinary cavities with foam.
By covering the blank with fiberglass, you will get an excellent bumper. It is also possible to create a so-called matrix. But it is made on the basis of technical plasticine.
Pulling out plastic
To do this, it is necessary to make a frame from a piece of plywood with hooks onto which the bars representing the base are attached. The plastic is heated to the required temperature, becoming soft and elastic so that it can be applied to the workpiece. The frame will help make it better and hold it. When the plastic has cooled, the part can be removed from the base.
Experienced craftsmen, working with plastic material, choose different options, taking into account what they have to work with. The characteristics of the parts and certain materials themselves determine the technological stages of the work. It is possible to make a simple part yourself, but for more complex elements it is recommended to use the help of experienced specialists.
The process of making a new body kit
Below we describe the process of manufacturing the base for the winch on the Chevrolet Niva:
- It is necessary to disassemble the front part of the car and remove everything that may interfere with the production of a new body kit, but the main thing is not to overdo it.
Step one: dismantled the “face” of the car - Next, it is necessary to strengthen the front side members, on which the new bumper will be mounted. For this purpose, special inserts are made that repeat the shape of the lounge.
Now we need to strengthen the front side members. - The next step will be the manufacture of side linings for the Chevrolet Niva side members, which are attached from the outside. It is necessary to mark and drill mounting holes in them.
Next, the manufacture of side linings is required - After preparing all the elements, you can carry out the initial assembly by installing amplifiers and linings on the side members.
We install the inserts and screw on the outer covers. - Next, a cross member is made between the linings, which is secured by welding.
We make a cross member and weld it. - After this, you need to think about where to install the winch on the Chevrolet Niva. To do this, it is recommended to have a traction mechanism available, from the base of which you will need to remove the template.
We weld an additional mount for the winch. - After taking the dimensions, you need to weld the platform. To install and attach the winch to the finished base, you need to drill holes in it for fixing with M12 bolts.
We attach a new body kit to the car and install the winch in the designated place.
The manufacture of the base on which the winch will be installed is completed. All welds are removed from slag, and the entire structure is covered with anti-corrosion and primer. When the painted surface has dried, it is necessary to assemble everything for the further manufacture of the Chevrolet Niva bumper itself:
- First, you need to think about attaching the power body kit to the car frame. You can use a square channel that will be attached to pre-made amplifiers, taking into account the bending angle of the bumper.
- A pre-cut square pipe is welded to the finished fasteners. It is necessary to observe all the symmetry of this process, because if the size of the central and curved parts, as well as the bending angles, are different, the bumper will turn out to be beveled.
- Next, the same square pipe will be used to shape the new Chevrolet Niva bumper. All seams must be thoroughly welded, removed from slag and cleaned with a grinder.
- The guide jaws for the winch are installed, places for the hi-jack are cut out, and the installation location for the towing clamps is provided.
After the power bumper has been manufactured and installed, it is recommended to test it, since the entire structure may need to be strengthened.
Further work consists of covering the entire structure with anticorrosive, primer and then painting it. To do this, it is recommended to use high-quality powder paint, which, in turn, also protects the metal from corrosion.
Disadvantages of the Chevrolet Niva
Installing a new bumper on a Chevrolet Niva car is entirely your decision, just like making it yourself or buying it at a car store. The main thing in this matter is to determine your capabilities, namely, the ability to work with metal and welding. This is the main part of the work you do.
Author: Vysotsky Alexander Petrovich
Higher education: Chita State University, Institute of Technological and Transport Systems, specialty - cars and automotive industry. Repair of passenger cars of domestic and foreign origin. Chassis repair,…
- Leonid says:
I didn’t understand how the bumper is attached? For some reason, I got a bend on the frame. - Alexander says:
This is not the first time I have encountered a person who has such a problem. A bend to the frame could only happen in two cases. If you measured the future bumper incorrectly, because if one of the measurements is incorrect in relation to the car, nothing will work out for you. But this is a global problem. As far as I understand, there is a problem with the side to which the bumper was welded. In this case, you need to make a new bumper and attach it to the side where you will have the winch mounts. - Victor says:
I’m wondering, what is the thickness of the mounting plate, it looks kind of thin, will it not sag under the influence of loads on it? - Leonid says:
To the comment above. I made a bumper from a pipe. The thickness of the plate did not bother me, because everything can be welded onto it perfectly, the main thing is to use a good welding machine. Regarding the sag, I didn’t notice anything like that, there were no problems. I don’t know how things are now, because I sold the car, but I don’t think anything could have fallen off or broken. - Oleg says:
Niva Urban was recently purchased, and almost immediately it needed to be improved and strengthened. We made an amplifier for the bumper. We selected the appropriate metal and got to work. There were problems with the fastening, but I had to use a little trick. Additional fasteners were needed. As a result, there were four more of them than in the original version. This way it holds better and will last longer. - Gennady says:
The width is about five centimeters. This is quite enough for reliable fastening. True, the bumper was made not from a pipe, but from a channel. The technique is a little different, but the meaning is the same. Everything was done with our own hands, so that if something happens, you won’t be sorry for the money spent. I didn’t even think that something would fall off, but this is probably due to the fact that I’ve been driving for several years and have already seen a lot of things being repaired. - Nikita says:
I once had experience in making a new power body kit. This was done several times. The first attempt ended in failure, because after assembly it turned out that the body kit was much higher in height than the car itself. Reached to the garage floor. But in this case it was easy to change, I cut off everything unnecessary and that’s it. It's much harder to do the opposite. Because welding additional spare parts to a ready-made but short body kit is not an option, because if they are not from one piece, everything will simply fall off.