Installing a radio in a VAZ-2107
How to install a radio
on the dashboard of a VAZ
2107
, instead of central deflectors.
Radio
1DIN, JVC.
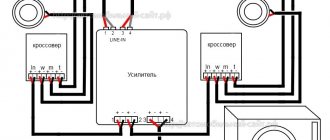
The picture shows the finished redesigned design:
In any case, you need a radio station. If you are just a fan of listening to Autoradio, you can install
and Quince. If you want to get a professional car audio system, then consider purchasing a full-fledged audio system to connect such a serious system as Pioneer (https://www.pioneer-rus.ru/ru/body.html). But remember that you need to start with proper complete soundproofing of the interior, purchasing a subwoofer, amplifier and other expensive things.
Also, if your cassette player doesn't have a USB port, know that what you are buying and you are going to be getting a very cheap and old model.
Then you need to buy at least four speakers: a classic setup contains two front and two rear, with a power of about 200 watts. Higher power columns for VAZ 2107
not worth buying.
The installation provides high-quality wiring, which you will have to buy yourself; in total you will need about 10 meters - 7 for the rear and 3 for the front speakers. When purchasing, it is better to take a 4-core wire so that the posts come out of one wire.
By the way, the standard colors of wires on the power strip are:
- The red color is always present in the on-board network, which operates on a voltage of 12 V, when the engine is running or the ignition is on;
- Black wire minus, ground.
- Blue power antenna;
- Yellow DC with battery.
- Orange illumination of the connection console.
Be sure to follow the instructions when replacing the radio in its original location. It should have a wiring diagram for the speakers indicating the pros and cons. Remember that there is a downside. this is the weight, that is, the body of the car, and so you can consider a well cleaned bolt that is in contact with the body. Works like a contact.
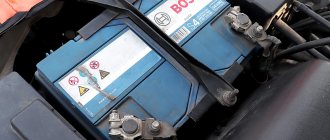
Of course, before you begin, you need to remove the negative terminal from the battery.
Then we connect the speakers: we hide the harnesses in the cabin and put them on the speakers.
On top is a 4-wire wire for the rear speaker shelf.
Let's start work:
1. Cut out a piece of plywood, rectangular in shape. This piece should close the opening that is located between the carpet in the interior of your car and the screws that were used to secure the standard audio system box. Thanks to such manipulations, you will end up with a blank wall near the stove, which needs to be securely fastened.
2. Cut out stencils for the right and left walls of the shelf.
3. Using ready-made templates, cut out the parts and twist them. The back and front parts of the box should be approximately 20 mm thick. They need to be twisted using self-tapping screws. Thanks to this screwing path, the structure will not delaminate in the future.
Read
4. Take sandpaper and sand the entire structure until it has a perfectly smooth coating. This is done so that the leatherette that will cover the player compartment does not tear during use.
5. We begin to glue the leather substitute fabric using PVA glue.
6. If desired, the shelf can be repainted to match the interior color, or to any other color that you think will suit.
7. If there are any gaps in the structure, they can be corrected using foam rubber. This way you can be sure that the music will not jump while driving on uneven roads and over bumps.
8. We install the radio in place and connect all the necessary connecting wires. The main thing is to do good insulation to avoid unexpected short circuits. You can connect the system to the dashboard so that it turns on during ignition.
How to connect a radio to a VAZ 2105
The player block itself is installed in a special hole located on the panel. The hole is located above the cooktop fan switch. If the tape recorder has not been installed before, this hole will be closed with a plastic plug. First you need to install a metal frame in the hole under the radio that will hold the tape recorder in the panel.
This metal frame has many cutouts and tabs that need to be bent to form a better connection to the panel. The tape recorder itself is installed inside the frame. When entering completely, the radio is fixed with special clamps on the sides. After this, it can only be removed with a special key included in the radio kit. These keys are supplied in two copies; in order to remove the tape recorder, you must simultaneously install them on the sides.
The most important. connect the radio to power. As a rule, the color coding of the wires on all radios is almost the same. Black and blue. power is minus, and red and yellow. plus. It is best to take power from the cigarette lighter. First, it has a high current fuse. Secondly, this is the nearest food point. You can, of course, install a new fuse in the block and run a new wire with a harness. But this is extra work.
The standard sound system has two front speakers and two rear speakers. Optimal wiring to the speakers is under the dash, running cables for the front speakers, and under the beard, near the parking brake, under the rear seat, for the rear speakers. All you have to do is lift the cover to feed the wires underneath.
It is best to install front speakers in the door. It will be good if you use podiums. The rear speakers are mounted on a shelf, with a podium between the shelf and the speaker. Try to pull the wires so that they do not touch them when driving the car. Connection to the unit's wires is made according to the diagram printed on the sticker on the cassette player, or in the instructions.
What do we get?
As a result of such simple and completely uncomplicated manipulations, you will be able to install in the interior of your VAZ , which is mounted in a completely new, more convenient, home-made housing.
Such a player will be used for a very long time, and most importantly, if you decide to replace it, the design of the shelf will allow it to be dismantled very quickly and easily. And the problem with the system overheating from the stove has now been eliminated.
GUY is standing at his post, stopping everyone, and such a thing is necessary - everyone is in order, well, you just can’t get to the bottom of anything. GUY gets angry, stops the next victim, checks everything (everything is absolutely in order), he then asks the driver: “But if you, comrade driver, the alarm system breaks, will the tire go flat?” - “Who the hell knows, Comrade Major. ” - “Yeah! You don’t know the basic principles of the machine’s operation, you don’t know the operating rules, you actually bought the wrong license, but let’s go to the post!” , “-Or maybe without a post somehow, but comrade major. ” - well, things went well! GUY promoted one, another, the third in this matter, standing there satisfied. He stops the next one - it turned out to be New Russian (NR). He asked him again: “Tell me, if your alarm system breaks, will the tire go flat?” NR: “Listen, bro, if I hit you on the head with your stick, will your shoelaces come undone?” :)))
ZYZH And it shouldn’t turn off at all, unless you assume that the radio has a function that scans the airwaves and if it doesn’t find stations with a strong enough signal, it turns off the radio - “they say, why the hell turn it on, you won’t catch a damn thing anyway.” , but listening to cassettes is generally stupid!” :-))
How to connect
You can connect the radio to the VAZ-2106 via the ignition switch, but this scheme is less attractive, because you won’t be able to listen to the radio with the engine off. The standard connection diagram involves the use of standard wiring. Among other features of connecting the VAZ-2107, we note the following points:
- Do not connect directly to the battery as this may cause rapid battery wear.
- To eliminate the possibility of draining the battery, the power button is inserted into the yellow wire.
- The classic assembly does not have a standard fuse. To install it, you need to change almost the entire electrical circuit. The easiest way. Buy a power cable that already has a built-in security feature. A 20 A device is required for normal starting.
READ Replacing Front Brake Pads VAZ 2106
The service life of the speaker system largely depends on the correctness of the power supply system. It is recommended to insulate the wires; the contacts are connected by soldering or using special adapters.
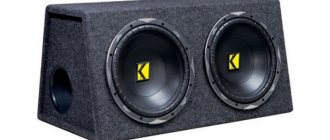
Subwoofer
To improve the sound system of the car in question, a subwoofer is often installed. This element is designed to output low-frequency sound. Among the connection features, we note the following:
- A modern device has a suitable output for connection.
- For this type of speaker, it is recommended to use a larger wire size.
It is recommended to lay the cable under the vehicle's trim. The radio is connected to the VAZ-2107 using special microcircuits.
Speakers
In order to connect the radio to the VAZ-2106, it must be connected to the speakers. Among the main recommendations are the following:
- The columns are installed with a hermetically sealed seal. Otherwise, vibration may occur.
- The greatest attention should be paid to correct cable routing. In places of contact with metal, it is necessary to ensure high-quality insulation, since vibration can lead to abrasion of the insulation.
- The connection procedure involves the use of special adapters. In addition, you can connect by soldering, all connections are insulated.
A modern radio tape recorder has appropriate outputs to the speakers. The network should have a minimum number of connections, as they can increase resistance.
How to install
When choosing a radio station, it is recommended to pay attention to products manufactured under the Pioneer brand. It has high performance and can last for a long time. You can install the radio to improve the music quality as follows:
- The radio is mounted in the car using a standard ISO connector. This international standard has become widespread.
- When choosing a radio, you should consider its size. If they do not fit, installation will be difficult. You can change your seat in the car.
- If the seat size is correct, there are no problems with updating the radio. All cables are secured in a rectangular connector.
- If the contacts do not fit, you can use a special adapter.
It is not difficult to install the radio correctly, because in most cases it has standard dimensions. For cars, it is recommended to purchase appropriate wires with good insulation.
Antenna
Before connecting the receiver to the VAZ-2107, you should take into account the correct position of the antenna. Various artificial interference can degrade the signal quality, which will lead to the appearance of extraneous noise. Among the antenna connection features, we note the following:
- There is a connector for connecting an external device.
- If the required plug is not available, you can purchase it and solder it to an external antenna.
- A quality connection provides insulation when using tape or sealant. Too much humidity can lead to corrosion, resulting in poor signal quality.
Installing and connecting the speaker system takes relatively little time. The greatest attention is paid to laying the cable to the power source, because the battery is used as is.
What do we get?
As a result of such simple and completely uncomplicated manipulations, you will be able to install in the interior of your VAZ , which is mounted in a completely new, more convenient, home-made housing.
Such a player will be used for a very long time, and most importantly, if you decide to replace it, the design of the shelf will allow it to be dismantled very quickly and easily. And the problem with the system overheating from the stove has now been eliminated.
GUY is standing at his post, stopping everyone, and such a thing is necessary - everyone is in order, well, you just can’t get to the bottom of anything. GUY gets angry, stops the next victim, checks everything (everything is absolutely in order), he then asks the driver: “But if you, comrade driver, the alarm system breaks, will the tire go flat?” - “Who the hell knows, Comrade Major. ” - “Yeah! You don’t know the basic principles of the machine’s operation, you don’t know the operating rules, you actually bought the wrong license, but let’s go to the post!” , “-Or maybe without a post somehow, but comrade major. ” - well, things went well! GUY promoted one, another, the third in this matter, standing there satisfied. He stops the next one - it turned out to be New Russian (NR). He asked him again: “Tell me, if your alarm system breaks, will the tire go flat?” NR: “Listen, bro, if I hit you on the head with your stick, will your shoelaces come undone?” :)))
ZYZH And it shouldn’t turn off at all, unless you assume that the radio has a function that scans the airwaves and if it doesn’t find stations with a strong enough signal, it turns off the radio - “they say, why the hell turn it on, you won’t catch a damn thing anyway.” , but listening to cassettes is generally stupid!” :-))
How to install
2107 has 2 spaces suitable for installing a 1DIN main unit. the tape recorder can be installed in a standard location on the center console; it is also possible to place the equipment in the place of the central vents. The first installation option involves cutting the seat to the desired size.
The second option reduces the heating of the player’s body by the hot cabin heater and provides comfortable control of functions. But at the same time, ventilation deteriorates, and there is a risk of heating the main unit by direct sunlight.
On the VAZ-2106 there is only one place for installation. center console, which needs to be cut to 1DIN size. The main unit is attached using a metal axis located in the instrument panel. The shaft mounting scheme is identical to the VAZ-2106 and 2107 using bent tongues.
To repair the device, you need to make a case; control is carried out using a remote wired remote control or via radio. It is possible to install the main equipment in the front passenger's feet, but this arrangement is rarely used due to the risk of damage to the radio.
Subwoofer
The low-frequency speaker on the VAZ-2107 is installed in the trunk. For connection in the car, separate speaker cables are used, which are laid to the main device or an additional amplifier. When using an active device connected to the on-board network, a fuse must be installed in the power circuit.
Installing a double din car radio
Modern 2DIN size standard radios are equipped with a larger display and touch controls. They are similar to 1DIN car radios in width and installation depth. Better functionality is achieved by increasing the height of the housing by 2 times (up to 100 mm).
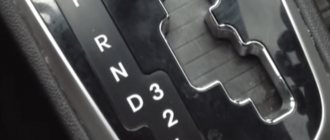
The two-din radio tape recorder does not fit into the VAZ 2107 car in its regular place. The installation of a large housing under the center console is hampered by the gear lever. It is also impossible to install a 2DIN car radio in place of the air ducts. At the top, the edge of the “dashboard” does not allow expanding the niche of the air ducts. To expand the niche downwards, you need to remove the stove controls. Much easier than a complex reconstruction of the dashboard would be to install a double-din radio in the glove box of the car. There is enough space in the glove compartment to install a double-din radio, which can be supplemented with a separate amplifier. The main difficulties of this method are the design of fasteners for the installation section. Under them you need to install damping pads that absorb vibrations of the plastic.
How to connect
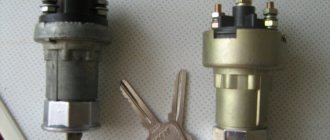
The correct connection of the radio to the VAZ-2107 and any other car occurs through the contact group of the ignition switch. In this case, when the key is removed, the power supply to the equipment is interrupted; only the memory unit is recharged by the battery.
On carburetor cars it is necessary to change the contact group:
- Remove the plastic steering column cover.
- Remove the ignition plug and loosen the 2 locking screws.
- Remove the lock from the post by pressing the lock with a thin object (with the key inserted and returned to position 0).
- Remove the group of contacts you want to change by soldering an additional element.
- Assemble the lock and install the parts in their original places.
Similarly, the modified lock receives the ACC position instead of 0, which is used to control the main unit in the parking lot. An additional fuse is inserted into the tape recorder connection circuit to protect the circuits from overload. Speaker cables are connected via an adapter.
Antenna
The antenna on a VAZ-2106 or 2107 is installed on the roof or trunk lid; You can use an active type device mounted on the windshield. The device is connected to the VAZ-2107 or 2106 car radio using a standard plug or adapter.
Speakers
The 2107 has standard front speaker mounting locations located at the corners of the instrument panel. When installing speakers in door cards, you need to cut holes in the parts; the diffusers and magnets of the speaker are placed in regular grooves on the inner metal part of the door. Speaker cables must be routed correctly; For this purpose, a special transition plug is used, placed between the end of the door and the column. The element protects the harness from kinks and damage.
READ How to Adjust Valves on Moskvich 412
To improve music playback, a pair of rear speakers are installed, which are located on the shelf behind the rear seatback. To install the parts, the metal panel must be processed; the cables are laid under the floor covering.
You can connect the radio to the VAZ-2106 only to the speakers located in the front door and on the rear parcel shelf. There is no space on the dashboard to install speakers (except for the oval-shaped central column, which was installed on the console back in Soviet times).
Installing the front speakers
First of all, we install the front speakers.
Then, when connecting the radio, you will not have to get confused in the wires installed by an illiterate radio technician. Most often, buyers of used cars encounter such cases. Identical black wires with careless twists and minimal insulation need to be ringed and labeled. It is much easier to replace unreliable electrical wiring with cables of the desired cross-section and color. Speaker wires of different colors are used for the left and right speakers. The color of the wire is selected according to the pinout of the car radio manufacturer. In radio engineering, pinout is the color, letter, and digital designation of outputs and cables. When installing more powerful speakers (100 - 150 watts), take into account their mounting depth, which should not interfere with the movement of the glass. To extend the speaker, spacer rings are used.
To install the speakers, you need to disassemble the front door and remove the window lift mechanisms.
The bottom of the door is usually used to install speakers. Holes for the diffuser are cut in the door panel.
Spacer rings are attached to the door frame, into which the speakers are installed. The wires for connecting the speakers to the head unit are pulled into the technological holes in the door. After assembling the door, additional work can be done.
A grill (decorative and protective grille) is installed on the speaker, the door card is covered with vinyl or leatherette. Without additional door cavity soundproofing, the speakers may sound muffled or resonate. For sound insulation, the outer metal is glued with a vibration-insulating material that dampens metal vibrations (for example, “Bimast”). The internal surfaces of the frame and stiffeners are covered with noise-absorbing “Spleen”.
How to check the connection
To check that the cables are connected correctly, turn off the ignition and measure the leakage current, which should not exceed 30 mA. An additional test will be to turn on the equipment in high-volume mode, and there should be no spontaneous shutdown of components.
Inserting a button into the wire
More correct way. insert an on/off button into the wire, which allows you to turn off the power manually.
- ANT, wire, usually white, used to control the antenna built into the radio, can be used to connect an external antenna;
- wires marked FL and FR are used to connect the right and left front speakers;
- The RL and RR wires are used to connect the right and left rear speakers, respectively;
Modern machines usually come with an ISO connector. In older cars, you need to install an adapter on the ISO socket, then when changing the radio model, you only need to switch the socket.
Once the electrical connections are complete, you can begin installing the speakers and external antenna. If the car is designed for only one pair of speakers, and there are no plans to install a second pair, then the wires can be twisted in pairs, left and right.
Connecting the radio
Connection work can be divided into three stages:
- installation of the device case;
- electrical connection;
- installation and connection of speakers.
You will most likely also need to connect an antenna.
To install the radio housing, you first need to install the metal frame. The frame is fixed in the socket using numerous protrusions that need to be bent around the perimeter. The cassette recorder body is fixed in the frame. Special keys are installed to remove it.
Make sure the battery is disconnected before connecting to power. When assembling an electrical circuit, the most important thing. Do not mix up the wires, but connect according to the markings. You can see the connection diagram in the photo. It is clear that read the instructions. It's not a royal matter. But, nevertheless, before you start installing the PG, carefully read the manufacturer’s recommendations at the top of the case or in the passport.
Typically, electrical wires are marked as follows:
- wire marked 12 V, power supply is yellow, plus comes from the battery;
This wire connects a constant power source to the radio, which stores memory settings.
- wire marked GND, black minus, connected to the car body;
- Marking ACC, the red wire is also responsible for power, but passes through the ignition switch.
If you connect the device this way, you will only be able to listen to music when the engine is running. This circuit was developed by manufacturers to save battery power. The easiest way to achieve the ability to use the radio regardless of the running engine. This is a direct connection.
If you twist the yellow and red wires together and connect the radio directly to the battery, then in case of long-term parking the radio will be able to completely discharge the old battery.
Car sound system
Rarely does a driver go without music in the cabin. Depending on the owner's preferences, the system can be simple or complex. Advanced speakers. This is a separate topic, worthy of a multi-letter story with a continuation. The degree of sophistication of acoustics is limited only by the wallet of a car audiophile and his personal understanding of cool. In this article we will talk about what it is and how to install the simplest music in the VAZ interior.
Any acoustic system, including a car one, consists of a main acoustic system (MA) and speakers. In the simplest case, these functions are performed by a radio tape recorder and a pair of speakers. By default, a modern tape recorder combines a music player from digital disk media or flash drives and a radio. There is also a built-in amplifier.
The original location of the radio, as provided by the manufacturer, is on the panel above the interior fan switch. Before first use, the mounting hole is closed with a plastic plug.
Conclusion
If you're planning a standard two-front, two-rear speaker setup, the front pairs of front doors are the best location. The rear ones are mounted on a shelf, for which it is better to make a special podium. The wires for the front pair are stretched under the panel, and for the rear pair near the handbrake. under the seat. Route the wiring so that the cables do not accidentally touch or become pinched during operation.
The external antenna is usually located on the windshield. The black wire of the antenna is connected to ground, the other wire. to the corresponding radio output.
These brief recommendations will allow you to connect a radio to a VAZ car. For more information about the construction process, see
Starting the installation process
How to connect a car radio to a VAZ 2106
First of all, you should check the power supply wires, each of which should have its purpose written on it. The wire can simply be painted in a certain color:
- The red color of the wire will indicate the cable that provides power plus 12 V when the ignition is on.
- Yellow will indicate constant power.
- Blue power cord to antenna.
- The orange wire is for controlling the backlight.
- The black wire is always negative.
Let's consider installing the main unit, which, in addition to playing CDs, is also equipped with a radio:
- We study the speaker connection unit (see How to choose speakers for a car radio). It consists of 8 plugs. Each speaker has two plugs. This results in 4 columns x 2 = 8.
The note. The speakers can be installed as follows: two in the front door, two in the rear parcel shelf.
- We study the player's power supply, which consists of 5 plugs.
The note. This doesn't mean it always has to be this way. There are different power supplies, and they may have different numbers of plugs: 5, 8, etc.
How to install a car radio on a VAZ 2107
The speaker and power supply are traditional. In other words, there is a predetermined purpose for them (the caps). In our case, it is assumed that these pads are included in the car kit and do not need to be purchased separately:
- We buy special connectors, which are very important when connecting a car radio. Such components a priori eliminate the need for soldering. These components are designed to connect an additional wire to the vehicle wiring. Typically the connector has two channels: the main wire goes into the through hole, and the additional wire goes into the curtain.
READ Replacement Inner CV Joint Opel Astra
The note. In the contact part of the connector there are two holes for clamping conductors through which current flows.
- As for the place of insertion into the standard wiring, you can find it using the connection diagram.
- After the connector is integrated into the vehicle's wiring, it is necessary to check the voltage plus 12 V and ground. This is done on the corresponding pins of the block. We use a simple probe. a 12 V car light bulb with two wires connected or a special one.
- We connect the gaskets for the amplifier (which were not used or will not be used during installation) with electrical tape.
The note. Wiring harness. This is a kind of block, it should come out so that the wires for connecting the player are pulled out without excessive tension.
- Now you need to pass the wire harness for the turntable and antenna through the special slide of the main unit.
- We insert the curtain into the console connector on the instrument panel.
Advice. The slide must be installed without distortion. Therefore, the outer flange of the slide must be close to the edges of the turntable seat.
- Take a suitable screwdriver and bend the mounting tab of the mustache. We make sure that they sit securely in the nest and do not wobble.
How to connect a car radio to a VAZ 2101
- While we are in no hurry to install the car radio, we will once again check the voltage and ground with a homemade probe on the necessary contacts of the power supply.
- Connect the antenna cable to the radio.
- Also connect the remaining wires.
- We insert the radio into the socket on the instrument panel.
Connection diagram for car radio VAZ 2105
The note. To easily remove the radio from the slide, the installation kit includes two pullers. They are installed on both sides in the gaps that remain between the player’s walls and the sled. You just need to pull out these pullers to remove the radio.
- We install the car radio panel trim.
- We install the panel itself.
- We check the operation of the entire system.
Connection diagram for car radio on VAZ 2105
Advice. It is recommended to protect radio communication points with insulation. You can use colored tape.
At this point, the operation of installing the radio with your own hands can be considered complete. It won't hurt to use other step-by-step instructions. It is also important to review photos and materials during the process. The price of self-installation will a priori please everyone, because for comparison it will be several times lower than what you will have to pay to specialists.
How to connect a VAZ 2110 car radio with your own hands
Installing a radio in a VAZ
Today you can find almost any major category on the market. Different prices, different needs, finally bought a car radio. Almost every one of them today is equipped with a radio receiver and can read discs of any format. And if the choice of a head unit is not a problem for many, then installing a VAZ or other car becomes a real problem. In our article we will look at how car radios are connected. Installation on a VAZ 2107 or other model should be simple and quick if you study everything that is presented below.
Installing a car radio on a VAZ 2107
Let's start our story with the simplest way to install a car radio. This approach is completely justified, because it is impossible to immediately study complex installation options, but you need to move on from simple ones. Before purchasing expensive equipment, you should decide on the choice of installer. If you intend to carry out such an operation independently, then you need to know many secrets. On the contrary, it is very easy to connect an inexpensive device, and you do not need to spend money on the services of a specialist. So, what does a typical speaker system consist of??? Of course, the main role here is played by the car radio, which we will install. But don't forget about the four standard speakers that come with the kit. You will need to connect wires from the main unit to them.
The note. All AC components are installed only in locations specified by the vehicle manufacturer. This was done not only for simplicity, but also to avoid short circuits.
Reorganization of the regular place for the radio.
After purchasing the desired equipment and before installing it, you need to slightly alter the standard niche for it. This can be explained by a number of unfavorable reasons.
The oven can dry out too much and cause the electronics to overheat. Many motorists have already become victims of such troubles.
The scheme according to which we will work and the necessary tools.
Installing a radio on a ZHIGULI. VAZ 2106
How to install a radio in a VAZ 2107
Installing and connecting the radio
. Add to the group on VK, subscribe, leave.
You will need ten mm plywood, a jigsaw, PVA glue and self-tapping screws, you should also take leatherette, cardboard and sandpaper .
How to install
When choosing a radio station, it is recommended to pay attention to products manufactured under the Pioneer brand. It has high performance and can last for a long time. You can install the radio to improve the music quality as follows:
- The radio is mounted in the car using a standard ISO connector. This international standard has become widespread.
- When choosing a radio, you should consider its size. If they do not fit, installation will be difficult. You can change your seat in the car.
- If the seat size is correct, there are no problems with updating the radio. All cables are secured in a rectangular connector.
- If the contacts do not fit, you can use a special adapter.
It is not difficult to install the radio correctly, because in most cases it has standard dimensions. For cars, it is recommended to purchase appropriate wires with good insulation.
Features of connecting a car radio
The standard connection diagram is usually the same for all car models and radios. But a number of nuances should be taken into account.
- The electrical wiring of domestic cars is designed to connect a device with a mechanical search for radio stations, which can cause certain difficulties if you are going to connect a modern model;
- In most VAZ models, a branch of the wiring for connecting the PG comes from the ignition switch: when you turn the key, a short-term power failure occurs, which leads to a reset if the model does not have an uninterruptible power supply;
- Before installation, the user must decide whether he is happy with only being able to listen to music while the engine is running, or whether he wants to use the radio in a parking lot.
- Sources:
https://omagnitolah.ru/podklyuchenie/ustanovka-vaz-2107.html https://autotuning.expert/magnitola/ustanovka-vaz-2107.html https://serenity-service.ru/zapchasti/kak-ustanovit- magnetolu-v-vaz-2106.html