Why do you paint the engine block?
A car engine (internal combustion, diesel, electric) consists of various elements and components.
Most of them wear out during operation and are replaced with new ones. Some worn-out parts of a car engine can be painted on the outside. It is allowed to paint the following elements of the engine compartment: valve cover, cylinder block, outer surface of the intake and exhaust manifold. Metal parts are usually painted to provide them with additional protection against corrosion and to extend their service life. You can use paint to update the appearance of the plastic elements of the engine (paint the plastic casing). The main thing is to choose the right coatings (depending on the type of surface to be painted and the operating temperature of the part).
The main reasons for painting a car engine:
- making external surfaces decorative (before selling the car);
- extending the service life of metal elements;
- protection of metal from moisture and corrosion.
It is better to combine painting with major repairs. Before painting, it is recommended to remove and completely disassemble the engine. The outer surface of each part is painted separately. For any engine element, select the type of paint that is suitable for its performance characteristics.
Rules for choosing a coloring composition
To paint hot engine parts, it is recommended to buy heat-resistant paint. This type of paint and varnish material can withstand temperatures up to +400…+600 °C. The surface of the motor parts, as a rule, heats up to 105 degrees Celsius during operation. The valve cover can heat up to +120 °C. The exhaust manifold heats up to +500 degrees Celsius. The zones next to it are up to +200 degrees. The intake manifold is not exposed to strong heat.
Engine paint requirements:
- strength (after application and drying or heat treatment, the paint layer should become hard and resistant to mechanical damage);
- heat resistance (after hardening, the coating must withstand high temperatures);
- fire resistance;
- moisture resistance (the paint layer should not allow moisture to pass through);
- corrosion protection;
- the coating must be resistant to the effects of fuels and lubricants and salts;
- The hardened layer of paint should not crack with frequent decreases and increases in temperature.
Paint and varnish materials for painting the engine:
- silicone thermal paints based on silicone and solvents (for metal) - applied with a paint sprayer and brush, harden after heat treatment;
- dry powder heat-resistant compounds (epoxy, alkyd, polyurethane) for metal - sprayed with an electrostatic sprayer and require “baking”;
- aerosol cans (acrylic) for plastic - sprayed over the surface, dry naturally;
- aerosol (on silicone resins) for metal - sprayed over the surface, heat treatment is required;
- two-component (epoxy, alkyd) paintwork materials with a hardener (for elements that do not heat up too much) - two parts are mixed before painting, the mixture is applied with a brush or a paint sprayer, hardens in the open air as a result of a chemical reaction.
Powder coatings are considered the most heat-resistant and durable, but their application requires a special tool, and for heat treatment (“baking”) you will need an oven or infrared lamps. But such paints do not contain water, which can penetrate inside the engine and lead to corrosion.
Engine cleaning
Factory painting of the engine is carried out on hot metal, as a result of which the paint has better adhesion. It is more difficult to remove such noticeable paintwork than usual. At the same time, it is necessary not to damage the aluminum parts of the car, and some corners can only be reached with special brushes. Homemade scrapers, coarse abrasives, brushes and rags are a standard set for cleaning engines.
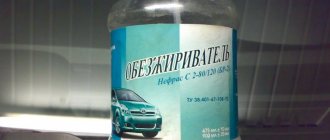
After removing carbon deposits and old paint, the surface of the motor must be thoroughly degreased. Special products are sold for this, such as car shampoos from the Karcher company or the Russian “Engine Cleaner”. Such compositions soften the remaining dirt and degrease the surface at the same time. Flushing is done with strong water pressure from a hose.
If there is no money for a branded cleaner, more attention should be paid to mechanical cleaning, and degreasing should be done with acetone, solvent or xylene. In workshops for these purposes, a mixture of soda ash, trisodium phosphate, sodium metasilicate and detergent additives is prepared - the motor is immersed in the mixture heated to 90°C. Areas that do not need painting will need to be protected. To do this, you can use the following mixture, which can be easily removed with water:
- 2/10 dextrin;
- 4/10 chalk;
- 1/10 water;
- 3/10 glycerin.
Coloring order
It is recommended to paint engine parts only when disassembled. Before painting, the surface must be carefully prepared. The final result depends on preparation.
Removing and cleaning the engine
First of all, you need to remove the engine from under the hood. It is recommended to disassemble the engine into its component parts before painting. For spare parts that will be painted, you need to unscrew all small elements and fasteners.
First, the surface to be painted should be washed with ordinary dishwashing detergent and a sponge or brush. You can use a sandblasting sprayer to clean the engine. After washing, metal parts must be thoroughly dried and treated with a rust converter. Then clean it again. Oil stains can be removed with acetone or solvent. After cleaning, it is recommended to dry all parts thoroughly before painting.
Putty and primer
The next stage of preparatory work is putty and primer. These activities are carried out to paint parts that do not heat up very much during operation. To correct defects on the surface, automotive putty and special primer (epoxy, alkyd) are used. The type of primer must match the paintwork. Before using heat-resistant powder paints, the surface is not puttied or primed, but only degreased, that is, wiped with acetone or solvent.
How to paint a plastic engine casing?
The plastic casing is painted in the same way as all other engine parts. The difference lies in the use of a special primer for plastic (adhesion enhancer).
It is better to remove the casing from the engine. This will make it easier to prepare and paint. The plastic must be thoroughly washed and treated with gray Scotch-Brite and dried. If there are elements that cannot be painted, they need to be covered with masking tape. Before painting, you need to degrease the surface.
The first layer you need to spray is primer for plastic (one thin layer is enough), wait 10-15 minutes, then spray regular primer, then paint, then varnish (if the paint requires varnish).
Source
Purposes and features of painting
Often those who want to achieve an external transformation of this part of the car resort to painting the engine. After applying the paint, the entire space under the hood will look stylish, will attract attention and look more well-groomed. A big advantage of painting is when selling a car - after it you can even slightly increase the price of the car or sell it faster.
A painted engine is a very popular “highlight” among cars that participate in various shows. In addition, the color of the engine also has a practical function. It eliminates incipient corrosion and prevents metal rusting in the future, increasing the service life of the unit.
Engine painting has a number of features. This is done only after removing the element, because otherwise high-quality paint application will be impossible. Before painting, it is advisable to overhaul the engine in order to immediately get rid of existing technical problems. To work, you will have to buy special types of paintwork materials, a spray gun or a roller, and also thoroughly prepare the surface first.
Painting an engine in the garage
Old Soviet power units were covered with a silver primer of a greenish or brown tint, and some were not covered with anything, but after a few years all the engines acquired the same dark brown color. The modern driver also has to deal with painting a car engine, because today, although engines emit less soot, trying to fit the products into Euro standard standards, a film of dust, oil and soot still forms on them. Such a build-up has a high density and low thermal conductivity, which leads to overheating of the motor and its rapid wear, especially in the summer.
The film of dirt gradually destroys the engine paintwork and causes corrosion. Ordinary moisture, chlorine and sulfur compounds slowly, but with enviable persistence, corrode the metal. At first glance, the engine is not such a noticeable part, but it is worth recalling that this is the most expensive element of the car, and improper and untimely care for it can hit the owner’s wallet hard.
Preparing the engine for painting
Before painting, you will have to disassemble the engine and remove it from the engine compartment. Beginners are advised to take photographs of all stages of work and number the cables from the spark plugs so that the assembly goes without any problems. Each part that will be painted is cleaned of dirt and degreased with a solvent, otherwise the paintwork will not adhere to the surface.
To be sure to get rid of grease, oil, and dirt, you can use sandblasting. With it, all manipulations will go faster, and the quality of base preparation will increase. If this is not possible, sand the areas where there is corrosion with fine sandpaper or a grinding wheel. Areas of bends and recesses are treated especially carefully.
Folk “craftsmen” use an original method of cleaning the engine:
- boil water;
- pour washing powder into the water;
- lower the motor into the soapy solution;
- allow the liquid to boil again;
- remove the clean part.
After drying the unit, an epoxy or other heat-resistant primer is applied, although some craftsmen skip this step due to the risk of overheating the motor in the future. In any case, you should not apply more than 1 coat of primer on the main engine components.
Engine painting
The unit is painted according to the following plan:
Work on the engine is carried out at a temperature of +20…+25 degrees, ensuring good ventilation in the garage. The engine itself must be cool. Each layer of paint is made thin so that the overall paint layer does not prevent the heat from the engine from dissipating. The first layer is the lightest because its purpose is to create a base for the remaining layers. Intermediate interlayer drying lasts up to 20-30 minutes.
If the paint is applied from a spray can, the latter is kept at a distance of 25-30 cm from the surface. If spraying is carried out at close range, drips may remain on the base. After completing the painting work, allow the engine to dry for 24 hours, then install it in its proper place, having first removed all plugs and tape.
Valve cover painting
Before painting, it is advisable to remove the lid - this will make working much more convenient. Remove the spark plug wires, unscrew the fasteners, then hook the valve cover from one and the other edge and remove it. If the sealant layer is still strong, apply force to remove it. The rubber caps, which act as gaskets, can be removed without any problems.
After removing the cover, cover the top of the motor with plastic wrap to prevent paint from getting inside. Place the part on a clean surface and inspect it carefully. If the protective coating on the base material is partially worn off, it can be rubbed off with paint remover. Leave the rinsing composition for 10 minutes, let it work, then clean the coating particles with a wire brush. Rinse the lid with clean water and allow to dry. All manipulations are carried out in the shade to avoid contact with direct rays of the sun.
Valve cover priming
The following actions are taken as preparatory measures:
After the valve cover has dried, the sealant layer is restored, the part itself is put in place and screwed. Before returning the old rubber gasket to its place, it is cleaned, coated with a thin layer of oil and only then installed. Make sure that the bolts are not over-tightened or under-tightened, which could interfere with the operation of the part.
Car engine paint
The ideal option for painting the main elements of a car engine is powder paint. The difficulty of its use is that it requires baking the part in a hot oven after application for maximum fixation on the surface. Not all drivers turn to specialized service centers when painting their engines, and they may simply not have a heat-heating oven and other necessary equipment.
In such cases, you can use regular heat-resistant paint, which can be easily purchased at automotive or hardware stores.
Please note: Heat resistant or powder paint is not necessary for all parts. It is advisable to paint only those engine elements that become very hot during operation. For example, these could be parts of the cylinder head (heating up to +400 degrees Celsius), exhaust manifold (heating more than +900 degrees Celsius). At the same time, various tanks with liquids or the intake manifold do not heat up very much when the engine is running, and they can be painted with conventional paints.
To paint engine elements, you should purchase paints from trusted manufacturers. In this case, it is optimal if all types of paints that will be used to paint engine elements are from the same manufacturer - this will reduce the likelihood of differences in the “shine” of the paint and the thickness of the applied layer. Among the well-known manufacturers of automotive paints are the companies Body and Abro, which are widely represented in stores.
Car engine parts are painted using a spray gun. It should be kept at a distance of about 15-20 cm from the surface to be painted. To make the paint stick better, it is usually applied in 2-3 layers. Depending on the type of paint, parts may require different drying times. Most often, drying after painting takes at least 24 hours.
How and why you need to paint your engine
What are the goals of a car owner who decides to paint the engine of his car? There may be several of them:
- External transformation of the unit is the first, most significant and common goal that is pursued in the process of work. The painted part transforms the entire engine compartment, attracts attention and indicates proper care of the car. This is especially appreciated during the pre-sale inspection.
- Elimination of corrosion and prevention of its further development. In this case, the durability of the power unit will be significantly increased.
- Preparing the car for car shows and various types of displays. In this case, the car must be perfect in everything, the same applies to the engine compartment.
- Pre-sale preparation may include painting the engine. This will indicate proper care of the car and the seriousness of its current owner. As a rule, such cars are sold without haggling and unnecessary red tape.
The painting process is carried out only on a dismantled unit. Otherwise, it will simply not be possible to do this work efficiently. If you have to remove the power unit, which is not at all easy, then it is usually overhauled. This solves two problems at once. A spray gun is used to apply the composition. During operation, it should be kept at a distance of up to 20 cm (at least 15 cm) from the surface being treated. The coloring composition must be applied in several layers, which will allow for good adhesion.
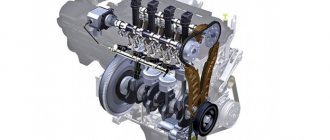
VAZ 2106 16 valve engine
Each part is painted separately, assembly is carried out after drying. Often, a separate color of the paint composition is selected for each part. This way you can get a unique and unusual motor.
Selection of coloring composition
This process needs to be given enough attention, because it largely determines the quality of the expected result. We have already mentioned above the choice of paint by color, but this is far from the only parameter that influences a motorist’s choice.
The ideal option would be to use powder paint followed by baking in a special oven. This method should not even be considered, since it is expensive and requires the use of specialized large equipment. Therefore, paint with heat-resistant characteristics is selected; it is presented in automotive and construction stores in a large assortment.
This composition should not be applied to all engine parts; it would be more advisable to select only those elements that are exposed to high temperatures during operation. These parts include the exhaust manifold and cylinder heads. All containers with liquids do not heat up to critical temperatures, therefore it is permissible to use a regular coloring mixture to paint them.
As for choosing a brand, preference should be given to proven mixtures. It would be a good idea to study reviews of specific manufacturers. This information will allow you to make the right choice and achieve high-quality and long-lasting results. It is advisable to choose different types of compounds from the same manufacturer. In this case, there will be no differences in the thickness and texture of the finished coating.
Powder coating of engine
Before painting the engine valve cover, pan or block, you need to study in detail the instructions for working with the selected composition. Preliminary dilution of the paint may be required, and different types of compositions may differ in drying time.
Preparing for painting
Don't expect to get the job done quickly when painting the engine. This process will be long and multi-stage. The engine needs to be prepared for further operation. The essence of this process is to perform the following actions:
- Removing the engine from the engine compartment. The engine must be disassembled in such a way that there are no difficulties during assembly. Be sure to number the spark plug cables as they can easily be mixed up.
- Cleaning and degreasing every part that will be painted. Care and scrupulousness are important here, otherwise the paint will not adhere well to the coating. You can use sandblasting, which will make the work much faster and easier.
- Cleaning the surface of old paint using a solvent.
- Grinding of areas heavily affected by corrosion. Sandpaper or a grinding wheel can be used for this.
- Applying a primer is not a necessary step; moreover, due to the presence of primer, overheating of the motor may occur. That’s why many experts recommend skipping this stage.
- Check the sealing of holes and repair if required. Spot paint can be applied, bolts are screwed into the holes, studs or other plugs of suitable size are installed.
Multi-colored car hood
How to prepare an engine for painting yourself
Preparing the surfaces of parts for painting is a task that requires a lot of time. If we talk about garage conditions, the elements need to be thoroughly cleaned and well degreased.
Moreover, the complex shape of many parts often complicates the process. However, cleaning is still extremely necessary, since only in this case can quality be achieved after painting.
Taking into account the above, it becomes clear that you need to be patient, and you will also need compositions and substances for cleaning and degreasing the engine, that is, the surfaces to be painted. Also, in the case of internal combustion engines, it is recommended to abandon the usual household products, since it is optimal to use special solvents. As a last resort, you can use external engine cleaners.
If you want to reduce work time, you can use the sandblasting service. This method allows you to remove remnants of old paint, as well as clean parts from rust and dirt. If you don’t want to pay for sandblasting, you can make the device yourself. The main thing is that there is a compressor in the garage.
As a rule, high-quality sandblasting cleans parts very well. The only thing you need to remember is that during such work it is necessary to seal the engine holes so that the abrasive does not get inside. To do this, you can use masking tape to seal all the holes.
More serious defects in the form of corrosion areas must be sanded separately. This work can be done either manually (with medium-grit sandpaper) or using a grinding wheel. As for applying putty and further sanding the putty surfaces, as well as using a primer before painting, this approach is not often used when painting an engine.
However, if such actions have been performed, then the parts and all holes must be blown out with air from the compressor. This will remove all particles from hard-to-reach cavities, channels, etc.
Also, before painting, repeated and more thorough sealing of the holes is necessary, since paint should not get there. If the holes have threads, then you need to screw the corresponding bolts or studs into these places. In those holes where there are no threads, wooden “chops” are carefully inserted or similar plugs are made.
As a last resort, you can use tape again. If this is not done, then after painting the cylinder block, head and other parts, the paint will get into the holes, and after it dries, there is a high probability of clogging various channels.
How to paint a valve cover?
It is better to remove the valve cover and then paint it, but you can do without removing it.
To remove the cover, you need to remove the spark plug wires and unscrew the cover fastenings. You will need to pry up the valve cover with a flat-head screwdriver, first from one edge, then from the other. It may be necessary to apply force to break the gasket seal. If the gasket is rubber, the cover will come off easily. The sealant will then need to be restored. After removing the valve cover, it is better to cover the top of the engine with polyethylene or a clean rag so that nothing gets in there. Once removed, place the valve cover on a clean surface.
The valve cover is made of aluminum and covered with a protective coating that may be partially destroyed.
It is better to remove it with paint remover (see the article on paint removal, which describes in detail the use of remover). Spray or spread the remover until the old coating is saturated. Give the remover at least 10 minutes to work. Next, use a wire brush to remove any remaining coating. After removing the paint, rinse the surface of the valve cover generously with water and wipe dry with a towel. Preparation for painting is very important. Any missed, poorly prepared area will cause the paint to peel off. In addition to cleaning, you need to treat the surface with red Scotch-Brite. Paint removal helps to easily remove the old coating.
To ensure that all oil contaminants are removed, saturate the surface of the valve cover with solvent. Spray the solvent and let it sit for 10 minutes. Then you need to wipe off the solvent and thoroughly wipe the surface with a degreaser. It is necessary to close all holes where paint and primer should not get in. Use masking tape for this.
Now you can move on to priming and painting. It is better not to paint under the scorching rays of the sun, but to do it in the shade or indoors. To paint, the valve cover must be placed on a hard, clean place; it is better that it rises slightly. You want all sides of the lid to be easy to paint.
It is better to apply a special high-temperature epoxy primer (Engine Enamel Gray Primer) to the aluminum valve cover. This will greatly increase the adhesion of the subsequent coat of paint by spraying 2 thin coats 10-15 minutes apart.
After the primer has dried for 30 minutes, begin painting.
Apply the paint in thin layers, with intermediate drying between layers for 5–10 minutes. It may be necessary to apply up to 4-5 coats, depending on the hiding power of the paint. For better shine, the paint can be varnished. The first layer is a special primer, then layers of paint.
After painting and drying, the valve cover must be replaced and screwed. If sealant was installed, new sealant must be used to ensure a tight and airtight connection. If you install an old rubber gasket, you need to clean it and coat it with a thin layer of oil.
You need to be careful not to overtighten the bolts and tighten the valve cover so that the gasket fits snugly. If the valve cover bolts are loose or too tight, oil may leak through the gasket.
Car engine paint and features of the material application process
It is quite obvious that the best way to paint parts is with paints that involve subsequent “baking” of the freshly painted part in a special thermal oven. For example, painting the engine with powder paint and similar solutions.
The specified type of paint can easily withstand high temperatures, which is especially important for the engine. However, not every owner is willing to pay for such an expensive procedure, preferring to do everything in his garage.
So, to paint the engine yourself, and without special equipment, you need special heat-resistant paint for engines. At the same time, it is not necessary to purchase such paint with the expectation that all parts will be painted with it. The fact is that different elements under the hood do not heat up equally. For example, the intake manifold is not subject to significant heating, while the exhaust manifold is very hot.
It turns out that you need to use more expensive heat-resistant or powder paints only on parts that are subject to maximum heating, while for “colder” areas and elements the use of such paints is not necessary. This information allows you to save significantly within the total cost of paintwork.
As for various paints, today it is better to use a ready-made product. Special automotive paints and enamels (for example, Body, Abro, etc.) do the job well.
When choosing such materials, it should be remembered that painting the cylinder head and the cylinder block itself, as well as the engine oil pan, requires the use of paint that can withstand temperatures up to + 400 degrees Celsius. At the same time, the paint requirements for valve covers, as well as intake elements, are not so strict.
You also need to take into account that the exhaust manifold requires painting only with a special material. We are talking about heat-resistant paint that can withstand heat of more than 1 thousand degrees.
If you don’t want to purchase ready-made engine paint, you can make the material yourself. To do this, you need to have the necessary components that are mixed in the required ratio. For example, a well-known paint called “silver” can be made in a garage.
At the hardware store you need to purchase drying oil, varnish, some aluminum powder, epoxy glue, and solvent. You can also partially include zinc or other metal powder to replace aluminum. Having made the paint, you can use it to paint the intake elements and other areas that are not subject to significant heating.
For painting, it is best to use a spray gun. During the process of applying paint, the tool must be held level, without tilting at an angle up or down, at a distance of about 20 cm from the surface to be painted. The paint must be applied in several layers (usually up to 3 layers). Parts after painting should be dried at an average temperature of + 25 degrees Celsius for 24 hours. If the temperature is noticeably lower, then the drying time also needs to be increased.
Painting a plastic engine casing
The engine casing is painted in a similar way, although there are some peculiarities in the work performed. Before painting, the part is removed from the engine to make handling it more convenient. They act this way:
- wash the plastic;
- treat the surface with gray Scotch-Brite;
- allow to dry;
- unpainted areas are covered with masking tape;
- wipe the base with a degreaser;
- apply a special primer for plastic in 1 thin layer;
- after 15 minutes, apply a layer of regular automotive primer;
- paint the plastic, let the paint dry;
- varnish the product.
Airbrushing on the engine cover
With some skill and a careful approach, you can paint the engine yourself. It is only important to choose high-quality paint so that the applied layer lasts a long time and gives the unit real protection from damage.
How and with what to paint a car engine yourself
Not all car owners think about painting the engine, and many are not even aware of the possibility of such manipulation. In fact, engine painting is a type of tuning and carries a number of advantages.
You can do the coloring yourself, however, the process will not be easy and will require some effort.
Do-it-yourself car engine painting
How to paint the engine block?
Painting the engine is not a necessary process, as this coating does not technically affect its performance. Often drivers paint this part for decoration purposes.
Selecting paint
Engine painting is done using various compounds. This allows you to obtain different strength and durability of the coating.
The best option would be to paint the body with powder paints. They are applied to the surface using special devices and then heated. In this case, the powder melts and evenly adheres to the engine. This procedure can only be performed with expensive equipment.
An alternative would be to use heat-resistant paints. It is important to give preference only to these types, since the engine gets very hot during operation.
There are paints that can withstand temperatures of about 1 thousand degrees. But at the same time, not all parts heat up so much, so you can use several types of mixtures for certain areas of the system.
Popular products include thermal paints and enamels from Body and Abro. Many car enthusiasts prepare mixtures themselves from several components:
- aluminum powder;
- drying oil;
- varnish;
- epoxy adhesive;
- solvent.
About painting engines and valve covers
The minimum cost of painting a valve cover is 1,500 rubles, a cylinder head is 2,500 rubles, an engine block is 5,000 rubles, brackets and attachment parts are 500 rubles. The final cost depends on the specific engine and is determined by the technician during acceptance. You can also find out the price of painting from the photo.
Airbrushing and water print on engines and valve covers
If you want to radically transform the engine compartment, we offer you aquaprint or airbrushing. Waterprinting is the transfer of a pre-printed texture using chemicals and water from a special gelatin film to the part to be painted. This way you can paint the engine like wood, carbon, or even Khokhloma.
Airbrushing is, first of all, the work of an artist who will turn the engine into a work of art. After listening to the wishes, the artist draws several sketches, but only the best of them will decorate the engine. The design is applied manually using an airbrush and then covered with clear varnish.
Both of these methods require additional surface preparation.
Valve cover polishing
With few exceptions, each valve cover has pictograms, logos or lettering identifying the manufacturer and engine characteristics. All convex parts can be polished to a mirror finish and coated with a protective clear varnish.
How to paint the engine?
Heat-resistant paints can be based on silicone or epoxy resin, or can be multi-polymer and include both components. Some paints contain ceramic particles, which give the paint heat resistance and wear resistance (withstands 1000 degrees). This paint can be used to paint the exhaust manifold or manifold guard, or even the exhaust pipe. Powder paints can be considered the most heat-resistant, but their application requires a special spray gun and subsequent high-temperature drying.
Many high temperature paints require heat activation (“baking”). It is necessary to clarify the need for this process in the instructions for the specific paint. This improves the appearance and activates all the unique protective properties of the paint. The curing (activation/baking) process must occur slowly.
This can be done by infrared drying, in the oven (if the size of the part allows), a hair dryer, a propane torch, or by natural heating of the engine.
Heating should be done after the paint has dried (usually within a day, it is better to check the instructions). If you heat it with the flame of a propane torch, then you do not need to heat the paint very much, you just need to quickly, superficially apply the flame. Same thing with a hairdryer. There is no need to heat the paint in one place for a long time; you need to evenly move it with an industrial hair dryer, having previously adjusted it to the desired temperature. You need to heat and cool the painted surface several times.
The manufacturer recommends the following process for heating high-temperature paint for its complete polymerization:
Is it possible to paint the engine with plain car paint?
Oddly enough, a simple two-component automotive paint (with a hardener) sprayed with a spray gun gives good results when painting an engine. Two-part paint cures through a chemical process rather than simply drying like canned spray paint. Thus, the paint coating is stable. Cured paint shows good resistance to fuels and lubricants.
As was written above in this article, most of the engine surfaces heat up to a temperature of about 100 degrees. In the area close to the exhaust manifold it heats up more, but not above 200 degrees. For comparison, the body temperature of a black car in hot weather can reach 70–80 degrees. And if you add heating of the hood from the engine, the temperature may be higher. At the same time, the car paint on the body is not destroyed. While car paint is not specifically designed for the engine, quality two-part paint can withstand temperatures in excess of 100 degrees. The main advantage is the curing properties of two-component paint. Moreover, we already had practical experience in painting engines with two-component automotive paint with positive results. It is best to paint the exhaust manifold or exhaust manifold guard with a special high-temperature paint designed for the temperature range to which these surfaces reach.
Preparing the paint
During operation, some engine components can heat up to 500°C, but the main planes, such as the cylinder block, are cooled by standard antifreeze rated at 80-90°C. Such elements can be painted with regular silver, but heat-resistant paint will still be required. Factory painting is done with a primer containing zinc, silicon or graphite. These elements provide the paint with heat resistance, but the main element is aluminum, which has high thermal conductivity and the ability to create anti-corrosion alloys with other metals.
As you can see, there are no special features in factory paint - you can make it at home. The first step is to make the silver itself, although the usual instructions for PAP-1 and PAP-2 indicate that you need to mix aluminum powder with varnish or drying oil, but these methods are not always suitable for the power unit. The optimal solution seems to be universal epoxy glue. Both aluminum powder and glue can be found on the shelves of your nearest hardware store.
The proportions directly depend on the degree of heating. Unfortunately, accurate data is available only for special heat-resistant varnishes, but the average indicators of materials are almost the same, and you can follow the following figures: a ratio of 2 to 5 (2 - aluminum, 5 - glue or special varnish) can withstand approximately 350-400°C . Solvent needs approximately 100 g per 1 m2 of area, paint - 1 kg (± 100 g) per 1 m2. It is assumed that in terms of paint consumption, the engine is no different from a regular surface.
You can dilute too thick paint with a solvent from any neutral nitro paint. Aluminum powder is thoroughly mixed with thermovarnish or glue, and the powder is added in small portions. Engine painting is no different from usual: a thickness of 15-20 microns is achieved by applying 2-3 layers of coating. The paint dries after a few hours, but baking occurs when the car is first started and the engine warms up.
– a very labor-intensive job that requires a responsible approach to all stages of the process.
What paint to choose for painting an engine
While painting car arches or any other parts can be done using regular car paint, not just any mixture is suitable for the engine. Since it gets very hot, it follows that the paint must be heat-resistant. Pay attention to the special paints and enamels on the market that can withstand temperatures up to +1100 degrees. For example, Certa enamel, BODY paint, Tikkurila. They also differ in the method of application. Currently, paints in the form of aerosols and suspensions are presented on the market for automobile products, which greatly simplifies the painting process.
As for color, of course, everyone has their own preferences, but more and more car enthusiasts recommend painting the engine of their vehicle black. This is due to the fact that black has better heat transfer and will cool faster.
It is worth noting that the cost of heat-resistant factory paints is quite high, so some car enthusiasts independently prepare a mixture for painting the engine. By the way, the recipe for such a mixture is quite simple and does not require searching for any special ingredients - you only need a small amount of aluminum powder and universal epoxy glue. Both can be found in a regular hardware store or at the car market.
Depending on the engine size, the mixture is prepared at the rate of 0.9-0.11 kg of epoxy glue per square meter. The required amount of glue must be mixed with aluminum powder and, if necessary, a solvent for nitro paint must be added. The last ingredient is added only if the consistency of the mixture is too thick.
You can also create thermal paint yourself using regular thermal varnish. To do this, just mix the finished paint of the required color with thermovarnish.
DIY engine painting
After the engine is dry, it is advisable to further degrease it using acetone or any other solvent. Mix the paint thoroughly until smooth and apply it to the engine parts. It is not advisable to prime as this may cause the engine to overheat. It is recommended to paint metal surfaces in three layers. At a temperature of 20-25 degrees Celsius, the painted parts will dry for at least a day.
How to prepare paint for painting the engine and valve cover with your own hands
To make your own paint, you need to mix several components, maintaining the proportions. For example, the composition of silver paint includes solvent, epoxy paint and varnish (drying oil), and aluminum powder.
Pay attention to: Restoring and painting a car dashboard: step-by-step instructions for do-it-yourself work
For proper preparation, the ratio of the latter to drying oil is 2 to 5. The solvent is added to the desired consistency. The finished composition can be used to treat areas on the engine where there is practically no heating.
On the remaining surface exposed to heat, it is better to apply heat-resistant compounds that can withstand up to 400°C. And to treat the exhaust manifold, you need a mixture that does not lose its properties even at 1100°C. For colder areas, you can choose a different composition, after consulting with a specialist.
Putty, sanding and primer
As a standard, such measures are not carried out for the engine.
But if necessary, the process after cleaning the surface is as follows:
As preparation, the outer surface of the engine is cleaned, sanded and primed.
- Wipe the problem area with solvent.
- Sand with coarse sandpaper and degrease again.
- Thoroughly mix the putty with the hardener and, using a spatula, apply to the desired location. It is not necessary to immediately fill the problem area with the solution. You can do this in several approaches, waiting until the putty hardens.
- Sand with sandpaper or an abrasive wheel.
- Apply finishing putty, then sand with fine-grained sandpaper until the surface is smooth.
- Degrease again and treat with a primer.
Please note: Basic principles of painting a car fender
How to paint an engine?
It is convenient to paint the engine when it is removed from the car, and possibly disassembled. For example, the engine was removed for repairs. However, this is not always possible, so you need to look locally to see what access is available, what can be removed to improve access, or whether it will be possible to paint only individual engine elements.
Preparing the engine for painting
The key to any quality paint job is thorough surface preparation. In order for paint to adhere well to a cast iron engine block, the metal must be clean and dry. The cast iron surface has many small irregularities and pores that need to be thoroughly washed.
Car engine painting features and nuances
Painting a car engine is not a difficult process if the preparation has been carried out carefully and the paint has been chosen correctly. Here you need to adhere to the following work plan:
- diluting and stirring the coloring composition until smooth;
- applying the prepared composition to the engine elements using a spray gun or roller (the first option is more preferable);
- We give time for the first and each of the subsequent layers to dry, the number of which should be close to three; complete drying may take 24 hours.
At this point, painting the engine with your own hands can be considered complete. All that remains is to wait for the applied coating to dry completely, assemble the motor and install it in its original place.
Even such a difficult job can be handled without the involvement of specialists, whose services cost a decent amount. If you adhere to the work plan outlined above and clearly move towards your goal, then the undertaking is doomed to success.
Sources
- https://hozzi.ru/kraski/dlya-dvigatelya
- https://kraska.guru/kraski/avtomobilnaya/dvigatel-avtomobilya.html
- https://okeydrive.ru/kak-i-chem-pokrasit-avtomobilnyj-dvigatel/
- https://KrutiMotor.ru/kak-pokrasit-dvigatel-avtomobilya-samomu/
- https://auto-dig.ru/kakoy-kraskoy-pokrasit-blok-dvigatelya/
- https://orthograf.ru/chem-krasyat-blok-cilindrov-na-zavode-kakoi-kraskoi-pokrasit/
- https://MyKrasim.ru/kraska/pokraska-auto/pokraska-dvigatelya-avto
- https://DriverTip.ru/repair/kak-samomu-pokrasit-dvigatel-avtomobilja.html
How to paint a car engine with your own hands
Few car owners think about the need to paint the engine. To some, this may seem like a ridiculous idea that is not worth wasting time on. Believe me, this is not true. During our conversation, you will change your mind and seriously think about transforming the engine.
Engine painting
Various circumstances may force a car owner to think about painting the engine of his car. This process is by no means easy.
It requires compliance with a number of mandatory requirements, fulfillment of conditions, careful selection of paint (different for each engine compartment) and strict adherence to the work schedule. We have to study all this.