How to remove the Priora caliper
You will need : remove the front wheels and prepare a 17mm spanner.
Procedure :
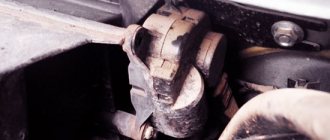
- Unscrew the two bolts securing the shoe guide to the steering knuckle using a 17mm wrench.
- Remove the pad guide from the disc along with the bracket and pads.
- Make sure that the brake hose is not stretched; to do this, tie the caliper to the suspension spring.
If you have to unscrew the working cylinder from the tip of the brake hose, then you should close the hole in the hose in any way so that the brake fluid does not leak out.
Installing the Priora caliper is done in the reverse order. Check that the brake hose is not kinked. After installation, do not forget to check the brake fluid level in the reservoir and remove air from the brake system.
Snapshot2
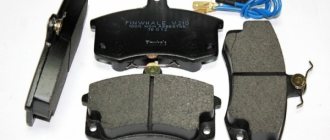
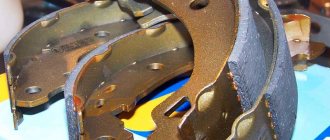
Attention! The brake pads of the front wheels must be replaced as a set - all four pads. Replacing the pads of only one brake mechanism can lead to the car pulling to the side when braking.
If the fluid level in the brake hydraulic reservoir is at the MAX mark, then before installing new pads, use a syringe or a rubber bulb to pump out some of the liquid from the reservoir so that when the piston is recessed into the wheel cylinder of the brake mechanism, liquid does not flow out from under the reservoir cap.
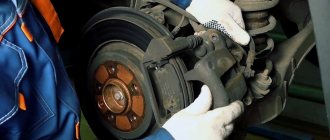
After removing the front wheel, we securely fix the car on a factory-made support stand.
Replacing the front brake discs of Priora
You will need : remove the caliper and prepare a ring wrench “7”.
Procedure:
- Unscrew the two guide pins using a 7mm wrench.
- Remove the Priora brake disc with your own hands. If this cannot be done, then you should knock it down with a hammer.
Installation of brake discs is carried out in the reverse order.
The mating surfaces of the hub and disk should be cleaned of rust and scale. If a small particle of dirt gets between them, then it will cause the disc to run out and vibrate when braking. In order for the Priora brakes to work properly, when replacing brake discs, be sure to replace the brake pads with a new set.
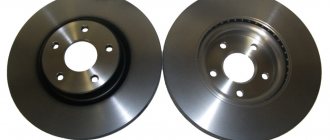
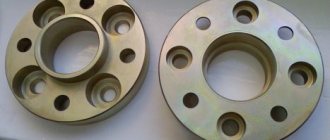
Perforated
These elements have a more complex structure. The design combines two thin metal disks 5 millimeters thick. Between them there are so-called channels through which air flows. Thanks to such ventilation, the operating temperature of the disk is reduced by one and a half to two times. And as we know, when braking, a friction force arises, which is converted into thermal energy. Disks require high-quality heat dissipation.
Which brake discs are best for Priora?
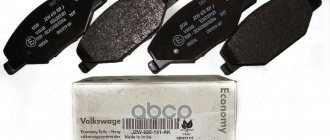
The front brake discs on Priora have catalog number 21120-3501070. They are also used on VAZ cars of the tenth family (see the best brake discs).
According to reviews, good brake discs are standard ones. If you want to buy alternative brake discs, then pay attention to Brembo discs.
Source xn—-8sbabr6ahc3e.xn--p1ai
Sooner or later, any part of the car wears out during its operation, first ceasing to efficiently perform its basic technical functions, and then completely requiring a complete replacement. In many cases, this process is also accelerated by our domestic roads, most of which, unfortunately, are in rather poor condition.
One of the most famous (in the negative sense of the word) parts of the Priora car in our country, which require frequent replacement, are its brake discs. Many auto mechanics cite dirt and dust on the roads as the main factor contributing to the frequent occurrence of this type of breakdown.
The fact is that dust, getting into the space around the parts and accumulating between the pads and the disc, interferes with the normal operation of the entire braking system of the car, which significantly accelerates the wear of its components. Therefore, replacing Priora brake discs is a fairly popular service in all car service centers in the country.
Do you know how to change the brake discs of your “iron horse” yourself, without using the services of auto mechanics and thus saving money? This is done according to fairly simple instructions, which you can read right now below.
Non-ventilated
These are the simplest brake discs that are installed on the basic configurations of Lada Priora cars. It is believed that this type has an outdated design and is practically not used on modern machines. Foreign manufacturers installed non-ventilated discs back in the 90s of the last century. Starting from the “zeros”, even the budget class was equipped with ventilated elements.
Instructions for quickly and easily replacing Priora brake discs:
- We get rid of the support. Immediately before replacing the main elements of the car’s brake system, it is necessary to remove the caliper. The tools required for this action are a 17-size wrench.
Remove the two front wheels of the car and unscrew the shoe guide bolts that secure them using the above tool. Carefully remove the pads and their guide along with the bracket from the discs. Carry out the process so that the brake hose is not stretched or twisted, otherwise it may be damaged, and you risk losing brake fluid in this situation.
Tie the caliper securely to the suspension spring. You need to put it back in place at the end of the job exactly the opposite.
We replace disks. To complete our main task, we need the “7” key. Using this tool, unscrew the two guide pins, allowing you to easily remove both brake rotors from your car. Installing new disks in place follows the same procedure, only in reverse order.
An important point: if you want to install old drives for further use, then you should definitely make sure that they are suitable for this. In addition, you will have to try hard to clean them of scale, dirt and rust. Therefore, it is best, for your own safety, to purchase new car parts and install them.
Source avtodoc24.ru
Brake discs on the Lada Priora were installed only in size R14 and ventilated. For them, the minimum thickness is 17.8 mm. If, when measuring with a caliper or other device, it turns out that the thickness is less than acceptable, the disks must be replaced, on both sides.
To perform this repair you will need the following tools:
- head for 17 mm and 7 mm
- ratchet and crank
- hammer
- copper grease
- calipers
Original articles
Front brake discs (catalog numbers)
:
- 21100-3501070-01 (8450055308) — Front brake disc R13
- 21100-3501070-02 (8450055309) — Front brake disc R13 (“Auto-Real” LLC, Miass)
- 21120-3501070-00 (8450102989) — Front brake disc R14
- 21120-3501070-01 (8450056449) — Front brake disc R14
- 21120-3501070-02 (8450056450) — Front brake disc R14 (“Auto-Real” LLC, Miass)
- 11186-3501070-00 — Front brake disc R15 Kalina Sport, Granta Sport
- 21905350107077 — Front brake disc R15 painted “Lada-Sport” LLC, Togliatti
Rear brake discs
:
- 11196-3502070-00 — Rear brake disc R14 Kalina Sport, Granta Sport
Kits
:
- 21100350107088 — Set of brake discs R13 in LADA SPORT packaging (“Auto-Real” LLC, Miass)
- 21120350107088 — Set of brake discs R14 in LADA SPORT packaging (“Auto-Real” LLC, Miass)
This is interesting: Fuel filter for Ford Transit: where is it located, replacement
Instructions for replacing brake discs on a Priora
So, the first step is to jack up the front of the car, and then remove the front wheel brake caliper.
After that, using a 7 mm socket and a wrench, unscrew the guide pins of the brake disc, as is clearly shown in the photo below.
To minimize the risk of breaking the studs, tap them with a hammer first without using excessive force. And only then unscrew it. Then you can tap the area where it contacts the hub with a hammer.
Now you can try to remove it with your hands, or with the help of special devices. If you can’t remove it by hand, and you don’t have a puller at hand, you can carefully knock it off from the back with a hammer, of course, using a special wooden spacer.
We finally remove the Priora brake disc from the front wheel hub, which is clearly demonstrated in the photo below.
Before installing new discs on the Priora, it is necessary to clean the surface of the hub with a metal brush if there is rust or other formations on it. It is also worth applying copper grease to the contact area between the hub and the inside of the disk.
This procedure will reduce the occurrence of vibration and extraneous sound when braking, as well as reduce the temperature effects on the elements of the braking system. Replacement is carried out on both sides simultaneously. To ensure that the surface of the disc remains smooth and free of defects, it is necessary to use only high-quality pads, and it is advisable to replace them at the same time!
The price of a new brake disc on a Priora is from 900 rubles per piece. Of course, there are more expensive options, even up to 1500 per unit, but factory components for around 1000 rubles per unit are also quite good.
Source priora-remont.ru
Original and fake
Now there are a huge number of fakes on the market, which are sold under the famous brands Zimmerman, ATE, Bosch and Brembo. It is quite easy to distinguish an original from a copy. First of all, this is the thickness of the disk. If it is less than one centimeter, most likely you have a copy in your hands. Reviews from motorists recommend paying attention to the junction of the two parts of the disk. The internal grooves should connect smoothly to the work surface.
Captain-Smollett › Blog › VAZ front drive brakes
This article will help answer all the questions about switching from one brake to another.
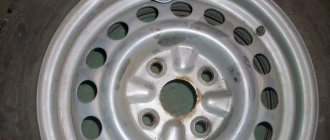
It will also help you figure out what kind of brakes you currently have. To do this, consider the stock front brakes for front-wheel drive VAZ: 2108-21099, 2110-2112, 2113-2115, Kalina, Priora, Granta R13 not ventilated. Installed on the SAMAR and SAMAR-2 family, as well as on the 10th family (only with 8kl . carburetor engine). Explosion diagram Caliper
Visually, they can be distinguished by the lack of ventilation on the brake discs, in addition to the characteristic 2108 boot.
Full size General view of the R13 non-ventilated brakes
Here you can see a brake disc without ventilation and a boot
R13 ventilated Installed on families 10, Kalin, Grant exclusively with 8kl. engine. Explosion diagram Caliper
Visually, it is easy to distinguish from 08 by its wider ventilated disk. Brakes from R14 can be visually distinguished by the brake disc boot ratio.
Full size As you can see in the photo, the boot has a larger radius (it is 14
Full sizeAnd here you can clearly see the ventilation on the brake disc
R14 ventilated Installed on families 10, Prior (even with 8kl. ICE), Kalin, Grant with 16kl. engine. Explosion diagram Caliper
Do-it-yourself replacement of rear brake pads on a VAZ 2109
Visually it is easily determined by the ratio of the brake disc boot. The disc will completely cover the boot. There is another option, remove the fixed bracket and 2112 should be stamped on it. In addition, it is simply impossible to install wheels of 13 radius.
Full size Disc completely covers the boot. movable and fixed brackets R14R14 close-up brackets with numbers
R15 ventilated Installed on the Kalin and Grant families with 16kl. engine in the sport version. Explosion diagram Standard R13″ ventilated calipers are used (movable caliper 2110, fixed caliper 2110 which is machined to fit a wider brake disc).
And to extend the guide to a larger radius, the plant uses “bone” adapters
When installing them, you need to file the ears on the fist
There is another option that is almost factory-made. Install the Volga calipers using a special spacer. They have their own brake pad, which, in addition to everything, has an even larger area compared to the VAZ one.
Spacers for Volga calipers
RESULT: 1) When moving from R13 non-ventilated to R13 ventilated, you will need: - Caliper bracket 2110 movable 2110-3501017 - Caliper bracket 2110 fixed 2110-3501155 - Brake disc housing right VAZ-2110 (14 inches) 2112-3501146 - Brake disc housing left VAZ-2110 (14 inches) 2112-3501147 — Brake disc VAZ 2110 (13 inches) 2110-3501070 As you can see, we will need brackets, boots and the brake discs themselves. You can leave the old calipers.
2) When moving from R13 non-ventilated to R14 ventilated, you will need: - Caliper bracket 2110 movable 2110-3501017 - Caliper bracket 2112 fixed 2112-3501155 - Brake disc housing right VAZ-2110 (14 inches) 2112-3501146 - Brake disc housing left VA Z -2110 (14 inches) 2112-3501147 — Brake disc VAZ 2112 (14 inches) 2112-3501070 As you can see, we will need brackets, boots and the brake discs themselves. You can leave the old calipers.
Brake pads whistle when braking
3) When switching from R13 ventilated to R14 ventilated, you will need: - Caliper bracket 2112 fixed 2112-3501155 - Brake disc VAZ 2112 (14 inches) 2112-3501070 As you can see, we only need a movable bracket and the brake discs themselves. The calipers can be left as old, the boots were originally designed for R14 brakes, the movable caliper remains the same.
Замена тормозных дисков
Тормозные РґРёСЃРєРё РЅР° автомобиле R›Р°РґР° RџСЂРёРѕСЂР° SѓСЃС‚анавливались S‚олько R14 размера Рё вентилируемые. RR»СЏ РЅРЅС… РјРенимальная толщРеРЅР° составляет 17.8 РјРј. Если РїСЂРё измерении S€S‚ангенциркулем RёР»Рё иным RїСЂРёСЃРїРѕСЃРѕ блением выяснилось, что толщина RјРµРЅСЊС€Рµ RґРѕРїСѓСЃС‚РеРјРѕР№, RґРёСЃРєРё RSRµРѕР±С…РѕРґРјРјРѕ R·Р°РјРµРЅРёС‚СЊ, RїСЂРёС‡Р µРј СЃ обеих сторон.
R”R”СЏ выполнения SЌS‚РѕРіРѕ SЂРµРјРѕРЅС‚Р° RїРѕРЅР°РґРѕР±РёС‚СЃСЏ следуюS ‰РёР№ инструмент:
- головка на 17 мм м 7 мм
- S‚рещотка Рё вороток
- молоток
- смазка медная
- штангенциркуль