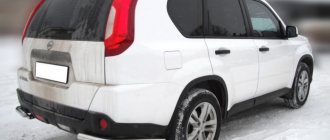
In winter, heated steering wheel plays a very important role, as it allows the driver to feel comfortable at any temperature. Fortunately, making a warm steering wheel with your own hands is not that difficult and not at all expensive. Below we will introduce you to instructions for performing this task, and will also try to resolve the question of whether it is worth installing a heated steering wheel yourself.
What tools and spare parts are needed to install a steering wheel heater?
In severe frosts, while the stove warms up the interior, the driver can literally freeze his hands while holding them on the steering wheel. It is known that steering the steering wheel while wearing gloves is not very convenient, and if the gloves are leather, this also aggravates the situation. Therefore, drivers who have found themselves in this situation more than once simply dream of a heated steering wheel that they can make with their own hands.
The steering wheel heater is essentially a heat-conducting wire that is attached to the steering wheel.
Both of its ends are terminated with terminals connected directly to the vehicle’s on-board electrical network, thanks to which the heating is switched on. If we talk about a more advanced and complex design, then its circuit also includes a regulator, with which you can not only turn on/off the heated steering wheel, but also regulate the heat emitted by it.
This is interesting! The first patent for creating a heated steering wheel appeared about 100 years ago, although such an idea received its first embodiment only in the 80s of the last century. The reason why car designers refused to install a steering wheel heater was the complexity of the design of such a device.
You can’t find such a function on every car, even the most expensive one, although on many Japanese budget foreign cars, manufacturers managed to install heated steering wheels at the factory. But to make a heated steering wheel with your own hands, you will need to prepare the following materials and tools:
• Electric heating designed for car seats. From it, in turn, it will be necessary to “remove” the thermal heating wire and relay to deactivate the heating operation when a certain temperature value is reached. The cost of such a car seat heater can vary greatly, but you don’t have to buy the most expensive one. You can get by with an option that will look quite safe, but will not empty your wallet.
• Quick-drying adhesive for universal use.
• Sealant (necessarily transparent, so as not to spoil the appearance of the steering wheel).
• Sharp stationery knife.
• Durable electrical tape (it is recommended to buy fabric-based tape).
• Marker.
• Soldering iron.
Important! A piece of copper wire, which conducts current well, can also serve as a heater. However, if you cannot correctly calculate the amount of voltage it consumes, this threatens to damage the vehicle's on-board network.
You will learn the answer to the question of how to make a heated steering wheel yourself from the instructions below.
Do-it-yourself heated steering wheel: step-by-step instructions
To install a heated steering wheel, you need to have a fairly good understanding of automotive electrics. We hope that the instructions below will help even less experienced car owners cope with the task:
1. Let's look at the car seat heater, from which it is necessary to remove the heating element with special care.
During this work, it is very important not to damage it and remove it together with the relay.
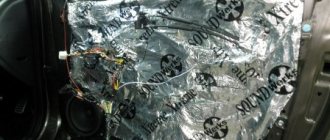
2. We remove the steering wheel itself from the car.
This process will differ significantly depending on what model of car we are talking about. But if you resort to the help of a manual for your car, everyone can cope with this task. The main thing during the dismantling process is not to forget to mark the position of the steering wheel relative to the shaft. Otherwise, you risk moving the steering wheel relative to its axis, which will make it impossible to control the car.
3. Apply markings to the steering wheel for laying the heating wire.
For this task, you first need to use a marker to mark the exact lines of the wire. It can be placed in any way you like - in a circle or in coils. Please note that the distance between the turns must be at least 2 cm, otherwise you simply will not have enough wire. After completing this task, cut the outer surface of the steering wheel so that the resulting groove can easily accommodate the heating element of the steering wheel heater.
Important! It is recommended to make the slots for the wires on the steering wheel at an angle. Firstly, this will make the task easier for yourself, and secondly, the heating element will be held more securely in the groove cut at an angle.
4. Lay the heating wire.
In order for it to hold securely in the steering wheel, it needs to be placed on quick-drying glue in several places. At the same time, try to lay the wire so that it fits as tightly as possible to the steering wheel, because only then will it be able to warm it up efficiently. If necessary, during installation, the steering wheel heater wire can be additionally fixed with electrical tape, which can be removed without a trace after the glue has dried.
5. All grooves and the heating element are covered with transparent sealant.
This task must be performed extremely carefully, since as a result, the sealant layer should not protrude from the edges of the groove and be felt on the steering wheel. Therefore, as soon as the sealant has dried, it is important to cut off its excess using a sharp stationery knife.
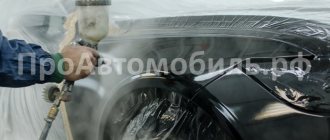
6. We cover the steering wheel with a cover or a layer of leather, which depends solely on the choice of the car owner.
In any case, you should not do without an additional cover on the steering wheel, as this will lead to wear of the sealant layer, as a result of which you can touch the heating element with your bare fingers, which can even be deadly. And thanks to the presence of the cover, the heat from the heating wire will be distributed more evenly throughout the steering wheel.
We recommend: Instructions for replacing the heater tap on a VAZ 2114
7. Reinstall the steering wheel and connect the heating to the on-board network.
This task is the most difficult in the entire process of installing a heated steering wheel with your own hands. To do this, you need to find 3 free contacts on your car, which must be provided for by its design. We connect the wires from the heating element to them.
To make using the heated steering wheel easier, you can connect it to the button for heated rear windows of the car. To do this, you just need to find the necessary electrical circuit and connect the contacts from the heated steering wheel to it. To do this, you should use copper plates, which must be connected to wires using a soldering iron. Don't forget to connect the relay as well.
Important! There is also a fourth contact on the steering wheel, which must be connected to the horn sound signal. Please also note that when working with the car’s on-board electrical network, it is imperative to disconnect the battery so as not to harm yourself or electrical appliances. After fully connecting the heated steering wheel and installing it in the previous place of the steering wheel, you can begin testing the heating. When you turn it on, the steering wheel should fully warm up in about 2-3 minutes.
Do-it-yourself heated steering wheel: arguments for and against
You already know how to make a heated steering wheel yourself, but if you have ever delved into car forums regarding this issue, then you have probably read negative reviews about such an innovation in cars. But first, let's look at the pros:
1. Driving a car when you are warm is much more comfortable. Even if you have a good stove, warming up in a car with a warm steering wheel will be much easier and faster.
2. The presence of a heated steering wheel allows the driver’s hands to remain mobile throughout the entire process of driving the car, thanks to which he can more accurately and quickly control even very difficult situations on the road.
3. Driving with gloves can lead to a dangerous situation where, when exposed to freezing temperatures, the leather surfaces of the gloves and steering wheel can lose their grip, and in a dangerous situation the steering wheel can literally slip out of the driver's hands.
This is interesting! On some car brands (BMW 1 Series, Range Rover), the steering wheel heating function is offered separately.
4. If you choose between a purchased heating function and installing it yourself, then, of course, you should choose the latter option, since it will cost several times less. As for the arguments “against”, they include the difficulty of connecting a heated steering wheel with your own hands to the car’s on-board network. If you do not take into account voltage drops or confuse “+” and “–”, you can easily achieve very unpleasant consequences both for yourself and for your car. Therefore, if you are not entirely comfortable with electricians, it is better to entrust the connection to specialists.
Another disadvantage for the driver may be the lack of a relay for adjusting the heating temperature of the steering wheel. In this case, you will either have to abandon heating altogether, or constantly turn it on and off, which is very inconvenient in winter driving conditions. Oddly enough, you will also have to get used to the heated steering wheel for some time, which at first can also become an obstacle to concentrating on the road situation.
In general, the question of whether to heat the steering wheel yourself or not remains within the competence of each driver. If you are tormented by doubts solely for the reason that you do not want to tinker with electricity, then it is better to look for a technician who will carry out the same scheme that we described above and will charge you less than in a car repair shop.
Subscribe to our feeds on social networks such as Facebook, Vkontakte, Instagram, Pinterest, Yandex Zen, Twitter and Telegram: all the most interesting automotive events collected in one place.
Why warm up the steering wheel?
Indeed, maybe this idea isn’t even worth a damn? Why heat the steering wheel if you have fur gloves? They thought about this 60 years ago in the USA, but the design was considered too complex to implement and was abandoned. This is understandable. Why heat the steering wheel in Miami? Only in the late 80s did Japanese engineers develop a design that did not triple the cost of the car, but cost adequate money and worked quite well.
At the same time, the heated steering wheel system is not widely used and is considered exotic even on business class sedans. But if you make the steering wheel heating with your own hands, not in the sense of heating the steering wheel with your hands, but on the contrary, then driving will become not only comfortable, but also safe. In the cold, wearing gloves is not particularly convenient to manipulate buttons and levers, and an icy steering wheel, even if it is leather, is more irritating than invigorating.
Purpose of the heating function
The function of heating the steering wheel, seats and even wipers was developed and introduced relatively recently. In a relatively short time, car enthusiasts all over the world began to use it. Most of them welcomed the fact that they made car trips more comfortable.
At first, heated steering wheels were installed exclusively on premium models. Nowadays, a similar function is available in more affordable cars, but only in relatively new ones.
If the vehicle is many years old, or when it comes to a cheap option, you can equip it with a heated steering wheel in the following ways:
- go to the service station and install it there;
- purchase ready-made and deliver;
- do the heating yourself.
We recommend: Step-by-step instructions for removing bumpers from a VAZ 2113-2115
It will be especially important to make steering wheel heating yourself for old Soviet-made cars. Such tuning will be a beneficial innovation for them. To work you will need to buy some parts. There is no need to save money, because it depends on how reliably the device will work.
By design, the device consists of several heating elements.
In order to control the degree of heating and also turn off the device when the temperature reaches the possible limit, a relay is used. The heating design is not as complicated as it might seem at first glance. If you make an effort, you can easily assemble it yourself, without turning to a specialist.
Rules for connecting the mechanism
After the heating elements have been installed on the steering wheel, you can connect the device to power. There are several connection options:
- through the cigarette lighter;
- through wiring specially dedicated for this purpose;
- using unused wires.
The most practical and safe option for arranging power is to connect via a dedicated line from the battery. The algorithm of actions is as follows:
- you need to take two copper rings, which are about 1.5 mm thick, and prepare a power button;
- the rings must be connected to the plus and minus of the electrical wiring of the machine;
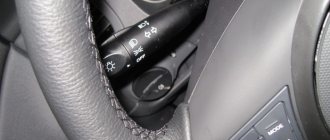
- the device switch off button should be placed in the steering column casing located at the bottom - this will be more aesthetically pleasing and convenient;
- on the left overlay you need to make a cutout to install the button using a special stencil;
- then the wires must be soldered to the rings, and then connected to the battery through the fuse and relay;
- copper rings should be attached to the wire with double-sided tape, and then filled with epoxy glue;
- one wire must be positive, the negative can be used from the steering shaft;
- the contact for switching off should be located opposite the rings in the steering wheel; for this you need to make a special hole;
- everything must be carefully isolated to avoid unwanted contacts;
- At the bottom, you should install a thin plate as a spring so that the shutdown button is constantly pressed against the rings: one end of the spring will rest against the steering wheel, the other will press on the contact.
This is interesting: How does a car's fuel level sensor work? 11 possible causes of the malfunction and its repair
The heating process with this connection will occur quite quickly and evenly. The steering wheel will be noticeably warm after just a few minutes.
Heated steering wheel, what are the advantages of a heated steering wheel
The heating device consists of a specialized heat-conducting wire, similar to the one in the rear window.
At the ends of the wire there are terminals that are connected to the on-board network of the vehicle itself. A regulator is sometimes added to this design to control the degree of heating and the ability to set the desired temperature, however, as a rule, heating is standard everywhere.
First of all, a heated steering wheel is necessary for comfort; it is much more pleasant to put your hands on a warm steering wheel in the cold season. In addition, a heated steering wheel is installed for safety reasons. You should not drive in warm gloves, especially woolen ones, as your hands will slip in them, which may well lead to an emergency on the road.
Why should you contact us?
Installers have more than 15 years of experience
Certified equipment
No queues
Guarantee on all work
It is absolutely no exaggeration to say that installing a heated steering wheel is a complex and time-consuming job. It requires good knowledge of electrics, the ability to handle leather well, as well as non-standard thinking and accuracy. In our organization, in order to achieve high-quality results, the work process is structured in such a way that everyone does their job, and does not grab onto everything in a row. Therefore, the work of re-stitching the steering wheel and introducing a heating tape into it is carried out by a specialist who specializes in work related to leather reupholstery and related tasks, and the issues related to connecting the electrical part of the process are dealt with by another specialist who has been working professionally in the field of auto electricians for many years .
Copper wire
Copper has tens of times less resistance than nichrome.
The resistivity of copper wire (0.25–0.3 mm in diameter) allows you to wrap the entire steering wheel rim in one piece, without breaks, and connect without using a step-up transformer. However, with the same power as nichrome wire, copper wire has less heat transfer.
On the Internet, on AliExpress, you can find a wire that is designed to heat seats or steering wheels (heating wire for car seat or steering wheel). It is coated with heat-resistant polymer (FEP coated or Nylon coated). Together with the coating it has a thickness of about 1 mm. You can choose the material from which it is made (copper, copper-nickel alloy, constantant, tin+copper+stainless steel). Due to the large cross-section, such wire will need to be recessed into the pre-cut grooves of the steering wheel so that it does not stick out and imprint on the braid.
We work with the following car brands
| Audi | Skoda | Volkswagen | BMW | Seat | Volvo |
| Kia | Hyundai | Ford | Honda | Infiniti | Porcshe |
| Land-rover | Jeep | Mercedes-Benz | Mini | Toyota | Lexus |
| Opel | Citroen | Chevrolet | LaDa | Renault | Nissan |
Still have questions? Ask us or sign up for installation!
Do-it-yourself heated steering wheel - solutions
If we still feel strong enough to make such a serious tuning of the steering wheel, then we can try to use several options to resolve the issue. The simplest and most painless is to remake the electric heating pad, or electric seat heating, which is sold separately from the car.
The simplest and most inexpensive domestic seat heating system is Emelya.
This is what will help us warm up not only our back and the friendly areas adjacent to it, but also our hands. The set consists of a thermoelement made in the form of a heating tape. Its length, power and resistance are already designed for use in the on-board electrical system of a car, so there is no need to do anything special.
Emelya will share with us thermocouples, relays and a heating control system (it’s loudly said, it’s a fairly simple device), all we have to do is remove the steering wheel trim, glue thermal tape around the perimeter of the steering wheel and run the wires through the steering column, connecting the system to the most powerful line. As a rule, this is the cigarette lighter branch.
We have scattered photos of a hand-made steering wheel heater between the lines, so everyone can choose the most suitable option for them. Warm your hands before riding, do not exceed the permissible warm-up temperature and have a nice warm road everyone!
To work you need to have:
- Steering wheel (personally, I was afraid to spoil the “native” one and took a used steering wheel at disassembly, you never know what would happen...).
- Heated seat kit “Emelya Gorynych” (you will need to remove the heating element in the form of a wire from it, and you will also need to expropriate the thermal relay, which will automatically turn off in case of overheating).
- Sharp knife (stationery).
- Glue.
- Electrical tape or needles (for fixation).
- Sealant.
If you have everything, you can start.
Recommendations for choosing cases
It is best to cover the wiring system with a leather cover. It can be purchased ready-made, but in this case you need to carefully select the size. In this case, it is necessary to take into account that, under the influence of the thickness of the insulation and the heating element, the steering wheel will be enlarged. It is recommended to steam a leather product in advance or soften the material by treating it in alcohol. Thanks to such measures, the leather will stretch and fit perfectly on the wheel. You can also sew such a cover with your own hands, but to do this you need to have at least minimal sewing skills.
We recommend: Rating of the best sealants for car headlights in 2019
Steering wheel heating is a thing that is useful not only for a car, but also for a motorcycle. Especially if a person needs to travel in the cold season. You can put a hat and helmet on your head, and insulate your body with a jacket, but warming your hands is more difficult - turning the steering wheel or driving a motorcycle in mittens is inconvenient, and without them, your hands will freeze.
A heated steering wheel is a good device that increases the comfort of driving a vehicle. However, it has several shortcomings that can be corrected. If you simply wrap heated handles with electrical tape, they will not look very attractive. This can be easily disguised with a nice cover. Another disadvantage is more significant: heating is very expensive in terms of energy consumption. You can install a night light lamp with a lower power.
To work you need to have:
- Steering wheel (personally, I was afraid to spoil the “native” one and took a used steering wheel at disassembly, you never know what would happen.).
- Heated seat kit “Emelya Gorynych” (you will need to remove the heating element in the form of a wire from it, and you will also need to expropriate the thermal relay, which will automatically turn off in case of overheating).
- Sharp knife (stationery).
- Glue.
- Electrical tape or needles (for fixation).
- Sealant.
If you have everything, you can start.
Installation features
To work at home, it is best to take special heating elements, which are used in car seat heating mechanisms. In stores you can purchase a set such as “Emelya Gorynych”. It is good because it is equipped with a high-quality thermal relay. Thanks to it, the heating will turn off automatically when it reaches a certain temperature.
To make a homemade heated steering wheel, in addition to the relays themselves and heating elements, you need the following tools and materials:
- felt-tip pen;
- knife and epoxy glue;
- double-sided tape and electrical tape;
- sealant;
- device shutdown contact, two copper rings;
- leather steering wheel cover (you can also sew it yourself if you wish);
- soldering iron
To begin the installation process, the steering wheel must be removed. After this, the heating elements are installed first.
The process is a sequence of actions:
- Using a marker, you need to mark the installation locations of the heaters. In this case, the step may be different. The permissible distance between grooves is from 20 to 30 mm.
- After marking the wheel, you need to use a knife to make indentations for the heating elements. Instead of a sharp blade, you can use a special drill with attachments for this.
- The wires can be fixed or left as is. As a result, they will be covered with a cover.
Experts advise placing heating elements on glue, and securing areas of turns and bends with electrical tape. It can be removed when the glue dries. Once it has hardened, the grooves with the heating elements will need to be filled with sealant. Thanks to this, the grooves will not be felt at all under the leather cover. Then the furrows are puttied and the surface of the wheel is leveled with a knife.
To work you need to have:
- Steering wheel (personally, I was afraid to spoil the “native” one and took a used steering wheel at disassembly, you never know what would happen.).
- Heated seat kit “Emelya Gorynych” (you will need to remove the heating element in the form of a wire from it, and you will also need to expropriate the thermal relay, which will automatically turn off in case of overheating).
- Sharp knife (stationery).
- Glue.
- Electrical tape or needles (for fixation).
- Sealant.
If you have everything, you can start.
How to connect the heating, step-by-step connection instructions
- First, you need to think about how you will adjust the heating function on and off. For this purpose, a compact steering wheel heating button is best suited, which will work on the basis of only two contacts. It can be mounted in the lower section of the steering column housing. This place is easy to use and discreet. To carry out the procedure correctly, you need to use a stencil. It will be used to determine the cutout configuration on the steering wheel trim.
- To determine the places where the “plus” and “minus” will be located, you will need two copper rings, the thickness of which should not exceed one and a half millimeters.
- The wires are connected to the rings using a soldering iron, and the connection to the battery is made through a relay. It is activated when the ignition is turned on.
- The rings are attached to the spiral cable in the steering wheel hub using double-sided adhesive tape.
- Epoxy glue thickly poured between the rings prevents short circuits.
- One of the contacts is left on the positive side; a component from the steering shaft can serve as a negative contact.
- It is necessary to drill a minimum hole in the steering wheel into which we mount another contact. It should be located directly opposite the copper rings.
- Now we completely isolate all contacts to avoid contact with the steering wheel.
- Then we mount a spring, which will ensure tight contact between the contact and the rings. To do this, you can use a thin plate. One side of such a plate will put pressure on the contact, and the other will press firmly against the steering wheel.
- At the end, the device is installed in its permanent location.
Heated steering wheel installation kits
On sale you can find kits for installing a heated steering wheel. They are based on small cross-section nichrome wire, connected in parallel in the form of cells and located on an elastic self-adhesive backing.
The kit includes:
- Heating element 2 pcs, 25cm each
- Converter block (to reduce the current passing through the steering column loop by increasing the voltage)
- Pins (which connect to two pins under the steering wheel of the car)
- Power button
- Installation instructions
You can also find an installation kit based on carbon fiber on the Internet (see photo).
The Teplodom company, which produces well-known heated seat covers, as well as built-in seat heating, also produces and sells installation kits for heating the Emelya UK-R steering wheel.
Another set can be purchased on the Auto Interior Studio website.
The kit includes:
- heating element 0.14 mm thick. And 60–75 mm wide.
- voltage booster unit 12V/24V
- heating on/off button
- connecting wires with fuse box
- installation instructions
The heating tape is quite elastic, which makes it easy to install on the steering wheel rim without wrinkling.