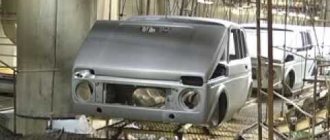
What is body geometry
The geometry of a car body is understood as a certain set of distances between special control points. The latter make it possible to determine how accurately the body elements, components and mechanisms of the vehicle are located in relation to each other. The location of control points is indicated in the technical passport of the manufacturer. When determining the correct geometry of the car body, first of all, you need to pay attention to:
- front and rear track width;
- distance between front and rear axle (wheelbase);
- the distance between the side members, as well as their length;
- trunk and engine compartment dimensions;
- dimensions of door and window openings.
Not only the appearance of the car, but also the comfort and safety of its use depends on the correct adherence to these dimensions.
Do-it-yourself pipe bender - simple drawings, diagrams, projects and the best homemade pipe bender models
Required Tools
To assemble a pipe bender, you need at least the following tools:
- welding inverter;
- angle grinder;
- lathe (or purchase of finished parts);
- vice;
- hammer;
- metal file;
- sandpaper;
- ruler;
- drill.
But the most important thing is the pipe bender drawings. The mechanism must be manufactured strictly according to the drawing. You can take a ready-made drawing from this material or find another one and adapt it to the required dimensions.
But it is impossible to make a pipe bender without a drawing, since precise calculations are needed to ensure the operation of the mechanical parts.
Snail pipe bender
The peculiarity of this type of pipe bender is the ability to bend a part along its entire length at the same time, and not in a specific place. This makes the tool more versatile.
Materials for volute pipe bender
When making such a pipe bender with your own hands, the dimensions of the parts must be selected to suit individual needs, since this model does not have a specific working diameter. This is also an advantage, since it allows the use of available materials.
To assemble the structure you need:
- meter channel;
- Sheet steel;
- 3 shafts;
- 2 stars;
- steel chain;
- 6 bearings;
- a two-meter pipe with a diameter of 12.7 mm for the production of knobs;
- screw for clamping;
- bushing with internal thread.
Making a volute pipe bender
The pipe bender should be assembled strictly according to the diagram. Check out the photo of a self-made pipe bender and different drawing options. Select a suitable diagram and adjust the dimensions if necessary.
Then follow these instructions:
- Weld the frame from channels (can be replaced with a thick steel plate or 1 channel of sufficient width).
- Mount the bearings on the shafts, which are then welded to the frame.
- Place the sprockets on the shafts and mount the chain on them.
- Cut out the guides for the clamping mechanism and weld them onto the frame.
- Mount the bearings on the clamp shaft and assemble the press mechanism. Use channels or thick steel strips as side restraints.
- Make a base for the bushing and weld it to the structure. Screw in the clamp screw.
- Weld a tubular driver to the upper end of the screw and the shaft.
- Lubricate the bearings and check the operation of the mechanism.
After installation, it is recommended to paint the mechanism to prevent the development of corrosion. To simplify the work, you can install a spring that returns the press to its original position.
Manual pipe bender on a roller mechanism
Making a manual pipe bender on rollers with your own hands is somewhat easier, since there are fewer mechanical elements. The device allows you to bend pipes in certain places. The device must have a long lever, since direct manual force is required to bend the products.
Materials for making a roller pipe bender
To assemble the mechanism you need:
- 2 steel rollers 10 cm and 6 cm in diameter. Inner radius – 12.7 mm, thickness – 35 mm;
- 1.5-inch thick-walled (from 3 mm) steel pipe for constructing a lever (length from 1.5 m);
- 4 steel strips 15x6 cm, about 5 mm thick. The mechanism for fastening the device in a vice. Also used for the construction of handles and lever supports;
- steel strip 6 cm wide and 3 mm thick;
- 2 bolts – 60 mm 17.78 mm and 40 mm 12.7 mm. For fixing the rollers;
- steel plate 30x30 cm (thickness from 3 mm);
Manufacturing a manual pipe bender on a roller mechanism
How to make a pipe bender with your own hands at home - step-by-step instructions:
Make 2 holes with a diameter of 12.7 mm and 17.78 mm at an interval of 80 cm (or other, based on your drawing). The frame has a 19.05 mm hole. Install the appropriate bolt into it and secure it with welding.
Weld a U-shaped part from 15x6 cm plates, a 12.7 mm bolt, a small roller and a 35x60 cm strip of steel. Pre-mount the roller using a bolt in the previously prepared holes. Weld the bolt to the plates. As a result, you will get a product that resembles a spear.
Weld a tube that acts as a handle to the base of the assembled part. Weld the pipe support strip to the base of the entire product. Between the bar and the main bolt there should be a distance equal to the radius of the main roller (which has a larger size according to your drawing) with an addition of 12.7 mm.
At the bottom of the base, weld a 15x6 cm strip, with which the structure is secured in a vice. Mount the main roller into the rod part. Place the latter on the main bolt and secure with a nut. Secure the device in a vice and test it in action.
Jack pipe bender
A simple and convenient device for bending profile pipes. For production you need the following materials:
- jack;
- 4 corners 40 cm long with equal shelves of 50 mm each;
- 2 rollers with grooves for belts. There should be through holes in the center. If they are missing, drill, measuring the middle;
- equipment for a jack in the shape of a semicircle with a recess inside;
- 2 channels 60 cm long and 10 cm wide;
- bed;
- 2 mounting bolts.
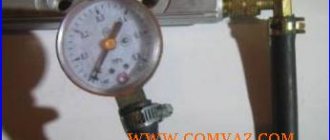
Checking body geometry with special tools
We will need a special caliper and a scale rod. The first is necessary to check the correct location of the wheels relative to each other. It is also suitable for comparing the location of control points on different sides of the vehicle body.
First, measure the distance between two points on one side. Then we fix the position of the compass legs using special fasteners. Next, we take measurements between similar control points on the other side of the body. If the results do not match, the geometry is broken.
Using the same principle, you can check for body deformation using a scale rod. It has a telescopic design and height-adjustable indicators, which makes it possible to take measurements when there are various obstacles between the control points. Also, the scale bar allows you to calculate the exact distance between control points on the body and frame of the vehicle and compare them with the data specified by the car manufacturer.
Features of the line
It is clear that the ideal body is a skeleton that looks excellent in appearance, like new, and ensures the safety of further operation of the vehicle.
The electronic measuring ruler is designed for 2- or 3-dimensional measurement of the geometry of the metal frame of the machine. The tool also helps to compare the obtained measurements with the parameters of the car manufacturer. As for the sizes, the line easily works with cars, trucks, and buses.
The most important electronic measuring tool for a bodybuilder is that such a ruler gives a chance to conduct a qualitative analysis of damage not only to the car body, but also to the frame, as well as the floor of the car. The ruler is able to ensure the accuracy of body work, as well as the ability to document the results.
How to check body geometry with a regular tape measure
It is less accurate, but it can be used to get a general idea of the violation of the geometry of the vehicle body. First of all, we check the front track: measure the distance from the middle of the tread of the front left wheel to the middle of the tread of the right front wheel. Then we check the rear track in the same way. We compare the received data with the information of the manufacturer. The discrepancy between the results will serve as evidence that the geometry of the car body is broken. We check the length of the wheelbase in the same way (we take measurements between the center of the front wheel hub and the center of the rear wheel hub). Also, using a regular tape measure, we check:
- trunk;
- engine compartment;
- doorways.
There is another fairly simple way to check the geometry of the vehicle body. To do this, on a flat and straight road, accelerate the car and release the steering wheel for a few seconds. If the car starts to pull to the side, there may be problems with the geometry of the body. To get a more accurate result, you need to check the car at different speeds - 50 and 90 km/h.
The procedure for bending a profile pipe on homemade machines
It is unlikely that you will be able to obtain the required bending radius in one go - too much force is required for this. It is impossible to create it manually. Receive the required bend in several passes:
- First, the rollers are aligned so as to obtain a slight bend, the pipe is rolled in one direction, then removed from the rolls, unfolded and inserted on the other side. It is necessary to unfold in order to obtain an evenly curved pipe.
- With the same position of the rollers, it is pulled several times until the curvature is no longer added.
- If the required bending radius is not achieved, change the position of the roller and repeat the steps again.
Rolling pipe bender with electric drive
The change in bending radius is achieved gradually, otherwise you will not be able to make an arc from a profile pipe using a homemade pipe bender. What to do if you need to repeat the same bend? Make a graduation - note to what height the roller moved, how many times it was rolled in each position. When repeated, the differences, if any, will be insignificant.
The difficulty of bending lies in the fact that there is no scale and it is difficult to obtain the intended bending radius without experience. Sooner or later you will get it, but you can spoil a lot of material in the process.
Checking the body geometry at a car service center
Specialized technical centers use modern computer equipment to detect deformations. The car is partially disassembled and placed on a special stand. Electronic sensors are attached to control points. The readings are transmitted to a computer, which creates a certain three-dimensional model of the vehicle and compares the initial data with the information obtained during the inspection.
The advantages of this method include high measurement accuracy. Among the disadvantages: time and financial costs. Checking the body geometry on a special stand will cost the owner several thousand rubles. However, experts recommend that owners check their vehicles in this way at least once every 12 months, arguing that body deformation can be caused not only by an accident, but also by normal driving on broken Russian roads.
Also read: 6 ways to check the paint on your car
SJRacing - tuning components for your car
Hello dear readers!
Today the object of our attention is the profile line. Another name for this tool is a profile template. This tool can be very useful in auto body repairs. This is the case when, having purchased a tool, you wonder how you ever managed without it. What kind of line is this? Let's take a closer look.
Auto body repair people know that it takes more than simply reshaping a jammed body panel. It is especially not easy to restore a body panel of complex shape. There are no clear guidelines; everything has to be done by eye. At best, craftsmen cut out a template from cardboard, but this is not fast and requires a certain skill. So, a profile ruler is exactly the tool that helps you accurately determine the profile shape you need. By looking at the ruler you will already understand what and where is not reached or has been squeezed.
How does the profile ruler work and how to use it?
It consists of a body and many rods of small diameter, which move freely back and forth in it. The use of such a template ruler is not limited to the field of body repair. Rather, this device came to bodybuilders from other areas. It has found application in woodworking, restoration of furniture and interior work, model making and other areas.
In body repair, a ruler can be used using the fact of body symmetry. That is, you can copy the shape of the panel from the other, mirrored side of the car.
It is very simple to use: just apply the tool to the desired surface and press lightly. The ends of the rods move and take the shape of the place on the body panel to which you applied the profile ruler.
Next, by applying the resulting template to the damaged area, you can understand in which direction to move when straightening the panel. Here you need to understand that you need to position the ruler so that it rests on entire parts of the panel and, as it were, continues the desired profile. If you simply apply the resulting template inside the dent, you will not understand anything.
It happens that you not only need to return the desired shape, but actually make the element anew. This may happen in the case of cutting off an area of the body that is rusted through. For example, when replacing a rusty rear fender arch. A template ruler will help you recreate the desired shape.
What are the profile lines?
This device is produced by different manufacturers from different materials. There are plastic products, metal and wood, combined and even bamboo. In body repair, the WURTH profile line is well known, but this is not the only manufacturer of such a product.
Profile ruler with bamboo rods Template ruler consisting of two sections
We list the parameters that need to be taken into account when choosing a profile line:
- The material from which the instrument is made. This is not a very important parameter; the main thing is that everything is implemented well and functions reliably.
- Ruler length. Too short is undesirable, since you often have to work with extensive damage.
- Length of rods (affects measurement depth).
A set of profile rulers from WURTH with a holder. For
example, here are the parameters of a template ruler from WURTH:
- The ruler has a plastic body and metal rods.
- Length: 40 cm.
- Rod length 8 cm (measurement depth: 7 cm)
You can purchase a set of two template rulers with a special holder. Thus, by connecting two rulers you can make a block about 1 m long.
As mentioned above, what is important is not so much the material from which the profile ruler is made, but the quality of manufacturing and mating of parts. It is important that the rods do not get stuck, tangle with each other, or become loose over time. It is necessary that the rods, having formed the contour of the shape, hold it as long as necessary.
Can I do it myself?
Looking at this tool, the craftsmen understand that there is nothing complicated in the design of this device. The idea immediately arises of making such a device yourself. However, there are not many, if any, high-quality implementations of the profile line.
Homemade profile ruler
In a separate article I will show several ways to make a good template ruler with your own hands.
More interesting articles:
Combined square
The quality of the junctions of the elements depends on the accuracy of the angles of 90° and 45° when cutting materials. To avoid gaps between the strips of skirting boards and platbands or to tightly fit the joining parts when making furniture, it is convenient to use such a square. It has double markings and a movable stop with a bubble level for precise orientation in space.
Price: 240 rubles.
Drawing bells and whistles
Published date 08/16/2020
Last modified date 08/16/2020
Those who have been reading my blog for a long time will have noticed that some information is duplicated and has already been published - I decided to expand and supplement it, incl. fresh photos.
Patterns
To construct smooth curves that cannot be constructed with a compass and ruler, a pattern is used. The photo above shows a set of ready-made patterns, but there are also flexible patterns - they were bent in place. They work like this:
In advance, control points 1-12 were built using a table or another method. If you connect them with straight lines, there will be a broken line; if you connect them with circles, you will get kinks at points. If you draw a line with your hand by eye, the result is not guaranteed. In the picture, curve 1-6 has already been constructed. To construct curve 6-9, select a pattern and a place on the pattern so that the edge of the pattern passes through points 6-9 exactly, and also so that it hits points 5 and 10 - in reserve, and trace. Although in 2021 Bezier curves in any vector editor look at patterns like mammoth shit.
Pay attention to this beautiful plastic. This is celluloid - nitrocellulose, a very old (developed in 1870) and very flammable plastic. If as a child you set fire to rulers that burned vigorously with a lot of smoke, then this is it. It is not difficult to recognize - camphor is used for plasticization; if you scrape such plastic with a knife and smell it, there will be a distinct smell of camphor.
Reisshina
Several different ones were used in drawing. A reisshina is needed to draw many parallel lines, and several designs have been invented.
Classic T-shape, it slides along the edge of the drawing board. If you need a line at an angle, please add a square, as in the photo. Simple and cheap, it had a drawback - you needed a drawing board, the edges of which were even and perpendicular.
Roller leveler, also known as inertial leveler - inside there is a powerful steel roller with rubber-coated ends, a spiral mark and a scale for uniform shading. It rolls along the sheet, maintaining its orientation, which is incredibly convenient for shading. Powerful and heavy, alas, it did not always survive the fall from the table intact.
A rope tie rod, often called just a tie rod. Uses rollers and tensioned string/line for parallel motion.
Stencil for erasing
These stencils are used to erase a specific line or point without affecting the surrounding drawing. Just apply it and erase through it. They are made of thin (0.15-0.2 mm) and elastic steel; plastic is not suitable for these purposes. On Ali, google using the keywords “eraser stencil” and “eraser shield”.
Features of the line
ATTENTION! A completely simple way to reduce fuel consumption has been found! Don't believe me? An auto mechanic with 15 years of experience also didn’t believe it until he tried it. And now he saves 35,000 rubles a year on gasoline! Read more"
It is clear that the ideal body is a skeleton that looks excellent in appearance, like new, and ensures the safety of further operation of the vehicle.
The electronic measuring ruler is designed for 2- or 3-dimensional measurement of the geometry of the metal frame of the machine. The tool also helps to compare the obtained measurements with the parameters of the car manufacturer. As for the sizes, the line easily works with cars, trucks, and buses.
The most important electronic measuring tool for a bodybuilder is that such a ruler gives a chance to conduct a qualitative analysis of damage not only to the car body, but also to the frame, as well as the floor of the car. The ruler is able to ensure the accuracy of body work, as well as the ability to document the results.