What type of “eyes” is best to make?
If we talk about the features of structures of this type, the lighting can be:
- LED. LED devices can withstand low temperatures well and have a long service life. They rarely break. LED “angel eyes” can be bought ready-made (they are quite expensive) or made with your own hands without any problems (you will have to spend the most money on a plexiglass tube just for LEDs).
- Neon. CCFL is distinguished by a brighter and more uniform glow, since in this case there are not light bulbs inside the tube, but heated gas. However, such products cannot withstand frost and begin to fully glow only a few minutes after turning on the headlights. To make such “angel eyes” yourself will require more costs (you need to additionally buy an ignition unit), so it’s easier to buy a ready-made kit.
Upgrading headlights must be done very carefully. Do not forget about the main function of lights and traffic rules. For example, if you use red or blue LEDs for “angel eyes,” then a conversation with a traffic police officer cannot be avoided. The fact is that such colors can only be used in the optics of official vehicles. If an ordinary driver imitates a “flashing light,” he risks paying a fine of 2,500 rubles or his car may be sent to the impound lot. Therefore, it is best to use white, yellow or orange lights for tuning headlights yourself.
This is interesting: Painting a car matte color with your own hands
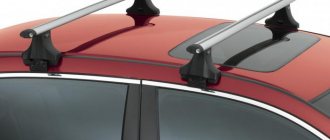
Installing angel eyes with LEDs on headlights with lenses
Angel eyes are sold in different sizes, usually from 60mm to 120mm. The LED angel eyes set contains rings with LEDs, one controller with a connector, and a remote control for changing the color of the angel eyes, including blinking modes. Diffuser caps can be added to the rings for a more traditional, uniform appearance.
“Angel eyes” in headlights with lenses are installed on the housing.
It can be pre-painted black to make the rings more visible. It is recommended that the rings be attached at three points at equal intervals. To attach the luminous rings inside the headlight, glue, double-sided tape or special wire are used. Glue has its drawbacks. Vibrations from driving and heat can weaken the adhesive bond. Double-sided tape cannot always be used, since there is not always a suitable surface inside the headlight for secure fastening in this way. It is better to use thin wire for hanging pictures. You need to drill small holes on the lens housing and screw the rings with wire. If you do everything carefully, you get an almost invisible fastening unless you look closely. The advantage of this method of fastening is that it is very reliable and does not weaken from vibrations and heat.
If you choose an adhesive connection as a method of attaching the rings, then apply a thin layer of glue to the back of the ring and to the reflector, in the place where the ring will be installed. Let the glue dry for 10 minutes before pulling the wires through. Gently press the ring into place for 5 minutes. Try not to move the ring until the glue dries.
First option
Often, when motorists want to make homemade angel eyes, LEDs are used. They perfectly complement the main beam headlights, and their installation does not cause much difficulty.
As for the set of materials and tools, here you will need to take:
What are angel eyes
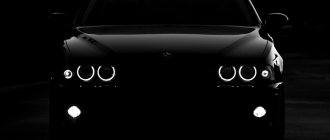
In 2001, the German concern BMW presented the restyling of the E39 model to the public. The main change was in the headlights: a luminous border appeared around the standard front headlight lamp. It began to glow in all four headlights when the driver turned on the headlights. The new product looked very impressive, the public immediately received it with a bang. The round edging is popularly called angel eyes (Angeleyes).
Glowing eyes instantly attract attention; a car with similar lighting is visible on the freeway from afar
Now the edging in the headlights can be seen on different cars, even on domestic Zhiguli cars. But the installed luminous “pupils” on any car except BMW are the result of tuning. In the factory configuration, angel eyes only come in “beh” versions, since the German manufacturer has patented the system.
Car enthusiasts love angel eyes because they give the car a modern look. There is also a practical value in the luminous rim - when the “pupils” are turned on, the car becomes more visible, safety on the road increases (other drivers see such beauty from afar, which reduces the likelihood of an accident). Angel eyes provide good visibility not only at night, but also in daylight, so they can be used as daytime running lights (but only on condition that the brightness of the emitted light is in the range from 400 to 800 candelas - this meets the requirements of GOST R 41.48 -2004).
Preparatory work
To create an unusual glow from the headlights, you will need to purchase a 7-8 mm plastic rod. It can be purchased at retail outlets that sell blinds or at an outdoor advertising store. Plexiglass should withstand high temperatures well, so it’s better not to skimp. If we talk about the length of the tube, then usually 1 meter is enough for 4 headlights.
Healthy! To accurately calculate the amount of plexiglass required, simply measure the headlight by diameter, add 2 cm to the result and multiply by the number of headlights.
Also for work you will need:
- an industrial hair dryer (if you don’t have one, then the necessary processing can be carried out in the oven);
- 2 LEDs 12V (per headlight);
- 220 Ohm resistor (for one headlight);
- screwdriver with 6 mm drill;
- bur machine with a thin diamond disc (can be replaced with a thin metal file);
- Super glue;
- glass jar or any other container, the outer diameter of which coincides with the inner diameter of the headlight;
- sealant.
Having purchased everything we need, we get to work.
Preparing for work
First of all, let's arm ourselves with the necessary tools and materials. As mentioned earlier, you will need pliers, wire cutters, a metal cutter, a drill, a file and drill of the appropriate size, a heat gun or a soldering iron. In addition, you cannot do without a special transparent rod made of plastic or plexiglass that can withstand high temperatures. Auto tuning experts recommend looking for it in stores that specialize in selling blinds and curtains. It is also worth preparing a large flat container for a plastic rod, a round jar, electrical tape, 8 one-volt LEDs, 220 Ohm resistors and wires with connectors.
Finding these materials and tools is quite easy, the main thing is desire. Please note that the headlights have wells of different diameters, so the “angel eyes” will turn out to be of different circumferences. Don’t worry about it – the design will turn out smooth and beautiful in any case.
How to make your own angel eyes
You can buy a light device ready-made or purchase parts separately and assemble it yourself. True, you can only make LED angel eyes with your own hands. Assembling neon and cluster eyes requires sophisticated equipment and professional skills.
A standard ready-made set of angel eyes contains rings or half-rings (1 or 2 for each headlight), 2 ignition blocks (stabilizer), mounting tape and wires. A set of peepholes costs 1100–1800 rubles. Self-production of the simplest LED system will allow you to save money, since you have to pay no more than 700 rubles for all the parts.
It is important to understand that the installation of both ready-made sets of peepholes and home-made devices requires subsequent examination and changes to the PTS. If you are not sure that you can select parts and assemble equipment so that it meets GOST requirements, then it is better to entrust this matter to professionals.
Step-by-step instructions for making rings
The main part of homemade angel eyes is a clear plastic rod that can withstand high temperatures. You can buy it in curtains, curtains and blinds stores. You will need 2 of these twigs (the price for a set of 10 pieces is 400–500 rubles, depending on the diameter of the tubes). You will also need 4 diodes with a power of 3–5 W, assembled with resistors (they are sold in sets of 10–15 pieces and cost around 150 rubles).
If you make angel eyes from colored rods, then a car with such lighting equipment will not pass the examination
The procedure for making angel eyes:
- We cut off the required length of the plastic tube with a margin of 4–5 cm (the length for each ring is determined by the formula 3.14 x D, where D is the internal cross-section of your car’s headlight).
There are no requirements for the diameter of the rod - it depends only on your personal preferences
- We soften the tube (any method will do - for example, you can put the rod in the microwave for 15 seconds, in the oven for 5 minutes, or in a container with boiling water).
- We grab the ends of the heated rod with pliers and wind them onto a suitable size coffee or paint can.
If you have an industrial hair dryer, then you can heat the rod at the same time as twisting it - to do this, you need to insert one end of the tube into the hole made in the jar, and then gradually soften it with hot air, immediately twisting the softened section onto the container
- Let the tube cool for 10–15 minutes, remove it from the jar, and cut off the excess ends.
- We solder resistors (resistance) to the “positive” legs of the LEDs.
Soldering diodes with resistances is necessary to prevent the angel eyes from burning out
- We solder wires to the fastened diodes to connect to the on-board network.
When attaching diodes and wires, do not forget that plus is connected to plus, and minus to minus
- We drill holes in all ends of the plastic rings to match the size of the diode heads. Pour liquid glue or nail polish into the holes and immediately insert the diodes there.
- We wrap all places where the rings with diodes are attached with electrical tape.
It is recommended to apply shallow notches on the inside of the plastic rings with a knife - this is necessary to diffuse the light
Before installing blanks in the headlights, you need to check their functionality. Connect to a 12 volt DC source - the rings should light up evenly. Be sure to shake the eyes slightly - if they go out or start blinking, it means the wires are poorly secured somewhere.
Video: an alternative option for making angel eyes from LED strip
Installing and connecting the eyes on the car
First you need to remove the glass of each headlight. If they are placed on rubber sealant, then it can be easily softened with an industrial hair dryer. You will have to get rid of the heat-resistant sealant by cutting it into pieces. After the glass is removed, you need to attach rings along the contour of the reflector. This can be done using double-sided tape or hot glue.
Once the angel eyes are attached, they must be connected to the car's on-board network. We pass the wires into the engine compartment through the technological slots. Now, under the hood, we look for a two-pin connector for the sidelights (the left one is located in the area of the windshield washer reservoir, and the right one is located in the area of the battery). We disconnect these two blocks and take the yellow wire. The following options are possible:
- If you want the angel eyes to light up along with the side lights, then solder or twist the “positive” wire from the eyes to the male terminal from the two-pin block. The negative wire of the angel eyes must be connected to the car body.
- In order for the angel eyes to light up instead of the side lights, we remove the male terminal from the two-plug block and pull the wire out (we no longer need it). We solder the positive wire of the eye into the free space, and attach the negative wire to the body.
When connecting angel eyes, the wires from them must be connected to part 1 “mother” and part 2 “father” (if the eyes should not be turned on together, but instead of the side lights, then part 2 should not be combined, but replaced with the eye wires)
For the “gentle” method (with automatic shutdown of the angel eyes when the low or high beam headlights are turned on), we need two PC 702 relays. The connection is made according to the diagram:
- We remove the yellow “positive” wire of the dimensions from the two-plug block.
- The “mother” terminal is secured with the “87” terminal on the RS 702 relay.
- We place the positive wire from the angel eyes on terminal “30/51”.
- We connect terminal “86” to the car body.
- With the low beam relay and the high beam relay (they are located under the right mudguard of the car), we make branches from terminal “86” and solder them to diodes D1 and D2.
- We connect the branches with diodes to terminal “85” of the RS 702 relay.
Connecting the eyes according to a gentle scheme will significantly increase the service life of the LEDs
Angel eyes look modern and attractive. But you need to think a hundred times before installing them on your car. It’s one thing when this “feature” is part of the standard kit of the car you are buying - in this case you do not risk anything. When it comes to tuning, it is important to ensure that the eyes meet GOST requirements for the color and brightness of the emitted light. Violation of the prescribed rules will result in deprivation of rights for a period of 6 to 12 months.
This is interesting: How to bind and reprogram an alarm key fob with your own hands
Making “angel eyes”
Holes for LEDs need to be made in the plastic rod on both sides. To do this, it is most convenient to secure the plexiglass in a vice and use a drill to make holes in it. You must act very carefully so as not to split the tube. It is best to set the screwdriver to low speed. The depth of the holes should match the LED bulb.
After this, the prepared plastic rod must be heated using a hair dryer or oven. However, you need to remember that organic glass begins to melt at a temperature of 160 degrees, so you shouldn’t be too zealous.
After the tube has become sufficiently elastic, you need to use pliers or wearing thick gloves to wrap it around a jar (or other container) and keep it in this position until the plastic cools and hardens again (about 3 minutes are required).
The result is a blank in the form of a broken ring. LEDs are inserted at both ends and secured with superglue.
At the next stage, you need to solder the wires to the light elements. They should be quite long so that they can be brought out behind the headlight without any problems. A resistor is soldered on one of the wires, after which a simple circuit is assembled to create an electrical circuit.
When all the internal work is completed, you can slightly improve the workpiece. To get a better and more stylish effect, using a drill with a thin diamond disk, you need to make even cuts on the rod (approximately every 0.5-1 cm). This will allow the light to be dispersed more evenly and achieve greater similarity with the “Boomer” headlights.
Important! When making notches, it is important not to press too hard on the tool. The depth of the cuts should be no more than ¼ of the total thickness of the tube.
After this you need:
- degrease the surface of the ring and headlight reflector;
- apply glue to the workpiece;
- press it against the reflector and wait until the ring hardens in this position;
- cover the headlight with glass and heat it along the seam using a hairdryer.
Healthy! In some headlights, the glass is secured with special latches. In this case, there is no need to heat anything.
The main and most complex work has been completed. All that remains is to connect the “angel eyes” correctly so that they work at the right moment.
Why do we need such headlights and how to choose them
The main role of “angel eyes” is aesthetic. A car with upgraded headlights attracts attention, especially at night. There is also a practical component: your car will become more visible to other road users.
According to the type of design, there are two types of “eyes”:
- LED or light-emitting diodes - work normally at sub-zero temperatures, have a long service life and, if connected correctly, rarely fail. Ready-made kits are expensive, but you can make them yourself and save several times. You can create “eyes” using plexiglass, LED strip or individual LEDs. The first option is the most accessible and least labor-intensive. We will look at this in our guide;
- CCFL or neon - they shine more evenly (there is heated gas inside the tube), but less brightly. They do not like frost and reach maximum brightness only after 2–3 minutes. To work, you need ignition units, which are fragility. The main advantage is the low price of ready-made kits.
The installation of “angel eyes” literally transformed the Lada Priora
How to make angel eyes like a BMW
“Angel Eyes” is a unique horse from a German manufacturer, loved by so many motorists. However, if you like this mesmerizing glow, you don’t have to buy an expensive foreign car. It can be done on almost any car. It is important that it has round front optics. For example, the domestic VAZ 21213 or VAZ 2106 have it.
But, of course, the design will be even better suited to foreign cars, including the same old BMW models that so lack the shine of their successors. In any case, the beauty and effectiveness of the new headlight bezel may attract the attention of traffic police officers. But if they stop you on the road, it will be purely out of interest - the driver will not face a fine for this.
Can there be problems with the traffic police when driving with angel eyes?
No country has a complete ban on the use of angel eyes, but there are restrictions on certain varieties. In Russia, a traffic police officer has the right to stop any car with additional lighting in the headlights and request confirmation that the car with such tuning has undergone maintenance, and the PTS contains an indication of the installed equipment. MOT will not be passed in two cases:
- If the requirements for the color of lighting devices are violated. According to GOST R 51709–2001, only white light-emitting devices are allowed to be installed in front. At the rear of the car, the reversing lights and license plate lights must be white, the light-emitting devices must be red, yellow or orange; retroreflective devices - only red.
- When the brightness of the emitted light is impaired. Paragraphs 6.1 and 6.2 of GOST R 41.48–2004 indicate that the intensity of low beam headlights should not be more than 750 cd in the direction of 34 degrees upward and not less than 1600 cd in the direction of 52 degrees down to the cut-off line. The maximum luminous intensity of all main beam headlights when switched on simultaneously must not exceed 225,000 cd.
As for making changes to the PTS about installed equipment, it is done according to the following scheme:
- Write a declaration application for the installation of non-standard equipment on your car and take it to the traffic police. Based on this application, a referral will be issued to the laboratory for examination.
- Take the car to the laboratory to undergo an examination to determine whether the new equipment meets GOST requirements (using the same parameters as when undergoing maintenance - angel eyes are checked for the color and brightness of the emitted light).
- Take the received certificate from the laboratory to the traffic police and receive a certificate “On the compliance of the vehicle with changes with safety requirements.” On its basis, amendments are made to the PTS and a new STS is issued. Only after this is it allowed to use the car with angel eyes.
The procedure described above applies only to tuned cars. For BMWs, where angel eyes are installed at the factory and they are specified in the technical documentation, examination in a laboratory is not required.
If a traffic police officer stops a car with angel eyes and finds out that the driver personally installed the lighting equipment and did not make changes to the title, he will punish the violator in accordance with Article 12.5 of the Code of Administrative Offenses. For illegal tuning, a motorist will be deprived of the right to drive a vehicle for a period of 6 months to a year. There is no monetary fine for angel eyes.
You can't drive on roads with purple angel eyes.
Be careful: selling and installing LEDs in headlights is not illegal. There is no point in blaming the stores that sold a set of colored or too bright eyes, or the craftsmen who agreed to supply them. Only the driver who enters the road with prohibited lighting equipment bears responsibility.
How to disassemble a headlight?
To disassemble the headlight, you need to separate the adhesive connection of its two halves. To do this, you need to heat it in the oven for about 10 minutes at a temperature of 150 degrees Celsius. It may take longer or less time for the glue to soften on different headlights. Before heating, you need to remove all fasteners from the headlight and metal parts that can get hot. Place the light in the center of the oven so that it does not touch the sides.
Once heated, remove the light from the oven and place it on a towel on your workbench.
Use a butter knife or flathead screwdriver to pry apart the two pieces of headlight. There is no need to twist the edges too much with a screwdriver, you just need to make a small gap and separate the two halves with your hands.
Take your time and do it slowly. You have about 20 minutes before the glue hardens again. The remaining glue will remain on the headlight halves and can be reused later when putting them back together. Be careful not to let any glue get inside the headlight.
It is better to work with the inside of the headlight with gloves so as not to leave fingerprints.
An industrial hair dryer can be used to heat the adhesive joint of the headlight (at 260 degrees Celsius). The advantage of a hair dryer is that the heat can be concentrated in a specific area of the headlight without heating the rest of the headlight. The hairdryer should be kept at a distance of 10–12 cm from the headlight and constantly moved. Heat the headlight joint in small 20 cm sections. Then insert a flat-head screwdriver and slightly split the headlight halves. Repeat the process around the entire headlight and remove the clear part completely.
Installation examples
The leaders in installation are domestic cars VAZ 2114, VAZ 2110, Priora. Among the foreign cars are BMW, Mazda 3, BMW E39, Ford Focus. They are also actively installed on motor vehicles, scooters, motorcycles, and ATVs.
..
BMW, BMW
BMW photo
BMW
VAZ 2114
Photo of VAZ 2114
Among domestic cars, the second place in popularity is occupied by angel eyes on the VAZ 2114, the first place is shared by Priors and VAZ 2106, which have round reflectors.
VAZ 2110
Eyes SMD3528 for VAZ 2110
Kalina VAZ
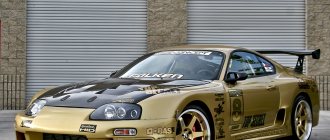
Mazda 3, 6 Mazda 3, 6
Among imported cars, angel eyes are popular on the Mazda 3, Mazda 3. They look especially chic on the Mazda 6, which has 4 circles in each headlight. The RGB LED rings will look interesting and will complement the dimensions of the turn signal.
Mazda 3
Mazda 6
Priora VAZ 2170
The most popular option in Russia is angel eyes on the Priora. The shape of the headlights is well suited for such tuning; the reflectors are round in shape.
Ford Focus, Kuga
The article consists of two parts, this is part No. 2. Read the beginning in part No. 1. How to choose LED eyes
DIY angel eyes installation
After the new lights are ready, you need to temporarily dismantle the existing ones to connect the wiring. Now install the diodes into the headlight housing so that they are almost invisible.
Installing angel eyes in a headlight
Solder the new contacts to the old ones, connect them into one “network” and connect it back to the main power supply of the car.
It is better to perform the installation at night or in the evening in order to fully appreciate the lighting. You may need more powerful LEDs or a good polishing of the headlight glass.
Where to install?
The main material for making the eyes will be neon tubes. The whole process is simple in words: the tubes are bent and installed in the headlights. But what are LEDs powered by? To do this, add an ignition unit. Some motorists use such modernization as replacing the dimensions and daytime running lights. And it is worth saying that the traffic police will not find fault, because... The glow is sufficient for both DRLs and dimensions.
The important point is connection. Each driver will deal with this issue personally, because... There are many ways to connect.
Experienced motorists recommend connecting angel eyes so that they light up along with the side lights. But in this case, you should turn off the front “dimensions”, because they do not look harmonious with the eyes. The best option would be to install marker lamps equipped with a rotary indicator.
The dimensions and diameter of the tubes can differ significantly from each other - this is an excellent design decision. But the classic method is to install the tubes in increasing order - this creates the effect of a powerful glow. It is also important that the driver can emphasize the front part of the body through different colors, because the LEDs include many shades.
Of course, the simplest option would be to purchase a set of “angel eyes” and then install it at a car service center. But if you are one of those drivers who want to try tuning your headlights yourself, then read on. In addition to job satisfaction, you can get an exclusive product, because the service station does such tuning according to the standard scheme.
Installing angel eyes on car headlights
The time has come to move on to, perhaps, the most unpleasant and unloved phase of the work, namely, the dismantling of the headlight glasses. But, unfortunately, there is no way without this. Remove the standard dimensions and be sure to plug the holes. Install the prepared diodes on top so that they are visible as little as possible. After that, attach it in place and check how the whole structure works. Be sure to do this in the evening or at night to really feel the effects. To prevent your impression from being spoiled by cloudy headlights, do not forget to polish the headlights first. We wrote earlier about different methods of polishing optics.
Finally, I would like to note that tuning, even if it is small, is a very responsible matter. If you are not confident that you can complete all or any part of the assembly, it is better to practice on something else first, or immediately seek help from a professional electrical installation specialist.
How to make angel eyes from scrap materials at home in the video:
Valve knocking on a hot engine: causes, repairs, consequences
- to Priora;
- Toyota Chaser 100;
- BMWs deprived of such a privilege;
- VAZ 2106;
- VAZ 2109;
- 2110;
- VAZ 2115;
- VAZ 2114;
- Renault Logan;
- Hyundai Solaris;
- Daewoo Lanos, etc.
Objectively, angel eyes look more advantageous on foreign cars. Although no one will forbid you to install such solutions on any machine.
To implement the task, you will need to prepare a slightly different set of materials and tools.
The following is required:
- double-density white LED strip, but without silicone coating;
- wires for connection;
- transparent silicone;
- glue;
- varnish (silver color);
- screwdriver;
- pliers;
- Have a good mood;
- extreme concentration and accuracy.
LED strips bend perfectly, which will allow you to easily make a ring of the required diameter. Just keep in mind that one headlight requires about 30-40 centimeters of tape.
Then the pads at one end are stripped to allow additional wires to be soldered there. They allow you to connect to a +12V power supply.
Next, a piece of tape is pointed onto a flat surface with the diodes facing upward. Gradually the tape is filled with transparent silicone. Do this slowly and carefully, armed with a mounting gun. This will allow you to coat the diodes with a uniform and even layer of silicone. It is important to wait for the resulting structure to dry completely, otherwise you will ruin everything with your own hands. Silicone will protect the product and act as a light diffuser.
To avoid wasting light illuminating the reflector, coat the back side of the tape with silver varnish. You can borrow it from your wife, sister or mother. Or buy it at your nearest store. The varnish will act as a reflector.
Homemade cars
I decided to make daytime running lights of the “Angel Eyes” type for my VAZ Kalina car.
The following photo shows the detailed process of making “Angel Eyes” with your own hands.
First of all, I purchased foil double-sided textolite; for production I will use the LUT method (laser ironing technology).
I printed out the board blanks on photo paper.
I combine the layers in the light under the lamp, and after combining, I fasten them with a stapler so that nothing moves. Then I put the textolite in the envelope.
I heat the iron over the paper so that the design transfers from the paper to the textolite.
I cut out the blanks with a jigsaw.
I etch the boards in ammonium persulfate.
After etching, remove the boards from the solution and clean the toner with a solvent. Copper remains under the toner.
We tinned the boards, for this we used Rose alloy. I drilled holes in the boards to connect the tracks on both sides with a screwdriver, the 0.5 mm drill broke, I had to drill holes with a 1 mm drill, but next to the tracks, because the diameter of the drill is too large and you can tear off the track, everything is in the negative track I still had to hit it with a drill.
I solder LEDs and resistors, the voltage will be reduced by the stabilizer to 9 volts, so the resistors are only suitable for 20 ohms. In total, for both headlights you will need 186 LEDs and 186 resistors.
I solder the LED, connect it with wire through the drilled holes, both sides of the board and solder the resistor, and so on 186 times.
If you leave everything like this, the glow points of the LEDs will be visible, so you need to install a light diffuser. I used a microprism. I bought it in a store, 2 pieces in a package. measuring 595 x 180 mm, which was enough for two headlights.
Marked it out and cut it out with a jigsaw.
I glue the body onto the light diffuser. The body was made from strips cut from a suspended ceiling lamp.
Let's check that everything works.
I glue it with two-component glue - Moment.
Smooth ignition scheme.
As a result, the author got these DIY Angel Eyes.
We invite you to watch the video of the author of the homemade product - the work of Angel Eyes on a VAZ car.
Homemade author: Evgeniy. Yaroslavl.
Share on social media networks
Popular homemade products on our website
- DIY buggy from Oka
- DIY rafting raft
- DIY tracked all-terrain vehicle: photo, video
- DIY chopper
- DIY karting
- DIY potato planter for mini tractor
- DIY motorized towing vehicle
- Homemade buggy with your own hands
- DIY car roof tent
- DIY buggy
- DIY chainsaw mower
- DIY dacha trailer
- DIY boat instrument panel
- DIY drift trike
Can I use red lenses?
Technically, the backlight can be any color, but don't choose blue and red. Traffic police officers regard the use of such colors in optics as an imitation of “flashing lights”, and will definitely want to talk to you about this. In extreme cases, they may even take the car to the impound lot. They react calmly to white, yellow or orange “angel eyes” (in most cases). Multi-colored lights are often considered by traffic police officers as a challenge and immediately cause an appropriate reaction.
What are the penalties for violation?
For those who like to argue, here are excerpts from the traffic rules.
clause 12.4 part 1 Installation on the front of the vehicle of lighting devices with red lights or red reflective devices, as well as lighting devices, the color of the lights and the operating mode of which do not comply with the requirements of the Basic provisions for the admission of a vehicle to operation and the duties of officials to ensure BJJ.
For those who are slow-witted, sanctions are provided in the form of fines:
- for citizens - 2.5 thousand rubles;
- for officials - from 15 to 20 thousand rubles;
- for legal entities - from 400 to 500 thousand rubles.
In addition, unauthorized devices and devices are confiscated. The violator also faces a ban on the operation of the vehicle with the removal of the seal.
Traffic police inspectors will probably issue a fine for such tuning.
INSTALLING ANGEL EYES.
Hi all. I decided to unsubscribe how I installed angel eyes.
Well, let's begin………in general, I purchased Angel EYES 4 gas discharge rings in our city.
Each ring had a separate ignition unit, which is very good. I didn’t really think about the sizes, since there wasn’t a lot of choice, I found out in advance whether it would be possible to return it back?, the answer was positive. I paid for it and went shopping in search of glue and spray because before purchasing I looked at a lot of links on the Internet for installation, the only thing I knew was what spray was needed (in order to paint the chrome panel in the headlight) I didn’t even know what kind of glue to use When choosing glue, the store recommended two-component glue. I believed it and took it.
After everything I bought, I headed to the garage for installation.
I removed the bumper because you can’t remove the headlights without this procedure, so I started disassembling the headlights, without experience, I tinkered with one headlight for about 2 hours, disassembled it with the help of an industrial hair dryer and screwdrivers. Having disassembled the headlight, I tried on the Angel EYES rings, small in size, like my original ones, the larger ones I didn’t shoot, without hesitation, I took the turbine in my hands, and having made a hole for a larger ring, I tried it on, and everything was fine. If you suddenly make a mistake, you shouldn’t be upset, that is, you make a cut not straight, crooked, at an angle, it’s not scary, the main thing is that the ring fits through and fits tightly, and then you can seal it with silicone, but I didn’t seal it with silicone, and so on normal After making the cut, we paint the chrome and wait for the paint to dry, glue the rings, check if your rings are shining and start assembling.
I connected the rings to the dimensions, that is, I cut the wires, wound the wires from the eyes to the wires from the dimensions, ran the wires from the eyes through the hole where the clearance light had previously been, and then assembled the headlight. I assembled the headlight using old sealant, then, just in case, I went over the contour of the headlight itself with selenium, and sealed the hole where the clearance was so that the headlight would not sweat from the nutria. I wrapped the ignition blocks together with adhesive tape, and the headlight was ready.
We do the same procedure with the second one.
On the second headlight, a friend helped me; with two pairs of hands, the headlight was disassembled much faster.
As I assembled the headlights, put them in the car, admired the result, I realized that something was wrong, and it was decided to tint the optics; I chose the lightest film from the dark ones.
When buying peepholes, ask to check the rings, there are new ones.
Unfortunately, I couldn’t take any photos of what glue and spray were used. But all this can be found in stores.
see the result above.
Thanks everyone for your attention. Good luck.
Snow chains or wheel bracelets: how they work
In general, installation and connection largely depend on the specific vehicle and its design features. But some general and very important points are worth highlighting.
To begin with, elements such as angel eyes act as an additional lighting device as part of the vehicle. Therefore, their presence falls under the requirement for DRLs. As you understand, these are daytime running lights.
And according to the rules, they should be turned on simultaneously with starting the engine, and turned off when stopping. Plus, the DRLs are required to turn off when the headlights turn on. This tells us that the connection of the eyes should be carried out according to the connection diagram for daytime lights.
One of the options involves using 4 female terminals and one five-pin relay. The minus from the eyes goes to the body, and the plus goes to the relay.
But it's usually easier to use the DRL controller for connection. It will not be difficult to purchase it at any auto electronics store. Here, just start from the diagram that comes with the kit.
Let me remind you of one important nuance. When using LEDs, a current stabilizer is used. If these are strips with LEDs, then a voltage stabilizer is used. But for CCFL rings you need an ignition unit.
Which angel eyes are better?
The question is ambiguous and difficult to answer. If you do not take into account manual assembly, then it is better to trust professionals who have already assembled similar headlights more than once. You can find a person who can make angel eyes to order very efficiently and quickly on any automotive forum or in social network groups dedicated to this topic.
It is recommended to contact people who have installed such lights themselves. They know how to select the right tubes, LEDs and take into account other nuances in order to achieve the maximum glow effect at minimal cost. In addition, they can show by their own example what the purchased angel eyes will look like.
Prefer to make your own headlights? Make sure to select a heat-resistant tube and LEDs with the appropriate light output. Angel eyes with a weak luminous flux will be practically invisible against the background of the main headlights. Very bright LEDs, on the contrary, will only blind oncoming vehicles and make it difficult for them to move on the road.
Step-by-step instructions for making “angel eyes” for cars
First of all, you need to remove the headlight and dismantle the glass. To do this, heat the edge of the headlight glass with an industrial hair dryer to warm up the factory sealant. As an alternative method, you can put the headlight in the oven for 10–15 minutes at a temperature of 60–80 degrees. Then carefully pry the glass along the seam with a flat-head screwdriver until it begins to separate from the headlight. Most likely, you will have to make some efforts, but without “fanaticism” (the glass may break off or burst).
Preheat the sealant and be careful - the glass may break off when removed from the headlight.
After disassembling the headlight, be sure to keep it clean. Use gloves and avoid getting any sealant or adhesive on the glass or reflector.
The next step is to measure the exact diameter of the required ring and select the appropriate shape. A tin can, bottle, cup or other round object is suitable for this. Just keep in mind that the plastic will have to be very hot for it to begin to bend, so use items that are resistant to high temperatures.
Use pliers and gloves to avoid heat burns
Heat the plastic with a heat gun or in the oven. Please note that the melting point of organic glass is 160 degrees, do not exceed it. Then use pliers to wrap it around the can. Do not let go for 2-3 minutes so that the plastic cools and takes shape.
Now cut off the excess ends and drill holes according to the size of the LED along the ends of the tube.
Drill a hole in each end of the tube
It's time to prepare the LEDs themselves. Connect their positive legs to resistors. As a last resort, you can do without a soldering iron by simply twisting the parts together and clamping them with pliers. But over time, the wire will become disconnected due to constant vibration, and then you will have to disassemble the headlight again.
Connect resistors to the positive terminal of the LED
Connect the negative legs together and further extend them with a two-core wire. Calculate the length so that you can connect to the contacts of the dimensions.
Solder together two negatives and an extension wire
Connect the two negative terminals to the extension wire. Watch the insulation so that the “plus” and “minus” do not connect. It's time to check the functionality of the design. The easiest way to do this is with a 9-volt battery. This can be done simply by connecting the “positive” and “negative” wires to the corresponding battery contacts. If everything is in order, then you can proceed to assembly.
Make sure all connections are secure
Finally insulate all contacts with electrical tape and insert the LEDs into the previously prepared holes at the ends of the tubes. Secure them in place with glue.
Insulate all contacts and connect the LEDs to the ring
For a more dramatic look, make notches on the back of the ring.
Photo gallery: installing LED angel eyes
Now place the finished rings in place. If adjustment is not required, then connect the contacts to the size wires and finally glue the ring. Use a two-part epoxy glue or something special for plastic. The main criterion is excellent adhesion strength so that the part does not fall off later due to constant vibration during movement.
Observe polarity when connecting
Avoid getting excess adhesive on the reflector. You can use small pieces of double-sided tape as an alternative method of fastening. But for good adhesion you need expensive adhesive tape, and its white parts will be visible when illuminated (depending on the design of the headlight).
We install the “angel eyes” in place
The last step is gluing the glass and installing the headlight in its intended place . Apply a moderate coat of sealant around the perimeter of the headlight and attach the glass.
Apply new sealant to the bonded area
Use clamps or other available tools to secure the glass in place. It should fit tightly and dry for about a day (see instructions for the sealant).
Drying time of the sealant is at least 24 hours
Video: how to install homemade “angel eyes”
Disassembling headlights
- First you will need to remove both headlights from the car. Remember how everything was attached and connected and collect all the fastening parts in some kind of container so that nothing gets lost.
- It is necessary to remove everything removable from them, since the headlights will need to be heated in the oven.
- In order to disassemble the headlights, they need to be heated and the sealant that connects the two halves softened. Preheat the oven to 130-150 degrees and place the headlight inside. It should stay inside for about 7 minutes. You need to be careful not to overheat the headlight. When removing the headlight from the oven, use an oven mitt to avoid getting burned. Instead of an oven, you can also use a hair dryer.
- Next, you need to immediately carefully divide the headlight into two parts. For more information about disassembling a headlight, read the article “how to disassemble a headlight.”
How to connect a voltage stabilizer (optional)
In the electrical on-board network of the car, the voltage “walks” from 12 to 16 volts. And LEDs do not tolerate such changes well. We soldered a resistor to each LED to regulate the voltage. But for more reliable protection you need a special stabilizer. It’s easier to buy a ready-made version and arrange it into a connection between the “angel eyes” and the on-board network of the car.
Factory version of the voltage stabilizer
If you are an “advanced” electrician, you can solder a simple stabilizer yourself. The L7812CV chip is used as a basis. See the photo below for the connection procedure.
The connection diagram is quite simple
According to this scheme, you need to connect the negative contact of the LED to the ground of the car, and the positive contact to the output of the stabilizer.
LED strip angel eyes
Rings with two LEDs have significant disadvantages. Firstly, they are open. Secondly, they are not bright enough to be used as daytime running lights. Angel eyes made from LED strips are free of such disadvantages. To make them you will need:
- plexiglass sheet 5-7 mm thick;
- blade from a hacksaw for metal;
- devices for cutting round holes of large diameter (ballerina);
- strip with a large number of LEDs per meter of length;
- scattering film;
- transparent glue;
- heat-resistant tape. Aluminum;
- soldering iron, solder;
- wires with terminals;
- heat-shrink tubing.
To begin with, future rings are marked on a sheet of plexiglass. Then they are cut out, first along the outer diameter. They should only be cut with a hand jigsaw or a ballerina. If you use a jigsaw, the plexiglass will melt at the cut site.
The resulting circle is checked in place on the headlight, if necessary, the size is adjusted. After checking, you can cut out the inside.
For better glow, the outside of the rings is covered with a special diffusing film. If it is not there, then you can make notches with a hacksaw blade or simply mat it with fine sandpaper.
Now you can install the tape. Before gluing, you need to carefully attach small cubes - six pieces will be enough - of plexiglass between the LEDs so that the distance between the diodes and the surface of the ring is about two mm. The tape is attached to the finished ring by gluing these cubes.
Before attaching the tape to the rings, you need to solder the wires to it and fill the soldering areas with silicone sealant.
The finished rings can already be checked by connecting them to a 12 volt power source.