On our forum, and on the forums of our auto repair friends, questions constantly come up about making a slipway for body repair in your garage. Many people try to make it with their own hands, but sometimes new knowledge is required, solutions to possible errors are required, and they have to seek help from their colleagues.
Usually two versions of homemade stocks are considered: mobile and stationary (concrete floor).
In this article, I tried to compile useful information from our forum, including: tips, drawings, photographs on making a slipway and to give an impetus to those who are not yet completely confident in their abilities and are afraid to start making it on their own.
Types of slipways and their main differences
There are 4 types of design:
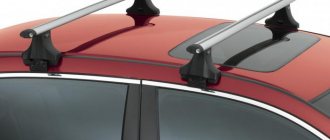
- Floor-standing. Standard rail mounted design.
- Roll-on. Small in size. Such structures are stored in a garage or workshop.
- Frame. Structures on chains designed for complete repairs and lifting the machine to a height.
- Platform. Designed for professional repairs. Suitable for large machines.
Floor structures
The floor slipway is also called stationary. Its difference is that there are rails on the floor that allow you to move the mechanisms. With their help it is easy to carry out body work.
The stationary slipway is convenient thanks to retractable mechanisms.
Floor structures have 3 advantages:
- They take up little space.
- They cost less than other slipways.
- Fast installation of transport.
The disadvantage is the complexity of installation of the structure.
A rolling slipway is a slipway that is used for light repair work if there is no full-fledged slipway or its use is impossible for some reason. The difference is that the rolling slipway is small in size - it is not necessary to roll the car up to it. You can bring the rolling slipway to the car.
This design has advantages:
- It is customizable for different types of cars.
- Possibility of equipping the device with hydraulics.
- The clamp fastening design has no analogues.
- Can be used with most types of machines.
- Compact size.
The disadvantage is that it is impossible to carry out complex work involving large distortions.
A distinctive feature of frame structures is the use of the frame as a base. The car is secured with chains. Most often this design is used for minor repairs. But, at the same time, the structure of frame stocks is more complex than others. They are equipped with grippers that allow you to fix the car body in the required position or even lift it to a certain height.
Platform models
The platform model is very similar to the trestle structure. It allows you to pull the car body in any direction. A lot of different equipment can be installed on the slipway platform. Pulling on a platform is very convenient, and the functionality is enough to make professional repairs right in the garage.
Operation of the power stand
A slipway can be made of any design; frame or platform are most suitable for such purposes. The main thing is to approach your work responsibly and show your own ingenuity. Understanding how to make a slipway is quite simple, and choosing the right material will help reduce the cost of its creation. To implement your own ideas, you should take the best of existing models. The operation of the slipway is designed for many years and such equipment will prove its practical usefulness more than once.
Step-by-step construction instructions
The construction of any home-made structures begins with the design stage. You need to make a slipway that is convenient to use. It is important that it does not take up too much space, blocking free movement.
The second point is always the creation of the structure's frame. The last point is to install fasteners and tightening devices yourself.
Drawings and dimensions
First you need to make suitable drawings. Ready-made options can be found below. The markings are made according to the dimensions of the vehicle. Afterwards the stage of preparation and selection of tools and materials begins. We will also need to make a mounting system large enough to fit our vehicle. It would be nice to cook it with the ability to change the height.
- Once all the drawings are ready and the materials have been selected, you can start working. First you will have to remove moisture from the materials and coat them with a primer. You can paint them right away, or you can leave this step for last.
- Now weld the metal corners to the base profile.
- Weld the profile (this will be the stand). It is secured with bolts.
- Now the chains, hooks and retractable devices are welded.
Frame making
The frame is responsible for fixing the car. Therefore, you need to be careful when creating it.
- Before creating the frame, you need to create the outer frame. It is to this that the frame will be mounted.
- A metal profile is suitable as a material. A stand and grips are attached to it (they are needed to fix the car threshold).
- Now the thresholds are being made. They are created from metal corners.
- Thresholds are installed on beams and secured with bolts.
- After installation, all elements will have to be secured by welding.
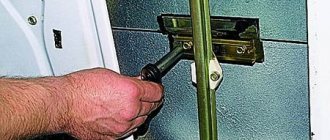
Fastening the body to the slipway
Clamps are required for fastening. If you can't buy them, make your own. You will need railway platforms (what the rails are attached to the sleepers). Each of the platforms is cut in half, and metal is welded onto the inside. It is cut into diamonds using a grinder.
You don't need to do anything to the outside. A plate 4 millimeters thick is also welded to the inside. It is important that the clamping device fixes the threshold and does not bend during use.
Installation of rack and pulling devices
Factory hydraulic attachments are suitable for racks and devices. If they cannot be purchased, a homemade mechanism will do. The power of the device should be from 1 to 2 tons. To attach the pulling devices, you need a pad. It is made from a channel and installed in the frame of the slipway. To place the tightening mechanism and chains in any place, it is necessary to make holes in the frame along the entire slipway.
If the stand is made independently, it is recommended to use a tower device. It is heavy, but the restoration of the car will be uniform.
Making a slipway is not that difficult. If you have basic knowledge of construction, you can easily do everything yourself. The main thing is to choose the right material and make the right drawings.
DIY body clamps
Guys, what do you think about this homemade clamp based on channel 12 (120 mm), width 40 mm, height shortened to 20 mm, M16 bolts. I also added a new configuration with a wedge
66
Hello. There's no need to waste time here. It’s better to make your own adaptations for the slipway and spotter, etc. Good factory metal lasts for many years. The file won't take it. But if the clamps are g... Then you can even throw the factory in the trash. They are of little use. They bend, the notch is eaten instantly. There are also quality Chinese ones. Now everything is Chinese. You need to look when you take it.
Yes, I later bought a factory one, it coped with its task)
Everyone here advises you to buy it because... metal G, out of idle curiosity I want to ask if it is possible to find high-quality metal or at an expensive price.
you can find it, you’ll just have to mill it from a solid one
Adaptation for a torture chamber?
yeah for a dentist
it would be funnier - for a urologist
The factory clamp solves the problem, this homemade product is complete bullshit, it won’t fit anywhere with scarves later. I use inexpensive tota clamp clamps, maybe you can find them in your region. I use chains from a coal conveyor. I cut one link as a connector, so far I haven’t been able to straighten it, although there are and minibuses and cargo cabins, and there’s a lot of metal there.
IMHO: the wedge should be made sharper...thereby the clamping force will be greater...well, the long sides of the “jaws” could be thicker...
only if you weld the front walls or weld the back mortgages
buy the real ones at the store... you'll suffer with the homemade gun... yes... they're expensive... but they work as expected...
It is advisable to change the operating principle of the clamp. A simple grab breaks the winch with a force of 250 kg. It is necessary with a wedge clamp, the harder you pull, the more the gripping jaws compress.
This one is much weaker than mine, it’s definitely for me to pull out the spar and not a jammed empty seam. rather weak
Mine is tested and pulls 2.5 tons, but yours is drawn and not tested. There is no justification for the assumption of weakness...
what does 2.5 tons mean and how is force measured?
winch 2.5 tons. which he pulled to the limit and tapped with a reverse hammer to relieve the tension... You are too self-confident.
It’s not a matter of self-confidence, the rigidity of the structure is simply not visible, all hope is in the thickness of the metal
It seems to me that the quality of the metal will not allow the idea to be realized. will bend. and if you cook it, it will weaken it even more. dangerous if it breaks
Idk. If it’s filthy ferrous metal, then at least cook it. trying is not torture. If it flies off once, we'll see. I'd rather buy a normal clamp
You can’t heat it, it will tear when jerking...
It seems to me that the quality of the metal will not allow the idea to be realized. will bend. and if you cook it, it will weaken it even more. dangerous if it breaks
What difference does it make what you cook?
The heating area is, firstly, smaller and the properties of the metal are completely different from those of the arc.)
yeah, and if it doesn’t warm up, it won’t cook
The heating area is, firstly, smaller and the properties of the metal are completely different from those of the arc.)
in this case, under such loads, welding is not very reliable. maybe I'm wrong. but taking risks is more expensive for yourself
The heating area is, firstly, smaller and the properties of the metal are completely different from those of the arc.)
not long ago I cooked a “miracle shovel” from 12 rods and a profile. I’ve already tried to pin and strengthen it. I cooked it semi-automatically - one horseradish bends and breaks. I never expected this. and all our construction ferrous metal is like this.
It seems to me that the quality of the metal will not allow the idea to be realized.
will bend. and if you cook it, it will weaken it even more. It’s dangerous if it breaks. Welding won’t have any effect, since the edges of the channel will be weakened, which are not involved in the work in any way, that is, it’s the same as taking the channel a few mm narrower.
a neighbor uses a Soviet household vice, having slightly modified it
can you take a photo?
The photo is problematic, the garages are cooperative, it’s hard to meet each other, but I’ll try to explain - these vices consist of two parts, one anvil with fasteners to the table, a clamp is screwed to the anvil, made according to the principle of tweezers with a spring, type “hand vice with a clamp”
And it's a good idea
look now added pictures
Okay, that's what I thought too.
The channel can bend inward in the center when you tighten both bolts in the center, thereby reducing the clamping force of the jaws and the fastening of the end bolt will deteriorate. A gap will appear between the channel flanges and they will bend outward. Maybe weld strips along the edges to create more rigidity?
like factory
Calculation of required materials
Before starting work on the manufacture of a slipway, it is necessary to complete its drawing and calculate the amount of materials required. The platform should look like a rectangle (or better yet, several) made of metal profiles with a cross-section of 50×50 or 70×40 (the thicker the better). The optimal length is 2000 mm, the width is equal to the width of the car's wheelbase.
Why was this width chosen? In general, it is possible to manufacture a slipway with a width equal to the width of the wheelbase of the car. Or smaller than it, but with extensions from the frame on which the clamps will be attached. The first method is preferable due to the location of the clamps.
In the middle of the platform it will be necessary to weld a stiffener from a similar metal profile. During the work, additional metal will be required, the amount of which is difficult to calculate at the initial stage of work.
After the calculation of the required amount of metal profile has been completed, it can be ordered from a special database or you can use an existing one.
To ensure the functionality of the slipway, it will need to be equipped with good hydraulics - a kit with a tonnage of up to 10 tons is suitable.
You also need to remember that there are two types of slipway: stationary (that is, installed in a specific place without the ability to move) and mobile (equipped with wheels and adapted for storage in a vertical position). If the second option is chosen, then you also need to purchase a set of wheels: 4 or more for the frame, 2 for the power rack.
Conclusion
One of the main features of the slipway is the preservation of the geometry of the body. Why is this necessary? Primarily due to a significant displacement of the front or rear track, wheelbase, etc. A sudden breakdown may occur, which, in turn, leads to dangerous consequences. During long-term operation of any car, a slight displacement still occurs, but this cannot be compared with changes in the geometry of the body after an accident or other major mechanical damage.
Making a slipway
The frame is assembled by welding. That is, skills in working with a welding machine are required.
Stages of work:
- First of all, a rectangle is assembled from a metal profile of the estimated length and width; exactly in the middle it needs to be reinforced with an additional profile. The frame is assembled as the future owner of the slipway deems necessary. He may want to further strengthen the longitudinal sides of the frame, perhaps the transverse ones. There is no definite principled position on this issue.
- To increase the stability of the car on the slipway, it is necessary to weld heights in its corners that will prevent the car from possibly sliding off.
- The next stage is installing fasteners on the longitudinal sides of the frame. Fasteners are clamps with jaws that are required to securely fix the vehicle frame when loads are applied to it. There cannot be a strict location for fixing the fasteners; they must be able to move along the entire length of the frame. Making clamps with your own hands is also possible, but if they are on sale, then there is little point in this, since a homemade clamp will cost about the same as a factory one.
- Next comes the installation of the power rack. The power rack is a device in the shape of an inverted letter L, which must also move throughout the frame and be securely fixed in any place. You can make not one, but two power racks.
- Giving the slipway an aesthetic appearance. This stage consists of ordinary painting of the slipway.
- Well, at the end of the work, the homemade slipway is equipped with those repair devices for which it was created: hooks, chains, hydraulics.
Communities › Homemade Garage Hi-End › Blog › Jig for welding motorcycle frames
Happy New Year, colleagues!
A couple of years ago I built a two-wheeled all-terrain vehicle based on an engine from a gas generator, and for this project a simple slipway was made for welding frames.
The jig held the headset and dropouts in place, holding them in position while welding while the main body of the frame was built around them. It is no secret that the frame itself can be arbitrarily curved and intricate in shape - the main thing is that the wheels of the future vehicle are parallel and in the same plane. Therefore, the main attention was paid to fixing the parts responsible for the future relative position of the wheels. This is what the slipway looked like in operation:
We encountered several inconveniences while working with it. Firstly, a slipway standing on a table is not always convenient, because it gets in the way of other work, and needs to be removed from the table when space is needed (and it’s heavy—you can’t remove it by yourself). Secondly, when welding a frame, you need to constantly walk around the slipway. And the larger the table, the more inconvenience. Thirdly, when welding a frame, sooner or later it becomes necessary to weld from below, and on our slipway this was associated with great inconvenience. It would have been easier to leave all the lower seams for later and weld them after removing the frame from the slipway, which is not very correct.
Having welded a couple of frames using this device, we decided to make a more advanced design. As planned, it should be collapsible, which will facilitate storage and transportation when moving. In addition, the collapsible design will allow you to quickly upgrade the slipway and supplement it with new elements as needed, or replace some parts with others. And, of course, the new design must be free of all previous shortcomings.
First, all the necessary fasteners were cut out with a laser. I apologize for the quality of the photo, unfortunately, there is simply no other