02 September 2015 Lada.Online 24 732 0
The windshield of a car is replaced if it becomes scratched, scuffed or cracked. The process is not complicated, but requires knowledge of certain skills. Replacement of fixed body glazing for all Lada cars (Granta, Priora, Largus, Kalina, Niva 4x4, Vesta or XRAY) and foreign cars is similar, the only difference is in the requirements for glue.
Prior windshield dimensions - VAZ Video reviews
Dear visitors of the “Video Reviews” site! We will be very grateful for your comments on the video clip “Prior windshield dimensions”; registration is not required for this. We also ask you to let us know if you have any problems playing the video.
105, 2 and 108, 1 diagonal.
Hi Vitaly, by chance it’s not 108.1 - 105.2 mm. It was meant ?
Hello everyone about GRANDFATHER
where is the male escort?
Bro, you’re somehow tired...... get a good night’s sleep...... or fuck off....
and the Priora is already quite rusty, the owner is clearly a drug addict if he wants to keep this non-galvanized coffin on wheels
Thank you, I took notes, I'll go try it on tomorrow
I couldn’t find the error, and I couldn’t find the left spar cushion bracket.
size 102, 2? in fact in the video it is 103.
from the center to the spar in the note 102, 2.. and you have 103, 3.. jamb
By the way, why don’t you want to put the burdock under the edge of the glass..? It’s better than doing the seam in front of the glass.
Hello Vilalya After your accelerated filming, you will definitely be dubbed either Vital a machine gun or Vital a jackhammer
Horror…. just a set of glands and not a spar.....
long live the domestic auto industry
Vital, share the secret of how you sharpen drills and what kind you use?
Frank defect and not spare parts. They say correctly that substandard products are being sold
I also have a treasured notebook somewhere, there were even drawings of some patterns there were all sorts of amplifiers that weren’t on sale, like the jet thrust bracket 2121 Thanks for the video, it’s really live, it’s like I’m doing it myself. True, I didn’t bother with two millimeters, somehow smart the client presented it, I had to show him a new one on the TOSH lift, there the run-up turned out to be greater.
Spare parts are essentially waste that is not suitable for the assembly line, so it is sent to the stores.
Vitaly the spar assembly does not come out of the factory as a spare part. A stick, an oyster, a jack and an amplifier come out separately, and then at companies, without any tools, they weld everything together on their knees and sell it as a spar assembly for a VAZ. That’s why there are such welding jambs.
can you tell me where to get the body dimensions for the Priora Hatchback?
How to change the windshield on a Priora
Windshield replacement
One of the most important factors for safe driving is good visibility. Well, it depends primarily on a normal windshield. Unlike the first VAZ "ten", the Priora's windshield is well thought out in its layout and does not hide the feeling of speed. Therefore, the car owner can only monitor the integrity of the glass and, if necessary, change it in a timely manner.
What types of glass are installed on Priora?
On previously produced VAZ models, two types of windshields were installed, like all other glass. It was:
- tempered windshield;
- glass - triplex.
What is the fundamental difference between these types of windshield? Triplex is made in the form of two-layer glass, in the spaces of which a thin but durable film is glued. Tempered glass is a glass of uniform formation and more transparent.
Tempered glass is much cheaper to produce, and therefore the price for the end consumer, the car owner, is correspondingly lower. However, at the first opportunity, all drivers tried to change the tempered windshield to triplex.
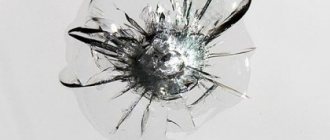
What is the reason? And the fact is that when a more or less massive object hits this glass, and even at speed, it simply bursts, showering the driver and passengers with a hail of cutting fragments.
Important! When buying new glass for a Priora, you need to make sure you don’t get a tempered windshield. Because they are cheap, they are still found in markets.
When examining the side part, the triplex is clearly visible in the middle layer of the film; you just have to look closely and not make a mistake when replacing it. This is a security issue.
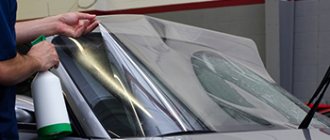
It would seem a strange question, especially against the backdrop of the ongoing discussions of traffic police (state road safety inspection) fines in the area of fines for tinting the windshield.
This protection also helps with sudden glare at night, reducing the risk of an accident. Therefore, moderate factory tinting, and even if it is a color close to the car’s paint, will not only not harm, but will also be beneficial on the road.
Windshield manufacturers for Priora
Deciding which manufacturer to choose when replacing the front windshield of a Priora is, of course, difficult. The fact is that there are now many companies on the market working in this area.
Therefore, it’s easier to remember a few simple rules: European manufacturers are quite reliable; Asia is China and Turkey, which are also the cheapest, but also unreliable. The original ones are always the most expensive, but at the same time the most reliable and easy to replace.
Therefore, before replacing the windshield on a Priora, it is worth comparing all these factors and thinking carefully about it.
How to replace the windshield on a Priora
You need to know that on the Priora, unlike VAZ models preceding the tenth series, the windshield does not have an adjacent rubber band. The glass is seated directly onto the adhesive applied to the body landing board. That's why it's called glued. This determines the set of tools and accessories for replacing the Priora windshield:
- metal brush;
- sandpaper;
- new windshield;
- Primer glue;
- surface degreasing liquid;
- stationery knife and string;
- special belt for glass.
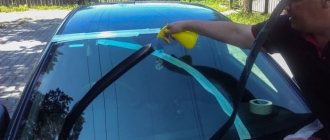
So, the first step is to remove the old glass. To do this, cut off the old glue along the contour with a knife or string, and then squeeze the old windshield out. Then carefully treat the surface of the seat with a brush, removing any remaining glue.
Attention! If necessary, precisely if necessary, sand the surface of the body. You shouldn’t do this just so as not to damage the paint.
Prepare a new Priora windshield for replacement, that is, treat the edges with a degreasing liquid. Clean the installation site in the same way. Apply Primer glue to the body where the glass will be installed, so that it protrudes 1 mm above the edge of the side of the seat. Install the fixing pads. Quickly install the new glass and press firmly.
It is better to do this together, since at the same moment you need to fix the tension belt, passing it from above along the glass around the pillars, and fix it in the cabin. Leave in this position for 24 hours.
Sometimes, to speed up the process, the gluing surface, after replacement, is heated with a hairdryer. But it is better to wait the specified time. After hardening, clean the glass and body from excess glue with a stationery knife. That's it, the glass has been replaced.
You can operate the Priora with a new windshield.
In the video below you can watch this process:
Replacing a Windshield on a Priora with Your Own Hands
According to search engine statistics, the question “how to change a windshield” is installed by thousands of Russian web users every month. This is not surprising, in principle, given the quality of our roads and the quality of our glass. Now I want to tell you how to replace a windshield yourself using the example of a VAZ 2110 house using available tools.
To do this you will need an assistant who will also:
- Glass gluing kit.
- Windshield.
- String with 2 handles.
- Primer and activator.
- White spirit.
I don't recommend skimping on windshield or materials. Intentional savings will certainly fade into the background a couple of years after installation in the form of chips, cracks, leaks in the rain and other problems. In addition, high-quality glue plays a very important role; much depends on its parameters and properties. In my own experiments I used dinitrol, terrozol, and sicaflex. at least one of the 3 options will provide you with reliability and a long service life, in short, you will not have any problems.
Before that, how to change a windshield The new surface must be prepared for installation and gluing. To do this, choose a spacious, beautiful place with good lighting and a temperature above 15 °, remove everything that may interfere with your work.
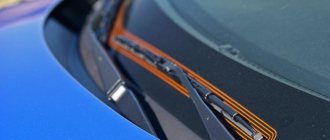
- Remove the windshield wiper blades and remove them.
- Remove the covers and the mounting screws.
- There are two “10” nuts on both ends of the frill, they fit under the cover, and they also need to be unscrewed.
- In the engine compartment, remove the rubber seal, then remove the screws that connect the sound insulation and the turnover.
- Secure the pad with the snap located in the center, pull it together with the cuff, taking 2 hands closer to the center.
- When lifting the protection, you need to cut off the clamp and hose for the washer, it is better to do this in some inconspicuous place, but it should be accessible in the end, the repair was easy to install an adapter there.
- If everything is unscrewed and there is nothing in the frill, remove it.
- Now you need to get the mold. To secure it to the rim and bottom of the glass, remove the two rubber triangle pads.
READ Suzuki Sx4 Key Battery Replacement
Replacing a windshield begins with dismantling the old one; to remove the old windshield, it must be cut. Read on to learn how.
>
VAZ 2170 / LADA Priora glass paste from one person
To cut the windshield you will need the line mentioned earlier. There are two types of cutting string. round twisted and square, the first is usually used for slicing, and the second. for slicing.
The principle of operation is common and resembles conventional two-handed ones: one end of the string is wound inside the cabin, and the other remains outside. The assistant's task is to pull one end of the string out or in (whichever is more convenient for him).
Warning! Study the angle of the string; it should only move along the edge of the glass.
I recommend that you stay outside and leave an assistant in the cabin. The assistant's job is to hold the string at an angle to the cut, standing on the right side, pull the string along the glass, pushing the end of the string upward slightly so as not to accidentally damage the body paint. As you approach the right corner, whoever is around the corner starts cutting the rope and starts cutting along the right post. The lower part of the VAZ 2110 windshield is better cut under the hood; an assistant located in the cabin must press the string very tightly against the glass so as not to damage the dashboard.
READ Honda Cr-V 1997 Timing Belt Replacement
When you're done cutting the glass, try to get the windshield, but don't forget to attach the antenna, which also needs to be removed.
Advice. To make it easier to cut out old glue, you can heat the cutting area with a household hair dryer, but be careful not to overdo it by melting the paint or plastic parts.
Before gluing and installation, it is necessary to prepare the surface by removing traces of glue and other residues from it.
How to replace a windshield with your own hands
- The old adhesive layer is not completely cut off. I recommend placing a small even layer on the frame to improve grip.
- Thoroughly clean all glass connections of glue, dust, sand, etc.
- Handle frame break using the activator.
- new VAZ 2110 windshield You must thoroughly clean the dust and then degrease everything correctly.
- Take the windshield and place it upside down, slide it over the molding, if it is loose, secure it with tape.
- Now turn the glass and go over the edge where the activator will be applied. White Spirit.
- Using a swab dipped in primer, mark a strip where the adhesive will be applied along the entire length of the casting.
- All the same steps should be followed regarding the glass frame clearance, and then allow the surface to dry for 10-15 minutes.
- We begin installing the windshield of the VAZ 2110. Load hot glue into the gun, then slowly, carefully apply glue to the surface about 1 cm wide.
Basically! If you do not have special suction cups from which glass is taken, it is better to apply glue not to the glass, but to the frame itself. Practice all of the following to install the windshield from the first sample.
READ Changing the Oil in the Automatic Transmission of a Volkswagen Jetta
1. Lower the front door windows and open the hood.
2. Having carefully lifted the glass, put your hand through the window gap into the cabin, control the process from the inside, holding the glass with your other hand at the bottom from the outside.
3. Slowly alternate hands, then move the bottom corners of the glass onto the lid and place it in the gap.
Basically! You don't need to use this method if you're comfortable doing it your way. The main thing. this is the end result.
4. The glue is applied 1cm wide, but in my case you may have a different brand of glue, so be sure to read the abstract on applying the glue, you may need to apply more or less.
5. Once the windshield is installed, install lugs at the bottom of the hole, which can be used to adjust the correct position of the glass.
6. Do not forcefully press the glass onto the stand.
when changing the windshield of a VAZ 2110 is done. get to the assembly, this is always done in reverse order.
All in all. The door cannot be slammed immediately after installation. If the car has excellent seals, the newly installed windshield may simply fall out or move. It is recommended to use the car after replacing the windshield no earlier than every other day, in particular, a lot of glue is required for proper drying.
That's it for me, now you understand how to change a windshield with your own hands . I hope everything is fine for you. Despite my experience and skills, I would like you to have the least amount of work to do!
Source
Replacement of windshield and rear glass
Replacing knock sensor Priora 16 valves
| You will need: a screwdriver, an awl, a knife, a set for gluing glass. |
| This is what the kit for gluing glass looks like. It consists of a tube of glue, a tube tip, an activator/cleaner and a primer. |
| There may be slight differences in the instructions for kits from different manufacturers. In this regard, when performing this operation, refer to the instructions for the kit you purchased. |
| Recommendation |
| To remove glued glass, it is convenient to use a steel wire. |
| 1. Lower the front door windows. |
| 2. Remove the front pillar trims (see “Body pillar trims”). |
| 3. Remove the hood (see “Hood”). |
| 4. Remove the windshield frame trims (see “Windshield frame trims”). |
| 5. Remove the two adjusting wedges (one shown, left). |
| 7. Use a screwdriver to pry off the edge of the side windshield trim... |
| 9. Remove the second cover in the same way. |
| 10. Remove the windshield seal and thoroughly clean it of dirt and sealant. If the seal is damaged or has lost elasticity, replace it. |
| 12. For ease of work, you can attach screwdrivers to the ends of the string, which will serve as handles. |
| 14. ...and remove the glass from the car. |
Attention: Take safety precautions when working with glass. If the glass is damaged, it may break unexpectedly
| 15. Cut off the old seam, leaving a thin layer of glue (1.0–2.0 mm). |
| 16. Install the seal on the new glass. |
| 17. Apply activator... |
| 19. Apply primer around the perimeter of the glass... |
Attention: Do not apply primer to old adhesive residues.
| 21. Apply glue evenly to the window opening (layer thickness 0.5 cm) and around the perimeter of the glass. |
| At the bottom of the windshield frame, two rubber pads are glued to the body, preventing contact of the glass with protruding body elements. Check their presence, otherwise the new glass may be damaged. |
| 22. Install the glass assembly with the seal on the car. |
| 23. Using adjusting wedges, achieve uniform gaps between the glass and the opening around the entire perimeter of the window. |
| 24. Press and secure the glass in any available way (for example, using masking tape). The glue polymerization period is at least 2–3 hours. During this time, the car should not be exposed to any external influences. Even abruptly closing the door can lead to an increase in air pressure in the cabin and, as a result, to tearing off the glass. It is advisable to start operating the car no earlier than 24 hours after gluing the glass. |
| 25. Replace the rear glass and side glass in the same way. |
Body MalfunctionsWindshield frame liningsSoundproofing of the engine compartmentFront bumperRear bumperFendersFront fenderSill platesHood (removal)Hood lockHood lock cableTrunk lidTrunk lid lockFront door trimFront door lockDoor opening limiterFront door glassFront window lifterFront door removalRear door trimRear door lockExternal New rear door handle Rear door glass Rear window lift Removing the rear door Removing the seats Replacing seat belts Outside mirror Rear view mirror interior Sun visors Handrails Steering column trim Floor tunnel linings Body pillar linings Luggage compartment shelf Sill linings Removing the dashboard Disassembling the dashboard Heater Removing the heater Heater radiator Replacing the windshield and rear window How to polish the body Anti-corrosion treatment
Replacing the windshield of Lada Priora, VAZ 2170, VAZ 2171, VAZ 2172
You will need: a screwdriver, an awl, a knife, a set for gluing glass.
This is what the kit for gluing Lada Priora glass looks like. It consists of a tube of glue, a tube tip, an activator/cleaner and a primer.
Note There may be slight differences in the instructions for kits from different manufacturers. In this regard, when performing this operation, refer to the instructions for the kit you purchased.
To remove glued glass, it is convenient to use a steel wire.
1. Lower the front door windows.
2. Remove the front pillar trims (see “Removing and installing the front pillar trims of the VAZ 2171 body”).
3. Remove the hood (see “Removing and installing the hood”).
4. Remove the Lada Priora windshield frame linings (see “Removing and installing the VAZ 2172 windshield frame linings”).
5. Remove the two adjusting wedges (one shown, left).
6. Open the front door and remove the door seal from the windshield pillar.
7. Use a screwdriver to pry off the edge of the side trim of the Lada Priora windshield...
8. ...and remove the trim.
9. Remove the second cover in the same way.
10. Remove the windshield seal and thoroughly clean it of dirt and sealant. If the seal is damaged or has lost elasticity, replace it.
11. Lightly pry the glass with a screwdriver, pierce the adhesive seam with a pointed tool (for example, an awl) and pull a string through the hole.
12. For ease of work, you can attach screwdrivers to the ends of the string, which will serve as handles.
13. Use a string to saw the glue line around the entire perimeter of the glass (you may need an assistant to perform this operation).
14. . and remove the glass from the VAZ 2170 car.
Warning Observe safety precautions when working with glass. If the glass is damaged, it may break unexpectedly.
15. Cut off the old seam, leaving a thin layer of glue (1.0–2.0 mm).
16. Install the seal on the new glass of the Lada Priora.
17. Apply activator.
18. . on the edge of the glass and the window opening around the entire perimeter.
19. Apply primer around the perimeter of the glass.
20. . and window opening.
Warning Do not apply primer to old adhesive residues.
21. Apply glue evenly to the window opening (layer thickness 0.5 cm) and around the perimeter of the VAZ 2171 glass.
At the bottom of the windshield frame, two rubber pads are glued to the body, preventing contact of the glass with protruding body elements. Check their presence, otherwise the new glass may be damaged.
22. Install the glass assembly with the seal on the Lada Priora car. 23. Using adjusting wedges, achieve uniform gaps between the glass and the opening around the entire perimeter of the window. 24. Press and secure the glass in any available way (for example, using masking tape). The glue polymerization period is at least 2–3 hours. During this time, the car should not be exposed to any external influences. Even abruptly closing the door can lead to an increase in air pressure in the cabin and, as a result, to tearing off the glass. After gluing in the glass, it is advisable to start operating the Lada Priora car no earlier than 24 hours later. 25. Replace the rear window and side glass in the same way.
Replacing Priora rear door glass repair
Lada Kalina windshield washer does not work
It is extremely rare to replace side windows on a Priora, and this usually happens for two reasons:
- Scratches on the surface as a result of constant friction and damage to the velvet
- Damage to glass - that is, its breakage, if it can be called such at all, since tempered glass shatters only into small particles
To replace glass you will need a minimum of tools, namely:
- 10 and 8 mm heads
- Extension
- Ratchet handle
How to remove the side window of the rear door on a Priora
The first step is to remove the door trim. The link above describes the procedure for the front door, but the back door will be even easier. After this, unscrew the two bolts securing the glass to the window regulator, as shown in the photo below.
Then unscrew another bolt that secures the gutter along which the glass runs. It is located on the far left side (if you look at the left door):
Then you can tilt the glass so that one edge is down:
We lower one edge down as much as possible, and thereby the upper corner as far up as possible, so that it looks like this.
Now, overcoming the resistance of the velvet covers (they do not need to be removed), we pull out the glass from the inside of the door for its subsequent replacement.
We finally take it out, and you can already replace it with a new one.
Of course, if you buy new glass in a store, then there will be no metal clip on the bottom to which the window lifter bar is attached. In this case, you will have to rearrange it yourself, carefully releasing this clamp, and then install it on the new glass. This procedure is not pleasant, so the ideal option is to buy used glass at a dismantling station, with the year of manufacture you need (this is not a problem to find) and in a condition even close to new.
Regarding the price. A new one costs from 450 for BOR white, and from 700 for BOR green, that is, athermal. But, as mentioned above, the original BOR with green stuff can be bought at a disassembly site for 300 rubles.
In what cases is it necessary to replace car windshields?
Rear glass types of Priora Sedan, Station Wagon, Hatchback or frontal models must be purchased taking into account the dimensions. The main part of the glass is standard, but there are deviations. Main reasons for replacement:
- deformation as a result of mechanical damage, constant contact with hot air;
- cracks (can also be on headlights);
- significant damage.
It’s not difficult to do the work yourself, the main thing is to work according to the scheme.
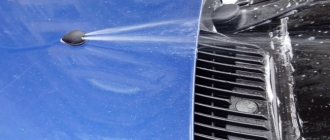
The main enemies of car glass are stones flying off the road and hail.
VAZ 2170 Rear window sedan body
18.8.1. Partial replacement of adhesive edging
| GENERAL INFORMATION |
| 1. REAR GLASS 2. SEAL |
| 1. REAR WINDOW 2. REAR WINDOW SUPPORT |
Removing the rear window seal (sedan body)
| 1. SEAL 2. REAR WINDOW SUPPORT 3. REAR WINDOW |
| 1. STRING |
| EXECUTION ORDER |
| 1. Remove the rear window trim by hand. To avoid damage to the paintwork, glue the body parts directly adjacent to the rear window with adhesive tape. |
| 2. Disconnect the electrical wiring from the rear window defroster. |
| 3. Using a seal removal knife, cut the sides and top of the seal as close to the edge of the rear window as possible. |
| 4. Rear window stops located at the lower edge, fig. Rear window stop. Insert a string from the outside between the glass and the body and, with the help of a second mechanic, cut off the adhesive layer along the lower edge of the rear window. |
| 5. Rear window from a car. |
| EXECUTION ORDER |
| 1. Window opening from the remains of all materials. |
| 2. Glass around the perimeter of the edge for subsequent application of preparatory layers. |
| 3. Wipe the windshield with a clean cloth soaked in alcohol. |
Install or attach
Windshield installation
Applying primer to the windshield
| 1. NEW BRUSH 2. PRIMER COMPOSITION |
| EXECUTION ORDER |
| 1. Using a new brush, apply preparatory layers along the edge of the glass using the appropriate compounds from the repair kit. First, apply a primer coat of a transparent composition, and then a black composition. Primer layers are applied along the perimeter of the glass edge (on the inside of the glass) in a strip 6 mm wide. Apply an even, continuous bead of adhesive around the perimeter of the glass and over the primer layers. When partially replacing the edging, the thickness of the roller should be 5 mm. When completely replacing the edging, the thickness of the roller should be from 8 to 10 mm. |
| 2. Rear window stops. |
| 3. Rear glass into the window opening with the help of a second mechanic. Center the glass in the window opening. The use of rubber suction cups can make glass installation easier, fig. Windshield installation. Press the glass stops towards the center of the car so that the rear window is in the correct position. |
| 4. Rear window molding by pressing it by hand. |
| 5. Check the tightness of the rear window seal by pouring water on it. If a leak is detected, the glass should be dried and an additional sealing compound should be applied. If the leak cannot be eliminated, you must remove the glass and repeat the entire installation again. Warning Do not direct a strong stream of water at freshly applied sealant. Water that gets on the surface of the sealant helps accelerate the polymerization of the urethane. |
Priora. .
| Priora : 3060 . |
| 4503A |
| XYG |
| LADA (110-SERIESS) PRIORA 99- |
| ∨ |
| ∧ |
| Priora : 3060 . | |
| 4503A | |
| XYG | |
| XYG-: | 2111 SW/RH/X |
| LADA (110-SERIESS) PRIORA 99- | |
| ∨ | |
| ∧ |
| Priora : 3060 . | |
| 4503A | |
| XYG | |
| XYG-: | LOGAN FD/RH |
| LADA (110-SERIESS) PRIORA 99- | |
| ∨ | |
| ∧ |
| Priora : 3060 . | |
| 4503A | |
| XYG | |
| XYG-: | 2110 LFW/X |
| LADA (110-SERIESS) PRIORA 99- | |
| ∨ | |
| ∧ |
| Priora : 3060 . | |
| 4503A | |
| XYG | |
| XYG-: | PATRIOT RW/H |
| LADA (110-SERIESS) PRIORA 99- | |
| ∨ | |
| ∧ |
| Priora : 3060 . |
| 4503A |
| XYG |
| LADA (110-SERIESS) PRIORA 99- |
| ∨ |
| ∧ |
| Priora : 3060 . | |
| 4503A | |
| XYG | |
| XYG-: | LARGUS RW/LH/X |
| LADA (110-SERIESS) PRIORA 99- | |
| ∨ | |
| ∧ |
| Priora 1995- : 3770 . |
| 4503AGNBL |
| XYG |
| 1995- |
| 1428×862 |
| WS2110GB 2110, 2111, 2112/PRIORA ( ) (1995-) //EURO: 4503AGNBL |
| ∨ |
| ∧ |
| Priora 1995- : 4320 . |
| 4503AGN |
| 1995- |
| 1428×862 |
| WS2110G 2110, 2111, 2112/PRIORA (1995-) //EURO: 4503AGN |
| ∨ |
| ∧ |
| Priora 1995- : 5080 . |
| 4503AGNBL |
| Pilkington |
| 1995- |
| 1428×862 |
| WS2110GB 2110, 2111, 2112/PRIORA ( ) (1995-) //EURO: 4503AGNBL |
| ∨ |
| ∧ |
| from Priora 2005- : 5140 . |
| 4503AGSM1B |
| Pilkington |
| 2005- |
| 1428×862 |
| () |
| WS2110GSM 2110, 2111, 2112/PRIORA (2005-) //EURO: 4503AGSM1B |
| ∨ |
| ∧ |
| Priora : 5360 . | |
| 4503A | |
| XYG | |
| XYG-: | 2110 FD/LH |
| LADA (110-SERIESS) PRIORA 99- .. | |
| ∨ | |
| ∧ |
| Priora : 5360 . | |
| 4503A | |
| XYG | |
| XYG-: | LARGUS RW/RH/X |
| LADA (110-SERIESS) PRIORA 99- .. | |
| ∨ | |
| ∧ |
| Priora : 5360 . | |
| 4503A | |
| XYG | |
| XYG-: | ST-2112 LFW/X |
| LADA (110-SERIESS) PRIORA 99- .. | |
| ∨ | |
| ∧ |
| Priora : 5360 . |
| 4503A |
| XYG |
| LADA (110-SERIESS) PRIORA 99- .. |
| ∨ |
| ∧ |
| Priora : 5360 . | |
| 4503A | |
| XYG | |
| XYG-: | LARGUS RD/LH |
| LADA (110-SERIESS) PRIORA 99- .. | |
| ∨ | |
| ∧ |
| Priora : 5360 . |
| 4503A |
| XYG |
| LADA (110-SERIESS) PRIORA 99- .. |
| ∨ |
| ∧ |
| c , Priora 2005- : 11100 . |
| 4503AGSHM |
| 2005- |
| 1428×862 |
| () |
| WS2110GSM Hz 2110, 2111, 2112/PRIORA (2005-) //EURO: 4503AGSHM |
| , |
| ∨ |
| ∧ |
. 2014.https://fix-glass.ru
Lada Priora glass replacement
By contacting a specialized company that offers to buy auto glass for a VAZ with subsequent installation, the client can count on the fact that they will select the most optimal windshield option, which will then be installed in strict accordance with the standards. The installation is completed in the shortest possible time: after just a few hours, the VAZ car can be used with virtually no restrictions.
Dear ladies and gentlemen, due to changes in exchange rates, glass prices may differ slightly from those indicated!
Prices for windshield, side and rear glass of Lada Priora
| OLIMPIA | 4625 rub. | 3795 rub. | — |
Didn't find glass for your car? Call Not all models of auto glass in stock are included in the site database.
When Lada Priora auto glass needs replacement
The windshield requires replacement most often because it is damaged by stones flying out from under the wheels of cars ahead. The newest VAZ car, and the most careful owner, are not immune from this.
In our specialized center you can buy a replacement windshield for Lada Priora.
Stages of windshield replacement for Lada Priora
Technologically, replacing the windshield of a Lada Priora consists of several stages:
- dismantling,
- treatment of the installation site,
- inserting new glass.
After removing the old auto glass, the frame is cleaned of any remaining adhesive and then degreased. At the next stage, a primer is applied to increase the adhesion of the glue and body parts. Then the new glass is installed and fixed well. Within an hour after the end of work, the VAZ can be used, making sure to adhere to the speed limit.
Still have questions? Request a call back!
Glass for Lada Priora
Priora is a family car. The safety of the car is always a priority for both designers and owners. The Priora is also positioned as a budget car, so cost plays an important role in the matter of repairs.
The cost of replacing the windshield on a Priora, as well as the rear and side ones, depends on several factors:
- Manufacturer. Original glass is supplied either directly from factories or through a distribution network. They are more expensive than non-original ones, but noticeably better quality. But in fairness, it should be noted that non-original glass is also manufactured in compliance with the technical standards approved for these products.
- Characteristics of glass. The strength and properties of the material directly depend on the production method. The most common today are double-glazed windows and silk-screen printing. Also, if the client wishes, it is possible to install double glass on the Priora; this is especially important in Moscow - in addition to strength, sound insulation increases.
- The work of a master. Experienced car enthusiasts know that the most profitable way to replace the side, rear and windshield of a VAZ 2172 in the South-Western Administrative District is through the trusted company XL General. There are highly qualified staff and the most reasonable prices.
By contacting us, you are guaranteed to receive a high-quality windshield replacement for your Priora, the price of which will be the most favorable.
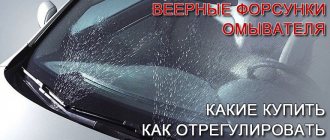
Heated windshield
Over time, warming up your car in winter and clearing snow and ice can get tired. How much incredible effort needs to be put into this, and besides, the surface of the windshield will be covered with microcracks due to the harsh impact of the scraper. It is worth considering a “softer” way to clear the car of snow and ice - if the windshield on the Priora is heated. In this case, all the frozen water will melt and you will not need to get out of the car to clean the surface yourself.
The usual windshield of a Priora car with a rain sensor and heated is produced by BOR. Eurocode – 4503AGSHM, price – 7,500 rubles.
There are other options for the Priora from which you can choose, it all depends on your preferences, even for example green auto glass, if that suits you best.
The standard size of the windshield of a Priora car is 1427-1428 mm. length and from 776 to 862 mm. width.
Windshield Lada Priora
For Lada Priora cars Economy class: Russia, China; Business class: Germany, Poland; Premium class: Japan, England; Guarantee on work performed up to 10 years We provide a guarantee from the manufacturer Installation of glass from 30 minutes We do it with high quality, and always on time
- Model year;
- Body type (Sedan, Station Wagon, Wagon, Jeep);
- Glass manufacturer (Russian, Chinese, European, etc.);
- Additional devices (rain sensor, emblem, etc.);
- Shade (green, bluish, etc.);
- Availability of a protective strip;
- Silkscreen printing.
Check the cost of glass by phone, our qualified specialists will offer both an economical option and glass from leading manufacturers!
Pre-register for installation by calling 8-985-769-87-66.
We are waiting for you at our installation center.
Lada Priora is a family of cars produced in Russia by the AvtoVAZ association. In 2007, the company launched Priora sedans; in 2009, production of Priora station wagons began. At the same time, Priors finally replaced Lada 110 cars from the assembly line.
The Lada Priora 2170 sedan is solid and visually appears larger than it actually is. The level of fit of the car body panels is characterized by minimal gaps and differences. The interior of the Priora is made in a modern style, starting from the original instrument panel and trim, ending with door locks equipped with a central lock, controlled by a remote control.
The windshield on Priora is made using triplex technology, which means the creation of three-layer glass using special technologies. Modern windshields are made with exacting precision.
The windshield on the Priora, like on other modern cars, is a technically complex, high-tech product that has been developed over many decades.
Types of windshields
The dimensions of the windshield, standard, and sensor-equipped windows are the same. Additional features and prices will vary. The most convenient way to select is by article number.
Standard
The most common glass without additional options. Installed on the factory rubber seal. The cost of the original glass model is approximately 2.5 thousand rubles; replacement will cost 2 thousand rubles if the work is done in a workshop.
Standard glass for Lada Priora may have a blue or green tint. The cost is 400 rubles higher.
Front windshield on Priora with rain sensor
The rain sensor automatically turns the windshield element and sometimes the washer system on and off. The essence of the operation of the unit is the refraction of an IR light beam. It passes through snow, mud, and water drops, coordinating the operation of a special photocell. The sensor can be rearranged after replacing the glass. The price of one product is from 5 to 9 thousand rubles, installation will cost 2 thousand rubles.
Heated
A product with a heating function can have different versions:
- heating of the entire working surface;
- warming up the working instrument area.
The principle of operation of the system is to heat thin filaments inside the glass. The unit operates automatically and switches off periodically, saving battery power and preventing overload of the on-board network. The ice crust thaws quickly in winter, providing good visibility and protection from fogging. Price – 6–10 thousand rubles, installation usually costs 2 thousand rubles.
There are combined models - with heating and a sensor; their installation will cost about 8-15 thousand rubles.
Replacing the windshield of a Lada car
September 02, 2015 LadaOnline 16 246
The car windshield is replaced if scratches, abrasions or cracks appear on it. The process is not complicated, but requires knowledge of certain skills. Replacement of fixed body glazing for all Lada cars (Granta, Priora, Largus, Kalina, Niva 4x4, Vesta or XRAY) and foreign cars is similar, the only difference is in the requirements for glue.
Preparing the car
Before starting work, you should remove the windshield (jabot), the plastic lining of the windshield pillars, the interior mirror, remove the upper door seal to a level above the windshield, and then the rubber glass trim.
Removing the windshield
You will need: a piece of string.
Procedure:
- We place the string behind the edge of the glass and cut off part of the sealant, moving from side to side (with an assistant).
- We pull one end of the string inside the cabin and continue to cut off the sealant around the perimeter of the windshield.
- We remove the glass from the car.
Place the string behind the edge of the glass and cut off part of the sealant. Pull one end of the string into the interior. Remove the windshield from the Lada car.
Windshield Installation
You will need: a sharp knife, a repair kit for gluing the windshield (read the instructions), a glue gun, a heated room (recommended air temperature 23°C, humidity 50%).
Procedure:
- We remove the remaining sealant; the permissible residual thickness at the seam is no more than 2 mm.
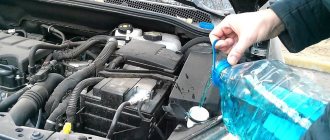
- We degrease the painted edges of the windshield with an activator.
- Degrease the edges of the body opening.
We remove the remaining sealant from the body. We degrease the painted edges of the windshield with an activator. We degrease the edges of the body opening.
- Apply glue around the perimeter of the glass, retreating 8-10 mm from the edge. The height of the layer should be 10-12 mm and the width no more than 8 mm.
- We place the glass in the body opening using suction cups. There should be even gaps between the side edges of the glass.
- Install the wedges from below so that the upper edge is pressed against the front side of the body roof. We press the glass to the body.
Apply glue around the perimeter of the windshield. Place the windshield in the body opening and install wedges at the bottom of the glass.
To prevent the glass from “sliding down”, secure it with three pieces of adhesive tape to the body 250 - 300 mm long.
The entire process (removing and installing the windshield) is also shown in the video:
After installation
Do not move the car or close the doors abruptly for 7-8 hours after installing the windshield.
The side windows should be kept open so that when the doors are closed there is no air pressure on the windshield. Work involving the application of force to the glass can begin 14 hours after gluing.
Optimal strength of the adhesive joint is achieved, depending on weather conditions, after 4-6 days. Reassemble.
Keywords: Lada Granta glass | glass Lada Kalina 2 | Lada Kalina glass | Lada Priora glass | Lada Largus glass | Niva glass | Lada Vesta glass | lada xray glass | universal article
00Found an error? Select it and press Ctrl+Enter..
About the size of the windshield wiper blades of the Lada Largus Checking the heated windshield of the Lada Priora Testing the heated windshield on the Lada Granta and Kalina 2
Windshield replacement: what you need to know when sending your car for service
Eh, it was good in the old days... When cars were simple, and handy car enthusiasts easily carried out repair work that would horrify a modern car user! As the famous joke goes, previously the car’s operating instructions included a method for adjusting the valves, but now they write that it is dangerous to drink antifreeze.
The windshield and rear windows are a clear example of fundamentally changed technologies. In the 90s, every second owner of the domestic automobile industry changed the windshield on his “swallow” using a simple soapy rope, and it never occurred to him to pay anyone money for it... But with the spread of glued glass, the procedure ceased to be a pleasant male entertainment under an evening beer in the garage, but turned into a difficult and rather painstaking work, requiring specialized tools, materials and a trained hand. So mastering this technique at an amateur level just for the sake of once and purchasing equipment has become unprofitable. It turned out to be more profitable and easier to pay specialists. But not everyone who calls themselves specialists really is.
Abroad, the first cars with a glued-in windshield appeared only in 1973 (Audi 100 in Europe and Oldsmobile Cutlass in the USA). We are more than 20 years behind in these technologies: our experiments with gluing began at the Gorky Automobile Plant - a trial small series of the Volga GAZ 3105 in 1992 became a test bench for running. Well, the Gazelle became a full-fledged production car with a sealed windshield in 1994. Two years after the commercial vehicle, passenger cars, the VAZ-2110, also received such glass. Today, glass with rubber bands is found on some commercial vehicles, agricultural machinery and various construction vehicles - on all passenger cars they are installed by gluing onto a sealant.
String
Cutting off the old glass before installing the new one is the most important procedure in the replacement process. And she is the most responsible.
Most universal car repair shops still use a classic tool for this purpose - a steel string with handles. The string is a hardened wire, most often with a square cross-section. This technology is very old and has not changed significantly over the years. The consumables for it are quite cheap - a 50-meter roll of string from a good brand costs about a thousand rubles, and is enough for many cars.
The string is threaded through a puncture in the layer of sealant between the glass and the body, and further along the perimeter until the glass is completely free. Most often they work together - from inside and outside the cabin. The danger of the string lies in the fact that along a significant length of its path it is cut essentially blindly. As a result, it often grabs along the way the plastic of the dashboard in the area where it adjoins the glass, the ceiling covering and the paint on the metal of the window opening. If it is still possible to demand compensation from careless workers for damage to interior trim elements, because they are obvious, then damage to the paint on the metal is usually hidden from the customer, and he only finds out about it when he sees a source of rust. Corrosion in the area of the windshield frame is extremely problematic; to eliminate it, you need to remove the glass again, clean it and locally tint the body - in general, everything is slow, expensive and offensive...
Therefore, when calling services in search of a place to replace glass, it is worth asking how they dismantle the old one. And, despite the fact that there are auto repair shops ready to take care of your glass within walking distance, it may be worth spending some time looking for a workshop that uses polymer thread. An example is Ezi-Wire® technology. This is a fundamentally different method of glass dismantling, an order of magnitude superior to the canonical manual cutting with a metal string. Ezi-Wire® is a special tool, which is a gearbox with pulleys and a handle, like a well-known manual meat grinder.
The device is attached to the windshield from the inside using powerful suction cups and pulls a cutting thread - not a metal string, but a special heavy-duty polymer FibreWire cord. For such work, the master does not need an assistant, whose actions may be asynchronous and inaccurate, the thread moves at an optimal angle and always evenly, and its material, most importantly, does not scratch the paint of the windshield frame and does not cause the risk of corrosion in the future!
Adhesive sealant
Another important factor in the work of automotive glaziers is the characteristics of the adhesive-sealant. First of all, the time of its polymerization. If you leave the car in the service until the next morning, then this does not matter significantly - compounds from many manufacturers, including quite cheap ones, harden in half a day + overnight. But this arrangement is not suitable for everyone - as a rule, a car is needed on the same day, and as soon as possible. However, manufacturers of even the highest quality glass sealants require that the machine remain motionless after gluing for at least two to three hours. After which it is allowed to drive it only at low speed and on a flat road, in order to avoid body distortions, strong vibrations that threaten to “slip” the glass, as well as slamming doors, causing sharp pressure surges in the cabin, tending to “push” the glass out. Any simplification of technology and acceleration of the process are fraught with the risk of leaks, distortions and complaints as a result...
A sane and contactable car service will not refuse information to a potential client and will tell you about the tools, materials and consumables used. Therefore, it is advisable to find a company that uses hourly sealant, for example, FastFit® or Optimum +Plus, the special composition of which allows you to start using the car within 1 hour after gluing the windshield. The requirements for careful movement, of course, remain even with it, but after installing the glass on the Optimum +Plus, you can safely leave the “glaziers” exactly in an hour, maintaining the guarantee for the work performed.
“Experience is the son of difficult mistakes”
Today, the procedure for replacing glued glass is an entire art, if, of course, it is done efficiently and not “garage-style.” To get to the adhesive seam, sometimes very difficult reinforcement work is required inside and outside - dismantling the interior trim, removing the plastic “jabot” around the wipers, etc. You need a good set of reinforcement tools, various protective shields that do not allow the shearing string to touch the interior trim, which are difficult or time-consuming to dismantle. Electric guns are needed to apply sealant in a perfect, continuous line of width; special holding hinges are needed to allow the glass to be positioned and lowered exactly into the right place if the master works without a partner.
Also, there is no single universal technological map for all this work, since car models differ significantly in design, and the masters of small car repair shops, even those who have more or less gotten their hands on mass-produced models, often encounter many cars (not necessarily premium and exclusive) for the first time. For example, the master did not understand where the hidden fastening piston was located in some plastic molding, and accidentally broke it... Do you want the glazier to get his first experience and hone his skills on your machine? I wouldn't want to...
The conclusion is simple! It is advisable to carry out glass replacement in specialized glass services that do nothing but glass. For example, in the centers of the international Carglass® network. Their craftsmen do not change oil, brake pads and shock absorbers between times, do not rebuild engines, do not paint bodies, and do not balance wheels. Their element is glass, and employees know everything about them, regularly undergoing retraining and certification. And, of course, they use Ezi-Wire® equipment with a polymer shear wire and super-fast 1-hour FastFit® sealant - replacing glass with such equipment on any car takes about one hour, but the work is guaranteed for ten years.
Yes, and one more pleasant detail: all Carglass® service zones do not hide anything from clients, and car owners can, if desired, be in close proximity to their car during work.
About Carglass®. An international network of service centers for the repair and replacement of automobile glass with its own service technologies. In Russia since 2010.
www.carglass.ru
Auto glass for VAZ PRIORA - buy windshields with replacement
invites you to buy windshields for VAZ PRIORA from the world's best manufacturers. We always have original and non-original auto glass for VAZ PRIORA in stock: front, side and rear. Replacement of VAZ PRIORA auto glass on the day of order in any area of Moscow - from 1,500 rubles.
Prices for auto glass for VAZ PRIORA in
model21202123LADA-110GRANTAKALINACLASSICALARGUSNIVAOKAPRIORASAMARA
cheapermore expensive
anylateralrearfrontal
Windshield LADA PRIORA 2007- Glass type: Windshield Manufacturer: BOR Eurocode: 4503ACL1B
Windshield LADA PRIORA 2007- Glass type: Windshield Manufacturer: SPEKTR Eurocode: 4503AGNBL
Windshield LADA PRIORA 2007- Glass type: Windshield Manufacturer: BOR Eurocode: 4503AGSBL
Windshield LADA PRIORA 2007- Glass type: Windshield Manufacturer: AGC Eurocode: 4503ACL1B
Windshield with rain sensor LADA PRIORA 2007- Glass type: Windshield Manufacturer: BOR Eurocode: 4503AGSM1B
Windshield LADA PRIORA 2007- Glass type: Windshield Manufacturer: PILKINGTON Eurocode: 4503AGNBL
Windshield with rain sensor LADA PRIORA 2007- Glass type: Windshield Manufacturer: PILKINGTON Eurocode: 4503AGSM1B
Heated windshield LADA PRIORA 2007- Glass type: Windshield Manufacturer: AGC Eurocode: 4503AGSH
Windshield with rain sensor and heating LADA PRIORA 2007- Glass type: Windshield Manufacturer: BOR Eurocode: 4503AGSHM
What else you need to know about windshields
They are often produced already tinted. Not everyone dares to purchase such an option, bearing in mind the long-term struggle of the State Traffic Inspectorate with tinting.
However, in reality, the law does not prohibit the installation of factory-tinted glass if their ability to transmit light is maintained within standard values. This option is quite convenient because it allows you to drive the vehicle normally when driving on a sunny day. Moreover, at night, tinting protects the driver’s eyes from the blinding high beams of oncoming cars.
To make your car look more attractive, you can choose glass to match its color; this option currently exists.
Which manufacturer's glass is better? Now products from Chinese and Turkish factories are supplied to the Russian market. There are also European ones, but they are correspondingly more expensive.
BOR glass is considered one of the best. In addition to the simple ones, we also supply:
- with rain sensor;
- with heating;
- with these two options at once.
They are quite expensive, but the reliability of BOR glass is much higher than, for example, cheaper KMC. Reviews of the latter indicate that a third of them are, on average, defective.