A crack or chip in the windshield is an unpleasant moment for every motorist, because driving with damaged glass becomes unsafe due to glare. In addition, the crack may become larger over time and in this case only replacement will help. Fortunately, new technologies are being created and windshield repair is possible. There are several effective ways to fix chips or cracks on your windshield yourself at a minimum cost. Read more about how to repair a windshield, and will be discussed in this article.
DIY windshield repair
Causes of glass damage
Damage to the windshield can be caused by various factors, ranging from mechanical damage or an accident to severe hypothermia in summer weather. But most often, defects on auto glass appear for the following reasons.
Sudden changes in temperature
Some inexperienced motorists get rid of ice on windows using boiling water, which leads to cracks. Also, such defects can occur when the element is severely overcooled in hot weather. To prevent such troubles, you need to avoid sudden temperature changes.
Glass cracked due to temperature
Body deformation
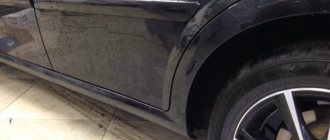
Deformation can be caused by fast driving on uneven roads, poor-quality body repairs, or the consequences of minor accidents. All this will sooner or later lead to the appearance of defects on the windshield.
Minor deformation of the car body
Articles on the topic
Do-it-yourself headlight polishing
How to remove rust from a car body
Small objects hit
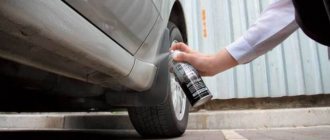
Quite often, various objects (crushed stone, gravel or spikes) fly out from under the wheels of cars. At high speed, they can damage the car’s paintwork or, if a stone hits the windshield, cause “bugs” to appear.
Pebbles hit the windshield
Repair it yourself or take it to a car service center. Advantages and disadvantages
| On one's own | At the car service | |
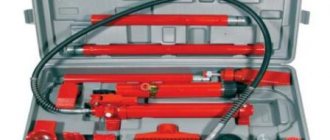
| pros | 1. If you have the skills to process the surface of a “lobovuha” and the necessary tools, repairs will cost less than in a car service center. 2. If you haven't repaired a windshield before, you can learn how to do it. And in the future, save money on windshield repairs. 3. You know exactly how well the work was done, because you did it yourself. | Professionals will work on sealing the glass. They have experience in repairing chips and cracks in windshields. The work will be completed in less than 1 day. |
| Minuses | 1. You need to buy a tool and master the technology. 2. Special solutions for filling damage take longer to harden on their own. It is not always possible to illuminate them with an ultraviolet lamp. | You need to look for a professional service that will provide quality repairs. Cost of work. |
Replacement and repair of windshield in a car service center
Car services provide repair services for windshield damage of varying complexity.
When long cracks and numerous chips occur, you need to contact a car service. There is no point in trying to repair it yourself in such cases. This is wasted time.
Attention:
If you try to repair a long crack yourself, you can harm both the car and yourself. Glass in which cracks are not repaired correctly will burst while driving. Airbags won't help here.
The service's professional craftsmen will do the job in 1–2 days. In 50% of car services, customers pick up the car 2-3 hours after they give it to the mechanic.
Cost of windshield repair at a car service center
The price of repairs at a car service ranges from 300 rubles to 5-7 thousand rubles. However, the high price of the work is associated with expensive car models. As a rule, the cost at a car service is comparable to purchasing a windshield repair kit or tools.
Some car dealerships have a set price for repairing a centimeter of crack. In them, the final cost of the work is calculated based on the length of the damage.
If you repair it yourself, the price will depend on the cost of tools and materials.
Note:
If the damage is minor, it makes sense to buy tools or a special kit and repair it yourself. The polymer mixture to repair damage is enough for 2-4 applications. This will save you money on subsequent repairs.
Diagnostic features
Even if minor damage appears on the glass, you should not panic right away. This can all be repaired. Of course, the effectiveness of repair largely depends on the size of the crack or chip, so diagnostics are initially needed. Inspect the defect and assess the damaged area to assess the plan for further work.
Windshield diagnostics
If the crack is single, then you can deal with it yourself , without resorting to the help of specialists. But if there is multiple damage, then you need to consult a specialist. It is likely that restoring such glass will cost much more than replacing it. Once the decision to repair has been made, you can begin the preparatory stage.
Inspection of a crack in the windshield
What is needed for repair
To eliminate chips and cracks on the windshield, you need to prepare a minimum of repairs. What is included in this repair minimum is described in the table below.
Table. Automotive glass repair equipment.
| Inventory, photo | Description |
| Flashlight and mirror | Needed to identify possible air bubbles in the polymer. You can also use a flashlight to determine the boundaries of the damaged area. |
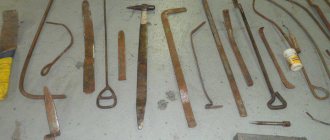
| Bridge and injector | Designed for introducing optical glue onto a damaged surface. It is advisable to use a metal bridge, since they have no restrictions on the period of use. |
| Scriber | A special tool used to expand the damaged area. Also, using a scriber, the glass is cleared of tiny fragments. |
| Ultraviolet lamp | An ultraviolet lamp is used to accelerate the hardening process of the polymer. It makes auto glass repairs much faster. |
| Drill | An electric drill is needed to drill holes along the edges of the cracks. Along with the drill, you also need a diamond drill. |
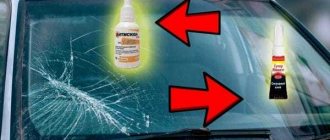
| Liquid polymer | Glue with a short drying time is excellent for repairs. The polymer must be transparent, just like glass. |
Note! To treat glass, you need cleaning fluid and wipes. Without pre-treatment of the glass, the polymer will not be able to strengthen sufficiently.
Windshield Crack Repair
To prevent damage from spreading further during the work, remove excess stress. To do this, step back 2-3 cm from each end of the split and drill small recesses from each edge (not through).
- Apply repair compound generously to the film strips along the entire length.
- Using a syringe, fill the crack with polymer adhesive material from bottom to top in one direction. Pump it under pressure into the drilled holes.
- Apply film to the surface of the defective area of glass and carefully smooth it out. Remove excess glue immediately with a clean napkin.
- Place the UV lamp at a distance of 10–15 cm. Leave to act on the resin for 25–35 minutes. If there is no special lamp to initiate the clutch reaction, move the car under sunlight.
- After the composition has completely set, remove the film and remaining glue using a blade.
Avoid the formation of air bubbles. If this happens, try to push them out using pressure. If the polymer material quickly adheres, try heating it slightly with a lighter.
We recommend watching a video about crack repair:
Depending on the chosen polymer composition, it takes from 10 to 48 hours for complete curing. During this time, operation of the vehicle is not permitted.
Windshield repair
There are several important conditions when repairing a windshield. First of all, you need to make sure the quality of the polymer used. The fact is that not all products from well-known manufacturers are suitable for our harsh climate. But as soon as everything is at hand, you can start working. The processes for repairing chips and cracks separately are described below.
Repairing a chip on the windshield
It is worth noting that repairing chips is much easier than eliminating cracks. Moreover, you can buy special tools for repairs in auto stores. Below step-by-step instructions describe the repair process in detail.
Step 1. To work, you will need a special kit for repairing windshield defects. You can purchase such a set at any auto store.
Windshield repair kit
Step 2. Inspect the syringe and make sure that the adhesive substance in it has not frozen.
Liquid polymer in a syringe
Step 3. You will also need sticky circles, an adapter and a pin.
Sticky circles, adapter and pin
Step 4. The chip is small, so our kit can easily handle it. Before work, clean and degrease the surface.
Cleaning the glass surface before repair
Step 5. Stick a plastic circle on the windshield so that the chip is in its center.
Fixing a plastic mug
Step 6. Glue the plastic adapter on top and press it firmly for a few seconds.
Gluing a special adapter
Step 7. Insert the syringe with polymer glue into the adapter.
Installing a syringe with polymer glue
Step 8. Pull the plunger out of the syringe to a certain point. At this moment all the air will come out of the chip.
Creating a vacuum in the cleavage cavity
Step 9: Lower the piston by applying slight pressure. Then repeat the procedure 4-5 times or until no air bubbles come out.
Lowering the syringe plunger
Step 10. All information is provided in the instructions. Once all the air is out of the chip, carefully trim the Velcro from the windshield.
Detailed instructions for repairing a chip
Step 11. This is what the chip looks like after the repair procedure.
Windshield after chip repair
Step 12. The polymer takes quite a long time to dry in the sun, so use an ultraviolet lamp if possible.
The windshield is ready
Auto glass crack repair
There are many similarities between repairing a crack and a chip in your windshield. But in the case of cracks, the process becomes more complex and painstaking. All actions, conditionally divided into several stages, must be performed indoors.
Step 1: Carefully inspect the crack to determine the drilling point.
Inspection of the damage site
Step 2: Make a small indentation.
Mark on glass for drilling
Step 3. Drill a hole no more than 1.5-2 mm deep.
Making a small indentation
Step 4: Thoroughly clean the surface with a brush. You can use an old toothbrush.
Cleaning the surface with a toothbrush
Step 5. Insert the scriber into the hole you made and lightly hit it with an object. This is necessary to obtain a bull's eye.
Getting the bull's eye effect
Step 6. Lightly press the hole from the inside until a characteristic click appears. This is necessary so that the crack reaches the “bull's eye”, that is, the drilling point.
Pressing the hole from the inside
Step 7: Drop a little glue onto the crack to see how it will fill.
Applying polymer to a crack
Step 8: Continue filling the crack with polymer. Do everything carefully, using a little glue.
Filling a crack with liquid polymer
Step 9. Glue the spilled areas with special translucent plates.
Gluing a translucent plate
Step 10: Fill the crack in small sections until you reach the bull's eye.
Filling a crack with glue
Step 11. Now drop a little polymer on the border of the filled and unfilled area, and then lightly press the drilled hole from the inside.
Pressing the drilled hole from the inside
Step 12: Continue pressing down on the inside of the glass until the entire cavity is filled with glue. This is a slow process, so you need to be patient.
Pressing the glass until the crack is completely filled
Step 13. If necessary, add another drop of polymer composition.
Application of polymer composition
On a note! You can’t drip on the bull’s eye itself yet, as it serves to remove air from the crack.
Step 14 : Install the injector. It must be installed in such a way that the drilled hole is exactly in the middle of the rubber band that is located in the injector itself.
Installing a bridge with an injector
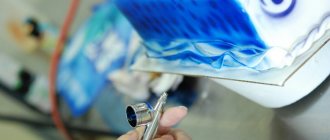
Step 15. Fill the injector itself with a few drops of polymer, and then screw it back in, as seen in the photo.
Filling the injector with polymer
Step 16. Wait 3-5 minutes until the polymer from the injector fills the hole in the windshield.
Filling the bull's eye with polymer
Step 17. Remove the injector and apply a translucent plate.
Installation of a translucent plate
Step 18. Install an ultraviolet curing lamp.
Connecting an ultraviolet lamp
Step 19. After polymerization, remove excess polymer with a special blade.
Removing polymer residues with a special blade
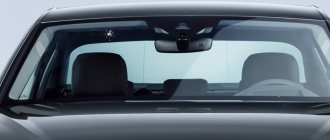
Step 20. The repair is complete. As you can see in the photo, it is impossible to see traces of a crack with the naked eye.
This is what the windshield looks like after repair.
Main types of adhesives for auto glass, classification by composition
Car glass adhesive can have different compositions, which determine the degree of its transparency, quality of fixation, and scope of application.
A popular option is polyurethane adhesive; it is often used in professional car repair shops for various purposes, including gluing visor frames.
This glue requires careful preparation of the base before work and the mandatory use of a primer (primer), otherwise leaks will quickly appear along the contour of the part and areas of corrosion will appear.
In addition, to seal and insert auto glass, craftsmen use the following compounds:
- Balsam. In appearance it is a glassy mass of yellowish color. The product is made from fir resin and is used to hold together fragments and seal holes in car windows. The glue dries quickly, has good penetrating ability, and is resistant to high temperatures. In addition to its advantages, it has a significant drawback - yellow spots may appear on the surface.
- Balsam M. Made on the basis of the previous one, but better in terms of strength, water resistance, and durability. The glue is transparent, does not leave stains, and does not deform after drying.
- UV glue. It is a transparent sealant for gluing car windows, flowing into even the smallest cracks, allowing you to remove chips of any size. Curing of the composition requires exposure to ultraviolet radiation.
- Acrylic glue. Ideal for DIY glass repairs. It has excellent viscosity, does not spread, and is very easy to apply to the surface. The downside of the product is long drying (up to 3 days).
- Silicone sealant. It can be black, white or transparent, it works like an elastic seal: it allows you to solve the problem of leakage of a self-inserted windshield. It can be produced in tubes, pistol cylinders, sprays. The latter are usually used in hard-to-reach areas, are convenient to use, but have a fairly high cost.
Some drivers try to remove a chip or other glass defect using regular superglue. But contact adhesives are not suitable for this type of work: after drying, they make the glass cloudy and stain it. If vibration occurs while driving, the crack will spread further, because superglues have low elasticity.
Types of adhesives by purpose
Auto glass adhesives vary depending on the application. In each specific case, you need to choose exactly the right product, because adhesives for installing glass differ in properties from compositions for sealing cracks. Two groups of such funds are described below.
For glass installation
These adhesives are used specifically for installing the windshield when it is completely replaced. Mounting compounds have successfully replaced rubber gaskets for fastening static glass. They increase the strength and tightness of the joint. After gluing the glass, the risk of it flying out in an accident is reduced, and the rigidity of the body increases.
To eliminate defects on glass
Such means are called repair or optical. After curing, their main advantage is that the optical properties of the seam are identical to those of the glass itself. Simply put, good adhesives remain crystal clear after curing.
Optical adhesives have high fluidity, which allows them to penetrate even small cracks, and they are resistant to water and ultraviolet radiation. Typically, repair adhesives are sold as part of a do-it-yourself kit, which additionally includes:
- transparent film;
- metal needle;
- dispenser;
- frame with suction cups;
- blade.
With the help of such a repair kit, you can easily repair defects and chips at home, following the instructions.
Rules for choosing adhesive for auto glass
To repair windshields, you need to use compounds that provide maximum bond strength. Experts recommend that beginners choose high-density adhesives, which, when dry, give the highest quality results. Also, the product must indicate its good penetrating ability, otherwise it will not be able to repair microcracks in the glass.
To choose the right glue, you need to pay attention to the following characteristics:
- degree of transparency;
- resistance to UV rays;
- elasticity, ability to withstand vibration;
- frost resistance and heat resistance;
- resistance to temperature changes.
You should also make sure that the glue has a normal shelf life and that it contains polymer resins. For a small, shallow scratch, you can choose a very thick glue, since sealing the defect does not require a high degree of penetration of the composition deep into the surface.
For cracks of significant depth and length, products with the highest degree of adhesion are purchased. If the defect exists for a long time, the repair may not bring the desired result, since it will not be possible to completely clean the crack from dust.
In such a situation, it is better to contact a professional car service center.
Advantages of adhesive sealant
Windshield sealants are popular among professionals and hobbyists. Here are their advantages:
- Elasticity. Since glass undergoes heating and cooling every day, its fastening compounds contract and expand due to temperature changes. The integrity of the seam will be preserved only by an elastic means, which will not lose the reliability of fixation when the condition changes.
- Shock absorption capabilities. The adhesive seam is quite elastic, so it helps to partially dampen vibration and shock during movement.
- Fast drying. This property allows you to start using the car after just a couple of hours, because the adhesive seam will be completely hardened. Due to their high drying speed, sealants compare favorably with polyurethane adhesives.
- Ease of use. Even a beginner can apply sealants. To work with them, you do not need to purchase additional equipment. Most of these adhesives do not require the prior use of a primer.
The best adhesive mixtures for installing auto glass
In any specialized auto store you can find a whole list of adhesives that are suitable for installing and repairing glass. By article number, any of them can be found in online stores. It is important to choose only products from trusted manufacturers who have no complaints about quality. Here is a list of good adhesives:
- Terostat Henkel;
- DoneDeal;
- Loctite;
- Scotch-weld Rite;
- Permabond.
Most manufacturers produce both individual adhesives and kits for auto glass repair. Silicone-based sealants are in great demand, as are ultraviolet adhesives, which quickly harden when the seam is exposed to sunlight. To reduce drying time, professionals additionally use UV lamps with a wavelength of 250 Nm.
Rules for gluing the windshield
To carry out the entire process correctly, you need to meet a number of conditions and prepare the foundation. In the room where the work will be carried out, the temperature should be within +5...+20 degrees, the optimum is about +15 degrees.
Before starting operation, you must not touch the car for at least an hour; its doors should not be opened or closed during this period. The car must be parked with the side windows of the front doors down. It is undesirable to open the door of the premises within an hour, otherwise there is a risk of deterioration in the quality of the seam.
After sealing the glass, you can wash your car no earlier than 2 days later.
Immediately before starting crack treatment, you need to do the following:
- thoroughly wash and dry the glass;
- remove all contaminants from the crack using convenient devices, needles;
- remove remnants of old glue, sealant, if any;
- degrease the crack with solvent, acetone;
- apply glue according to the instructions;
- level, remove excess with a scraper;
- dry the defect area;
- perform polishing.
If you have to completely replace the glass, the order of work will be as follows:
- Cutting the windshield (the work is carried out with an assistant). First, you need to carefully pierce the layer of old glue that is between the glass and the body, using an awl with a string threaded through it. Use pliers to pry the string from the reverse side, then pull the awl back. As a result, one side of the string will be located in the cabin, the other - outside. Attach the string to any handle so that it is easy to pull.
- Glass cutting. Carefully, so as not to scratch the car, pull the string along the glass from the outside. An assistant must pull it out of the cabin. In the corner, bring the string up, repeat cutting along the side and then until you return to the starting point. Take out the glass and remove any remaining glue.
- Preparing new glass. Fix special Velcro on the left side of the glass; the product will rise and fall on them. Repeat the manipulations on the right side of the windshield. Attach masking tape to the gluing area. Degrease the glass with a solvent.
- Applying glue. To work with the composition, a pneumatic glue gun is usually used, which begins to operate when the trigger is pressed. Thanks to the gun, the adhesive layer will be even and continuous. You should carefully squeeze the glue out of the tube, moving around the perimeter. The glass should be placed on a flat surface, for example, on the hood.
- Windshield installation. Take the product by the Velcro and place it in its proper place. Tape the top to temporarily secure it. Leave the car for 1-3 hours to achieve complete polymerization of the composition. Next, drive the car outside, leave it for another 12-20 hours, and only then start using it.
If a crack appears while driving
On the freeway, even the most careful driver is not immune to pebbles hitting the windshield. And if such an unpleasant phenomenon as a crack in your car glass catches you on the road, then you need to follow a few simple rules. First of all, you need to reduce the speed of the car to a minimum so that body vibration does not aggravate the situation. Also, to eliminate temperature changes, it is necessary to turn off the windshield defroster.
Windshield repair
The “twisting” effect of the body puts additional stress on the damaged glass, so when choosing a route, preference should be given to the most flat road possible. Therefore, driving on rough terrain is not advisable. Once you get home and examine the extent of the damage, you can begin car glass repairs.
What to do if a crack appears on your windshield
How to avoid windshield damage
There are several recommendations that, if followed, can reduce the likelihood of cracks and chips on the windshield:
- Maintain a maximum distance from trucks on the road. The same goes for cars with the “Ш” sign;
- avoid driving on uneven roads, especially in a car with a hard suspension;
- If even small pebbles get into the glass, stop immediately and inspect its surface;
- when replacing a windshield, give preference to original parts;
- monitor the operation of the air conditioning system to prevent sudden temperature changes;
- Adjust the heating power of car windows smoothly in winter.
How to avoid catching a stone in your windshield
Compliance with all these rules will not give a 100% guarantee, but will significantly reduce the likelihood of defects appearing on the windshield. Good luck on the road, dear motorists!
The most popular products for car glass repair
Any car store offers a variety of adhesives that are perfect for repairing or replacing windshields.
You can find any product by name in the virtual store. It is important to purchase only the best sealants from well-known companies that have proven themselves.
Here are the main ones: Terostat Henkel, DoneDeal, Permabond, Loctite and Scotch-weld Rite. Manufacturers supply the market with individual adhesives or kits for removing glass.
The most commonly used sealants are silicone sealants and UV adhesives, which dry quickly under ultraviolet rays. To shorten the drying process of the product, buy special lamps with a wavelength of 250 Nm.