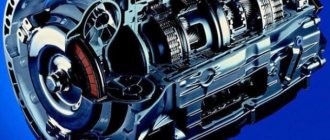
You should understand the terminology so that it is clear what will be discussed later. It is impossible to isolate the power plant itself directly, therefore the concept of engine sound insulation is incorrect from the point of view of an engineer. This expression came from the people and became a household word. Therefore, it is correct to say - soundproofing the engine compartment.
When developing a car, engineers strive to make the noise in the cabin as quiet as possible when driving. Studies show that most of the noise comes from the engine. Some owners don't mind this, but rather like it. But there are also owners who would like not to hear the sound of the engine. Therefore, sound insulation of the engine compartment from the engine side is a priority for them. Below we discuss how to do this work and what is needed for this.
Important information
Insulating the engine compartment is a complex engineering task, especially on a completed vehicle. Everything is complicated by the fact that there are many details to be sorted out. But the work spent on it is worth it. After all, this way you can achieve a reduction in the noise level in the cabin by 2 times or more.
Please note that motor noise arises not only from its operation, but also from problems in its mechanical parts. This is true for older cars. After all, increased wear of moving parts leads to additional noise. In this case, insulation will not help - repairs are required.
Necessary materials
The noise level in the cabin directly affects ride comfort. The main point when carrying out work is to choose high-quality materials in sufficient quantity. The throughput of the insulating layer depends on its thickness and material properties. You should also consider your budget.
To carry out repair work you will need to buy:
- Vibroplast.
- Soundproofing sheets - the thicker they are, the less sound they will transmit. But the greater thickness of the sheets will add weight, and this will affect the dynamics of the car.
- Anti-gravel - to protect vibration insulation from high engine temperatures.
Note! Combined materials have a high cost and low performance properties, so it is better not to buy them. The result will not be achieved.
Materials and tools
The main clients of the engine compartment soundproofing procedure are domestic cars or foreign cars with a fairly long history, that is, they were produced a long time ago.
Therefore, Shumka is not so rarely carried out on the following cars:
- Peugeot 308;
- VAZ 2114;
- Lada Priora;
- Lada Kalina;
- VAZ 2107;
- VAZ 2110;
- Volkswagen Polo;
- UAZ Patriot;
- Lada Granta;
- Volkswagen Transporter T4;
- Gazelle;
- Daewoo Lanos;
- Renault Megane;
- Renault Logan;
- Nissan Maxima, etc.
The list can be continued endlessly. Even these cars have factory noise. But its quality is extremely low.
Soundproofing material is presented in the form of special mats and sheets of various thicknesses. They are attached to body parts around the perimeter, directly to the metal.
The internal parts of the doors, trunk, roof, partition between the engine and the passenger compartment, floor, hood, engine compartment cavities, etc. are subject to treatment. High-quality material in combination with properly done work creates the effect of additional insulation of the car, which is important for our country.
Yes, if we are talking about the coldest regions, then Shumka cannot replace a car blanket for the engine. Here it is necessary to take into account specific operating conditions.
The main list of materials and tools for cleaning the engine compartment consists of the following components:
- Hair dryer. What is needed is construction equipment, not women's household equipment. You can buy it, borrow it from friends, or even rent it;
- Stitching roller. An extremely useful thing that helps in high-quality installation of sound insulation;
- Rags. When it comes to working with cars, rags are never superfluous;
- Sharp scissors for cutting material;
- A stationery knife for the same tasks;
- Cardboard required for creating blanks;
- Degreaser used in surface preparation;
- Malelin as a means of isolation;
- Splen. Sold in rolls and available in different thicknesses. Based on the features of your car;
- Bimast Super or Vizomat MP. Interchangeable materials.
I have repeatedly seen on the same Drive2 step-by-step instructions along with a photo where the guys isolate the engine compartment with their own hands.
I can’t give the same detailed photo instructions due to its absence, but I can offer some recommendations.
Stages of work
Surely many readers have not done this kind of work before. Therefore, you need to start with a simple place in the car - the hood. Preparatory work:
The old trim, if any, must be removed and replaced with a new one.
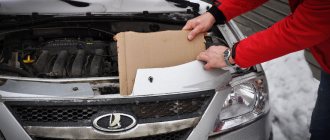
Structurally, the hood is not a sheet of steel. On its inner side there are stiffening ribs. Therefore, for thorough pasting with anti-noise, it is better to make a stencil out of paper.
The material is mostly self-adhesive. Pay attention to the thickness of the insulation. It should be such that the hood can close without hindrance. The installation took place without any problems, and everything was cut out neatly? This is a success and you can move on to the next part. If there were mistakes, then the work needs to be redone and be more careful in the future.
Insulation of noise in the cabin
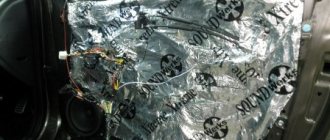
Next, work must be carried out inside the engine compartment. The configuration of the parts will most likely become more complicated, so stencils are indispensable. Particular attention must be paid to the partition between the engine compartment and the passenger compartment, where the main noise from the engine is observed.
Note! The stencil should not be neglected. It should be perfect and exactly follow the contour of the opening. Otherwise, the anti-noise will be cut poorly and will not fit tightly to the walls at the installation site. Sound insulation of the engine shield on the engine side, installation features:
- The dashboard will have to be completely disassembled. Otherwise, the pasting will be of poor quality, since some places simply cannot be reached.
- Removing the dashboard requires patience . The operation will take some time.
- The process should be photographed . This is necessary in order to correctly assemble the parts in the reverse order. On a Lada this will not be a problem. But you have to tinker with a foreign car.
- Vibration and sound insulation should cover the maximum area of the partition , even hard-to-reach places.
- The front side covered with foil is an ideal noise protection option for this part of the machine. It will not only reflect noise, but also not transmit high temperatures into the cabin. Relevant in summer and for the southern regions of the country.
Engine compartment
Do-it-yourself engine soundproofing starts with the engine shield. The main feature of the work is the need to remove elements attached to the partition. Since the engine shield is one of the most vibration-loaded body elements, the “vibration” on the side of the internal combustion engine must be glued over the entire accessible plane. You should prefer a material with a foil front layer, which will reflect heat waves, maintaining the temperature of the engine compartment (especially important for diesel internal combustion engines).
Pasting the inside of the engine shield is impossible without completely dismantling the dashboard, which on many foreign cars will require a lot of effort and care. If necessary, photograph the location of certain elements in order to put everything back together correctly.
Salon
If you covered 75-80% of the partition area on the engine side with vibration insulation, then 35-40% overlap will be sufficient for the internal part. Distribute the sheets in a checkerboard pattern. This way you can save on material and not lose quality. If the engine sound insulation is carried out only from the inside, then it is better to cover 95-100% of the area of the engine shield with “vibra”.
The noise absorber is glued directly onto the vibration damping sheets. When choosing a “noise”, pay attention to the frequency range in which the material is most effective. The smartest thing to do would be to combine material that works in the mid- and high-frequency ranges. Lay out both types of materials in a checkerboard pattern with an overlap of 2-3 cm. If you did not carry out external sound insulation of the wheel arches, then on the inside, on top of the vibration-proofing layer, place a sound insulator (for example, “Spleen”). The side parts adjacent to the motor partition are less vibration-loaded, so material up to 3 mm thick can be used as a vibration damper.
The instrument panel is covered with a sound absorber based on foam rubber or polyurethane. Sound insulation should not be compressed. When compressed, the porous structure loses its effectiveness. We recommend gluing the joints of plastic elements with an anti-creaking agent.
Hood
You shouldn't expect any special effect from the hood soundproofing. Only a small part of the sound waves generated by the internal combustion engine and transmission parts penetrates the cabin through the windshield. The hood mount does not contribute to the transmission of vibrations. Since the hood area is a thermally loaded part, dense material with a foil facing layer should be used as a vibration damper. Such “vibration” models need to be heated before pasting. Sound insulation of the engine cover will not noticeably affect the comfort in the cabin. https://www.youtube.com/embed/j771FDaVxWs
Recommendations
How you can soundproof your car (using the example of STP and Shumoff products):
- hood – “Vizomat MP” or “Bimast Super”; on top of the vibration-damping layer - “Splen” or a standard heat-insulating “blanket”;
- motor shield. Outside – “BiMast Bomb”. Inside – “BiMast Super”, 60% of the area – “Accent”, 40% – Isoton;
- dashboard - “BiPlast” or compositions of the “Comfort” and “Germeton” series from Shumoff. Self-adhesive material in rolls or Bitoplast is used as an anti-squeak;
- arches – “Vizomat MP”, “Spleen”, “Bilast”.
Pasting areas must be thoroughly cleaned of dirt, bitumen and oily deposits. Be sure to use a degreaser (“647”). You can heat the vibration insulation with a hair dryer; a special roller is used for rolling. https://www.youtube.com/embed/idkXK17obJw
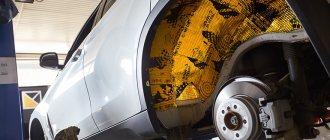
Wheel noise protection
Wheels also generate some noise. It occurs due to resistance or rustling of the tread on the asphalt at speed. This is the second source of car noise after the engine.
Most cars do not have any form of sound insulation for wheel arches. Therefore, doing it yourself is necessary to get results. Operating procedure:
- Wash the surface of the arches until the dirt completely disappears. Dry.
- Degrease the surface. Apply anti-gravel. With standard protection, you do not need to apply this product.
- Apply vibration insulation. For pasting you need to apply mastic in 2-3 layers. Drying time between applications is up to half an hour. The ambient temperature during work is 20 degrees.
- Adhesive soundproofing layer. It is worth using a material based on foam rubber.
The work is not difficult. But arches are a problem area for many cars. In some cases, additional processing will be necessary, especially for representatives of the domestic automobile industry. A layer of mastic must be applied in strict compliance with the technology. This will allow you to purchase additional protection from dirt and reagents.
Anti-gravel provides protection for the anti-shumka itself. Technical fluids will not have a negative impact on protection in this case.
Results
Works that have been done:
- Hood cover insulation.
- Seal the partition between the hood and the dashboard.
- Processing of wheel arches.
You shouldn't expect much from the hood insulation. The result will be noticeable only from the outside of the car. Inside the cabin, to get the result, you need to insulate the partition and wheel arches. The better the material is used, the more the noise level in the cabin will decrease. But in general, the noise will be 20-40% less. The design features of the machine will also have an impact.
How does noise enter the cabin?
The characteristic sound of a diesel engine finds many ways to penetrate into the cabin; cracks and glass are the best assistants for annoying sounds. If the engine is faulty, then half the interior may vibrate from its operation, usually due to malfunctions of the cylinders or fuel pump.
The importance of soundproofing is undeniable
It is necessary to get rid of the noise entering the cabin by any means. To do this, you must first inspect the plugs and bushings, which many drivers do not consider necessary to return to their place after installing the amplifiers. Next, you need to pay attention to the door seals: if they are compressed, then this is bad. If there are no traces, then the doors must be sealed in the closed position. It is easy to check the tightness of the door to the counter using a regular sheet of paper. The sheet is inserted between the counter and the door, if after opening the door the sheet turns out to be crumpled, then everything is fine with the insulation, but if the sheet remains intact, then this is not good.
Important! In some foreign cars, the doors do not close tightly and the explanation for this is simple: manufacturers try to save on everything; it is unlikely that a satisfied buyer will pay attention to such a trifle as door seals when purchasing.
Research at one of the technical centers revealed a similar problem with doors in many car models: Dodge, Mitsubishi, Hyundai and others. Even a small gap will be an excellent conductor for the tiresome sounds of wheels, engine or wind into the cabin.
Applying sound insulation
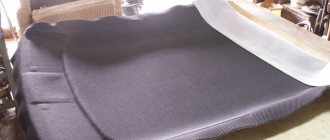
Having prepared the necessary materials, as well as eliminating possible problems with the internal combustion engine, you can proceed to installing sound insulation in the engine compartment. You should start by applying soundproofing material to the inside of the hood. This body element is simple, access to it is not difficult.
To “silence” the hood, it is enough to stick a sheet of noise-insulating material on the inside. As a rule, sound insulation is placed between the hood stiffeners.
We also recommend reading the article about why the engine became louder after changing the oil. From this article you will learn about the reasons why, after changing the lubricant in the engine, noise increases when the engine is running “cold” and/or “hot”, under load or at idle.
If the hood design does not provide such ribs, then the sound insulation sheet may come off over time. To solve the problem, you can use lightweight materials or additionally secure the sheet by making holes in it and then fixing the thermal insulation (hood insulation) along the standard holes.
By the way, in the case where there is standard thermal insulation or installed separately, you need to take into account that you do not get a “sandwich” of two materials, the hood closes normally, there is free space between the hood and the elements under it in the closed position, etc.
As for the noise reduction of the engine shield, the procedure is similar to the noise reduction of the hood. Before applying vibration and noise insulation, the surfaces to be pasted must be cleaned, then the insulating material is glued and, if possible, rolled out (for example, using a special rolling roller).
Soundproofing task
Many drivers begin to think about soundproofing only after the sharp noise penetrating inside the cabin has become impossible to tolerate. Although sometimes noise isolation is carried out after purchasing a new audio system, which is so powerful that pedestrians begin to jump from the high-quality bass. The purity of the music played will depend on the presence of third-party sound in the car. Even simple sound insulation in the cabin can improve the sound of the system several times, and the usual creaks and knocks will disappear.
Selection of materials
To treat the floor, ceiling or doors, most motorists prefer to use the same soundproofing materials, which practically do not differ from each other in quality and properties. The procedure for treating the engine compartment with soundproofing materials is very similar to the procedure for using materials for wheel arches.
Important! The engine itself is not treated with any materials. This may be an obvious fact for most, but it’s still worth clarifying: the engine compartment is insulated from noise.
There are three main types of materials for soundproofing the engine and interior:
- vibration-absorbing;
- noise-absorbing;
- gaskets
Now let's take a closer look at each of these types.
Vibration-absorbing materials
Another name is vibration damping materials. Used to relieve load from the vehicle structure. Due to their properties, vibration-absorbing materials take part in damping body vibrations during operation of the vehicle’s suspension or engine.
Why are vibration-absorbing materials needed?
The main components of vibration damping materials are butyl mastic and an adhesive layer, which significantly simplifies the installation process.
Talitsa: Popular vibration-absorbing materials
| Material name | Description | Average cost (per sheet) |
| Bimast | A relatively new material with a two-layer base. Depending on the thickness, Bimast is divided into three types: “Bomb”, “Super” and “Standard”. | 500 rubles |
| Vibroplast | Durable vibration-absorbing material with aluminum coating. | 420 rubles |
| Vizomat | High-quality self-adhesive material, the main component of which is bitumen. | 400 rubles |
Sound-absorbing materials
Special materials used in car finishing. Designed for sound absorption. In its structure, this type of material is similar to foam rubber sheets. The quality and effectiveness of sound-absorbing materials depends on the thickness of the sheets. But when finishing, you should not experiment with the thickness of the layer, as this may cause certain difficulties when installing decorative parts or interior trim.
One of the most important layers when performing sound insulation
To perform soundproofing of the engine compartment, in addition to the basic materials, you need to take care of an anti-noise mask and liquid anti-gravity agent. You will find out why this is necessary in the instructions for performing soundproofing of a car engine with your own hands.
Table: Popular sound-absorbing materials
| Material name | Description | Average cost (per sheet) |
| Shumoff | Excellent material from a modern developing brand. Excellent for soundproofing various parts of the car. The disadvantages include the high cost. | 1200 rubles |
| StP | A material that has a number of advantages over its competitors. Firstly, the quality of the material is at a high level. Secondly, it is absolutely safe for health. This is very important, since the driver and passengers will be in close proximity to the material for quite a long time. Thirdly, this is a wide range of goods. | 500 rubles |
| Acoustics | The noise-absorbing material is based on polyethylene foam, which improves the quality of the material and its insulating properties. The Acoustics material is very easy to use, as it is self-adhesive. | 200 rubles |
| Izolon | Another sound-absorbing material from a domestic manufacturer. It combines quality, durability and, most importantly, low cost. | 100 rubles |
Only the integrated use of vibration and noise insulation materials will allow achieving maximum results. Some manufacturers offer materials that claim to provide complete insulation from noise, heat and vibration. You shouldn’t be fooled by advertising and rush to the store to buy a new product, because the interior of your car is not the place for unsuccessful experiments. It is better to spend a little more time and effort to perform high-quality sound insulation.
Padding materials
This type of material is used to eliminate creaks and noise. There is another name - “anti-creaking”. Sheets of gasket material are applied to the joints between panels in the cabin, on air ducts and other areas.
Another type of material is cushioning
Any material that eliminates squeaks at the joints between parts can replace the factory anti-creak. However, it is recommended to use only originals, as they will last you much longer.
Table: Popular gasket materials
| Material name | Description | Average cost (per sheet) |
| Madeline MELSI | An insulating material used to prevent interior squeaks and noise. Consists of non-woven fabric and anti-adhesive paper. | 720 rubles |
| Standard | Popular self-adhesive material from a domestic manufacturer. Impregnated with polyester. There is no need for heating for installation. Refers to budget options for anti-squeaks. | 170 rubles |
| Ultimate | It is produced in the form of tapes, rather than the usual sheets. Made from synthetic fabric. The tapes are covered with an adhesive layer. | 220 rubles |
Why don't cars leave the factory with complete sound insulation?
Many car owners are wondering: why didn’t the manufacturer make good sound insulation of the car from the beginning? After all, if the car is of the lower and middle class, then there is either no soundproofing material at all, or its quantity is minimal.
The main reason for this is the manufacturer’s desire to save on insulating components, since each element of sound insulation will have to be spent. And if we take into account the volume of products produced, the cash costs of the car plant will be large.
The second reason is the manufacturer’s reluctance to devote time to installing soundproofing materials. All operations on the conveyor are scheduled to the minute, and equipping a car with high-quality noise insulation will require a lot of them.
The third reason is the extra weight (several tens of kilograms), which the complete “noise” adds to the weight of the car.
Although already in the process of creating a new model, at the stage of developing design characteristics, manufacturers seriously think about the issue of car sound insulation. To do this, the optimal mounting points for the exhaust system are calculated, the selection of engine mounts, supports, etc. The higher the cost of the car, the more serious the fight against external noise stimuli will be.
Due to the rapid motorization of Russia at the beginning of the new millennium, a great demand for noise and vibration insulation arose. In the mid-2000s, modern models of well-equipped, inexpensive cars appeared on sale. However, there was practically no factory sound insulation in them. According to the demand, a supply appeared in the form of various accessories and materials designed to provide additional noise and vibration insulation, which formed a separate market niche. Naturally, this gave impetus to the development of the service industry in this area.
Therefore, today soundproofing work is carried out both by private owners and official dealers. Some car owners do this themselves. The cost of soundproofing a car largely depends on the contractor.
There are two ways to install car soundproofing. The first involves the use of a ready-made kit, which includes a full set of necessary materials. In addition, there is a diagram of the car indicating the places where to glue and the sequence of work. Currently, there are very few such kits on sale. There is enough red tape with them, while the difference in cost compared to the work of specialists is small. Moreover, everything will depend on the quality of the manipulations performed.
Car noise insulation, performed by professionals using specialized materials combined in several layers, reduces the internal sound impact by up to 50%. If the work is carried out by the car owner himself, it will cost less than specialists. However, taking into account the time spent, possible errors in the process of installing sound insulation yourself (incorrect application, waste of material), the difference in cost will be insignificant.
Features of engine sound insulation
The issue is quite serious, so you need to be prepared for difficult work if you plan to perform the procedure yourself. Having minimal experience in this matter will make the process easier. But what if it’s not there?
Video - removing and gluing the dashboard on a VAZ 2109
How to start? First of all, you need to understand for yourself - what kind of engine compartment is it? Most will just smile after reading these lines, but not all motorists are aware of everything. The hood can also be processed.
For a high-quality result, we will carry out insulation:
- front wheel arches;
- partition near the engine;
- part of the floor;
- hood.
Those areas where noise and vibration are most noticeable will be insulated. We are talking about areas of the body that have attachment points. One of these areas is the gearbox suspension area.
Sound insulation usually occurs in two layers. The bottom layer acts as a vibration damper, and the top layer acts as noise absorber.
Tip: Diesel fuel or gasoline are aggressive substances that can destroy various materials. To prevent your insulation from being damaged after a week, choose the materials correctly!
The vibration-absorbing layer (bottom) must fit tightly to the surface of the housing. The final result of your venture depends on this.
DIY vibration isolation
Vibration-proofing materials are glued first as a base on which sound-proofing and sound-absorbing materials can be installed. You can only install vibration-proofing materials (which, in most cases, many people do), but the effect will not be complete. Installation of vibration and noise insulation material is required for most parts of the car body. Vibration dampening material, as an addition to an audio system installation, is designed to reduce or prevent rumble and vibration generated by low frequencies. The main purpose of vehicle vibration isolation is to obtain clean bass from the audio system.
Installing a full set of vibration isolation in a car will add an average of 25–40 kg of additional weight.
The thickness of the metal on the bottom is different from the thickness on the roof. Based on this, the thickness of the vibration insulation should be selected accordingly. Vibration isolation material can have different thicknesses (usually 1.6 mm, 2 mm, 2.6 mm and 4 mm). On the bottom of the body, the vibration insulation layer should be thicker, and on the roof there will be a fairly thin layer.
Vibration dampening material is most effective if it covers 50% (maximum 80%) of the panel area. Covering the surface 100% with this material is useless and will only add extra weight to the car. Installing the material on 20% of the area, in the middle of the panel, will give 80% of the improvements, eliminating most of the vibration and rumble. Gluing the material to the remaining 80% will only make a 20% difference.
Using multiple layers of vibration dampening material to reduce road noise (airborne) certainly has some effect on road noise reduction, as it adds significant mass to the sound path. But vibration-proofing material does not have a structure that would reflect sound. Instead of all these layers, it is better to use one layer as vibration insulation and an additional layer of material that specifically serves as a sound barrier.
To install vibration isolation yourself, you need to disassemble the car interior.
After removing the protective paper, the material becomes sticky and easily sticks to any surface. After gluing, you need to cut off the remains and cut out the necessary technological holes.
When applied, the material must be carefully pressed against the metal. Vibration-isolating material not tightly glued to the surface will not provide a vibration-isolation effect.
Modern materials do not require heating during the process of gluing and smoothing, however, if sound insulation is carried out in a cold room, then it is necessary to preheat the metal and material, or both. The material is very elastic and easily follows all the contours and shapes of the panel. Use a roller to smooth the sheets. Start leveling from the center and continue to the edges, rolling each panel outline. Even if the surface is flat, rolling with a roller will ensure good adhesion and full contact of the material with the panel, removing air bubbles.
Pasting with vibration insulation does not guarantee the complete absence of rumble. If everything is done correctly and efficiently, then vibrations and noise will remain at a minimum level.
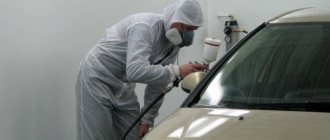
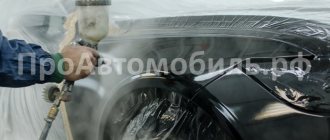
Performing sound insulation
Before starting work, you first need to prepare the car. The preparation process includes the release of the surface to be treated: cleaning and degreasing. Degreasing can be done using any technology.
Table: Methods for degreasing the surface of a car
| Product name | Description | Application | Price |
| White Spirit | A type of light kerosene related to organic solvents. Used to remove traces of dust, grease and greasy dirt. | Sand the surface with sandpaper. Then apply a small amount of product to a rag and thoroughly wipe the area to be treated. After drying, the surface will be ready for sound insulation. | 50 rubles |
| Bitumen booster Sitranol (BOS) | Shampoo used to remove various types of stains from metal surfaces. It has low flammability and an unobtrusive subtle odor. | It is necessary to spray the drug on a dry surface and wait 3-5 minutes. Then you need to wash it off from the surface being treated. If the grease stains are not removed the first time, repeat the procedure again. | 125 rubles |
| Xylene | A clear, flammable liquid used to dissolve paints, resins, varnishes and grease stains. Sold in large plastic canisters (1-10 liters). Xylene is very dangerous for the body, so all work with it must be carried out in special protective equipment. | Cleaning procedures must be carried out in ventilated areas. This will avoid poisoning from the fumes of the product. Apply a small amount of Xylene to a dry cloth and treat the surface of the car. | 150 rubles (1 liter) |
After degreasing the surface, you can begin the main work.
Step-by-step instruction
Step 1. Cut out the required piece of soundproofing material. This needs to be done according to the finished pattern. If you don’t have a pattern, place the canvas on the surface and mark its edges. Then trim. If you didn't get the right size the first time, reapply and adjust the material again.
To work you will need some tools
Step 2. Next, you need to follow the instructions: put vibration-absorbing material on the bottom, and noise-absorbing material on top. Heat one edge of the material with a hairdryer and press it to the body. When it has cooled, gradually glue the rest of the sheet. If necessary, tap lightly with a rubber mallet.
The main thing is to maintain the sequence of layers
Step 3. When laying the vibration isolator, it is advisable to choose materials that do not emit odors when heated. This only applies to the finishing of the engine compartment; any type of material can be used for the hood, bottom and wheel arches.
Try not to skimp on materials
Step 4. Having completed work with vibration-proofing materials, you can begin laying sound insulation. A wide variety of quality materials is undoubtedly a good thing. But for some elements, such as the hood, you need to choose materials with a foil surface. This will simplify the cleaning process.
When processing the hood, use foil material
Tip: When performing work, it is advisable to soundproof the dashboard. This will create an acoustic shield, increasing noise reduction effectiveness.
Step 5. When applying the top insulating layer, make sure that the contact is tight. The material must fit tightly to the insulated areas. Treatment of the engine compartment is only a small part of the sound insulation of the entire car.
Be sure to use a roller at the final stage
The procedure itself is not difficult, you just need to do everything carefully and one by one. The result will certainly please you. The reward for your work will be a pleasant, quiet ride.
Technology for installing soundproofing materials
When you have already purchased everything you need and have carried out the preparatory work, you can proceed directly to the procedure of covering the engine compartment with sound insulators. You need to understand that our main task is to create a kind of capsule, and it should be as airtight as possible. Therefore, when applying insulating layers, strictly follow the technology so that as a result there are no unpleasant surprises that will negate all your efforts. So, let's do the following:
- degrease the surface of the engine compartment. This applies specifically to body elements. Engine noise insulation is a rather broad expression, since we do not affect the engine. The materials will be glued specifically to the body elements. When degreasing, do not use acetone or solvent. They only drive grease particles into the layer of paint underneath. And with the slightest heating, fats are pushed back to the surface of the paint. The cheapest and most effective remedy is white spirit. It can be purchased at every point where paint and varnish materials are sold;
- then you should arm yourself with a hair dryer. Without it, it is unlikely that it will be possible to lay the next two layers of vibration and noise-absorbing materials efficiently. There is no need to try to heat the sheets by leaving them in the sun on a warm day or on a radiator during the heated period of the year. If the material is not sufficiently heated, air bubbles will remain between it and the surface of the body or the previous layer. After a certain period of operation, this layer will completely fall off, which means there is no need to skimp on tools;
- Using a hairdryer, we warm up the elements cut from a single sheet and apply them to the degreased surface of the body. Using a rubber spatula or a special roller, firmly apply the vibration insulation to the metal surface of the body;
- then we heat the noise-insulating material with a construction hairdryer. We also carefully apply it to the previous layer with a rubber spatula. Without this tool, the sheets will not stick together tightly enough, and air bubbles will almost certainly form between them, which will only grow over time and lead to delamination of the materials;
- in the same way we heat and glue the third, protective layer.
The sound insulation of the shield between the engine compartment and the passenger compartment also requires attention. We glue it on both sides with the first insulating materials described above, not forgetting about degreasing the metal surface .
Tips and tricks
When performing soundproofing of a car, you must adhere to certain rules. This will improve the quality of the work performed.
Recommended rules include:
- Be sure to clean the surface before applying the material. The cleaning technology is the same as the technology before painting the body;
- do not forget about degreasing the surface (we have already mentioned this);
- use tools to roll the material over the treated surface (a regular paint roller will do);
- Use as much patience as possible when making each pattern. You are doing the work for yourself, so don’t be lazy.
Additives that are dangerous
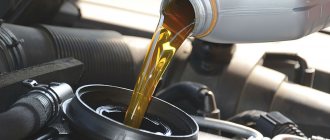
If the first signs appear that the engine is running
not as usual - troits, loss of power, etc., do not rush to fill in supposedly life-saving additives. Adding chemicals can essentially improve some characteristics of the oil, as well as worsen others. In this case, the negative effect will certainly affect the operation of the motor, but will the motor start working
better - unclear.
High quality oil
has an equilibrium set of additives
, and by adding any chemicals to the composition, you upset this balance.
As a result, the oil
loses some of its fundamental parameters. In the worst case, the engine lubrication system may become clogged. The damage from such pseudo-help can increase the cost of major repairs significantly.
What to consider?
Only some bituminous materials need to be preheated. Be sure to read the instructions before installation.
After completing the treatment of the engine compartment, apply a layer of special mastic or anti-gravel. This will enhance the sound insulation effect and also protect the metal from exposure to aggressive liquids.
Using anti-gravel will prolong the life of the body
Anti-gravel is a modern means for protecting the car body. It has anti-corrosion and sound-proofing properties. It is produced in the form of an aerosol or anti-gravel film.
If desired, you can perform additional sound insulation of the wheel arches. In combination with motor insulation, the effect will be much better.
What is needed to install a Shumka?
To install the Shumka with your own hands you will need:
- construction hair dryer;
- scissors;
- knife;
- degreaser (nefras, white spirit, acetone, Galosha gasoline or any other technical degreaser);
- putty knife;
- stitching roller;
- rags.
It is also necessary to purchase noise and vibration-absorbing materials, which will differ in properties, weight and thickness for each element being pasted. For additional treatment of certain areas under the hood you will need mastic.
Pros and cons of sound insulation
Engine noise insulation treatment has the following advantages:
- noise level is reduced;
- engine vibration when driving is reduced;
- driving comfort increases.
There are few shortcomings, or rather, there is only one. During work, the owner encounters difficulty in dismantling the dashboard. This panel needs to be removed for disassembly, and then reassembled.
High-quality sound insulation is the key to a quiet ride
If you are not confident in yourself and your capabilities, entrust this task to specialists. At service stations, engine soundproofing will cost you from 2,000 to 6,000 rubles (the price depends on the car model).
Stages of soundproofing the engine compartment
The main task when quieting the engine compartment is to create a sound and vibration-absorbing capsule around the power unit. To do this, the hood lid and engine compartment are covered with a vibration absorber and sound-proofing material.
Soundproofing the hood begins with dismantling the standard noise reduction system. Next, the metal is cleaned of dirt and degreased, after which all surfaces between the stiffeners are covered with a vibration insulator. After this, a sound insulator is applied and the standard protection is installed in place.
In the engine compartment, a vibration damper is applied to all free surfaces. Depending on the car model, this may be the partition of the engine shield, the left pillar, wheel arches, or the space behind the battery.
The price of engine compartment noise reduction depends on the make and model of the car. You can purchase soundproofing materials individually or as a ready-made kit. Contact usYour namePhone* By submitting this form, I agree to the terms of processing of personal data
Return to list