Factory sound insulation of the car's wheel arches does not eliminate the noise from tires and gravel flying from under the tires when driving on dirt roads. The owner can improve the acoustic comfort in the cabin by applying protective materials to both body parts and fender liners. Work can be carried out in a garage or specialized service.
Why do you need soundproofing for wheel arches?
Wheel arches are one of the main sources of noise that occurs when a car is moving. In addition to the natural hum from the rotating tires, clicks from stones and sand thrown by the tread are heard in the cabin. In the factory, a layer of mastic is applied to metal surfaces to protect the paintwork from damage and increase acoustic comfort.
Additionally, fender liners made of plastic or pressed felt are installed, but many owners note the insufficient effectiveness of standard noise protection.
External method of soundproofing car arches
External sound insulation of wheel arches is the most popular method.
Today, the external method is more popular. It happens as follows:
- We remove the fender liner.
- We clean the anticorrosive agent from it.
- Degrease the surface with white spirit.
- We glue the arch and the outer side of the fender liner with Bimast.
- We glue it with foil splen. We choose the largest thickness – 8 mm.
- Experts recommend lubricating untreated areas with an anti-corrosion coating.
But what to do if the car does not have additional plastic fender liners? In this case, you can use “liquid fender liners” - bitumen-rubber mastics. We apply them with a brush or spray. This is done in the same way as painting - in several layers. Before applying a new layer, you must allow the previous one to dry thoroughly. All suspension elements must be protected from mastic.
Methods of high-quality sound insulation
To increase acoustic comfort use:
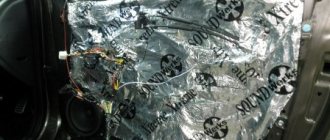
- Vibration-proof materials that increase the rigidity of the treated structure. The sheets consist of a layer of bitumen mastic, covered on one side with aluminum foil. The opposite plane is treated with adhesive with a protective film, which allows insulation to be attached to plastic or metal parts. When selecting material, one should take into account the mechanical loss coefficient KMP, which is in the range from 0.4 to 0.65 units.
- “StP Splen” materials are based on polyethylene foam, providing sound absorption and heat protection. The sheets are coated with a layer of glue that maintains good adhesion to the substrate.
- Polyurethane foam sheets (for example, from the manufacturer K-Flex) with an adhesive backing applied at the factory. The material has a low specific gravity, is resistant to water and absorbs noise well over a wide frequency range. Supplied in sheets of different thicknesses.
- Liquid mastics that provide sound insulation of curved surfaces. They are characterized by increased resistance to mechanical stress and the influence of road reagents, and provide additional protection against corrosion. The material is applied with a brush or spray; after polymerization, an elastic layer is formed on the surface that is not destroyed by impacts with gravel.
Tools and Supplies
Soundproofing can be done with your own hands using:
- bitumen-based materials (liquid or sheet with an adhesive layer);
- paint brushes with different widths of the working part or rollers for rolling out the coating;
- thread gloves to protect hands;
- rulers and patterns for marking blanks made of sheet material;
- drawing tool and knife;
- solvent and clean rags to remove oil stains;
- construction hair dryer, which allows you to increase the elasticity of bitumen sound insulation.
Installation work should be carried out in a dry room at +20°C. It is permissible to install sound insulation outdoors at normal humidity, but in strong winds dust gets onto the treated surfaces, which impairs the adhesion of adhesives.
If there are pockets of corrosion on the body arches, then before starting work you should remove the rust and restore the paintwork.
External sound insulation with foil
This method involves treating the outside of the wheel arch and fender liner with your own hands with a layer of thick aluminum foil.
Stages of work
- The first thing to do is to remove the wheel and locker.
- If there is previously installed worn sound insulation, it must also be removed.
- Thoroughly clean the wheel arch and fastenings from accumulated dirt.
- Degrease the dried surface.
- Cover the surface with a layer of foil at least 8 mm wide.
- A layer of foil is attached on top of the installed bitumen.
- On top of the sound insulation, apply liquid liners to all joints to seal the joints and seams.
- Treat the surface of the locker in the above order.
Processing procedure
Processing wheel arches is not a complicated procedure, but requires careful marking of sound insulation and careful application. Mastics should not get on the external paintwork; white spirit or another solvent that does not destroy the enamel should be used to remove. To increase sound insulation, it is recommended to treat the wheel arch liners and apply sheet or liquid material to the inner surface of the wheel arch.
Internal processing
Additional protection is installed on the engine compartment side. The sheets are glued not only to the surface of the shield and wheel arches, but also to the floor of the luggage compartment and the bottom of the car in the cabin. Comprehensive sound insulation includes finishing of door and roof panels. For processing, an adhesive-based material is used (for example, “Spleen”), dust and traces of process fluids are first removed from the metal, and areas of corrosion or peeling of the paint coating are eliminated.
When installing insulators in the engine compartment, the thermal effects from the exhaust manifold and exhaust gas converter housing must be taken into account. Additional sheets must not interfere with the movement of drives or block ventilation ducts.
There may be factory cutouts on the wheel arches; technological holes should not be silenced with sound insulation.
External treatment
General algorithm for performing work:
- Place the car in the work area and remove the fender liner fastenings. The elements are fixed with screws and clips; on some cars, you will need to remove the mudguards and protective shields of the engine compartment. For better access, it is recommended to remove the wheels and place the car body on support stands under the sills.
- Inspect the surface of the arch and remove contamination with water and detergents. Detected areas of corrosion should be cleaned and treated with primer and paint; areas of standard mastic peeling off are not allowed. The durability of the soundproofing layer depends on the quality of surface preparation.
- Dry and degrease the surfaces with an organic solvent that is inert to factory coatings (for example, white spirit).
- Apply a layer of vibration insulation using a brush or glue pre-cut blanks from sheet material. To increase elasticity, the bitumen is heated with hot air, and then the elements are applied to the surface and carefully smoothed with a roller. The formation of bubbles, which contribute to the formation of corrosion centers and peeling of the protective material, is not allowed.
- Apply an additional layer of sound insulation, leaving free space in the mounting areas for the fender liners.
- After the materials have hardened, reassemble in the reverse order. If defects are found, modify areas.
- Place the car on the wheel hubs and remove the car from the stands to check the effectiveness of the sound insulation.
The purpose of soundproofing arches
Depending on the type of car body, the noise intensity varies.
- Sedan. Thanks to the location of the wheels (front arches at the level of the hood, rear arches at the level of the trunk), extraneous sound from under the wheel arches is muffled.
- Hatchback. Due to the fact that the rear wheel arches are located directly under the passenger compartment, the noise is very audible.
But in both the first and second cases, extraneous noise penetrates into the cabin.
This means they distract the driver and can lead to an accident. Therefore, the problem has to be resolved directly by the car owner. And here the question arises: do you do the soundproofing of the wheel arches yourself or take the car to a service station. If a person is not limited in finances, then, of course, it would be right to entrust this work to professionals. But in most cases, car enthusiasts, rolling up their sleeves, crawl under their favorite car themselves to make the noise of the arches with their own hands.
It is worth noting that if a few years ago Shumka was installed only on the inside of the arch, today external insulation is gaining popularity. The driver chooses exactly how to quiet his car.
Lockers
Most Russian and imported cars have standard fender liners made of elastic plastic or pressed felt. On their inner surface there are mats made of lightweight material that reduce vibration when stones hit. The main function of fender liners is to protect the paintwork of the arch from damage by sand, gravel or road reagents. The material somewhat reduces the noise level from wheels and mud flows, but to increase acoustic comfort, the application of bitumen mastic or elastic mats is required.
The fender liners are processed if there is no bare metal in the wheel arch (for example, many manufacturers fill the surfaces with plastisol or other mastic). Applying protection to the fender liners reduces the quality of sound insulation. Blanks are cut from the material and glued to a plastic part, after preheating the bitumen layer with a hairdryer. Thermal effects on the fender liner are undesirable, since irreversible deformation of the surfaces occurs. It is impossible to glue sheet insulation or apply liquid mastic to felt elements.
Noise insulation with fender liner installation
It should be noted that the presence of such elements somewhat reduces the noise penetrating into the cabin. The fender liners serve as a kind of barrier that repels some of the noise. And this fact has been scientifically proven.
All actions are performed as in the first method, but the fender liner is soundproofed. For this purpose, the inner surface of the fender liner elements is carefully processed, and the noise-absorbing material that you have chosen for the work is fixed on it.
In more detail the procedure for performing the work can be seen in the video:
Liquid insulators
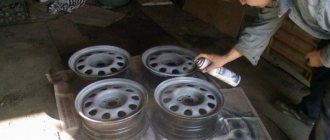
To treat the inner surface of the arch, you can use mastic based on organic solvents and polymers. The material is applied using a sprayer connected to a source of compressed air. To improve the quality of processing, it is necessary to remove the springs and shock absorbers, covering the seating surfaces with templates made of thick cardboard. You will also need to remove dirt and eliminate pockets of corrosion, and then degrease the surfaces. In artisanal conditions, mastic is applied with brushes in 2-3 layers with intermediate drying.
The advantage of liquid sound insulation is its resistance to mechanical and temperature influences. The material can be applied to the outer parts of the arches or the bottom, exposed to sand and road reagents. To improve adhesion, primer can be added to the composition of the materials (information about the components or the admissibility of adding additives is indicated by the manufacturer).
To treat cars, special compounds Noxudol 3100 or Dinitrol 479 or rubber-bitumen anti-corrosion mastics are used. Noxudol 3100 contains a polymer base designed for spray application. The thickness of the protective layer is from 1 to 2.5 mm, it takes up to 12 hours to harden “touch-free”, complete hardening occurs in 10-14 days. The advantage of the material is the possibility of applying paint and varnish. Dinitrol 479 liquid based on synthetic rubber is applied in a layer of 1 to 1.5 mm; it takes 12 hours for the solvent to evaporate. An additional advantage of liquid mastics is the low weight of the protective coating.
Rating of the best liquid products
- “Liquid fender liners” Dinitrol 479 Undercoat claims to be a universal composition with protective properties. Suitable for use both externally and internally. Available as bitumen-wax mastic complete with black filler. Dries in two hours. Available in liter and five liter containers. The cost of such a product is 1200 rubles. per liter, about 6,000 rubles for a five-liter bottle.
- Primatech Extra is a liquid Shumka applied through spraying. Helps increase vibration isolation and protect the working area from corrosion. It's also easy to use, just read the instructions first. Safe for car paintwork, rubber, plastic.
- Defender Noise - contains a complex of organic elements. Completely safe for car paint, rubber, and plastic. It is distinguished by the ability not to degrease the area, as well as the drying time - about 24 hours.
- Aerolux is a domestic creation that serves to protect cars from vibration, corrosion, and noise. Reviews say that it is quite good in terms of quality and price ratio. The composition has a rich complex of useful elements.
Improving car sound insulation is not a whim or caprice
This is an important condition for a comfortable and safe ride, which will give an undoubted benefit if approached correctly.
Practical advice
Additional recommendations for soundproofing wheel arches of cars:
- The factory anti-corrosion coating should not be removed from metal body elements. Before applying sound insulation, the factory felt mats are removed from the interior (there is no need to cut off magnetic-based pads that have undergone a heat treatment cycle before painting the body).
- If there are stiffening ribs in the wheel arches, they are not covered with sound insulation. The maximum effect is achieved when processing flat surfaces.
- Wheel arches should first be washed with water under high pressure and then wiped with a degreasing compound.
- When applying sheet material, it is advisable to use blanks of the maximum size, giving the elements an arched curvature at the installation site. The panels must be laid end-to-end; a large number of small overlays impairs the quality of sound insulation.
- When using liquid mastics, you need to protect areas that the material should not get into with cellophane film or thick paper. After polymerization, the coating is carefully removed, taking care not to damage the sound insulation layer.
- Some cars use fender liners made of pressed felt; it is impossible to stick insulator sheets onto such material. In this case, you will need to process the arch inside or mount protection on the body from the engine compartment side.
- If the car does not have a fender liner, then you should not apply mastic or other noise-insulating material to the metal of the body (due to the rapid destruction of the layer by gravel from under the wheels). In this case, it is necessary to purchase or make custom-made plastic shields, which are covered with soundproofing materials and installed in the arches. An alternative is to wrap the body from the interior or engine compartment.
- When pasting the fender liner, apply a layer of vibration insulation no more than 2 mm thick; excess material will increase the weight of the part and make installation in the wheel arch niche difficult.
- For additional protection from extraneous noise, you can use “liquid fender liners”. The mastic should not block the cross-sections of the channels for ventilation of hidden cavities and drainage of condensate.
- On some car models (for example, BMW X5 and X6 or Volvo XC-90), disposable clips are used to attach the fender liners. It is necessary to purchase a fastening kit in advance, which will allow you to quickly complete the soundproofing procedure.
When working with bituminous materials, it is prohibited to use open fire. It is necessary to organize ventilation in the room and install lampshades for lighting. Insufficient illumination of the working area leads to the formation of defects (gaps between sound insulation sheets or poor rolling of panels that peel off during further use of the vehicle).
Step-by-step instruction
To increase the maximum effect, insulation is done both from the inside and from the outside. This process is not difficult, but it requires a lot of patience and time. We'll have to disassemble half of the car and cut out the materials. It is necessary to glue according to all the rules, efficiently, without leaving any air holes or gaps.
Sound insulation from the inside
The inside of the wheel arches may have factory sound insulation. If it is attached well, then the foil vibration insulation is glued to it, but if it is bad, then remove it. The whole process goes like this:
- The surface is cleaned of dust and treated with degreasing solutions.
- The vibration absorber is divided into small plates or a pattern can be made from a whole sheet.
- Use a hairdryer to heat the surface to a certain temperature of 50 – 70°C.
- In order for the insulated plates to be elastic and take the required shape, they also need to be heated.
- Remove the protective film and press the sheet firmly to the surface.
- Use a roller to roll out the foil so that there are no exposed surfaces. This is the most important moment of the whole process. The work must be done perfectly and only then will it be of any use.
When you finish gluing the first layer, check whether the holes are closed after assembly. If everything is as it should be, then just free them. Then you need to prepare an insulated layer from noise.
Also check the quality of the adhesives. The protective film is very difficult to remove. The main thing is to see how easily it comes off or not.
We recommend:
GDI engine - description, features, motor malfunctions
sound insulation inside
Sound insulation from the outside
Noise insulation on the front side depends on the presence of fender liners. If they are present:
- First of all, we need to demonstrate them.
- Then you need to clean them of accumulated dust and dirt, and then treat them with a degreaser.
- Then cover the first layer with vibroplast. This method gives massiveness to the fender liners.
- The second layer is splen. Noise insulation is doubled.
